Create an account
New to PixelForce? Create a HiFORCE account with a username and an email address you can access. Verify the email, choose a password, then sign in. You do not need to provide a phone number, personal name or company name in this registration flow.
If you have used PixelForce or another HiFORCE product before, try your existing sign-in method first. This includes Google, Apple and email-code sign-in. Creating another account will not move or merge your existing images and points. See Sign in.
Open account creation
| Where you are | How to start |
|---|---|
| Mobile app | On the sign-in screen, tap Create account. Registration opens in a bottom sheet and stays inside the app. |
| Web, including a phone browser | Open PixelForce Web. On the HiFORCE sign-in page, choose Create account below the form. Continue in the same browser window. |
| macOS app | Use Create account if it is available on your sign-in screen. You can also create the account through PixelForce Web and then use it in the app. |
If the Web workspace opens immediately, you are already signed in. There is no need to register again to keep using that account. The app's email icon is for signing in, not for opening registration.
1. Choose a username and email
Enter your Username and Email address. Choose an address you will still be able to access later; it can also be used for email-code sign-in.
| Field | What is accepted |
|---|---|
| Username | 1–64 English letters or digits, beginning with an English letter. No spaces, underscores, punctuation or non-Latin characters. |
| Availability | The username must be unused. Changing only its letter case does not make it a different username. |
| Email address | An address you control that is not already linked to another account. Enter the full address, including any +alias you intend to use. |
For example, Studio2026 is a valid username format; 2026Studio, Studio_2026 and My Studio are not. The example is not a reservation of that username. Your sign-in username is different from the name displayed on your account page.
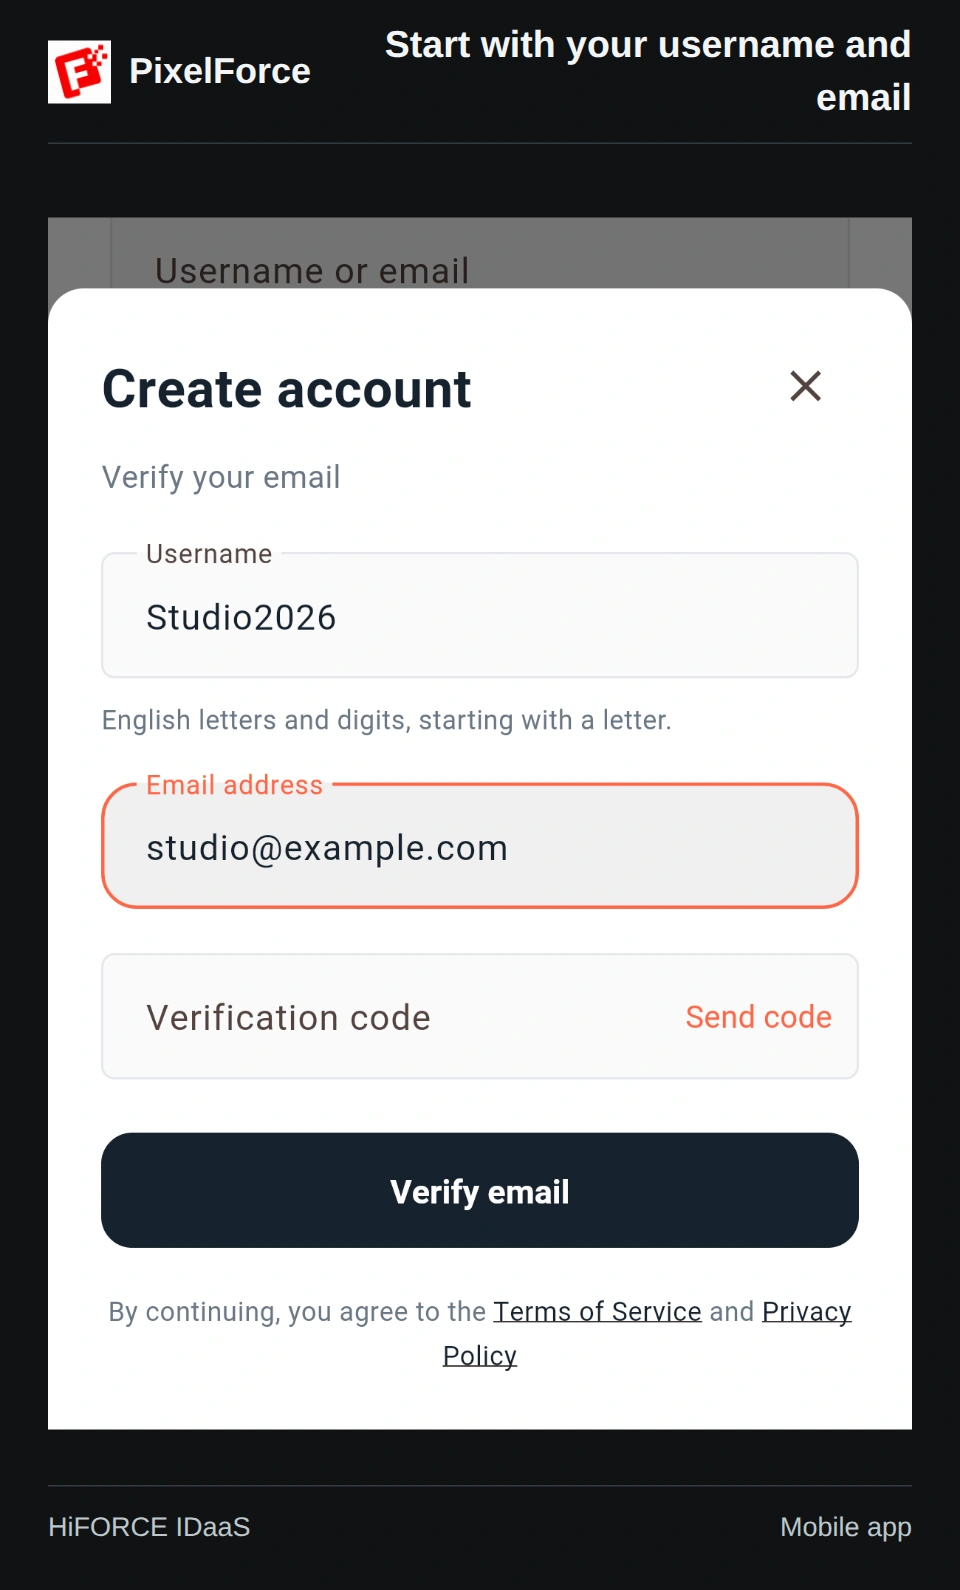
2. Verify your email
- Select Send code once. Wait for the confirmation and resend countdown.
- Check your inbox and spam folder. Copy the six-digit code from the latest registration email into Verification code.
- Select Verify email. When it succeeds, the form switches to password setup.
Keep the username and email unchanged between requesting and verifying the code. Editing either invalidates that request; wait for the countdown, then send a new code for the updated details. A code requested from the separate email sign-in form does not complete registration.
Sending or verifying a code does not finish creating an account. You must also set a password and select Create account. Never share a verification code, including with support.
3. Set your password
Check the verified email shown above the password fields. Enter your Password, then enter it again in Confirm password.
- Use 6–72 characters: English letters, digits and standard English punctuation are supported.
- Spaces, Chinese characters, accented letters and emoji are not supported in this password field.
- There is no requirement to mix uppercase letters, lowercase letters, digits and symbols. A longer password that you do not reuse elsewhere is a better choice.
The eye icon shows or hides your password. The edit icon beside the verified email lets you Change email; you will need to verify the updated details again. Close the app sheet, or choose Back to sign in on the Web, to leave registration without completing it.
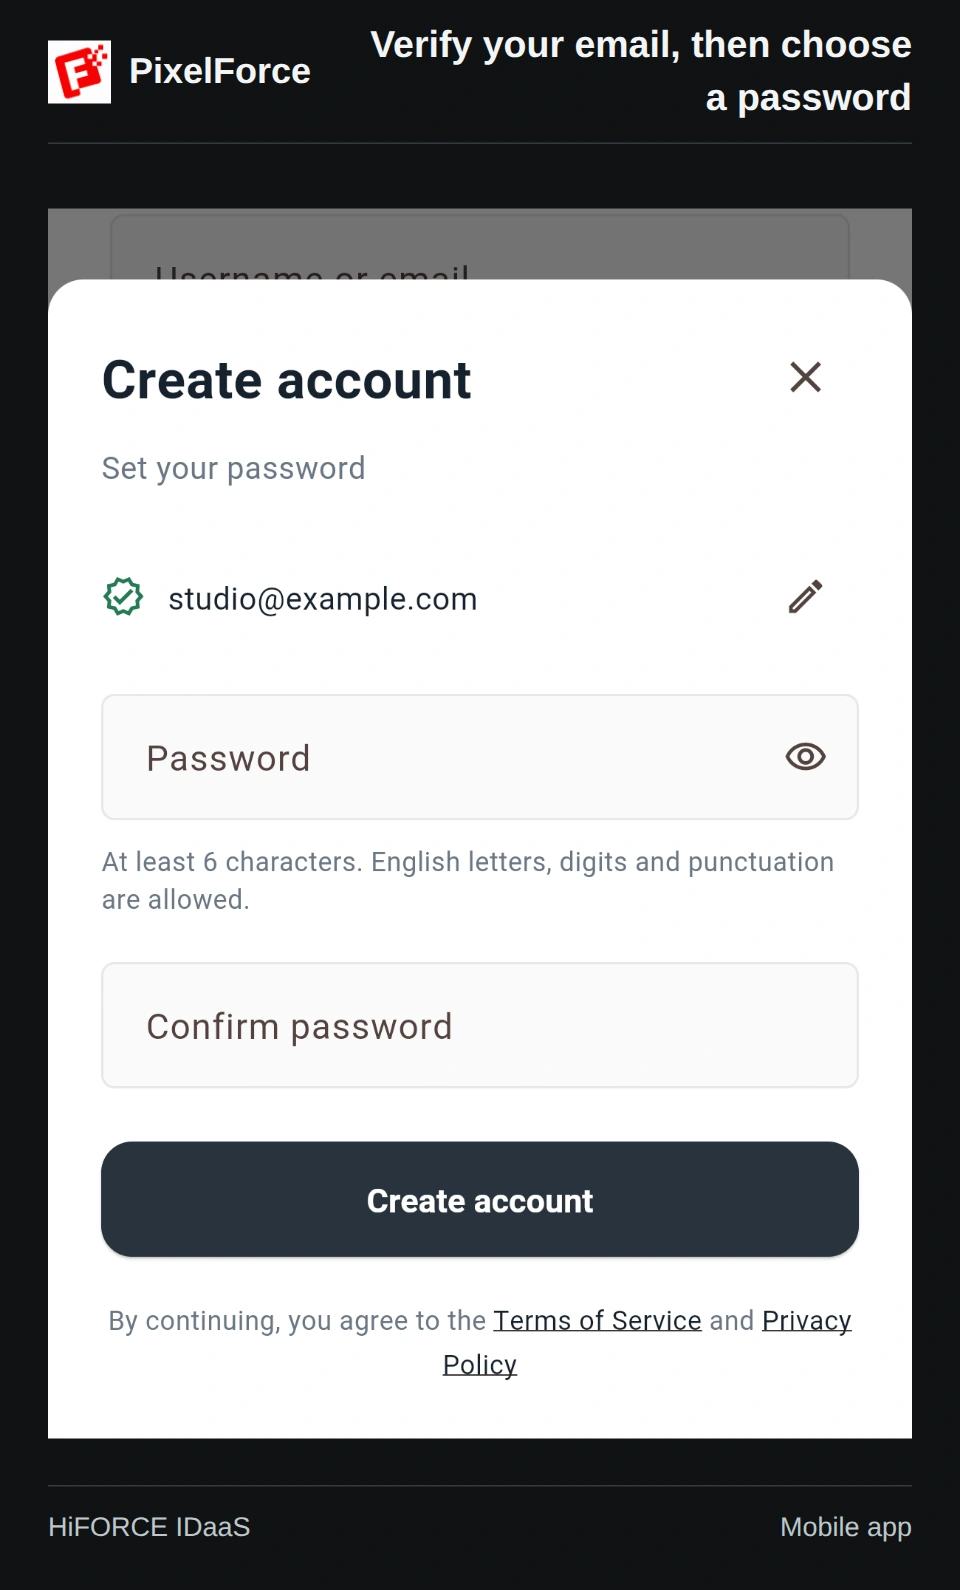
Review the terms and privacy links below the form, then select Create account once and wait for the result. Do not repeatedly tap while the request is processing.
On the Web: the same two steps
The HiFORCE Web page uses a regular form rather than the app's bottom sheet. First fill in the username, email and code; after Verify email, set and confirm the password. You do not need to fill in a company name or phone number.
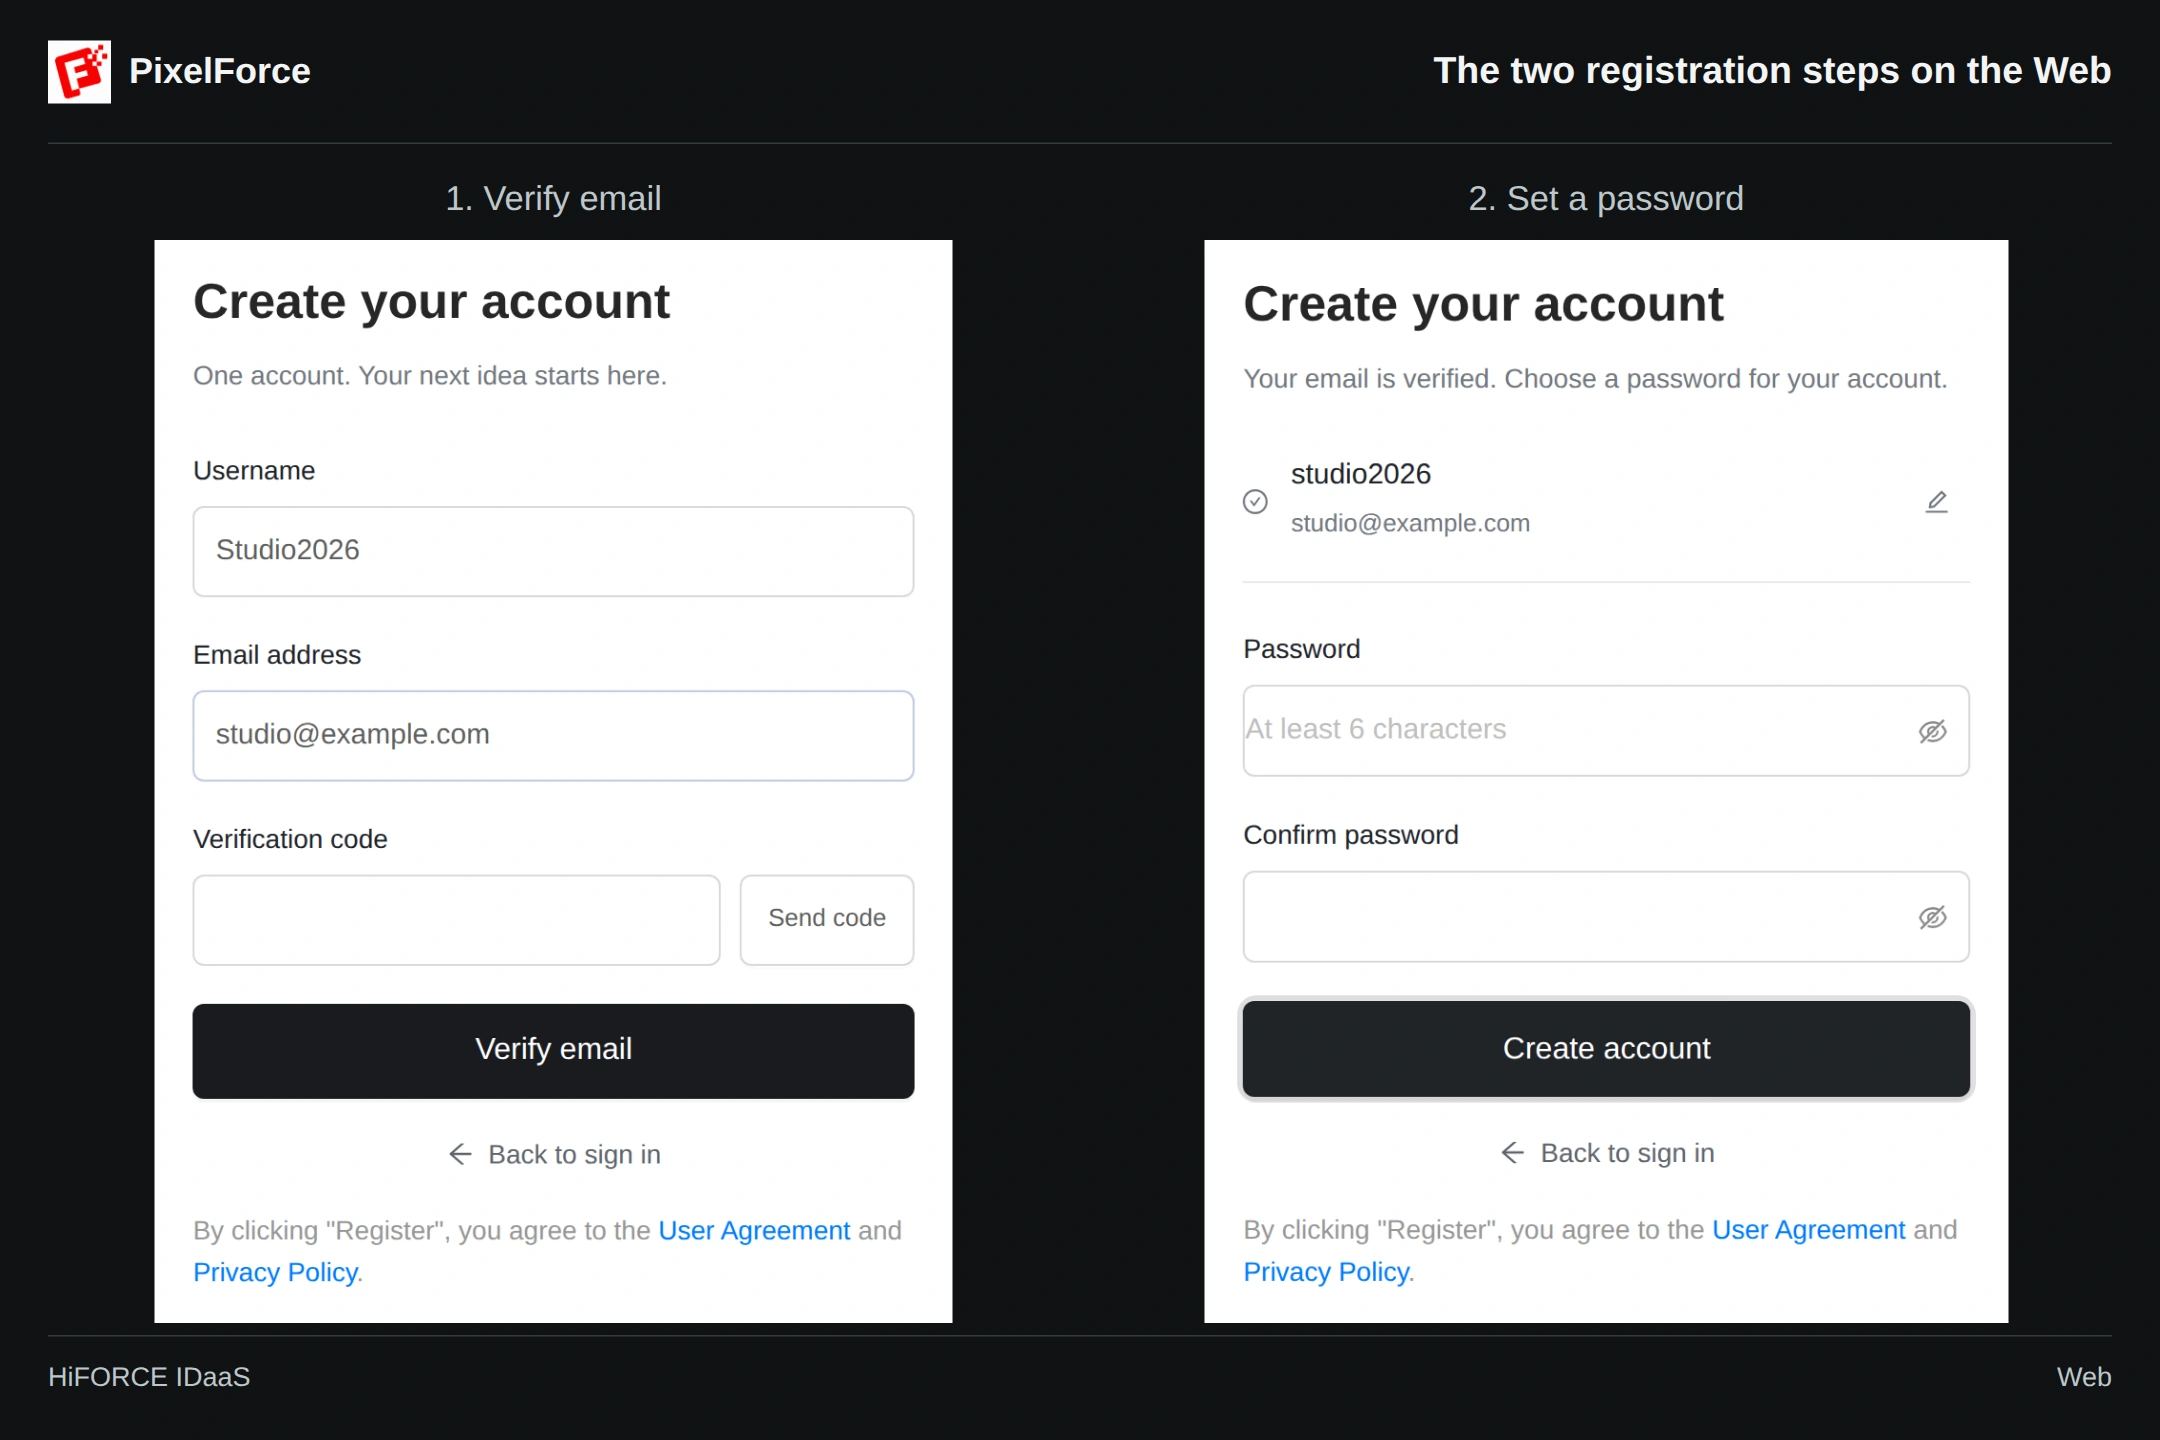
The controls may appear in English if the hosted page does not support your selected language. Start from PixelForce Web and keep using its current browser window so you can return to PixelForce after signing in.
4. Sign in to start creating
After successful creation, you return to account/password sign-in with your username filled in. Your account is created, but you are not signed in yet. Enter the password you just chose and select Sign in. The Web flow returns you to PixelForce after sign-in.
You can later use the same account and password, or the email-code method with the address you verified. Keep using the same identity on other devices to access that account's works and points. Google and Apple identities are not automatically merged with a newly registered account.
Open Account after signing in and check the account name, tenant identifier in parentheses and points balance. Account creation does not by itself mean that a points purchase has been made. Next, follow Quick start or Get to know the workspace.
If something goes wrong
| What you see | What to do |
|---|---|
| Username format is rejected | Start with an English letter and use only English letters and digits, up to 64 characters. Remove spaces and underscores. |
| Username or email is already in use | If the account is yours, sign in instead. For a genuinely new account, choose an unused username and an email that is not already linked. Do not change only the letter case. |
| No verification email arrives | Check the full address and spam folder. Wait for the resend countdown, then request one fresh code. Avoid sending several requests in quick succession. |
| Code is invalid or expired | Use the latest code sent for these exact registration details. If necessary, request a new code. If you changed the username or email, verify again. |
| Password is rejected or confirmation does not match | Check the length, allowed characters and accidental spaces, then enter the same password in both fields. |
| Password setup returns to email verification | Verification may have expired. Request a new code and complete verification again before setting the password. |
| Creation fails, then the username or email is reported as taken | The account may have been created before the connection was interrupted. Try signing in with the details you chose, or use email-code sign-in. If neither works, contact support rather than registering repeatedly. |
| Temporary service or connection error | Check your connection, wait, then try again. Do not create several accounts to work around a network problem. |
For support, provide the platform, app version including build number, approximate time, the step where you stopped and the visible error. Hide personal details in screenshots. Never send your password, verification code or sign-in token. See Troubleshooting and support.