AI Portrait Studio
AI Portrait Studio creates a coordinated set of portraits from one photo. A collection defines the mood, wardrobe, setting and shot compositions; your photo supplies the person's identity. Sample images illustrate the collection, not a guarantee of an identical result.
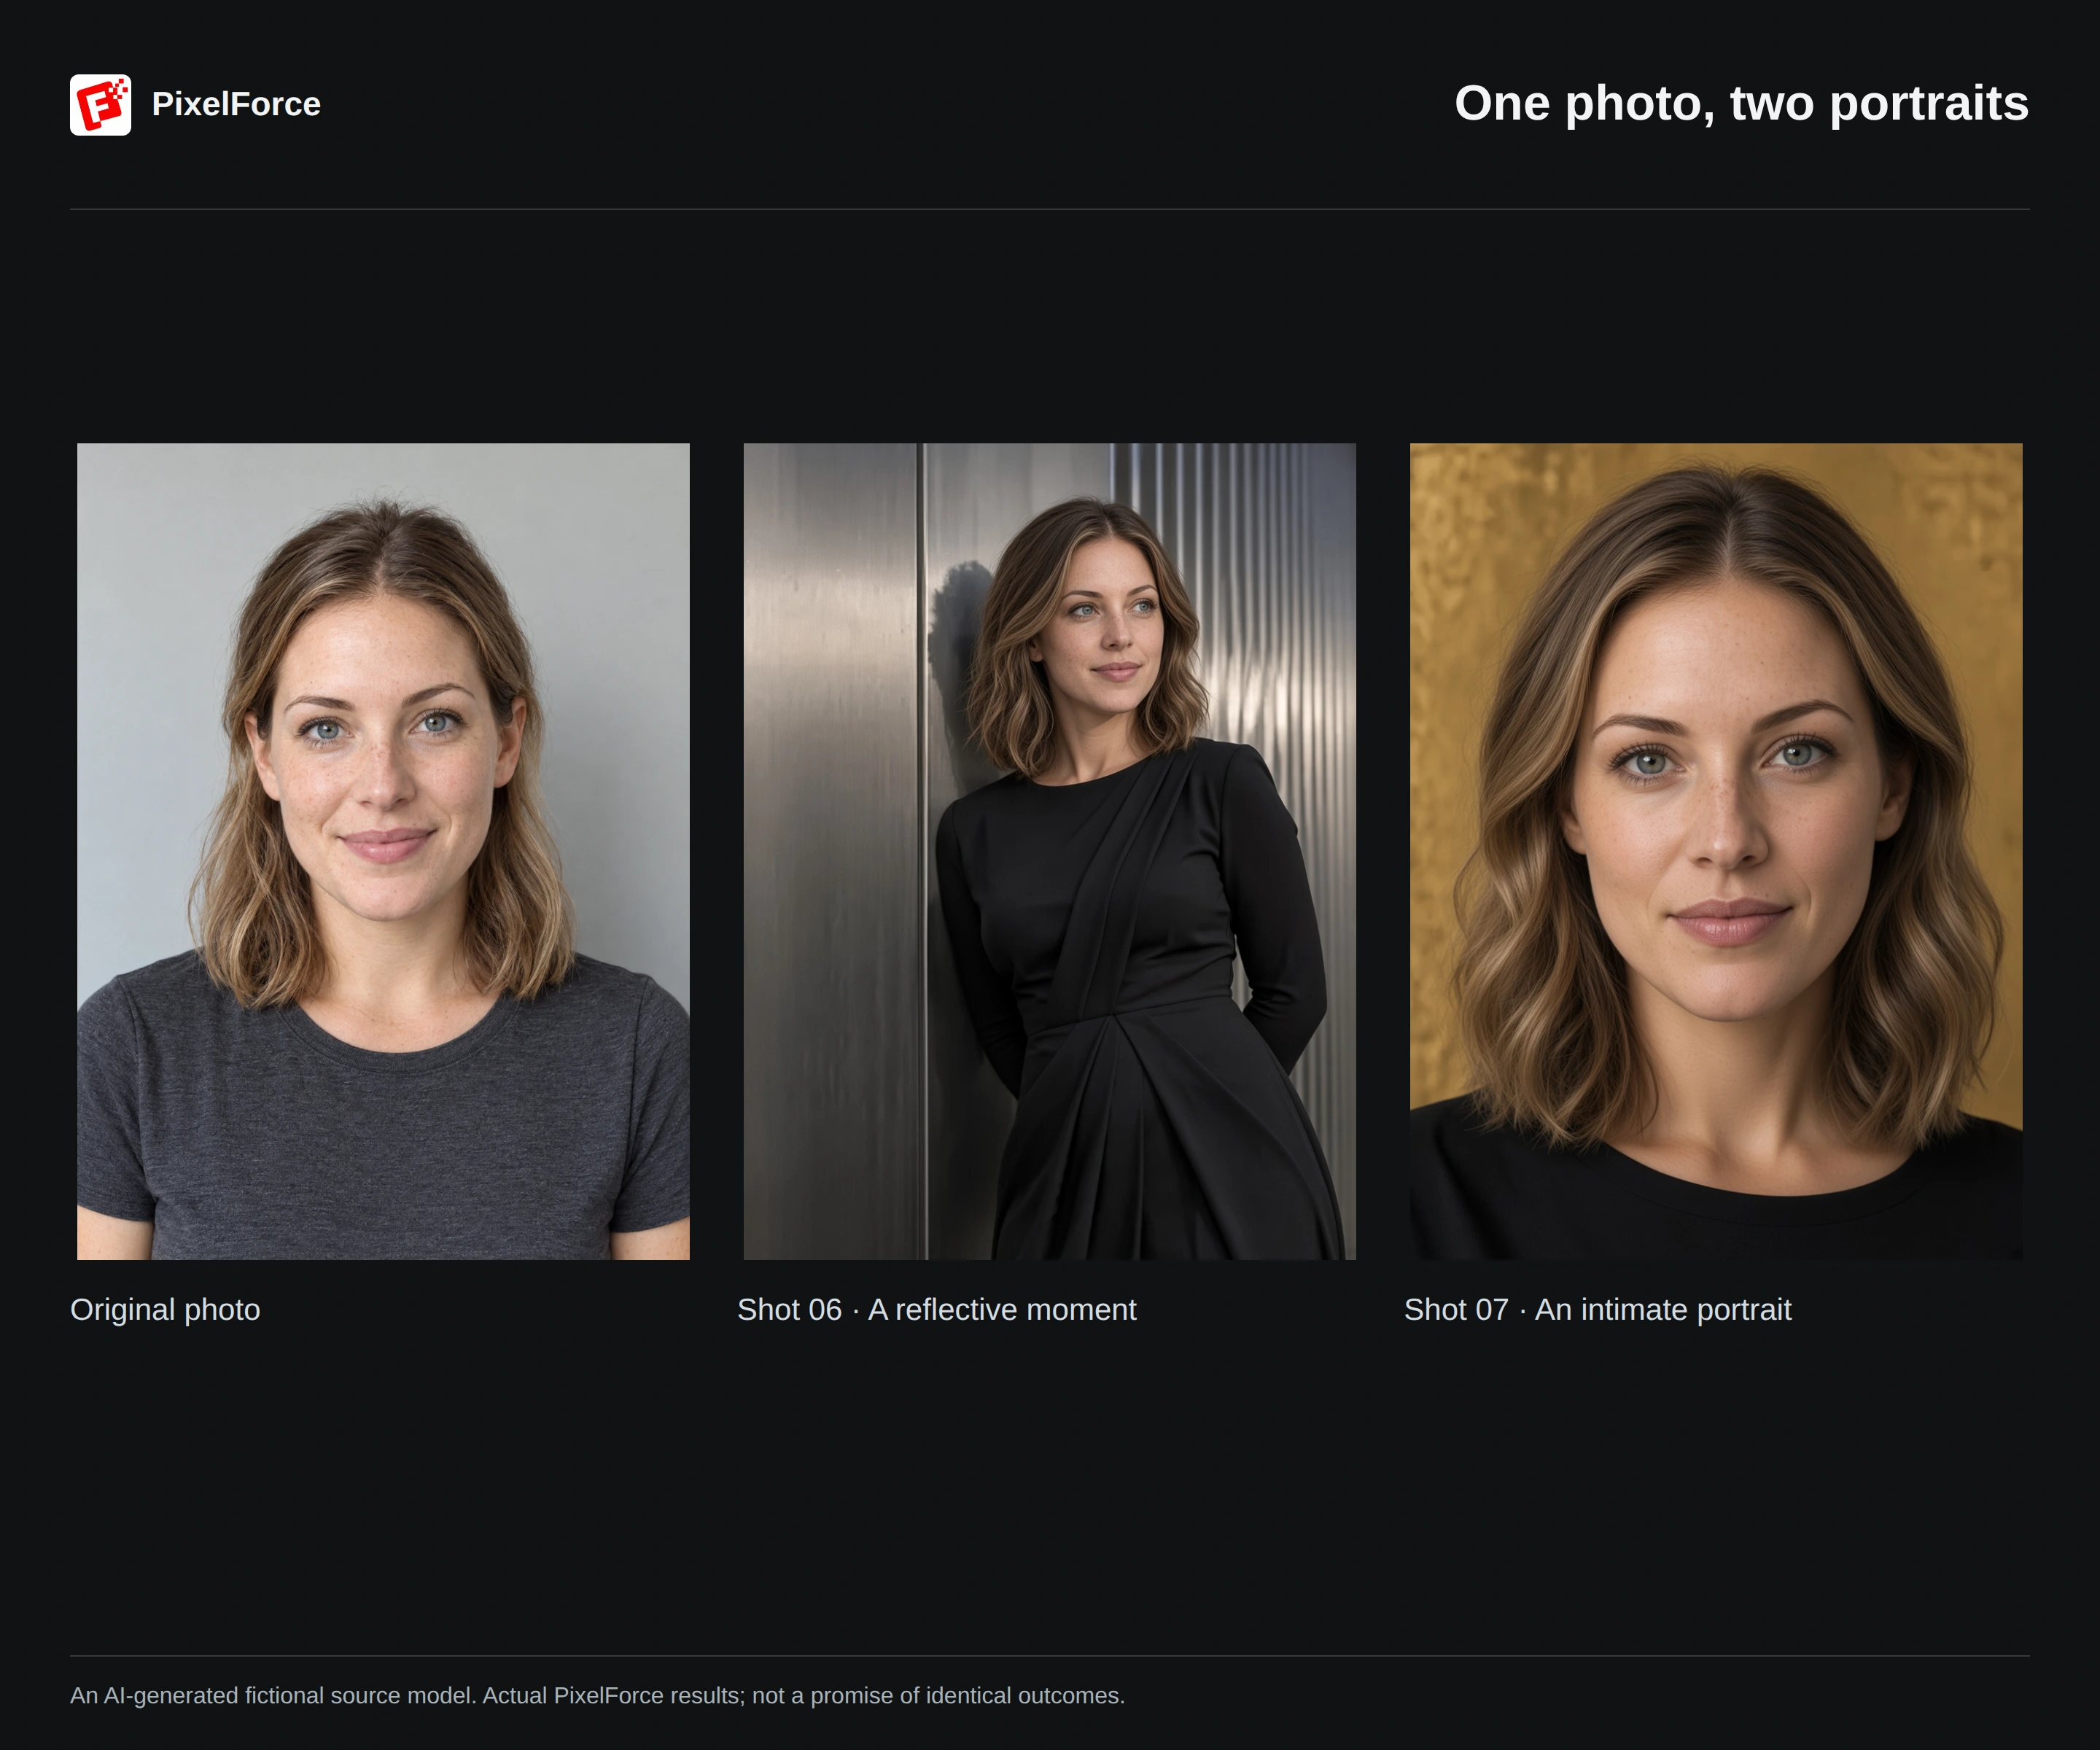
Example: Sculptural Noir
This example uses Sculptural Noir, selecting shots 06 and 07 at 3:4. Follow the collection and shot pickers, then browse the completed portraits. The source photo is an AI-generated fictional adult; the two results were created with PixelForce.
Prepare the person's photo
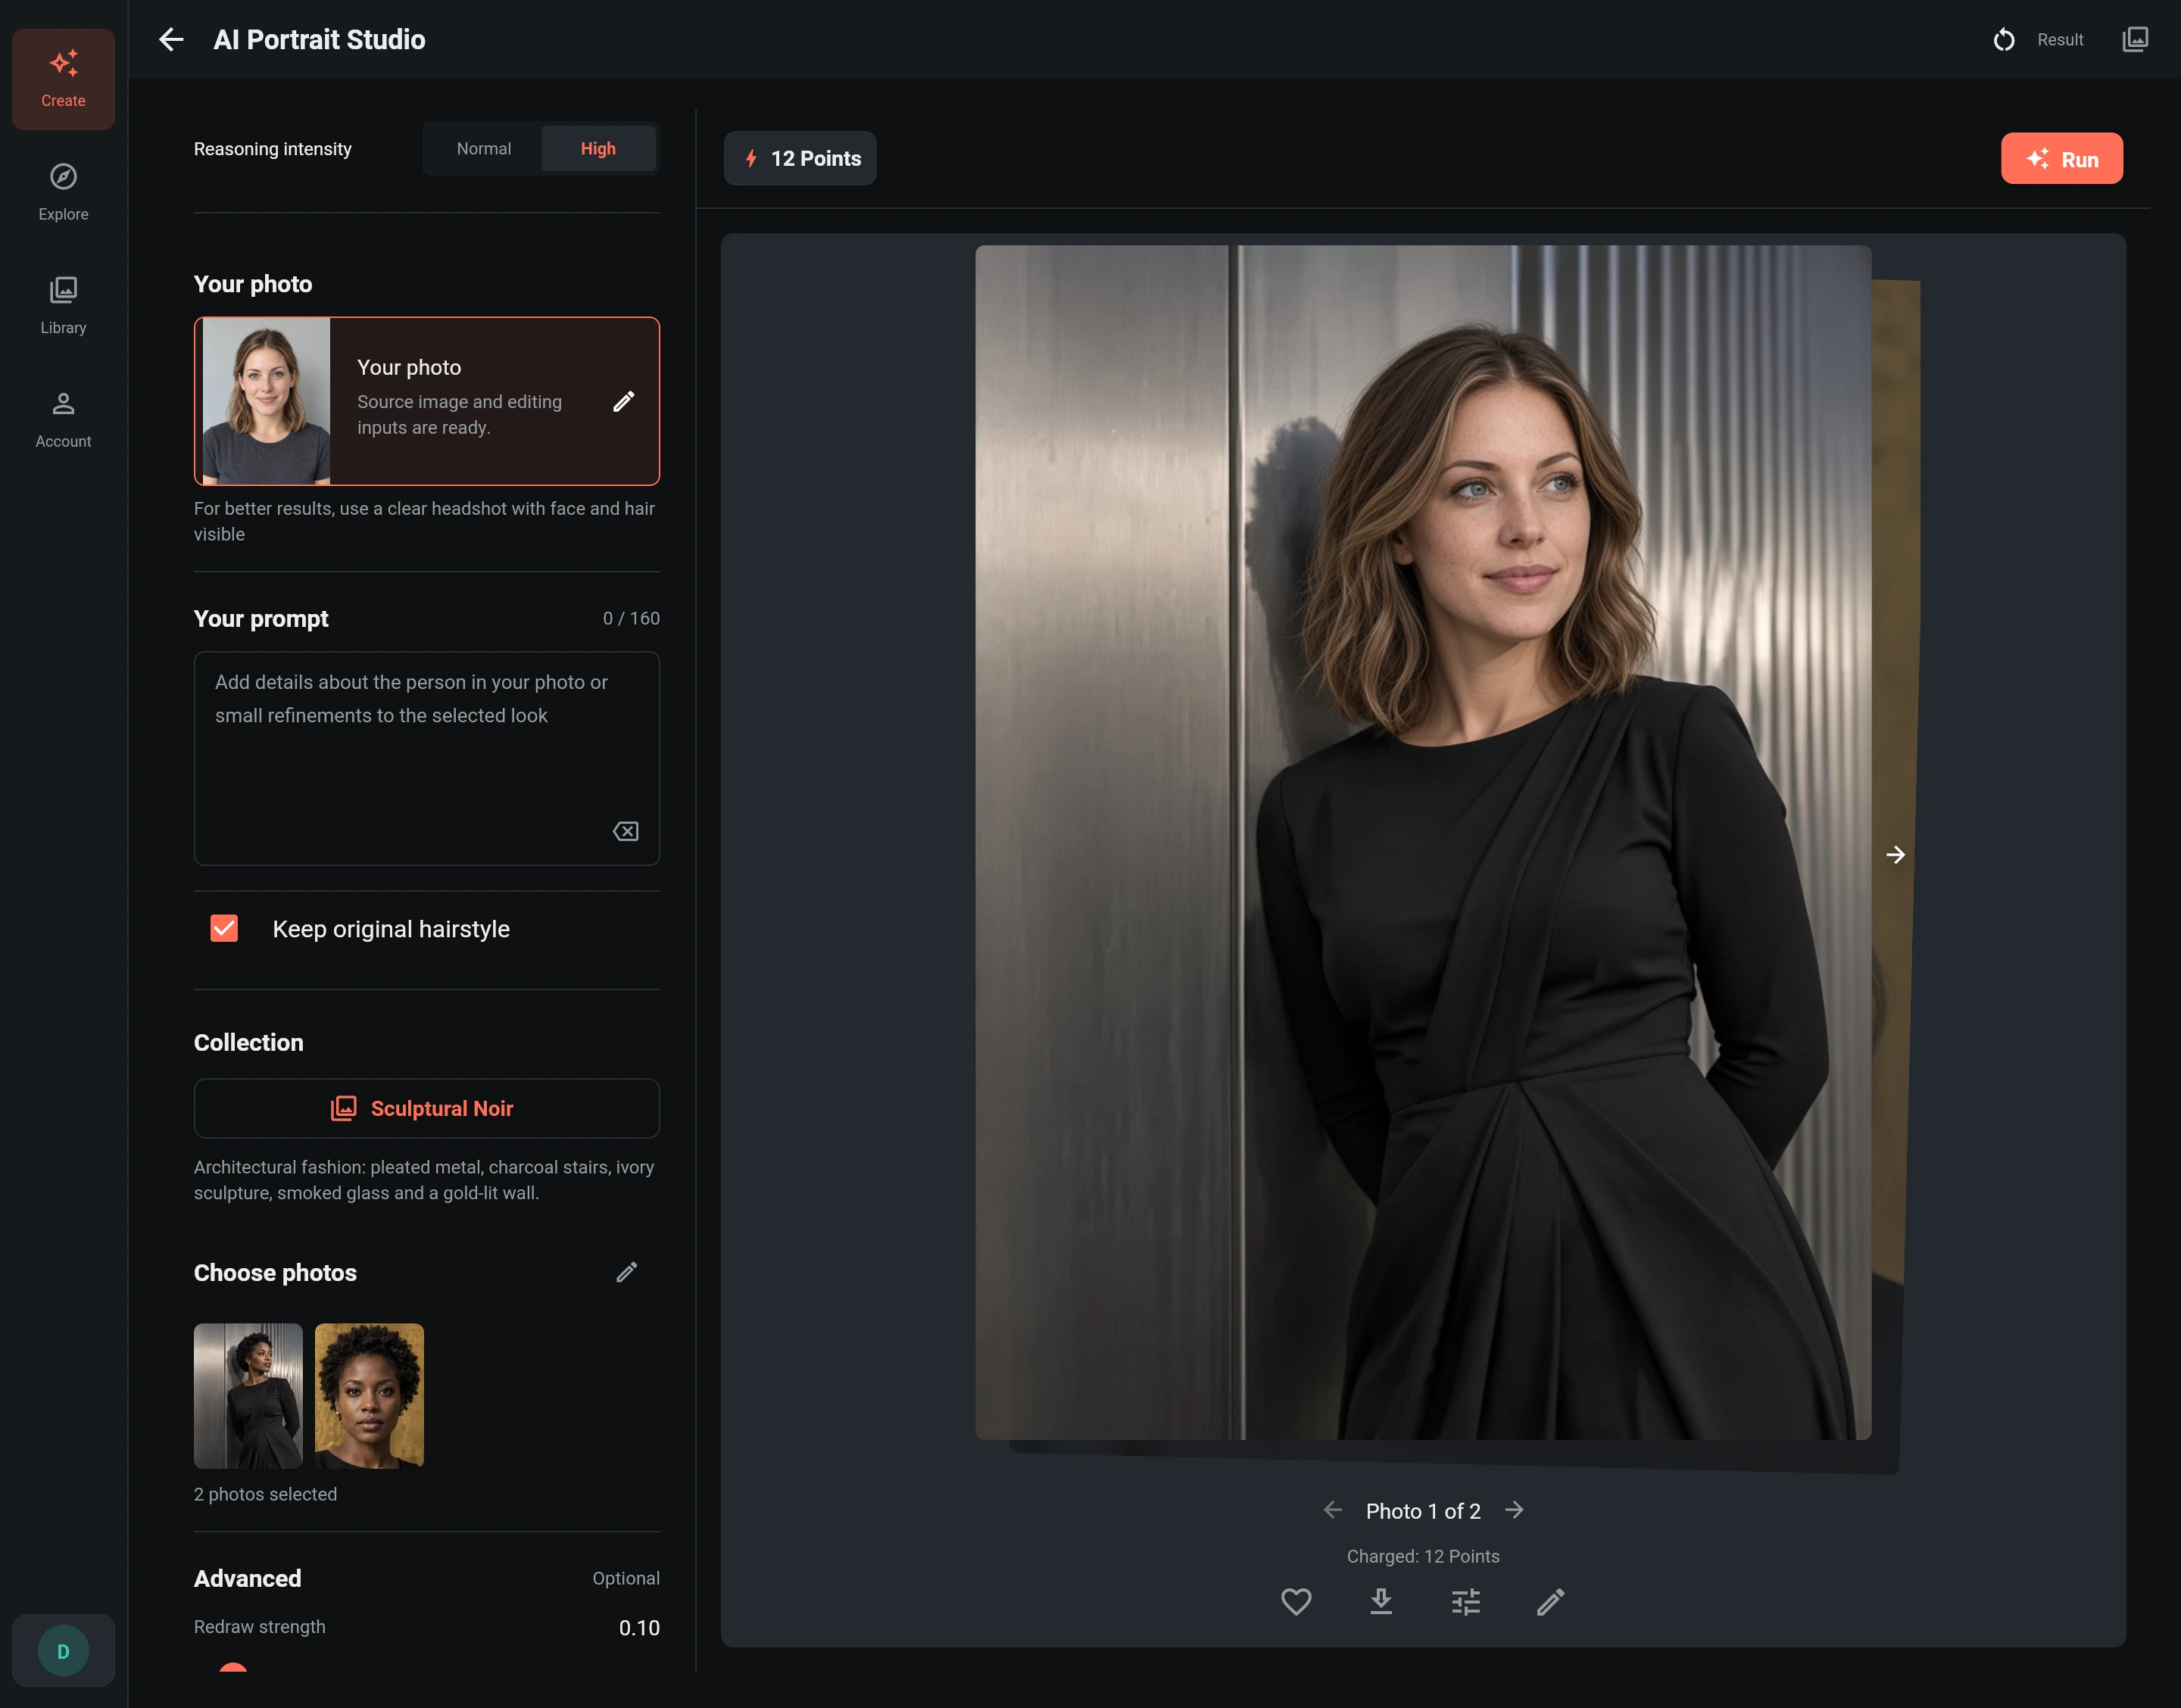
Open AI Portrait Studio from Create or Explore and add one primary photo. A clear headshot showing the face and hair usually works better than a distant, filtered or heavily obstructed face. Full-body photos are accepted, but the face still needs enough detail. Use a photo you have permission to process.
Keep Preserve original hairstyle selected if you want the source hairstyle retained. Deselect it to let the chosen collection influence the hair. The optional short prompt is for important identity details, such as keeping glasses; it is not meant to redesign the whole collection.
Select a collection and shots
- Open the collection picker and browse its categories and sample images.
- Choose the collection you want.
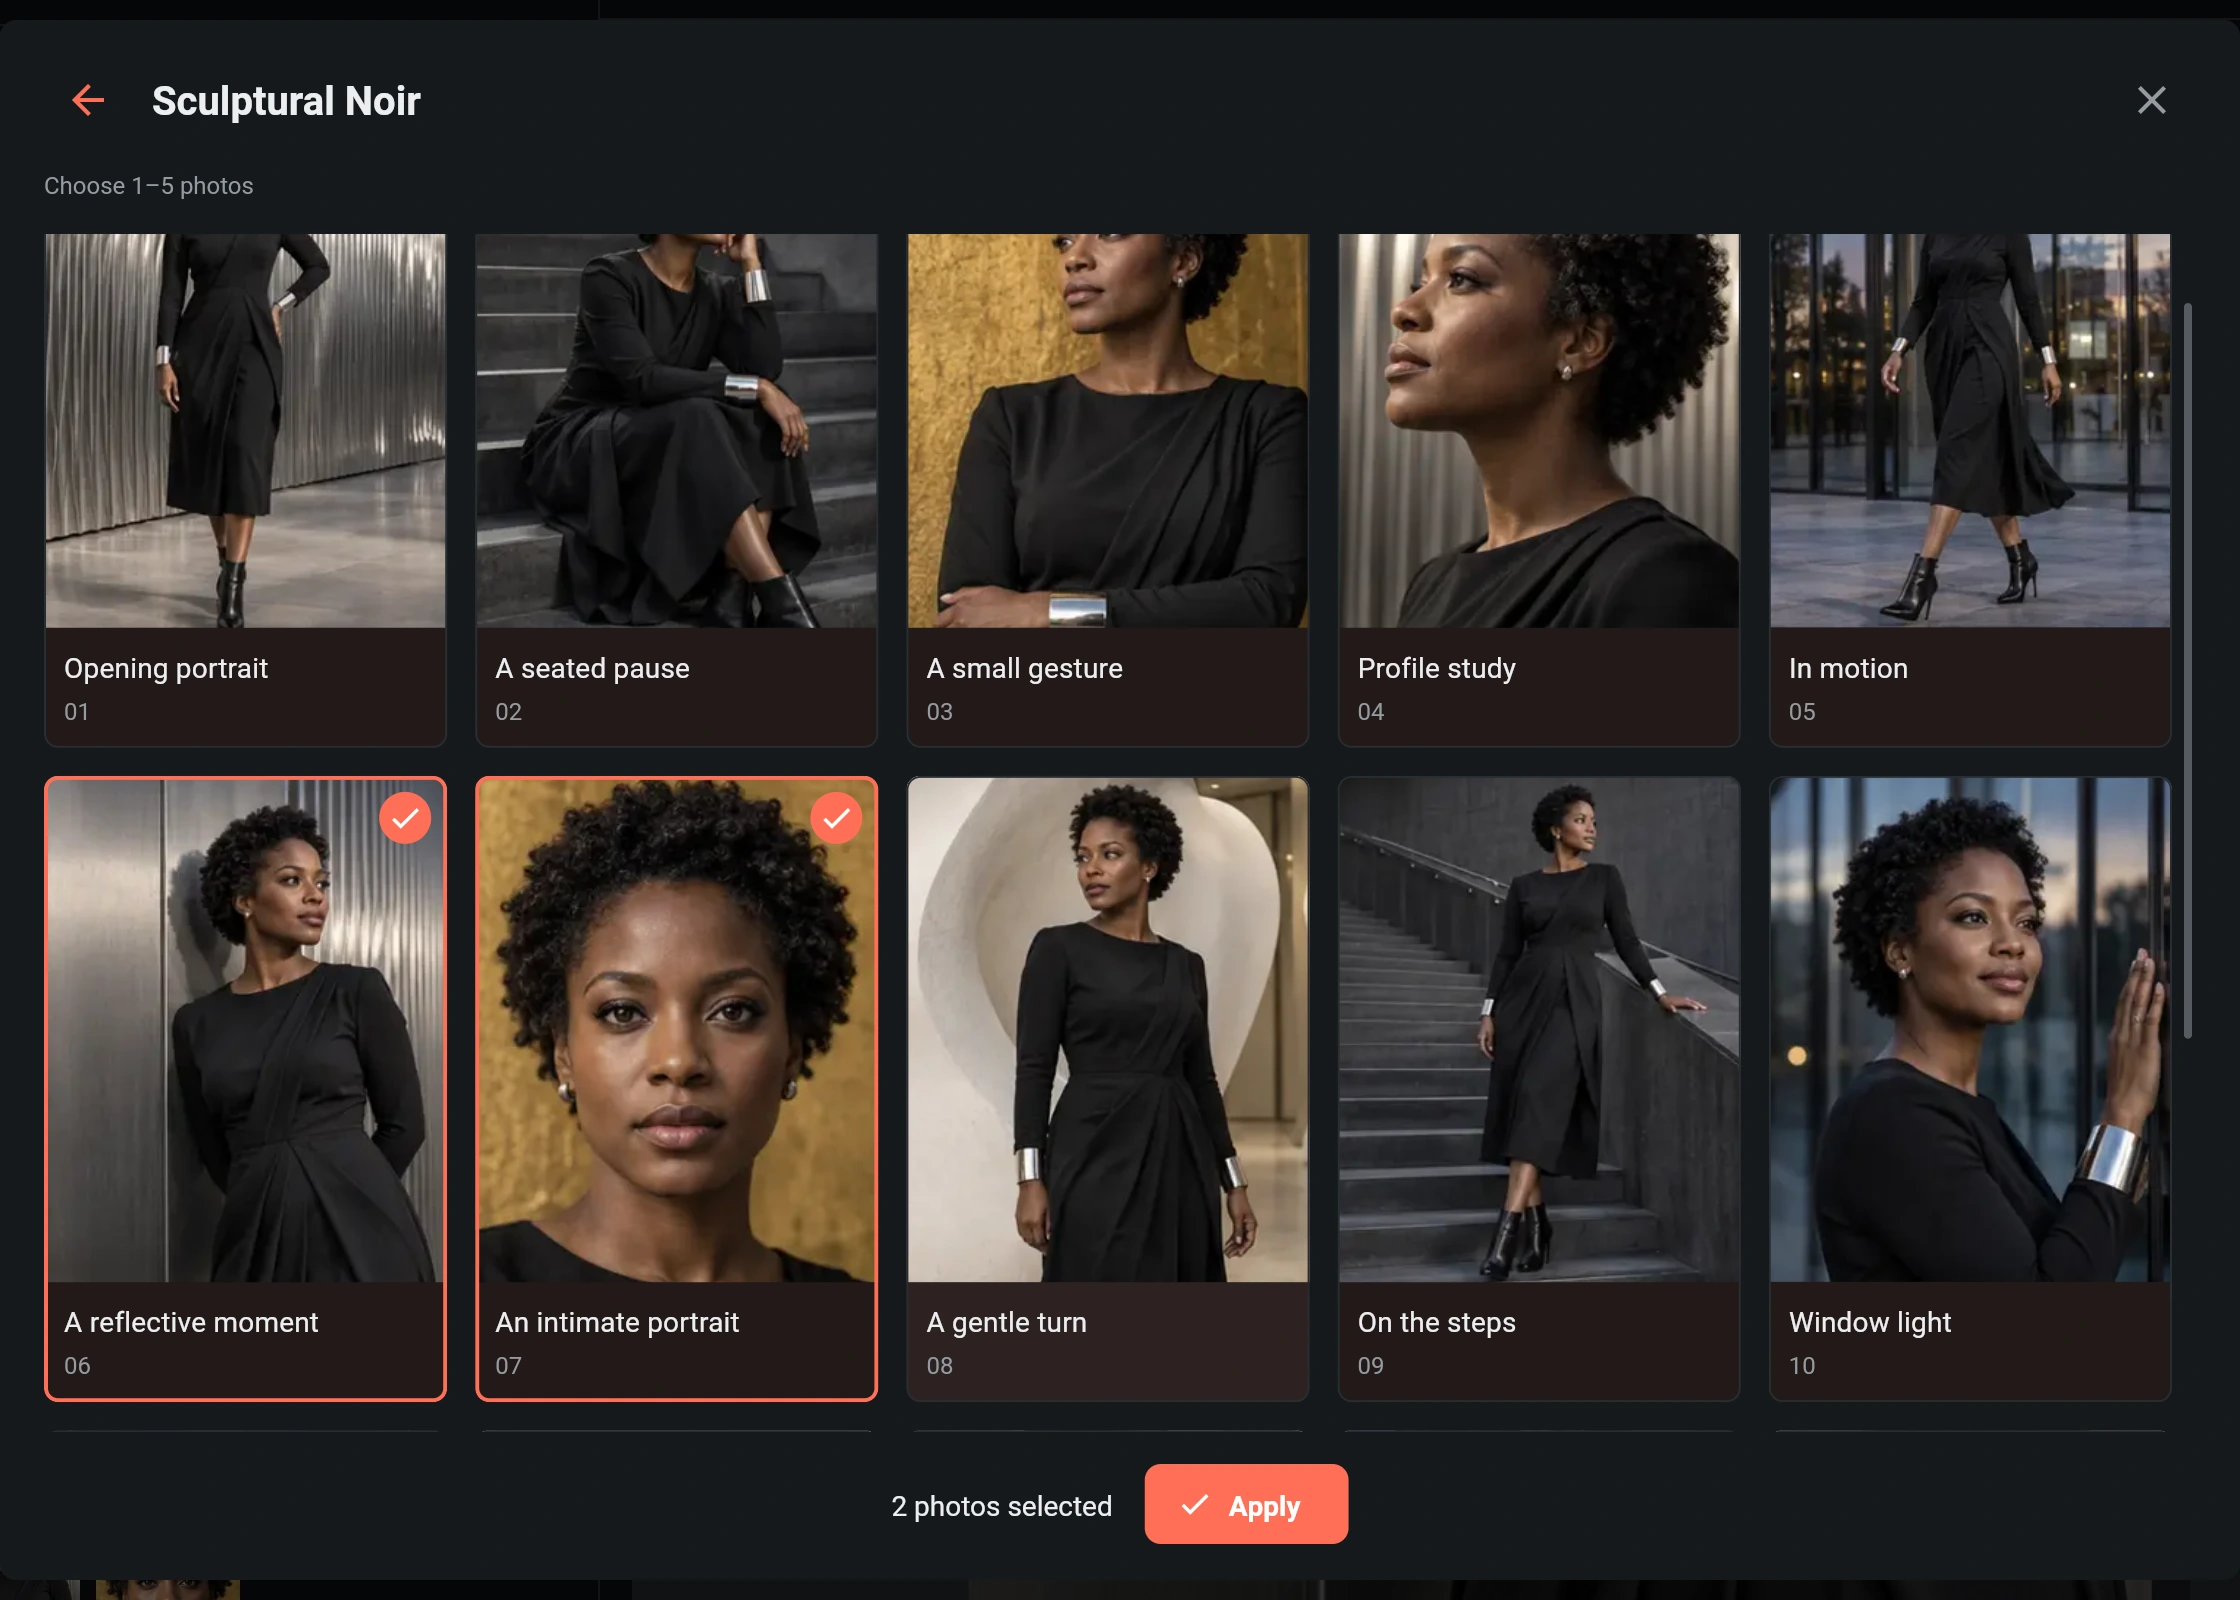
- Select one to five shots. You can choose individual samples rather than generating the entire collection.
- Confirm the selection. Closing the picker without confirming keeps your previous choice.
- Review supported reasoning, ratio, clarity and advanced strength controls, then check the total quote and run once.
For children's collections, complete the guardian confirmation when requested. A previous task or imported setting does not replace that confirmation.
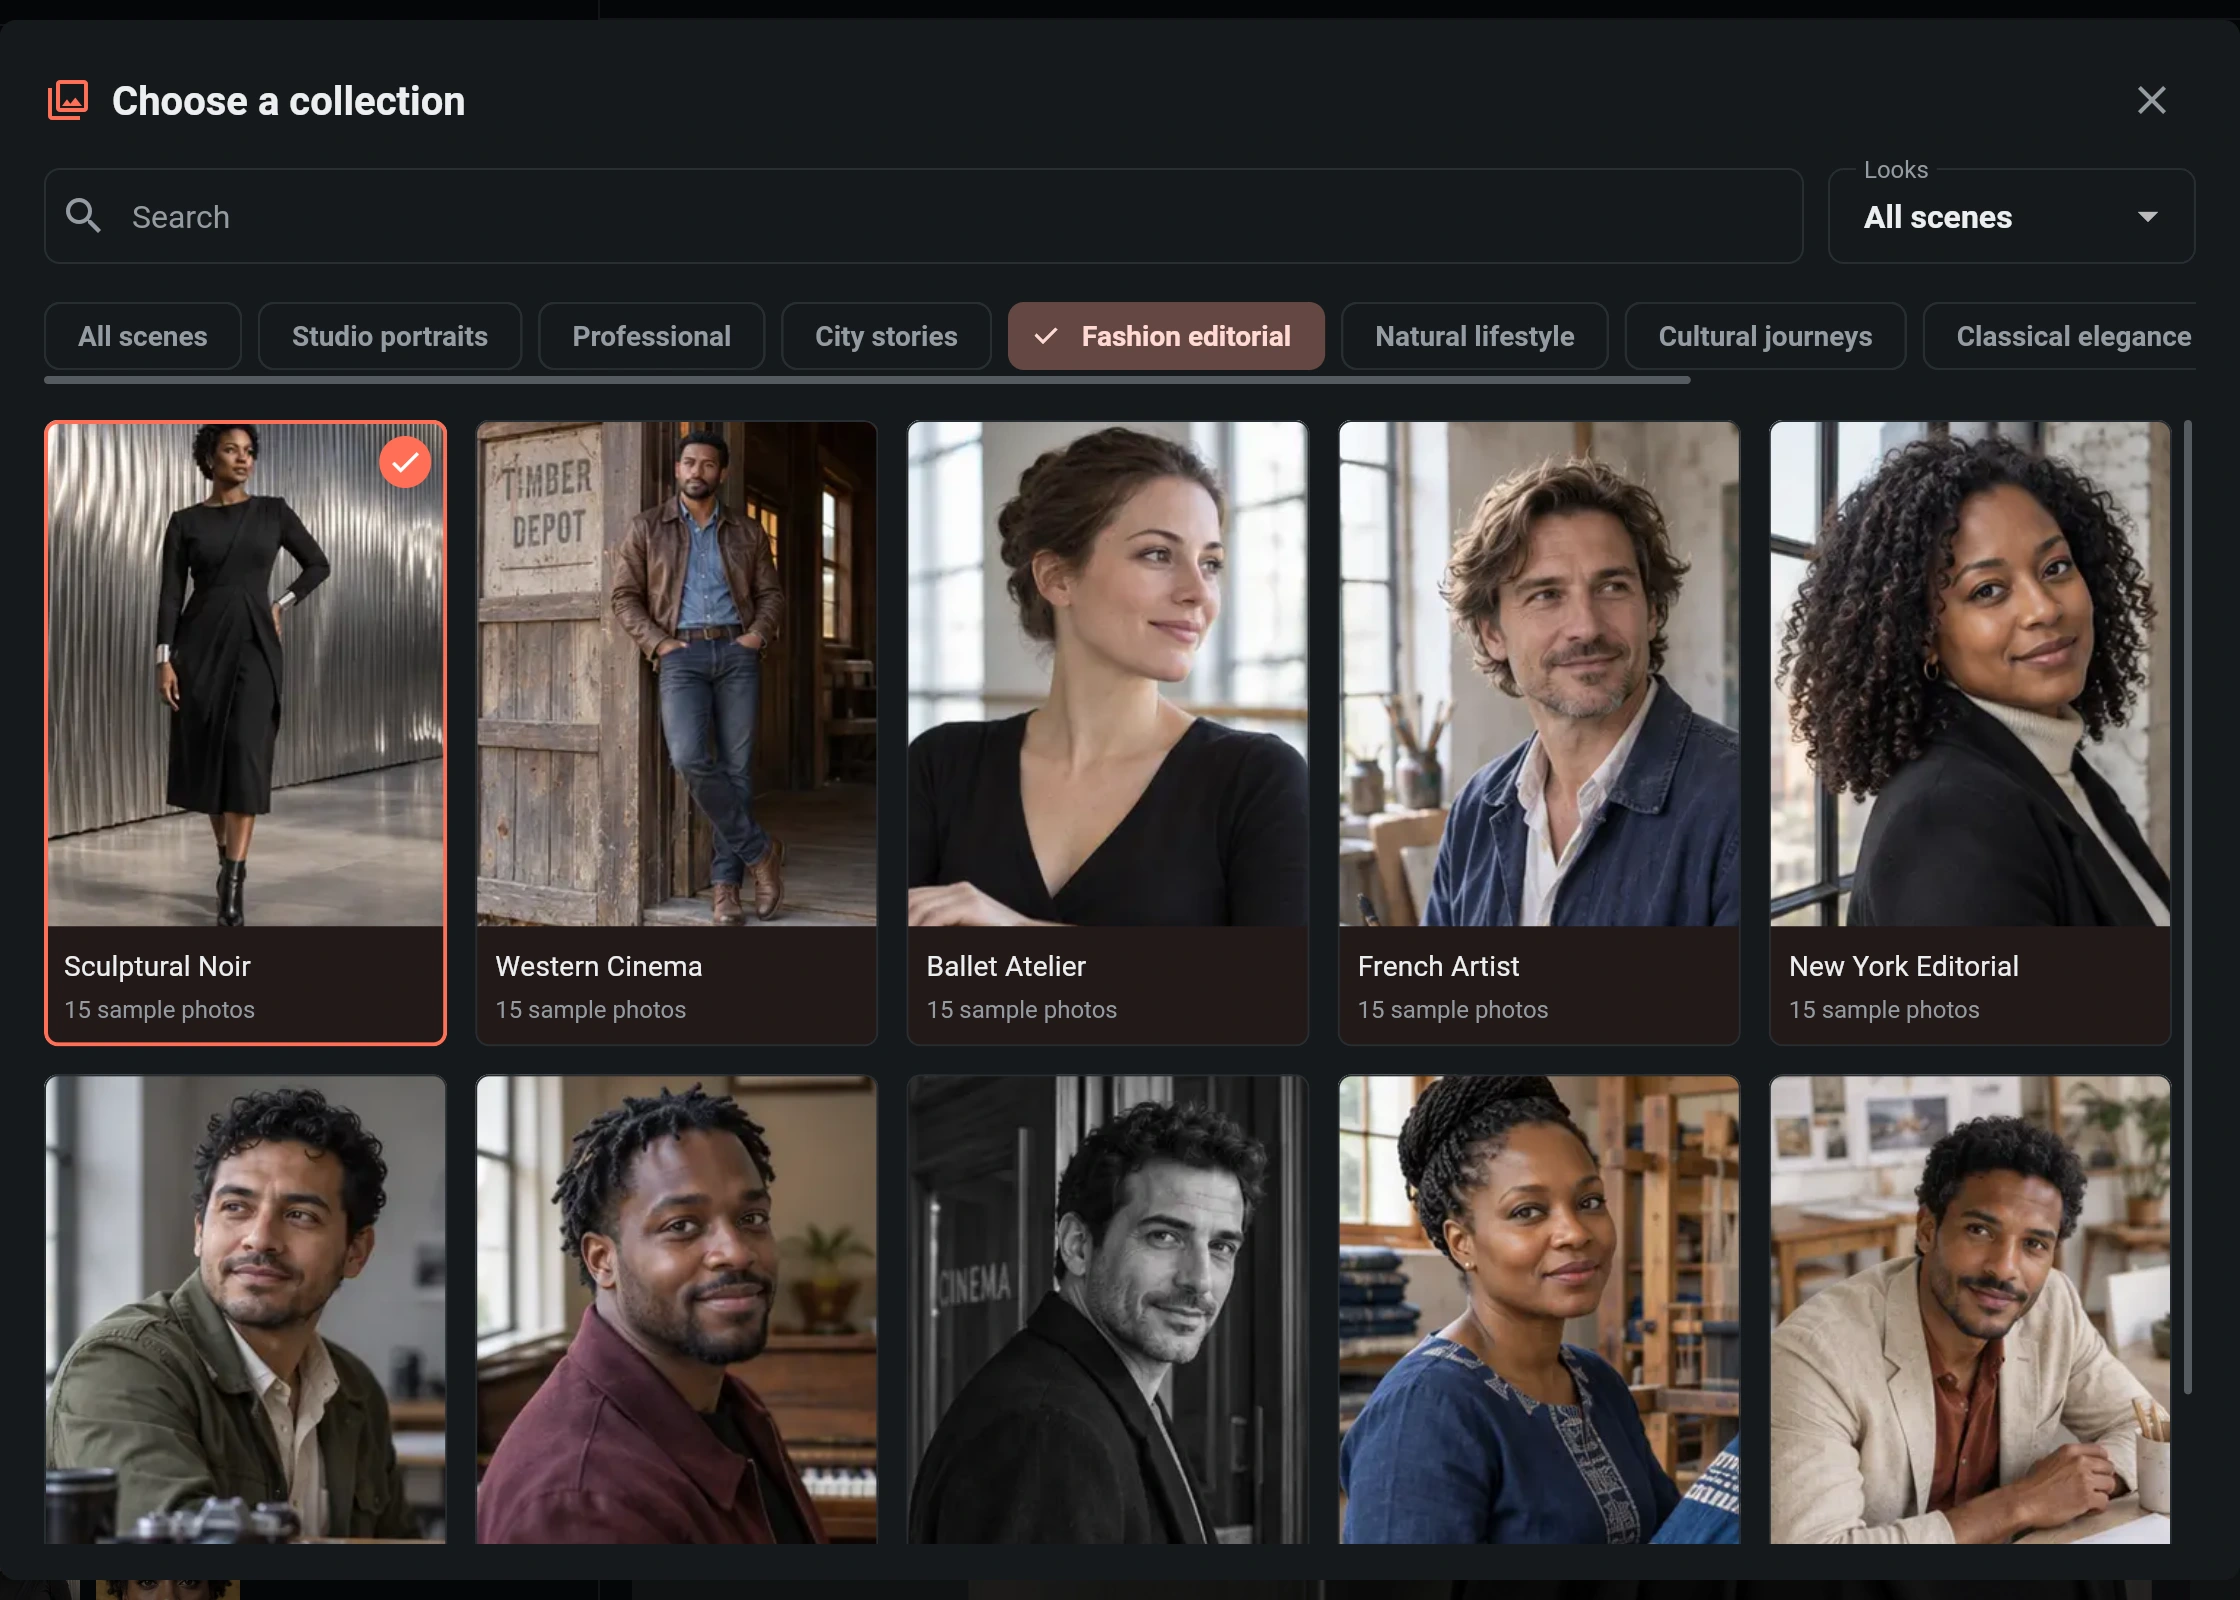
The highlighted collection sets the overall look. Its sample shots are references, not your finished photos. In this example, A reflective moment (06) and An intimate portrait (07) produce a wider portrait and a close-up. Check that the picker shows 2 photos selected, then choose Apply.
Follow the session gallery
Photos can arrive one at a time. Select a thumbnail to inspect that photo, download its original or continue editing it. The selected image, rather than the first image in the session, is used for these actions.
A session can be partially completed: finished photos stay available when another shot fails. Read the session's status and settlement before starting again. Do not repeat every shot merely because some were unsuccessful.
Improve likeness and reuse a session
Start with a sharper face photo and avoid aggressive redraw settings when likeness matters. Compare facial features, skin tone and hairstyle before publishing. Collection previews may be smaller than the generated downloads; inspect a downloaded original for final detail.
Reusing an older session restores its selected package and shot settings when that version remains available. If the collection has changed or is no longer published, choose a current collection explicitly. Reuse prepares a new task; it does not charge or generate until you run.
See results and export, task recovery and points.