Garment-preserving redraw
Turn a worn-outfit photo into a different presentation without asking the AI to design a new garment. Garment-preserving redraw combines the clothing source, an optional person reference and your desired setting. It is useful for presenting the same outfit on a different model or in a new scene.
Start with clothing already worn by a person. For a flat-lay or standalone garment, use Garment Try-On. If you only want to change the person while keeping the photograph's setting, Model Recast is a simpler starting point.
From a source outfit to a studio image
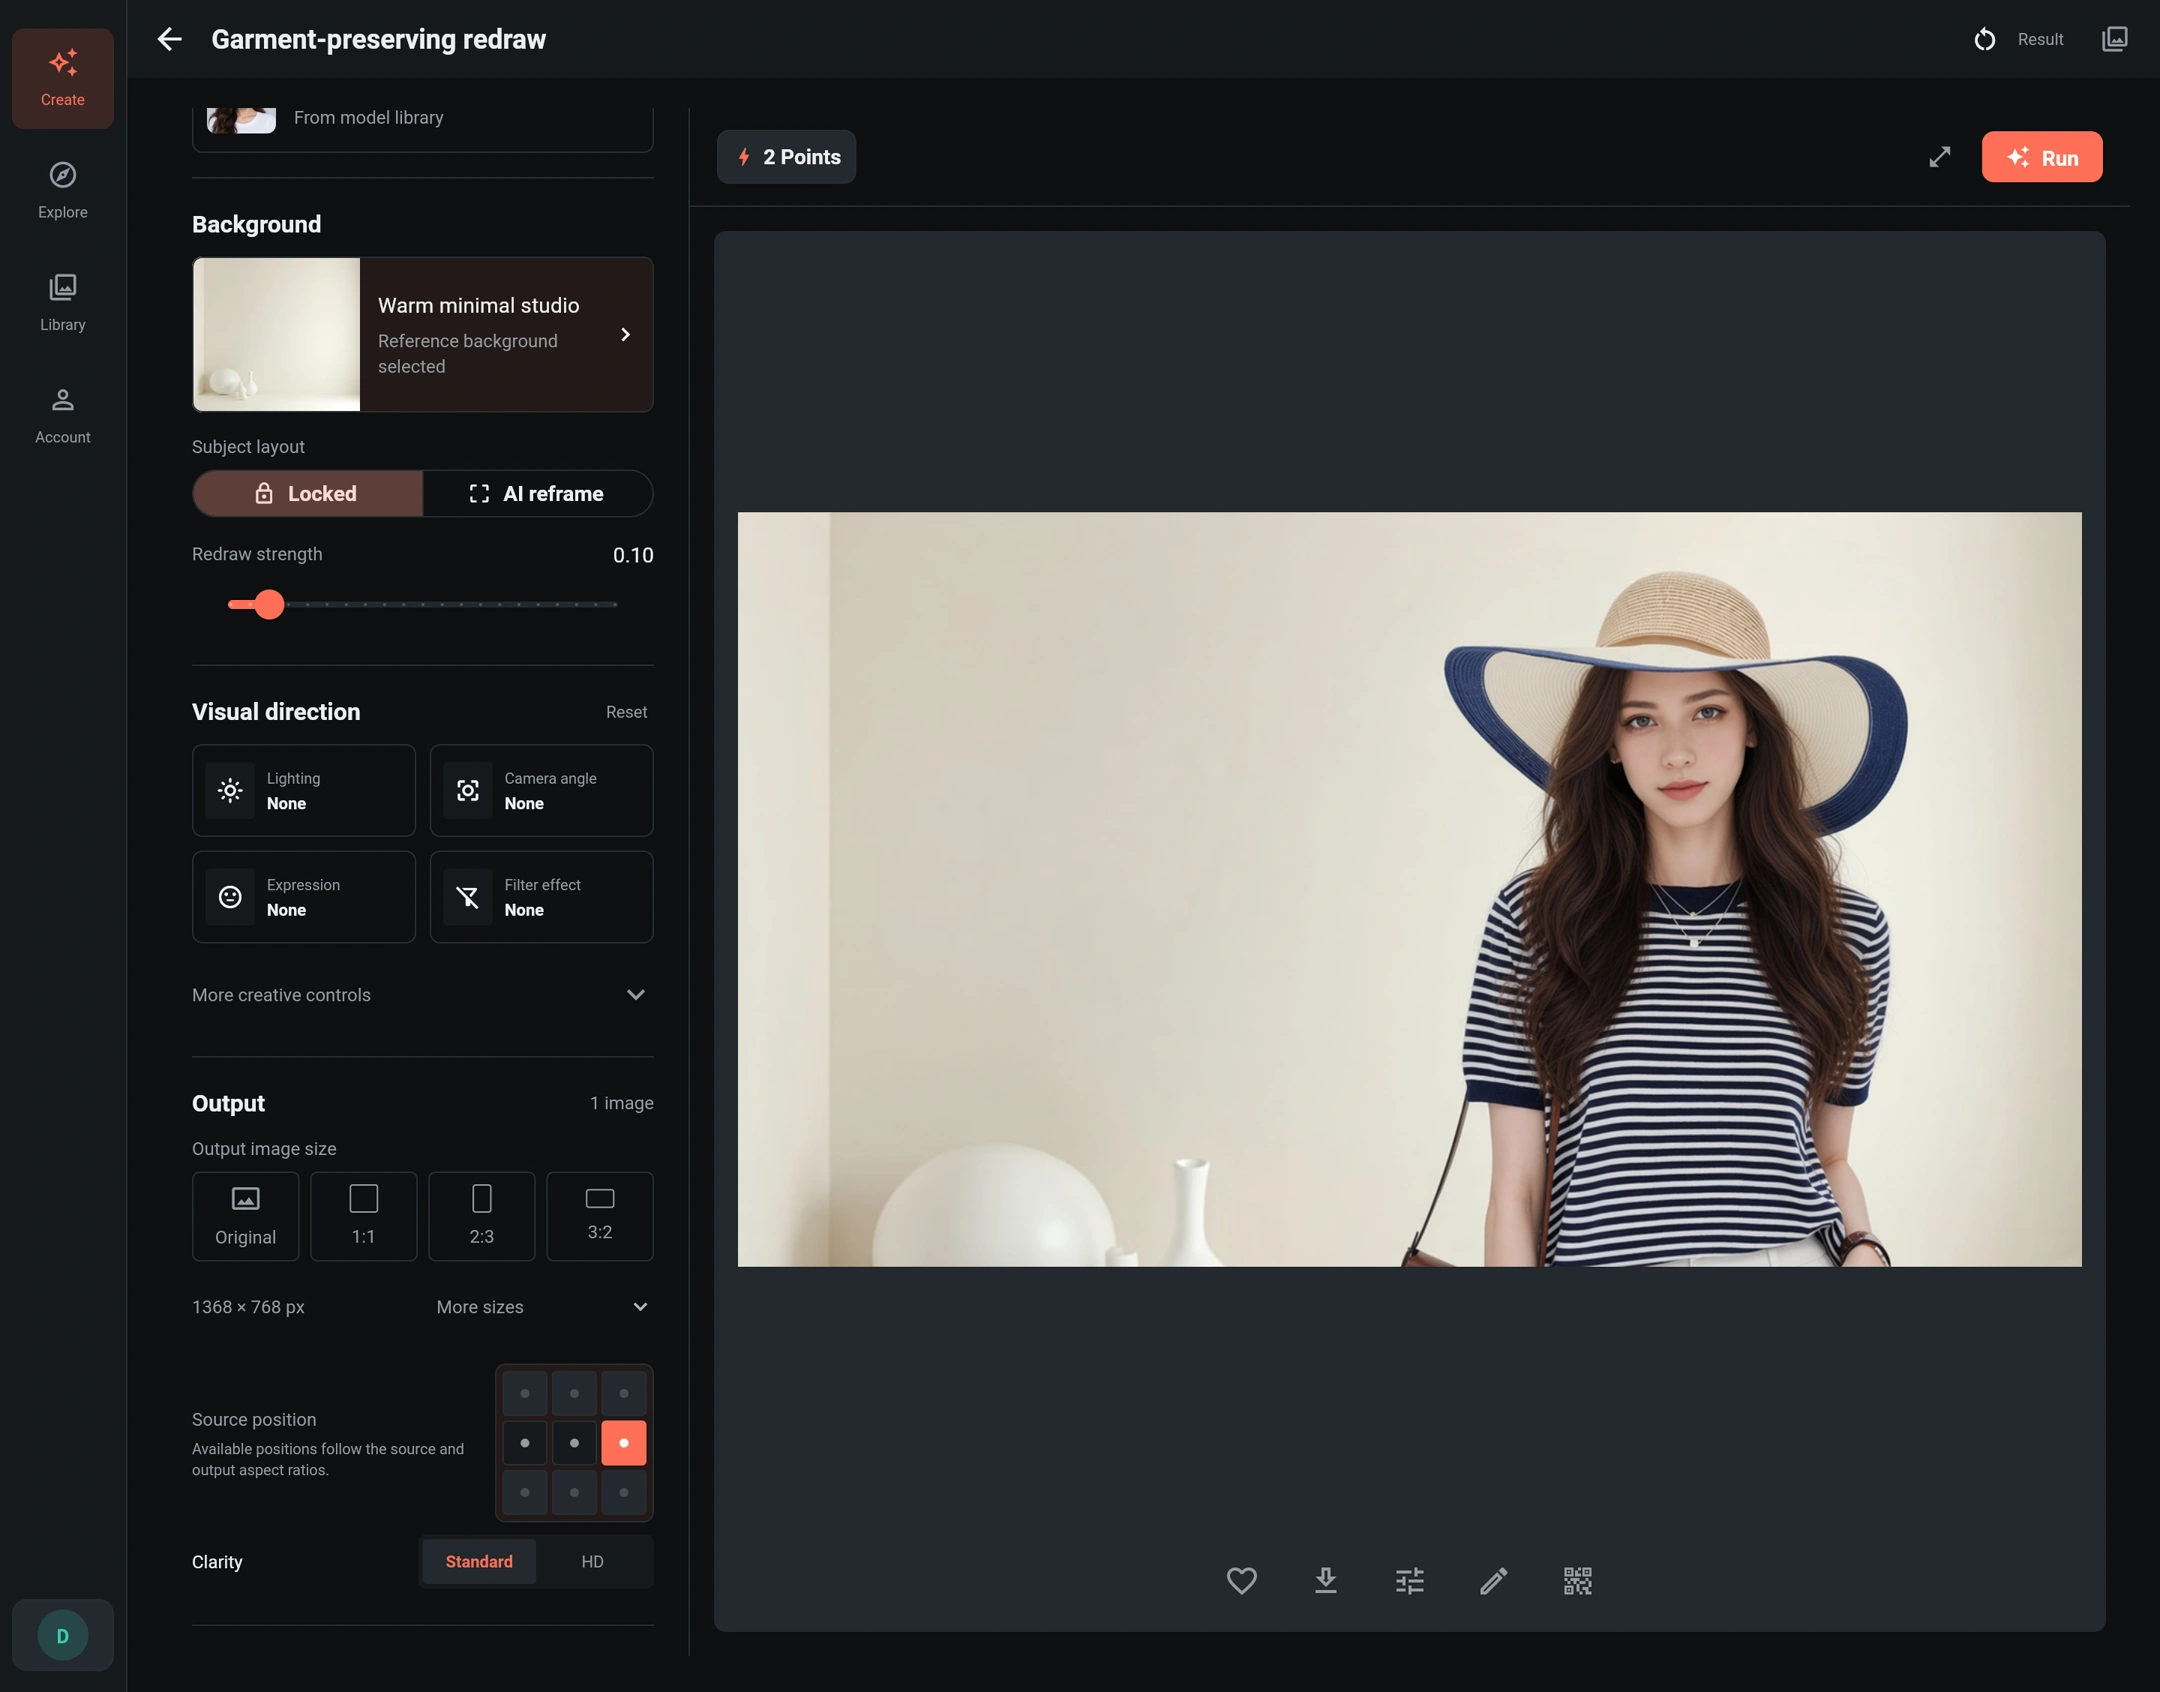
The source in this example shows a short-haired person in a navy-and-white striped top and a wide-brimmed straw hat. Kinge Anni supplies the new model identity. The result places the model toward the right of a wide, warm ivory studio image, with white sculptural vases at the lower left.
The three images have different roles: the source defines the outfit; the model reference defines the person; the background and prompt define the setting. Kinge Anni's white shirt is not the garment to copy. The result should carry through the striped top and hat, not borrow clothing from the model portrait.
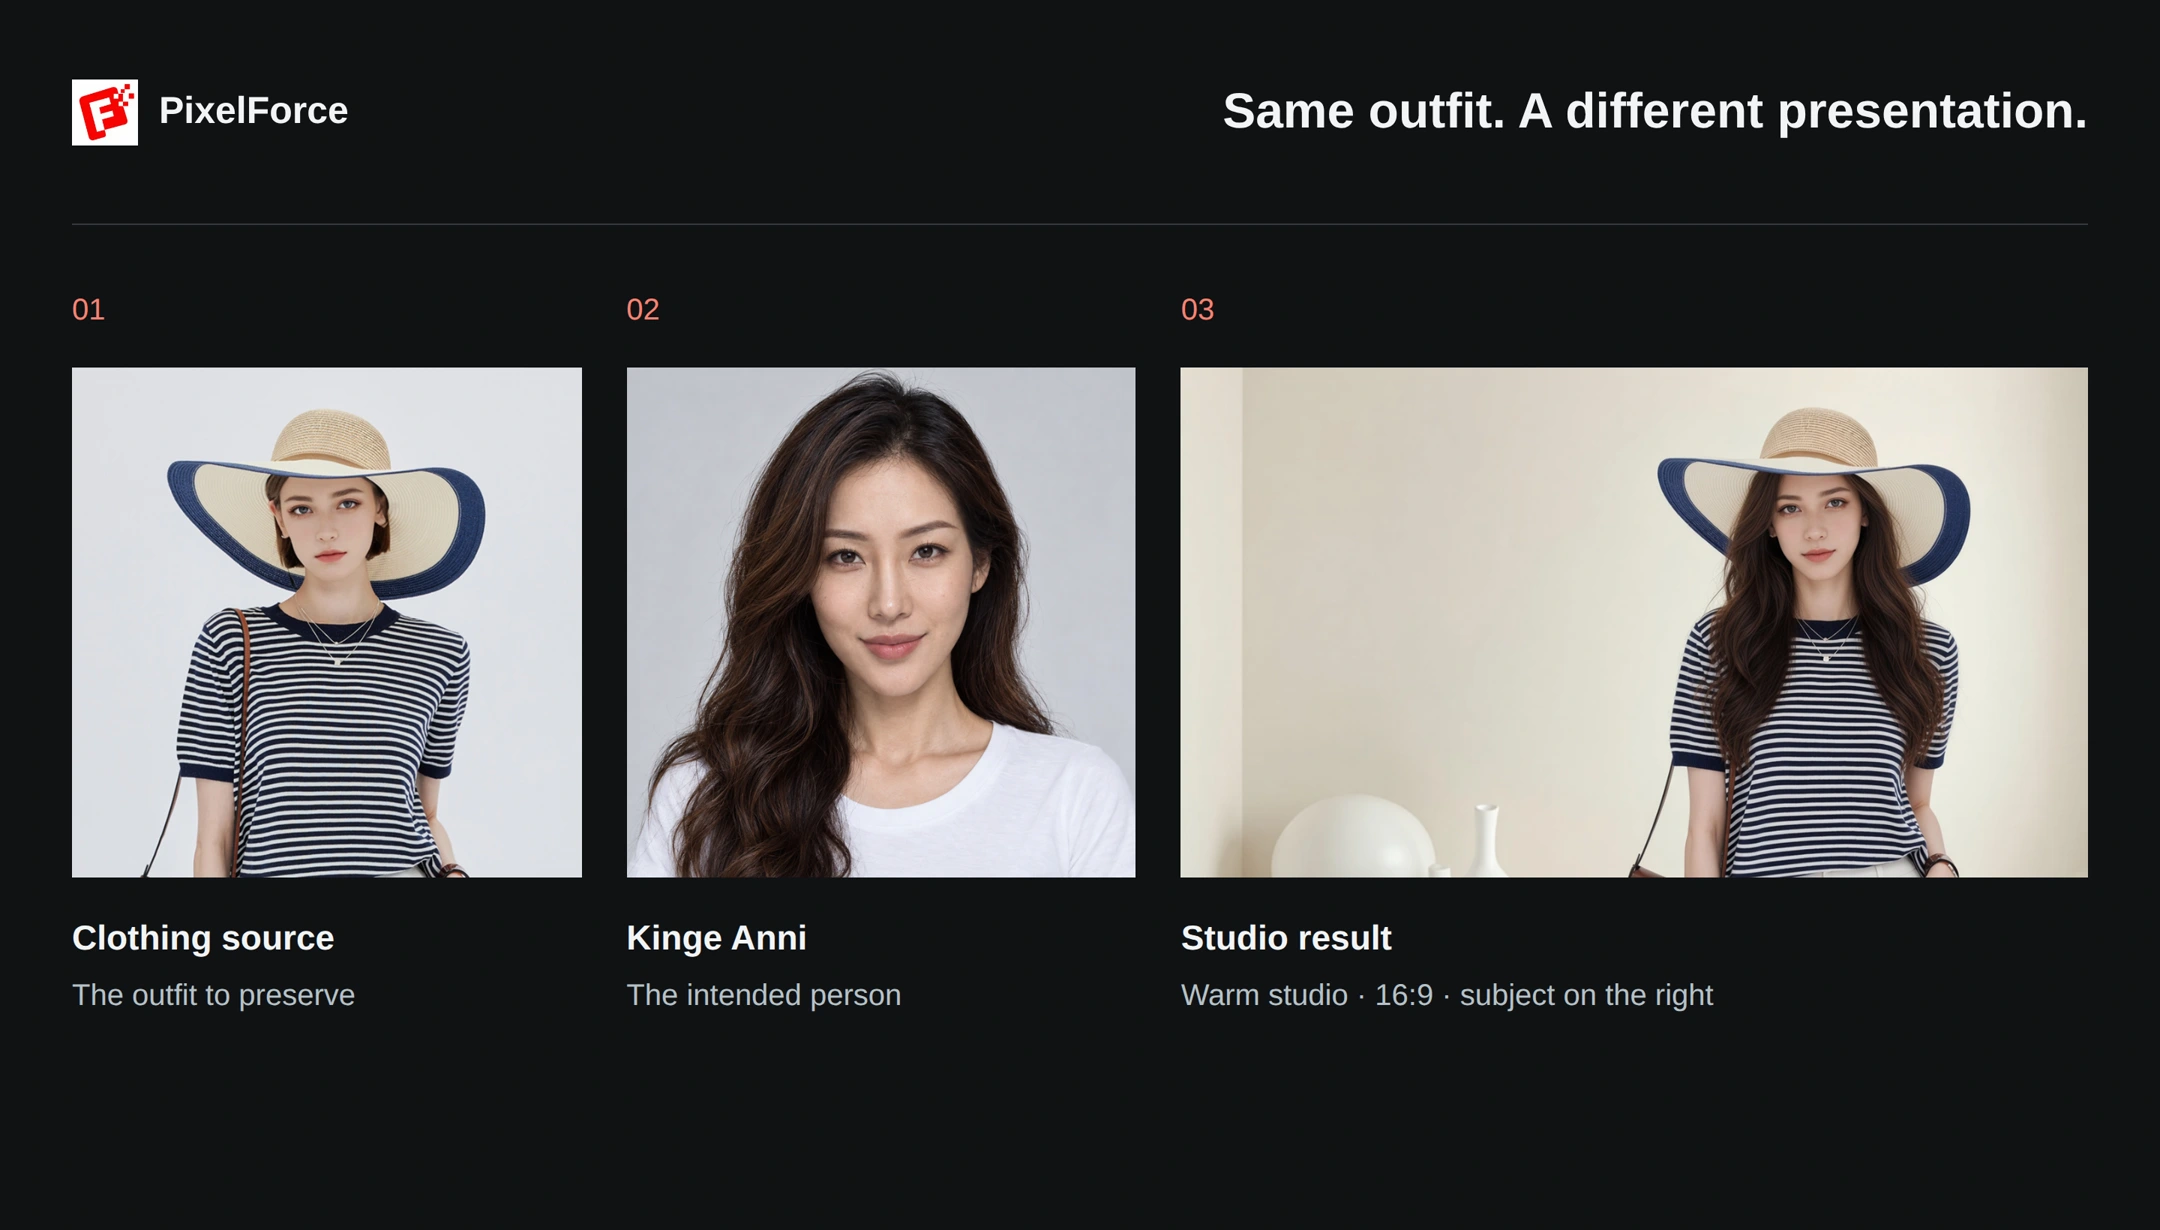
Use this example as a guide to the controls, not a guarantee of exact garment reproduction. Inspect the stripes, neckline, sleeve length, hat trim and visible accessories in your own result before publishing it.
Step 1: Prepare the clothing source
- Open Garment-preserving redraw from Create.
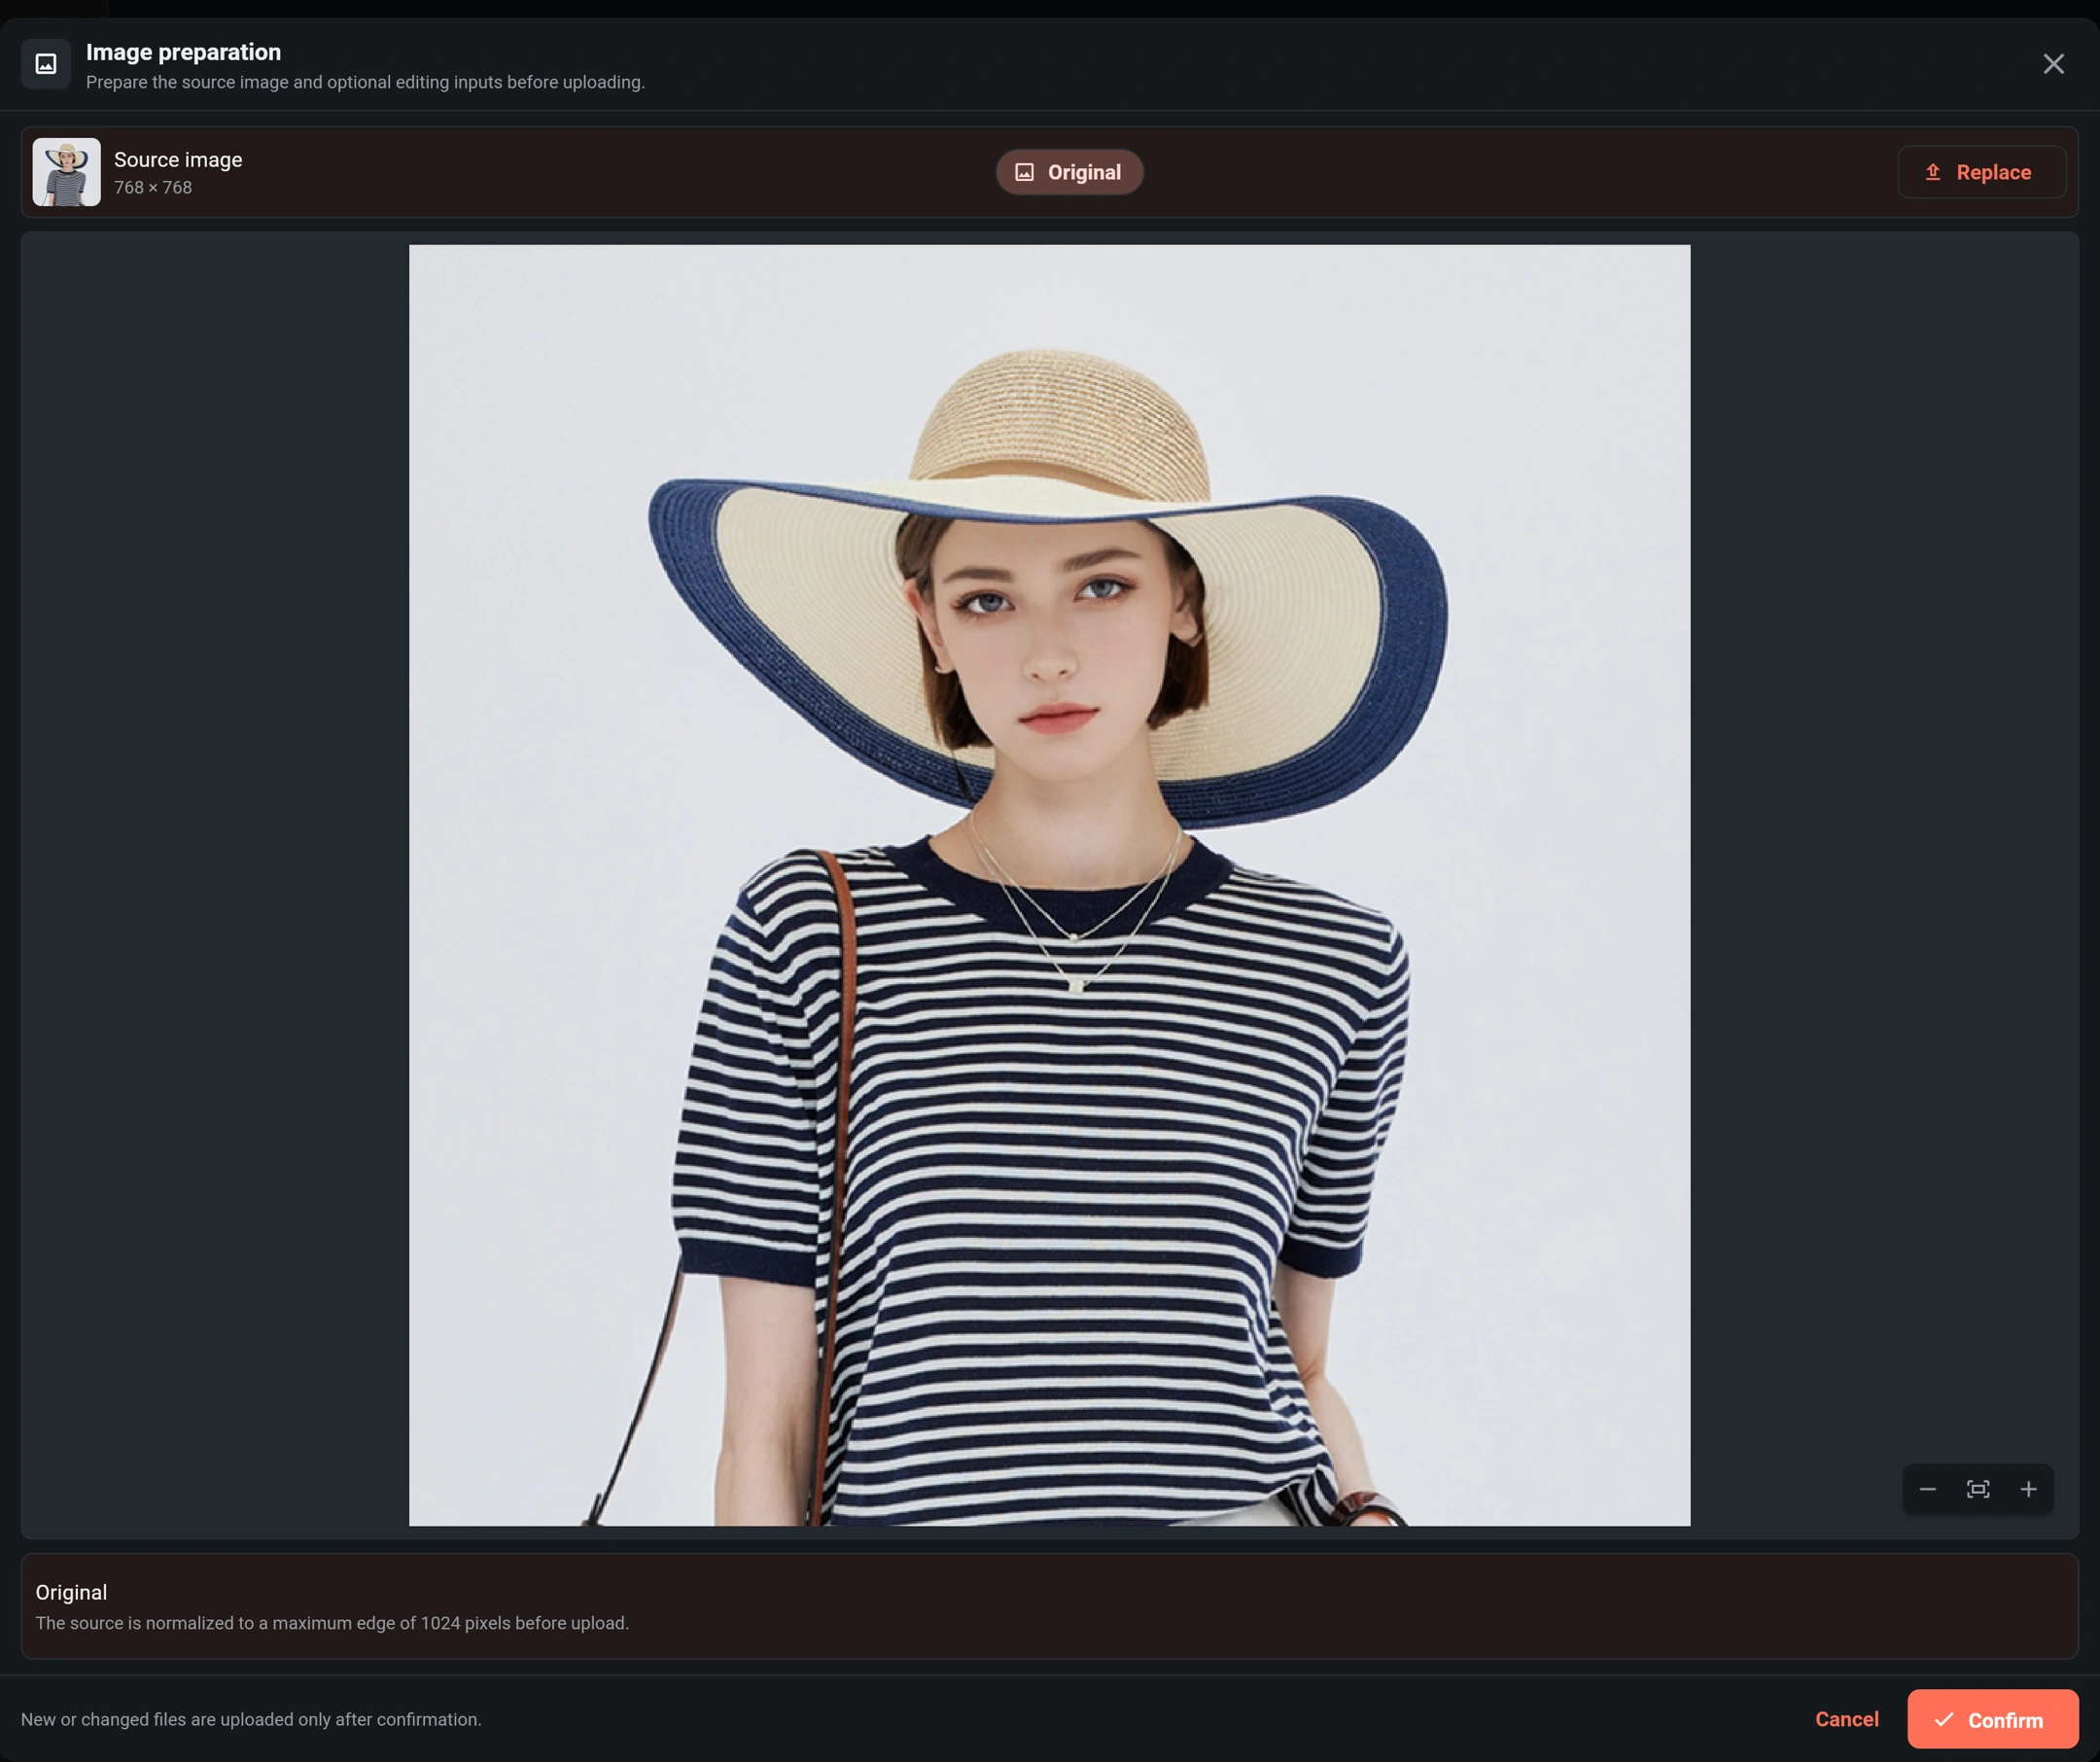
- Open Image preparation and choose the worn-outfit photo. Web uses a file picker; Android and iOS offer Photo library, Take photo and Browse files.
- Keep the clothing you need to preserve visible. Check color, pattern, neckline, sleeves, hems, straps, logos and fastenings; avoid blur and heavy filters.
- Select Confirm. To change the source later, reopen image preparation and select Replace.
You do not need to paint a clothing mask for this scene. Start with one clearly visible person. Do not crop a full outfit down to a face, and do not expect the AI to recover a hidden hem, back print or garment construction that the source does not show. The example is a half-body photo; it does not establish the unseen lower half of the outfit.
Step 2: Choose who wears the outfit
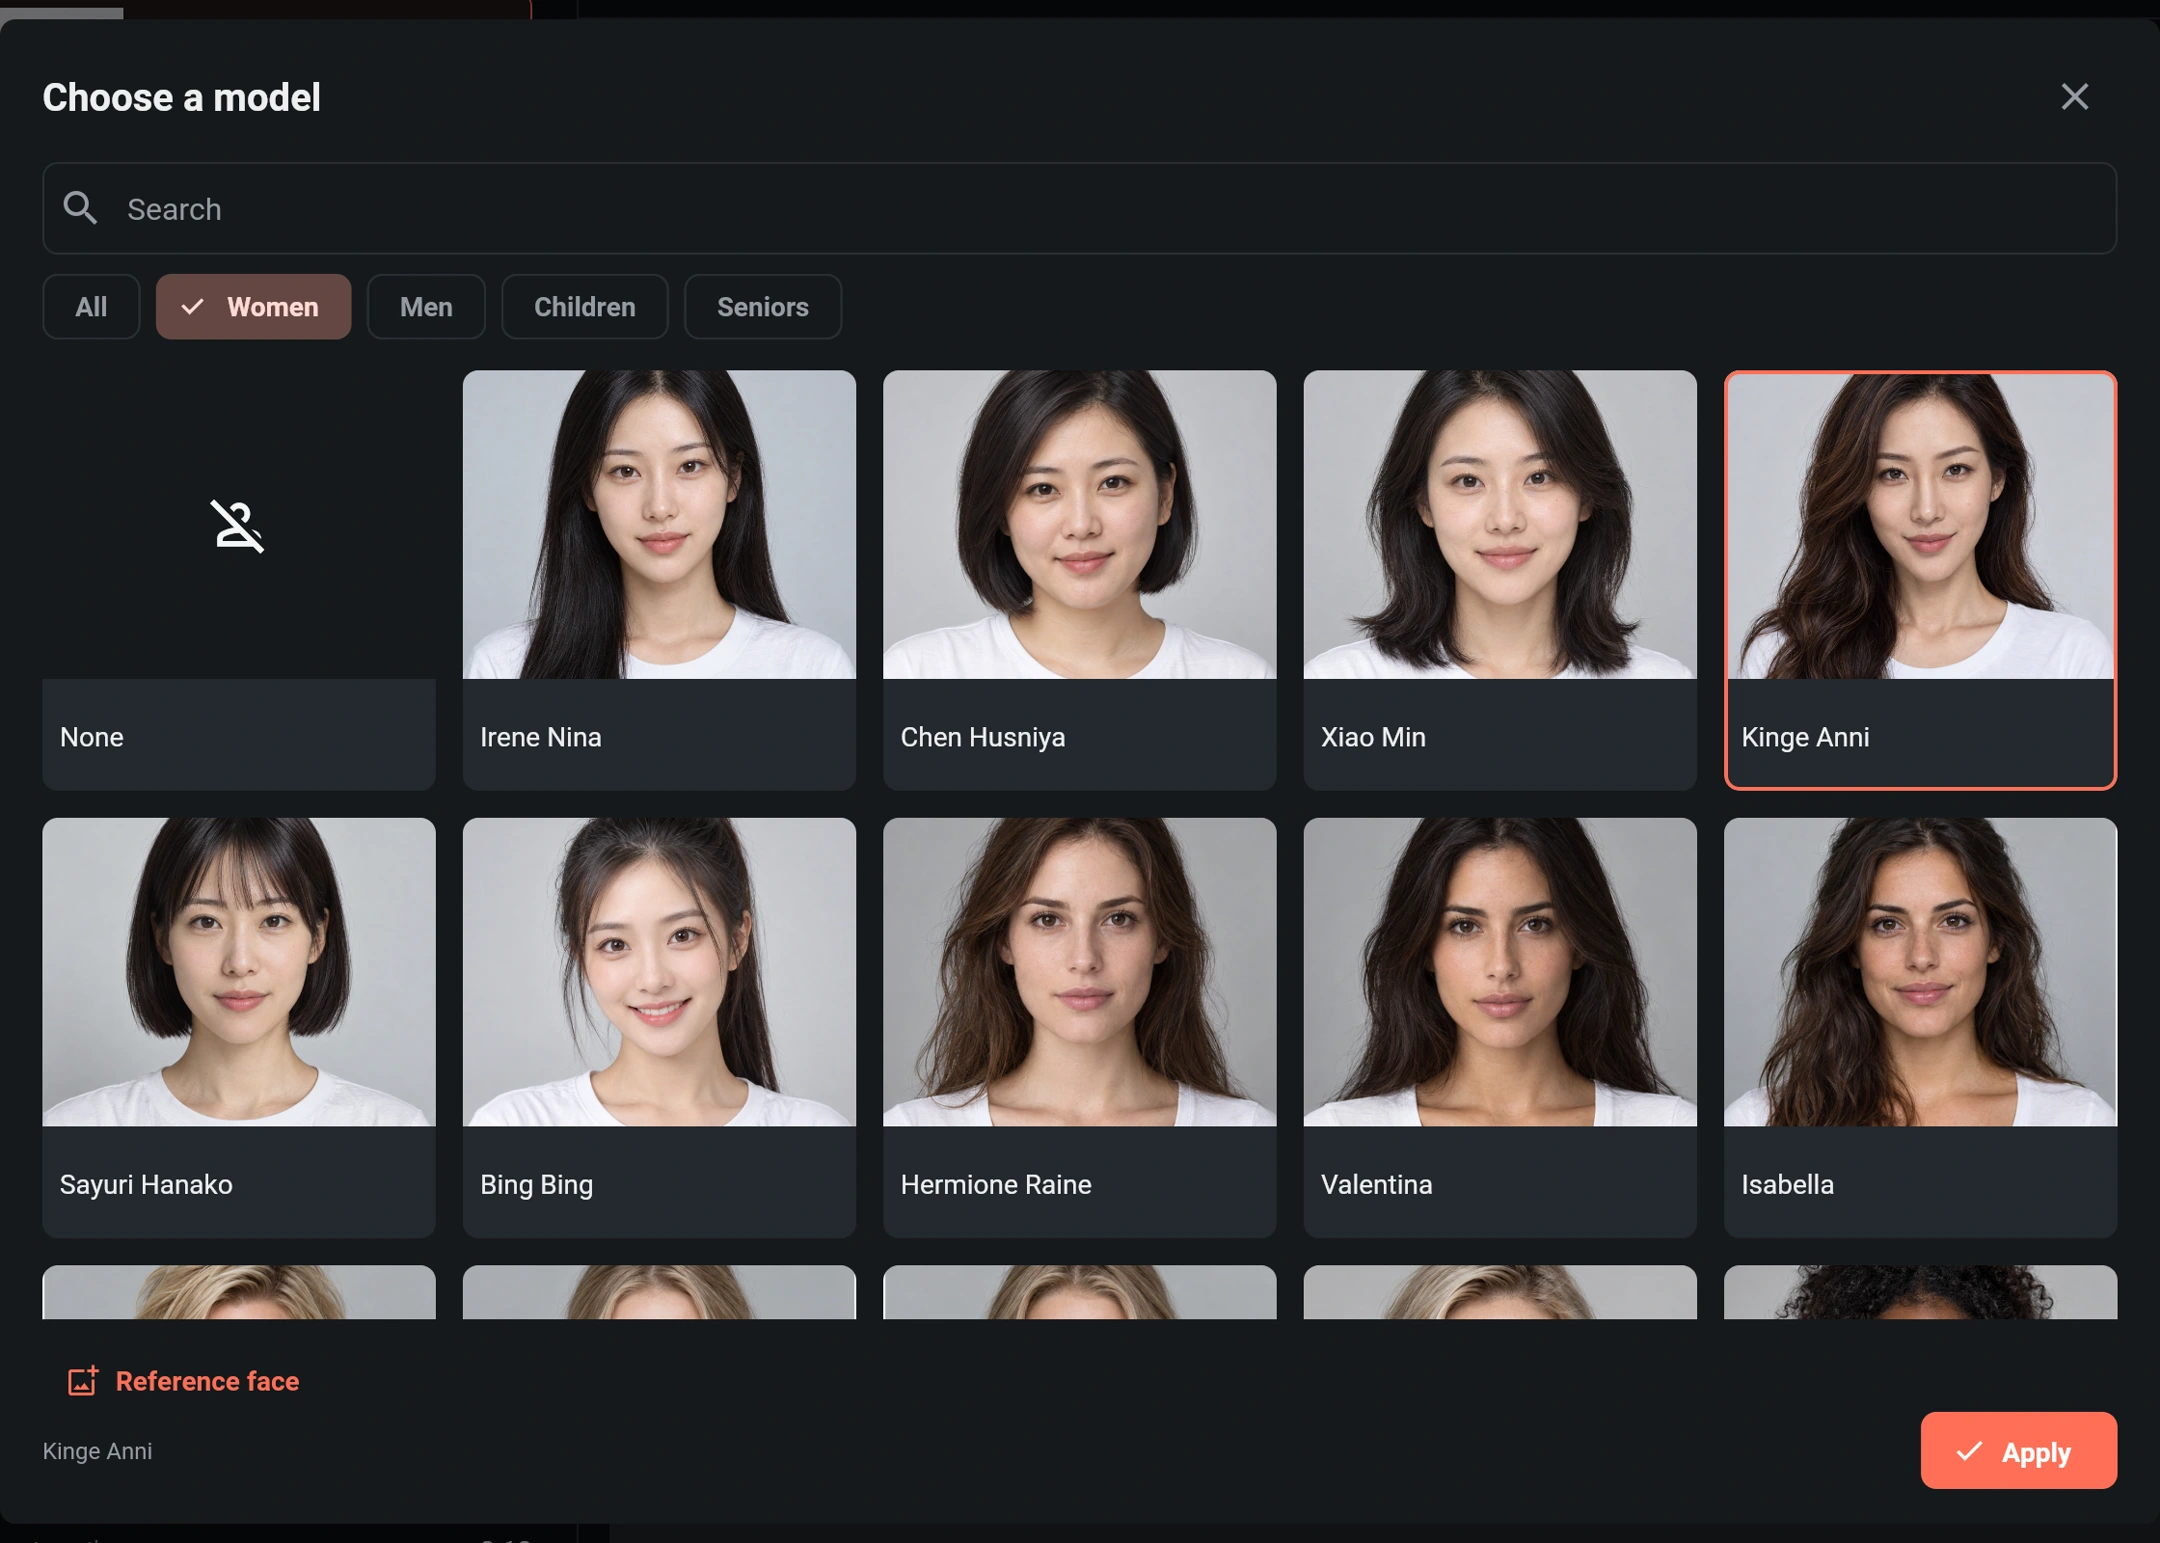
Open Person reference if you want a particular model. You can use a library model or your own permitted portrait.
Use the model library
- Browse All, Women, Men, Children or Seniors, or search by name.
- Select the model and check the selection. This example uses Kinge Anni.
- Select Apply to return the model to the form. Simply closing the picker does not apply a different library model.
Use your own person reference
Select Reference face in the same picker and upload a clear portrait you are authorized to use. Prefer a single person with visible facial features and little occlusion. Identity-reference uploads allow a longest edge of up to 2048 pixels. Choose one identity source rather than combining conflicting person descriptions and reference portraits.
The source photo still supplies the outfit. A person reference is not a second clothing input or a background reference. If you leave person reference unselected, you are not requesting a specific replacement identity.
Use photos and model identities you have permission to process and publish. Do not present an AI-generated image as a real person's experience or endorsement.
Step 3: Set the scene and composition
Describe the setting
In Your prompt, describe what should change. You can use English or Chinese. This example's actual prompt is:
A warm ivory studio alcove with softly rounded corners, diffuse cream lighting, and a small group of matte white sculptural vases near the floor.
It describes the surroundings, not a new outfit. A concise request is usually easier to check than a long list of unrelated styles. When a detail is important, name it explicitly, for example: Keep the navy-and-white stripes, neckline, sleeve length and hat unchanged. Do not ask for a different color or a new garment while also asking to preserve the original one.
Choose a background when you need a visual reference
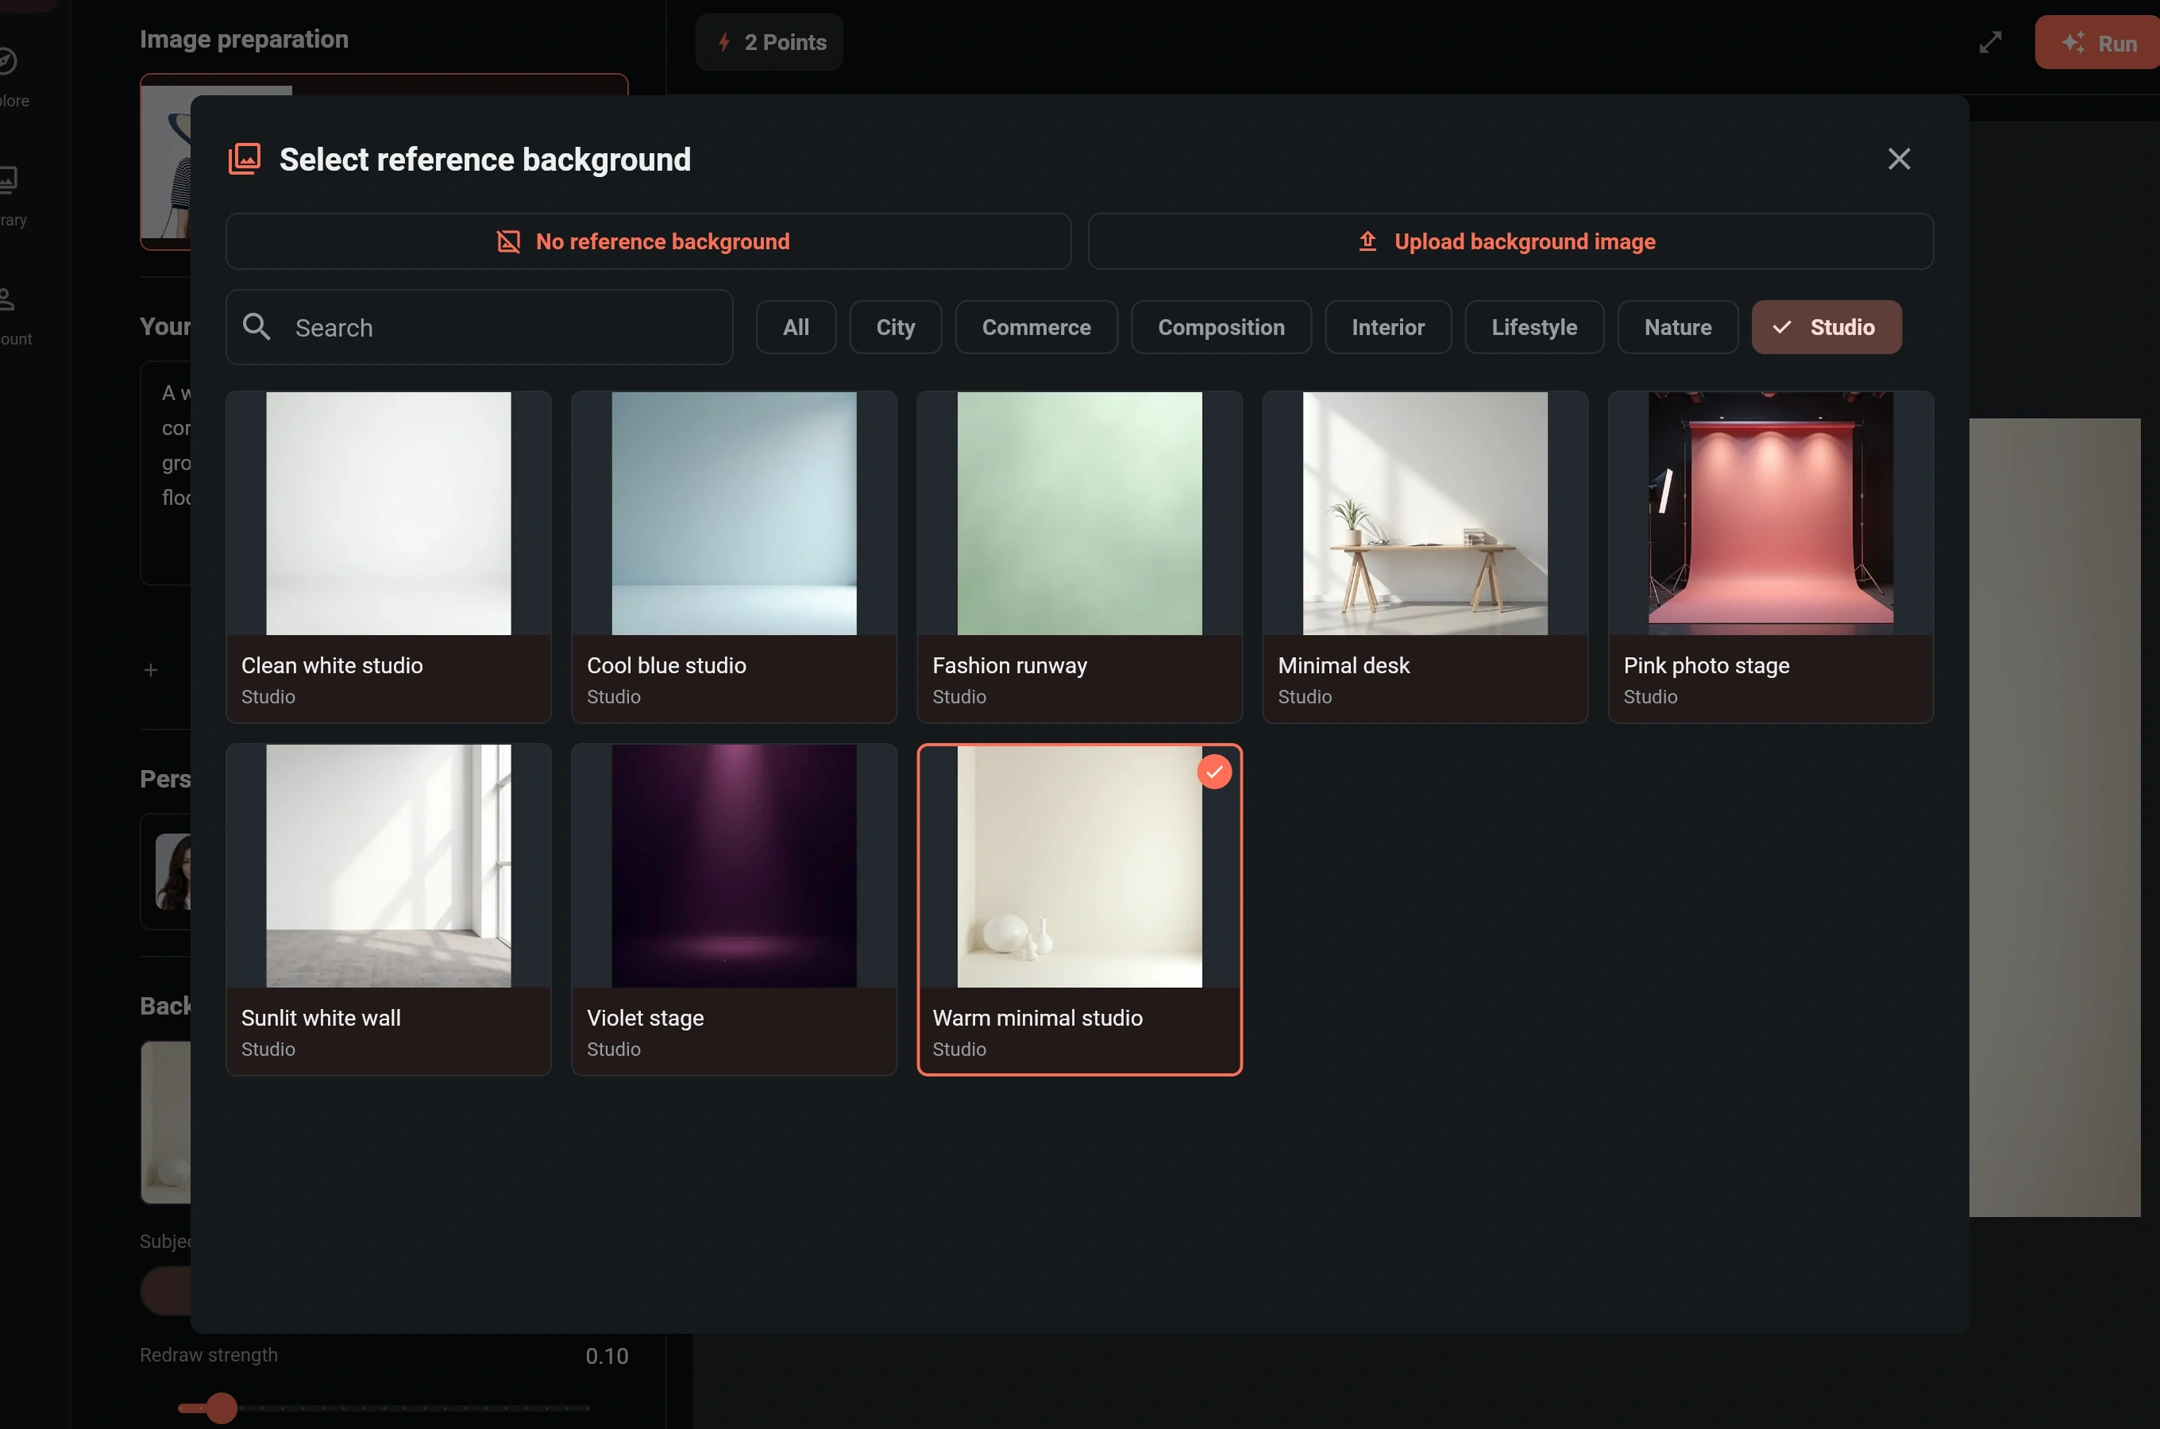
Open Background to choose a template or select Upload background image. This example uses Warm minimal studio. Selecting a template puts its scene description into the prompt; review the text and add your own changes afterward.
You can also choose No reference background and describe a setting in words, such as a sunlit park. A background image is optional. Keep a supplied reference and your written request consistent when you want to follow that reference closely.
Match the example's controls
| Setting | Example choice | Purpose |
|---|---|---|
| Person reference | Kinge Anni | Supplies the intended identity, not the outfit |
| Background | Warm minimal studio | Supplies the warm studio reference and its prompt |
| Subject layout | Locked | Keeps the source subject's framing and footprint conservative |
| Redraw strength | 0.1 | Stays close to the chosen reference rather than strongly restaging it |
| Output image size | 16:9, 1368 × 768 | Provides a wide canvas for the studio setting |
| Source position | Right, center vertically | Places the subject on the right; the setting has more room on the left |
| Visual direction | No extra styles selected | Avoids adding another lighting, filter or artistic treatment |
| Clarity | Standard | Checks the first result without selecting HD |
Redraw strength controls creative freedom outside the protected outfit, not permission to change the clothes. With no background reference, it starts at 1.0. Choosing or uploading a background resets it to 0.1; removing that reference resets it to 1.0. You can adjust it after either change, so review the value after choosing the background.
Lower values keep the person, pose and environment more conservative. Higher values allow more restaging, and at 0.81–1.0 the written prompt takes priority over the background reference. Locked still takes priority over creative freedom for the subject's framing. Choose AI reframe when you intentionally want a new arrangement; neither choice relaxes the requirement to preserve garment details.
Use Source position to place the original on a different-shaped canvas. Only geometrically available positions are enabled. A wider canvas can add surrounding space; it does not supply missing clothing details or turn a half-body source into a faithful full-body product photo.
This scene does not show a High/Normal selector. Standard and HD control output clarity separately; HD is not a stronger garment-preservation switch. Check the current points quote instead of assuming every output option has the same price.
Step 4: Generate and check the outfit
- Recheck the source, person reference, prompt, background, layout and output settings.
- Review the points quote beside Run, then select Run once. If submission is unconfirmed, check the existing task instead of submitting repeatedly.
- Open the result preview and compare it with the original at a useful zoom level.
| Check | Look for |
|---|---|
| Color and pattern | The same colors, stripe direction and spacing, prints and their placement |
| Text and logos | Correct lettering, size and position, not a similar-looking invented mark |
| Shape and construction | Neckline, sleeves or straps, silhouette, visible hem length, closures, ties and pleats |
| Fabric | Plausible original texture, thickness, folds and transparency |
| Accessories and joins | Hat trim, bag straps, jewelry, hands, hair and clothing edges without broken transitions |
| Person and setting | A recognizable fit to the selected identity and a setting consistent with the prompt/reference |
| Composition | The intended framing and placement, with no unexpected crop or invented unseen garment area |
The example retains a striped top and a broad hat while changing the model and setting. That does not remove the need to check finer details. If a critical garment detail changes, do not publish the image as an accurate product representation. Correct the source or request, change one setting at a time and assess another result.
When satisfied, save the image. For a targeted correction, select Edit image to continue in AI Retouch; that new AI task has its own points quote.
Common questions
I asked for a different pose, but little changed. Why?
Check Subject layout and Redraw strength. Locked layout and a low value favor a conservative result. Use AI reframe and a suitable higher strength when pose change is intentional, while keeping the garment instructions clear.
Can I change the background without choosing a background image?
Yes. Choose No reference background, then describe the new setting in the prompt. If you also choose a background, check that its selection has not replaced your intended prompt and reset the strength.
Why is the clothing different despite a low strength?
Low strength is not a fidelity guarantee. Check source clarity, visibility of the affected detail and any conflicting style/prompt choices. Do not use the result as a faithful product photo until the important details pass your comparison.
Can someone else reuse this creation?
Use the result's sharing action to create a QR code. The recipient reviews and imports the inputs and settings, then generates their own task; see Sharing and importing. Restoring a garment-preserving redraw requires its retained inputs and is unavailable once the original task is older than 30 days. Save important results promptly.