Sign in
PixelForce uses your HiFORCE account. To return to your existing images and points, start with the sign-in method and identity you used before. Using the same device, display name or similar email address does not guarantee that two sign-ins belong to the same account.
Choose where to sign in
| Where you use PixelForce | What to expect |
|---|---|
| Web, including a phone browser | Open PixelForce Web. Without a valid session, you are taken to the HiFORCE sign-in page, then returned to PixelForce after signing in. |
| Mobile app | Sign in directly in the app. Account/password fields appear first; Google, Apple and email icons sit below them. Email sign-in and account creation open bottom sheets. |
| macOS app | Use the app’s sign-in screen and whichever methods are available there. A desktop browser still follows the Web flow. |
A valid Web session opens the workspace directly. An expired session may ask you to sign in again. If a connection fails, you may instead see Continue with IDaaS; reconnect before trying it. This is not proof that your password is wrong.
Use your account and password
- Enter your registered username, or the email address linked to that account, in Username. Use your sign-in identifier, not the name displayed on a portrait or your account page.
- Enter your Password. The eye icon shows or hides it; use it only when nobody else can see your screen.
- Select Sign in once and wait for the workspace to open. While the request is processing, do not repeatedly submit it.
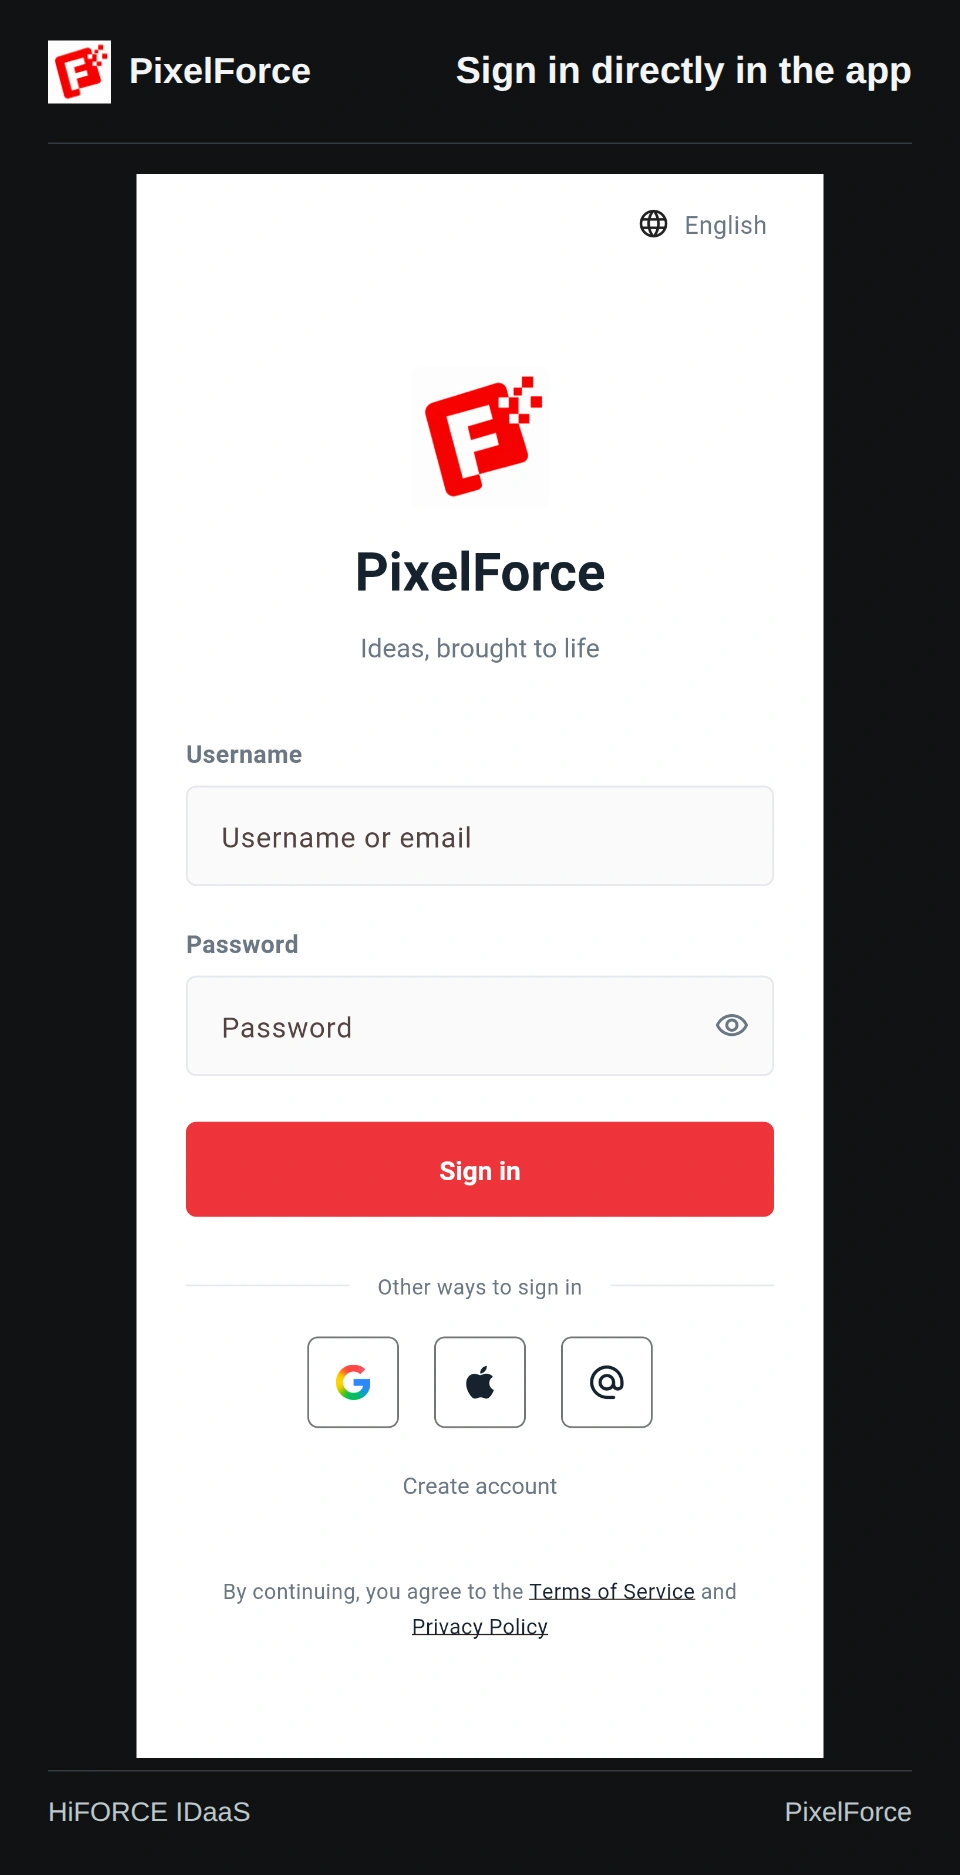
If you do not have an account, choose Create account. You provide a username and email address, verify the email, then set a password. Account creation and email-code sign-in are different actions; requesting a sign-in code alone is not registration. See Create an account.
Sign in with an email code
Use the email address linked to the account you want to access. You do not need its password for this method.
- In the mobile app, tap the email icon. The Email code sign-in bottom sheet opens.
- Enter your Email address and choose Send code.
- Check your inbox and spam folder. Enter the latest message’s code in Verification code. Wait for the resend countdown if you need another code.
- Choose Verify and sign in. When verification succeeds, the sheet closes and the workspace opens. The close icon leaves the sheet without signing you in.
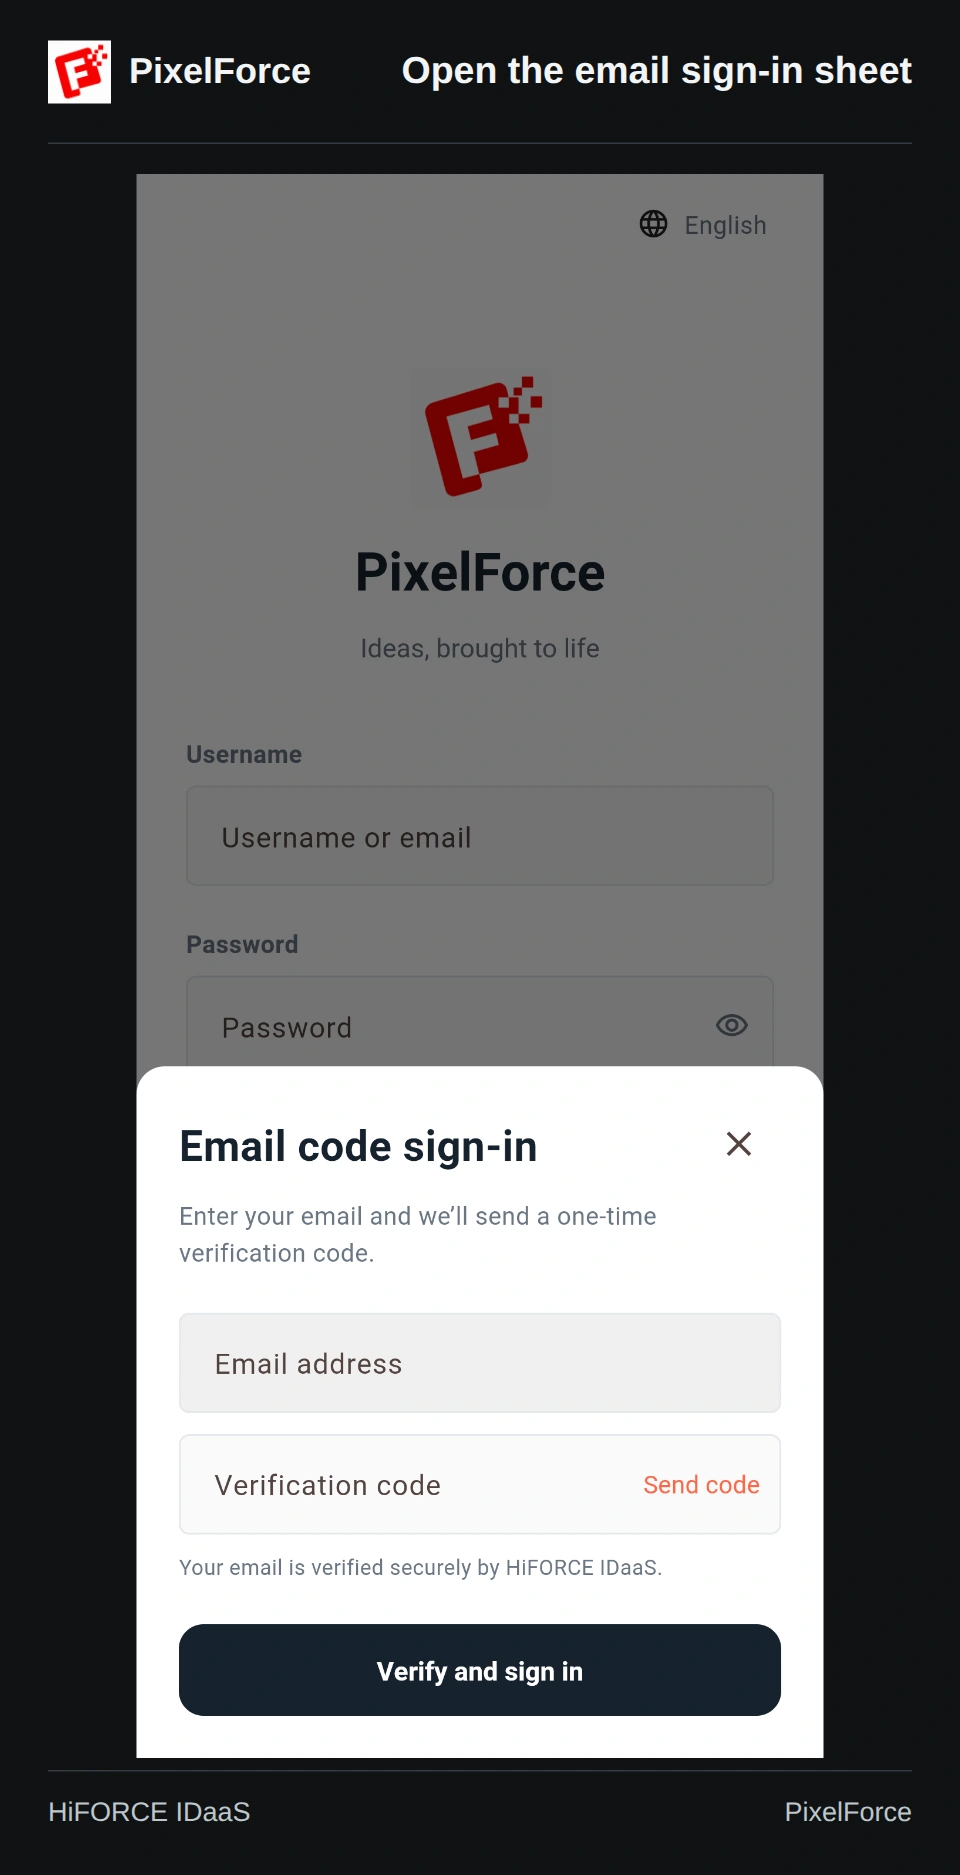
Use the exact address you registered, including any +alias. Do not assume another spelling, a Gmail alias or an Apple private-relay address maps to the same account. If you are new or the address is not registered, use Create account instead of repeatedly requesting codes.
Use the HiFORCE Web sign-in page
The Account tab accepts your identifier and password. The Email tab lets you enter your linked email address, request a code and sign in with that code. On a phone browser, the page adapts to the screen; it does not become the app’s bottom sheet.
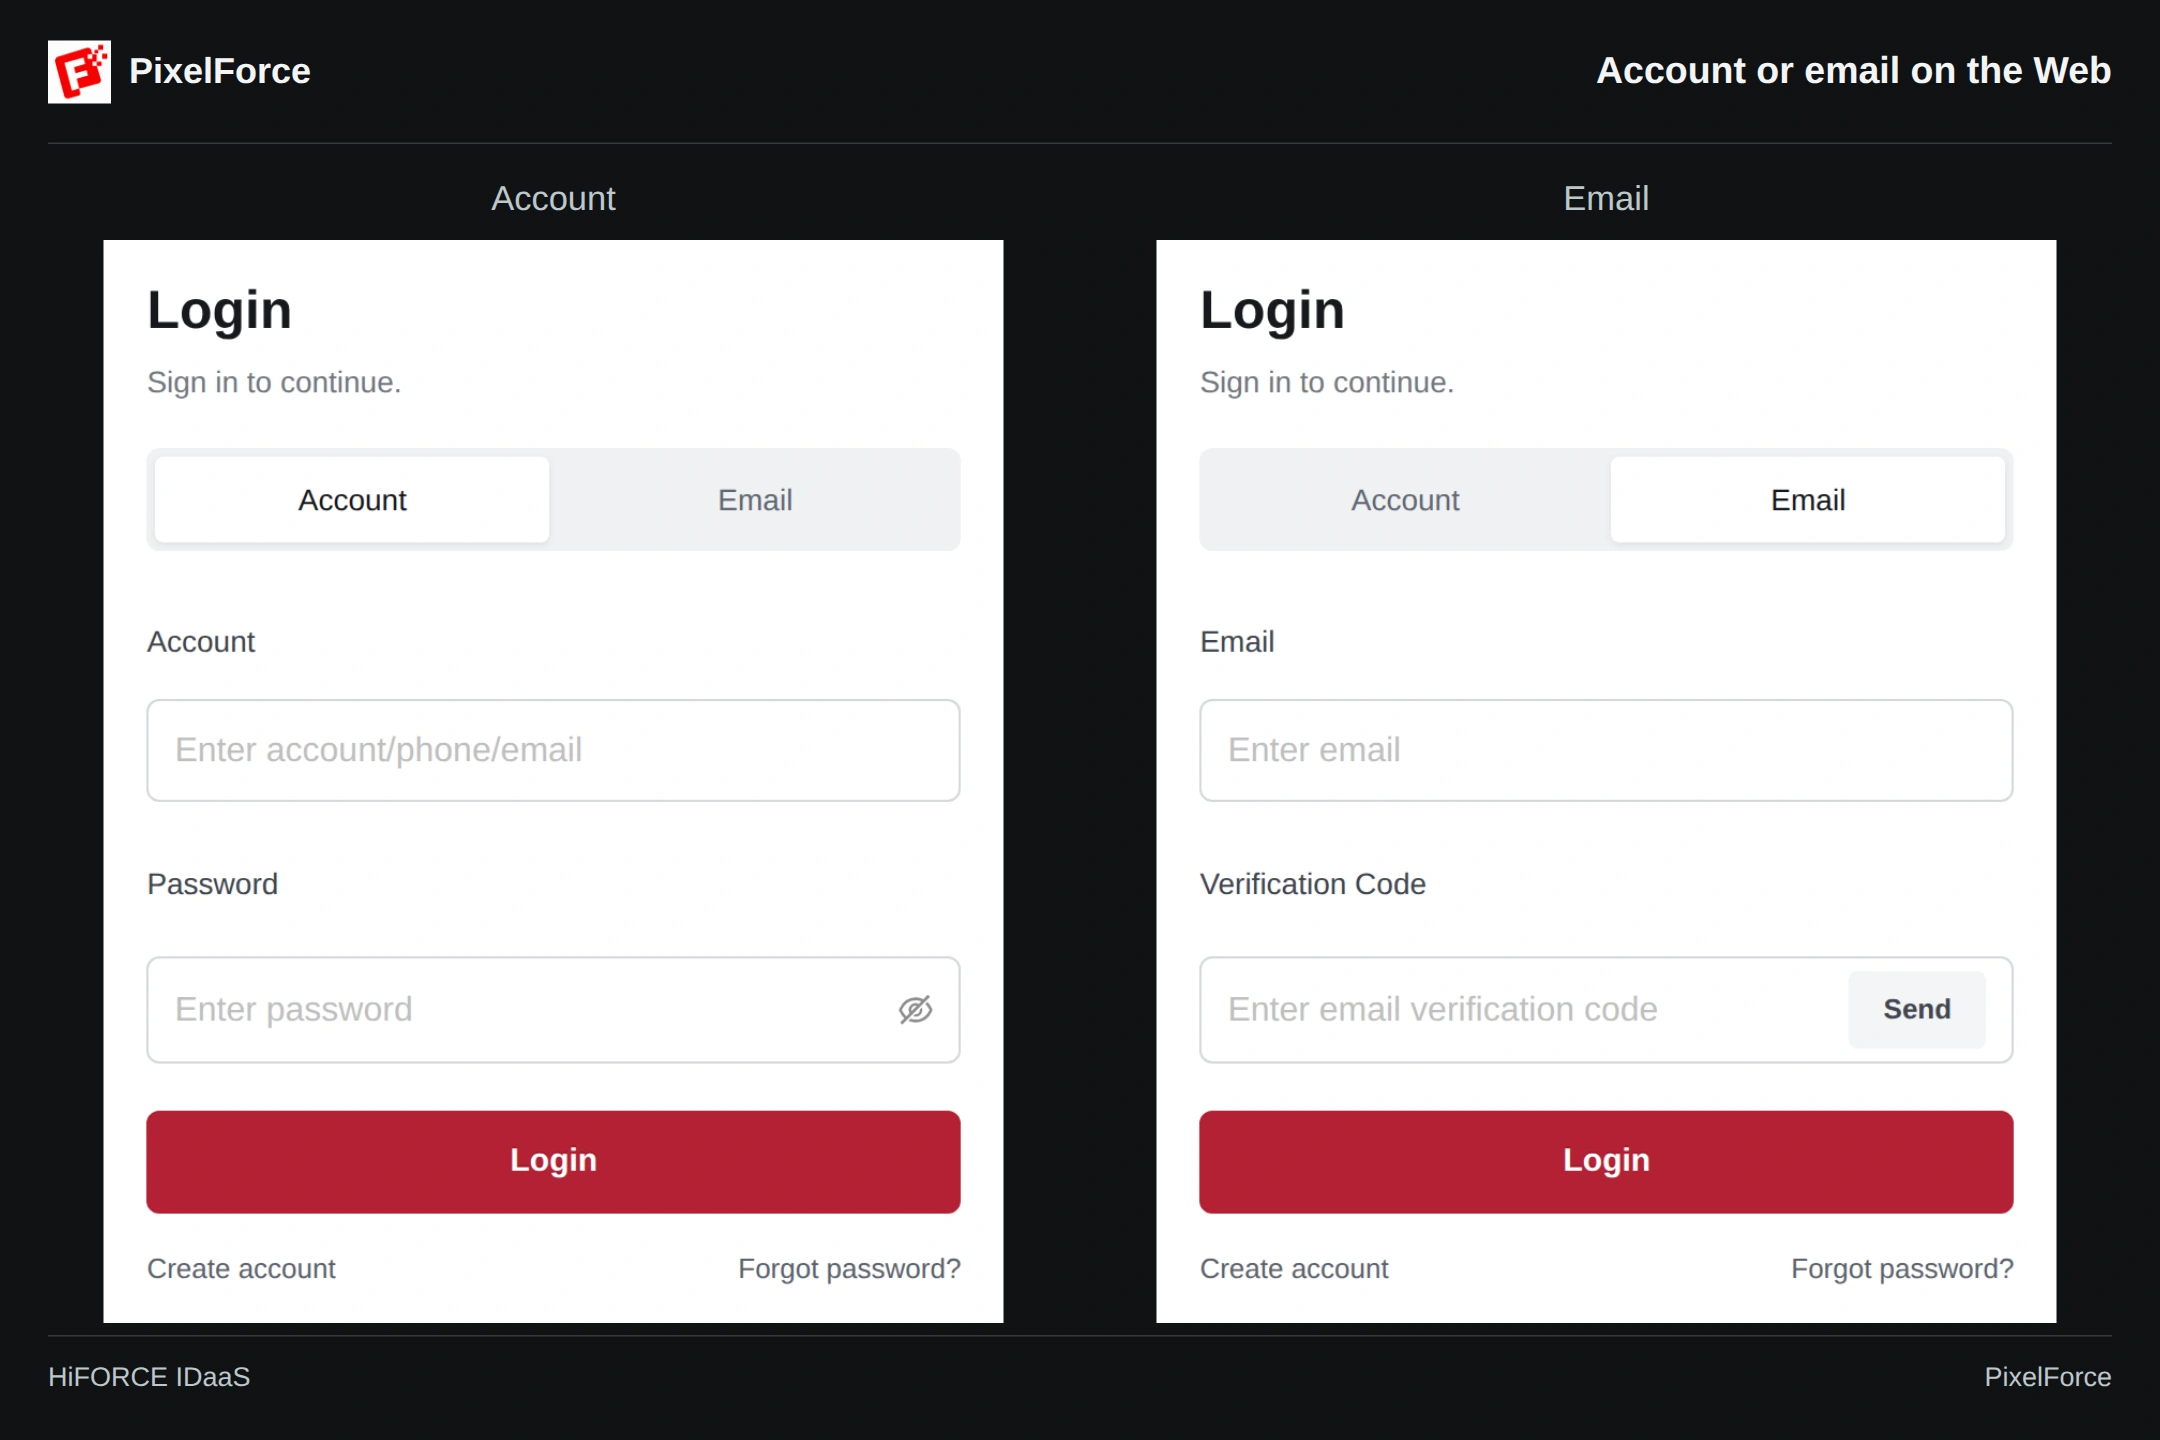
Complete sign-in in the browser window opened from PixelForce and allow it to return to the app. Avoid copying a temporary sign-in address to another browser or tab. If a pop-up or redirect is blocked, allow it for this sign-in and retry from PixelForce Web.
The hosted page may use English when your chosen language is not supported there. Google, Apple and any other available methods depend on the current page and service availability. You do not need to use every option shown.
Continue with Google or Apple
Select the provider icon and complete Google’s account chooser or Apple’s authorization screen. In the native app, these screens are controlled by the provider or operating system, not PixelForce’s email sheet. Canceling or closing authorization does not complete sign-in.
- For Google, choose the same Google account you used before. If several accounts appear, check which one you are selecting.
- For Apple, use the same Apple Account. Choosing to hide your email can produce a private-relay address that differs from your usual inbox. You do not need to type that address into the Apple sign-in flow.
- If a method is disabled, unavailable or cannot finish authorization, check your connection and try again later. Use another method only if you know it is linked to the account you want.
Confirm you are in the right account
After signing in, open Account and check the displayed name, tenant identifier in parentheses, and points balance. Use the same identity on your other devices to access its cloud works and points.
If your balance or images look unfamiliar, sign out and select the original identity before buying more points or creating another account. Different sign-in identities are not automatically merged. Library only shows the recent cloud history, so an old image’s absence does not by itself mean you used the wrong account. See Library and retention and the workspace guide.
If you cannot sign in
| What you see | What to try |
|---|---|
| Account or password rejected | Check the identifier, keyboard language, capitals and accidental spaces. On the hosted Web page, use its password-recovery link when available. A linked email-code method can also avoid entering the password. |
| No email arrives | Check the full address and spam folder, wait for the countdown, then request one fresh code. Do not request many codes in a row. |
| A code is invalid or expired | Use the most recent code for the same address. If needed, wait and request a new one. Never share a code with anyone. |
| Provider selection closes without opening PixelForce | Authorization may have been canceled, interrupted or failed. Start again from the provider icon; contact support if it keeps happening. |
| Connection error or temporary limit | Check the network and wait before retrying. Repeated tapping or registering a second account will not fix a service problem. |
| Sign-in succeeds, but works or points differ | Check the account and tenant identifier, then return to the original sign-in identity. |
For support, send the device/platform, app version including build number, approximate time, sign-in method and the visible error. Hide private details in screenshots. Never send your password, verification code or authorization token. See Troubleshooting and support.