Write a useful prompt
A useful prompt makes your priorities clear: what you want to create or change, what it should look like, and what must stay the same. Start with a few specific sentences. You do not need a long list of camera jargon or repeated quality claims.
Start with the image you want
For Text to image, describe the subject, setting, composition, light and style. Add the details that make this particular image yours.
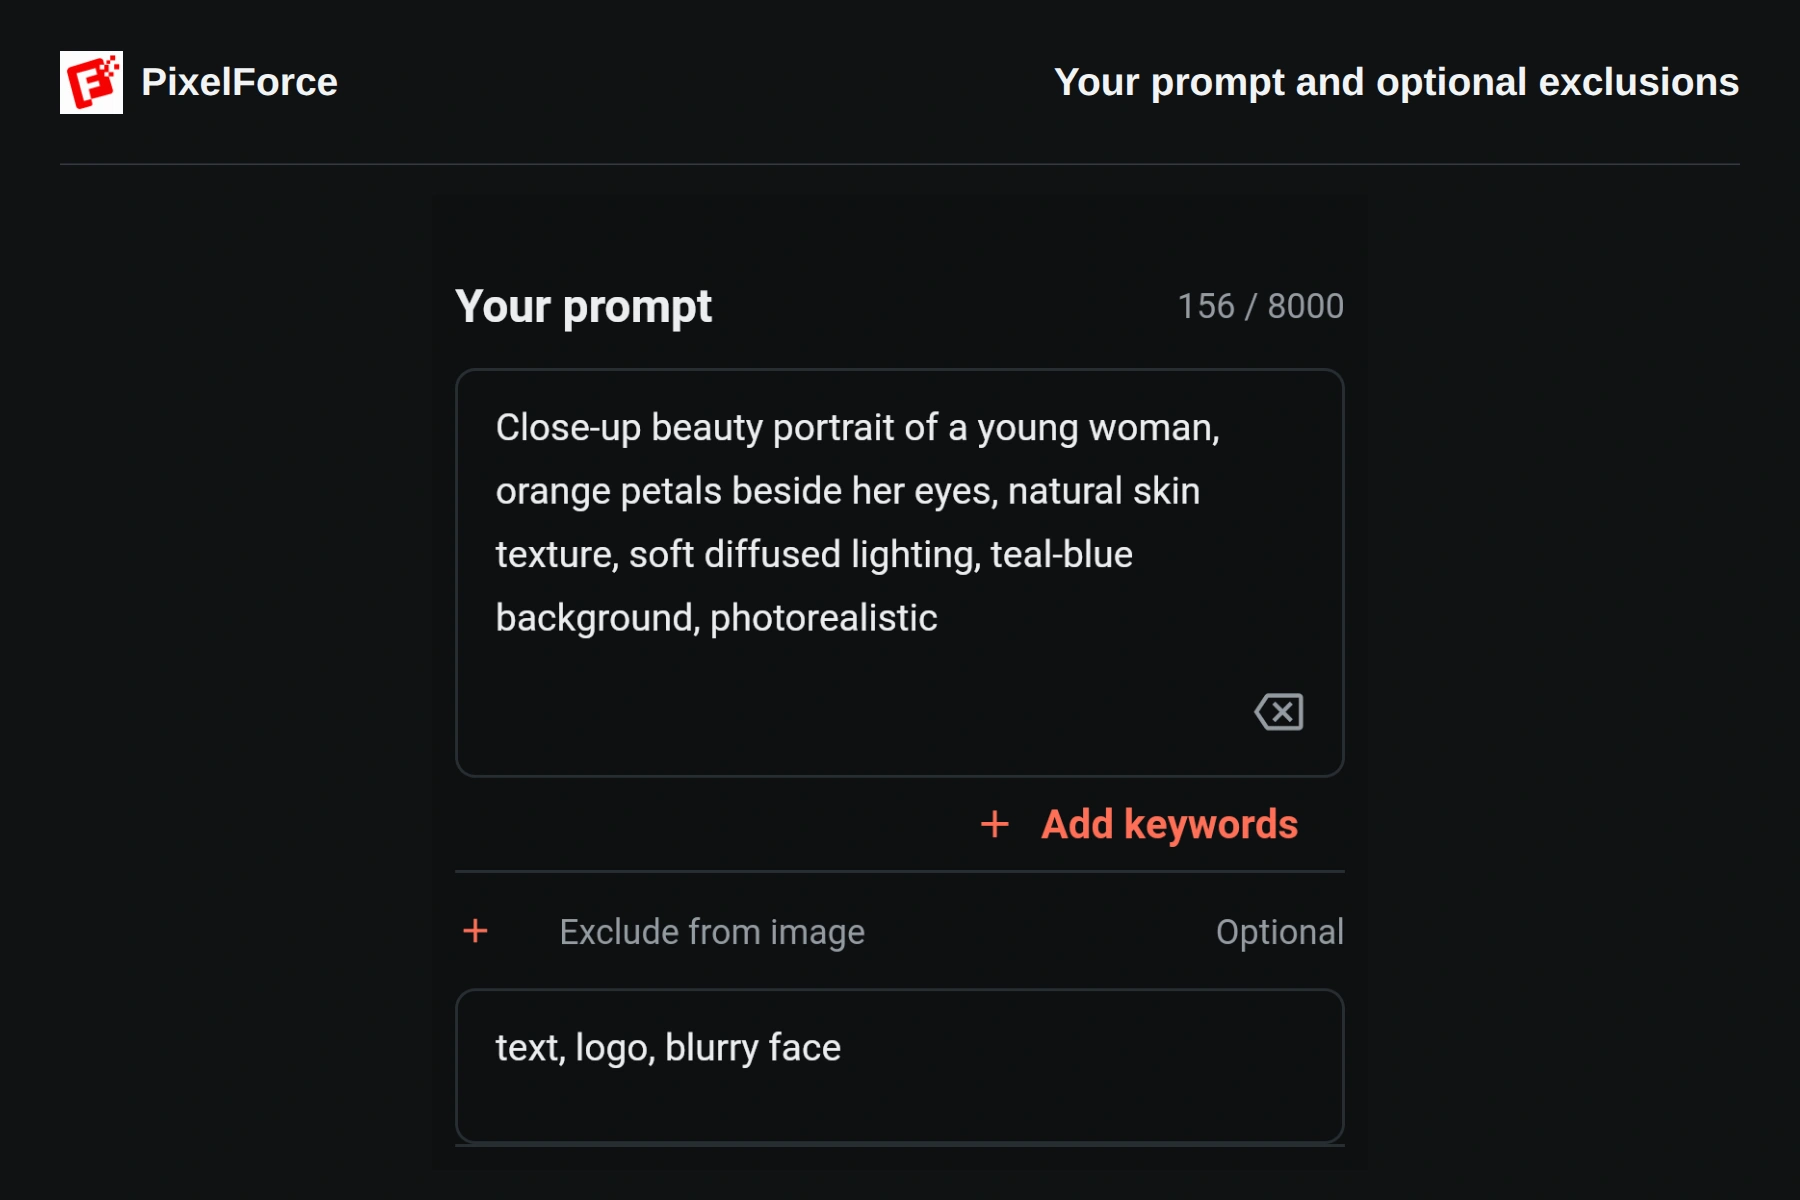
Close-up beauty portrait of a young woman, orange petals beside her eyes,
natural skin texture, soft diffused lighting, teal-blue background,
photorealistic
This is more useful than “a beautiful photo, best quality”: it specifies the framing, a distinctive detail, the lighting and the background. You can write in your own language; the English examples here are also ready to adapt.
Choose the aspect ratio and available image dimensions in the form. Writing “8K” in a prompt does not set the downloaded file's resolution. See Creation controls for output settings.
Change one thing and protect the rest
When editing an existing image, use this order: change → keep → finish. Name the details that matter instead of relying on “keep everything.”
Replace the background with a sunlit city park. Keep the dress unchanged:
its pink color, floral print, neckline, straps, seams and hem length.
Match the subject's lighting and shadows to the new surroundings.
For a product, also mention its logo, lettering, material, fastenings or unusual construction when relevant. In Garment-preserving redraw, avoid asking for a new dress design if your aim is to preserve the supplied garment.
These instructions guide the edit; review the result carefully before using it in a product listing, especially text, patterns and fine garment details.
Write the request and exclusions separately
Enter what you want in Your prompt. When the tool provides Exclude from image, expand it and list only the elements you do not want, for example:
text, logo, blurry face
Exclusions are optional. Leave them blank if you have no specific need. Do not exclude a logo or text that must remain on your product, and do not use exclusions to contradict your main request. Not every tool includes this field.
Build on your prompt with keywords
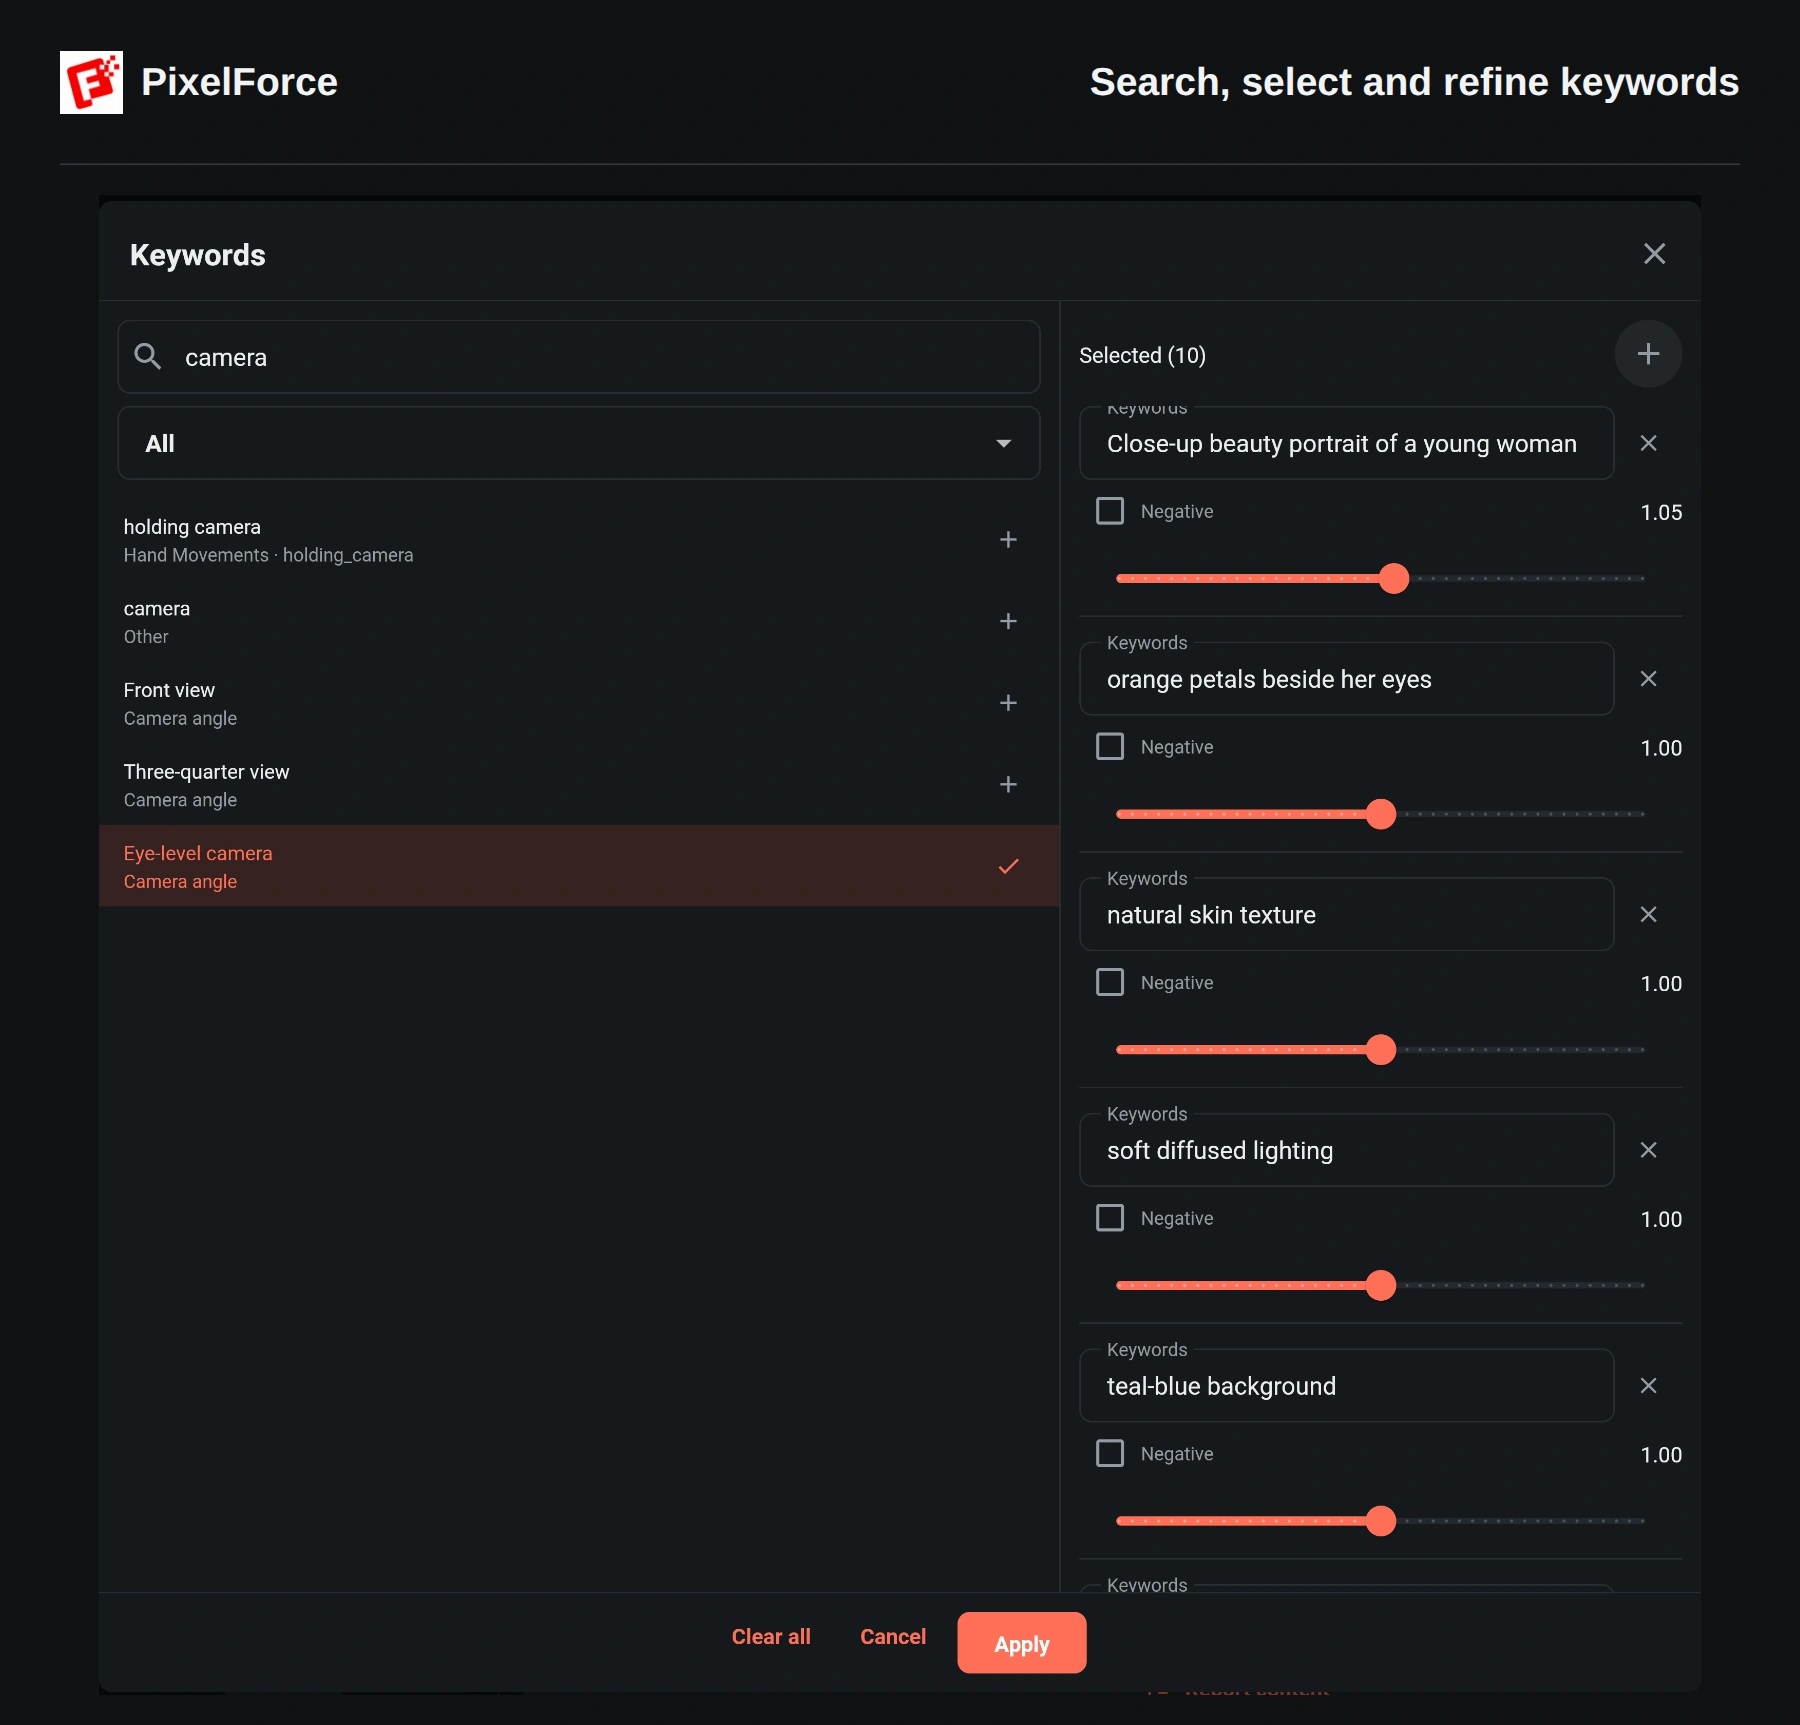
Add keywords opens the library without starting a generation. On a wide screen, the catalog and Selected list appear side by side. On a phone, switch between the Keywords and Selected tabs.
- Search by a keyword or category. You can search the displayed translation or the English name. Category and subcategory menus narrow the list; an active text search searches across categories.
- Select an entry to add it; select it again to remove it. Your existing text is included in Selected, generally split at commas and line breaks.
- Edit a selected phrase, use the plus icon to add your own, or remove one with its close icon.
- Mark a phrase Negative to put it in the exclusions. Start with weight 1.00; the slider runs from 0 to 2. A larger value asks for more emphasis, not a precise percentage or a guaranteed effect.
- Choose Apply to write the changes back to the form, then reread both fields. Cancel or the dialog's close icon discards unapplied edits.
Clear all empties the entire selected list, including phrases from your original prompt and exclusions. It is not limited to the last keyword you added. Nothing is written back until you choose Apply.
Keep reference images and styles consistent
Use the matching image input for a source, model or background reference. A sentence cannot replace an image required by the tool.
Choose a single visual direction. A supplied park background, a prompt describing an indoor studio and a night-lighting preset give competing instructions. For a natural photograph, begin without magic effects and add only the lighting or photography choices you need.
The keyword library edits text; the separate visual pickers select attributes. After reusing an example, check both: replacing the prompt does not necessarily clear previously selected styles.
Match the note to the tool
Follow the character counter on the current input, rather than assuming every field has the same limit. Remove repeated instructions first; a longer prompt is not automatically better.
- AI Portrait Studio: use the short note for personal features you want to preserve. The collection supplies the theme; the note is not a replacement collection brief.
- AI Upscale: use the optional note for the details to enhance, not a different subject or scene.
- AI Retouch: say what to change and what to leave alone. For small edits, keep the request focused.
Changing the interface language does not translate an existing prompt. Some library entries insert an English phrase even when the displayed label is translated; check the final text before running.
If the result misses your intention
| What you notice | What to try next |
|---|---|
| The wrong background or mood | Resolve conflicts between the prompt, background reference and selected lighting or effects. |
| Clothing or a product has changed | Name the exact color, pattern, text and construction to preserve; remove redesign instructions. |
| Too many effects or an artificial look | Remove unnecessary keywords and effects, then change one setting at a time. |
| A content warning | Read the message and revise the request or input image. Do not repeatedly submit the same blocked content. |
Before you run
Check the input images, prompt, exclusions and selected styles together. Confirm the output settings and displayed points, then choose Run. For the first complete workflow, follow Quick start.