Understand the creation controls
Start with the image you want to make, not the largest collection of settings. PixelForce only shows controls supported by the tool you have opened. A missing control is not necessarily a problem: a tool may have a fixed output or may need a source, reference or different setting before an option becomes available.
On a wide screen, scroll the creation form beside the result. On a phone or narrow window, open Create and scroll the form; Result is a separate tab. Changing a setting does not edit an already completed image or start another generation.
Which setting should I change?
| Your goal | Start here | Do not confuse it with |
|---|---|---|
| Spend more AI effort on the result | Reasoning intensity | Output pixels or how much the source should change. |
| Choose the available output clarity | Clarity, using Standard or HD | High reasoning intensity. |
| Fit a square, portrait or landscape space | The ratio tiles and More sizes | A guarantee that the full subject will fit without adjusting composition. |
| Allow more or less change to a source | Redraw strength, where available | More AI resources or better quality by itself. |
| Control the composition around a source | Subject layout and Source position | A face, garment or background reference. |
| Set the look of a new generation | Visual direction and its pickers | Applying a local editor filter to a finished file. |
For source images, reference images and masks, begin with choosing images. This chapter explains how the creation controls work together, not a list of options every tool must offer.
Reasoning intensity and clarity
Higher reasoning intensity uses more AI resources for finer detail and better results. Choose High when quality is your priority, or Normal for everyday edits. Where the selector is available, new forms start at High; explicitly reusing a work can restore its supported saved choice. Always check the selected value rather than assuming an imported setup uses the current default.
Standard and HD belong to Clarity, a separate output setting that can affect points. High does not automatically select HD, and HD does not automatically change Normal to High. Where both are offered, choose them independently, then review the total.
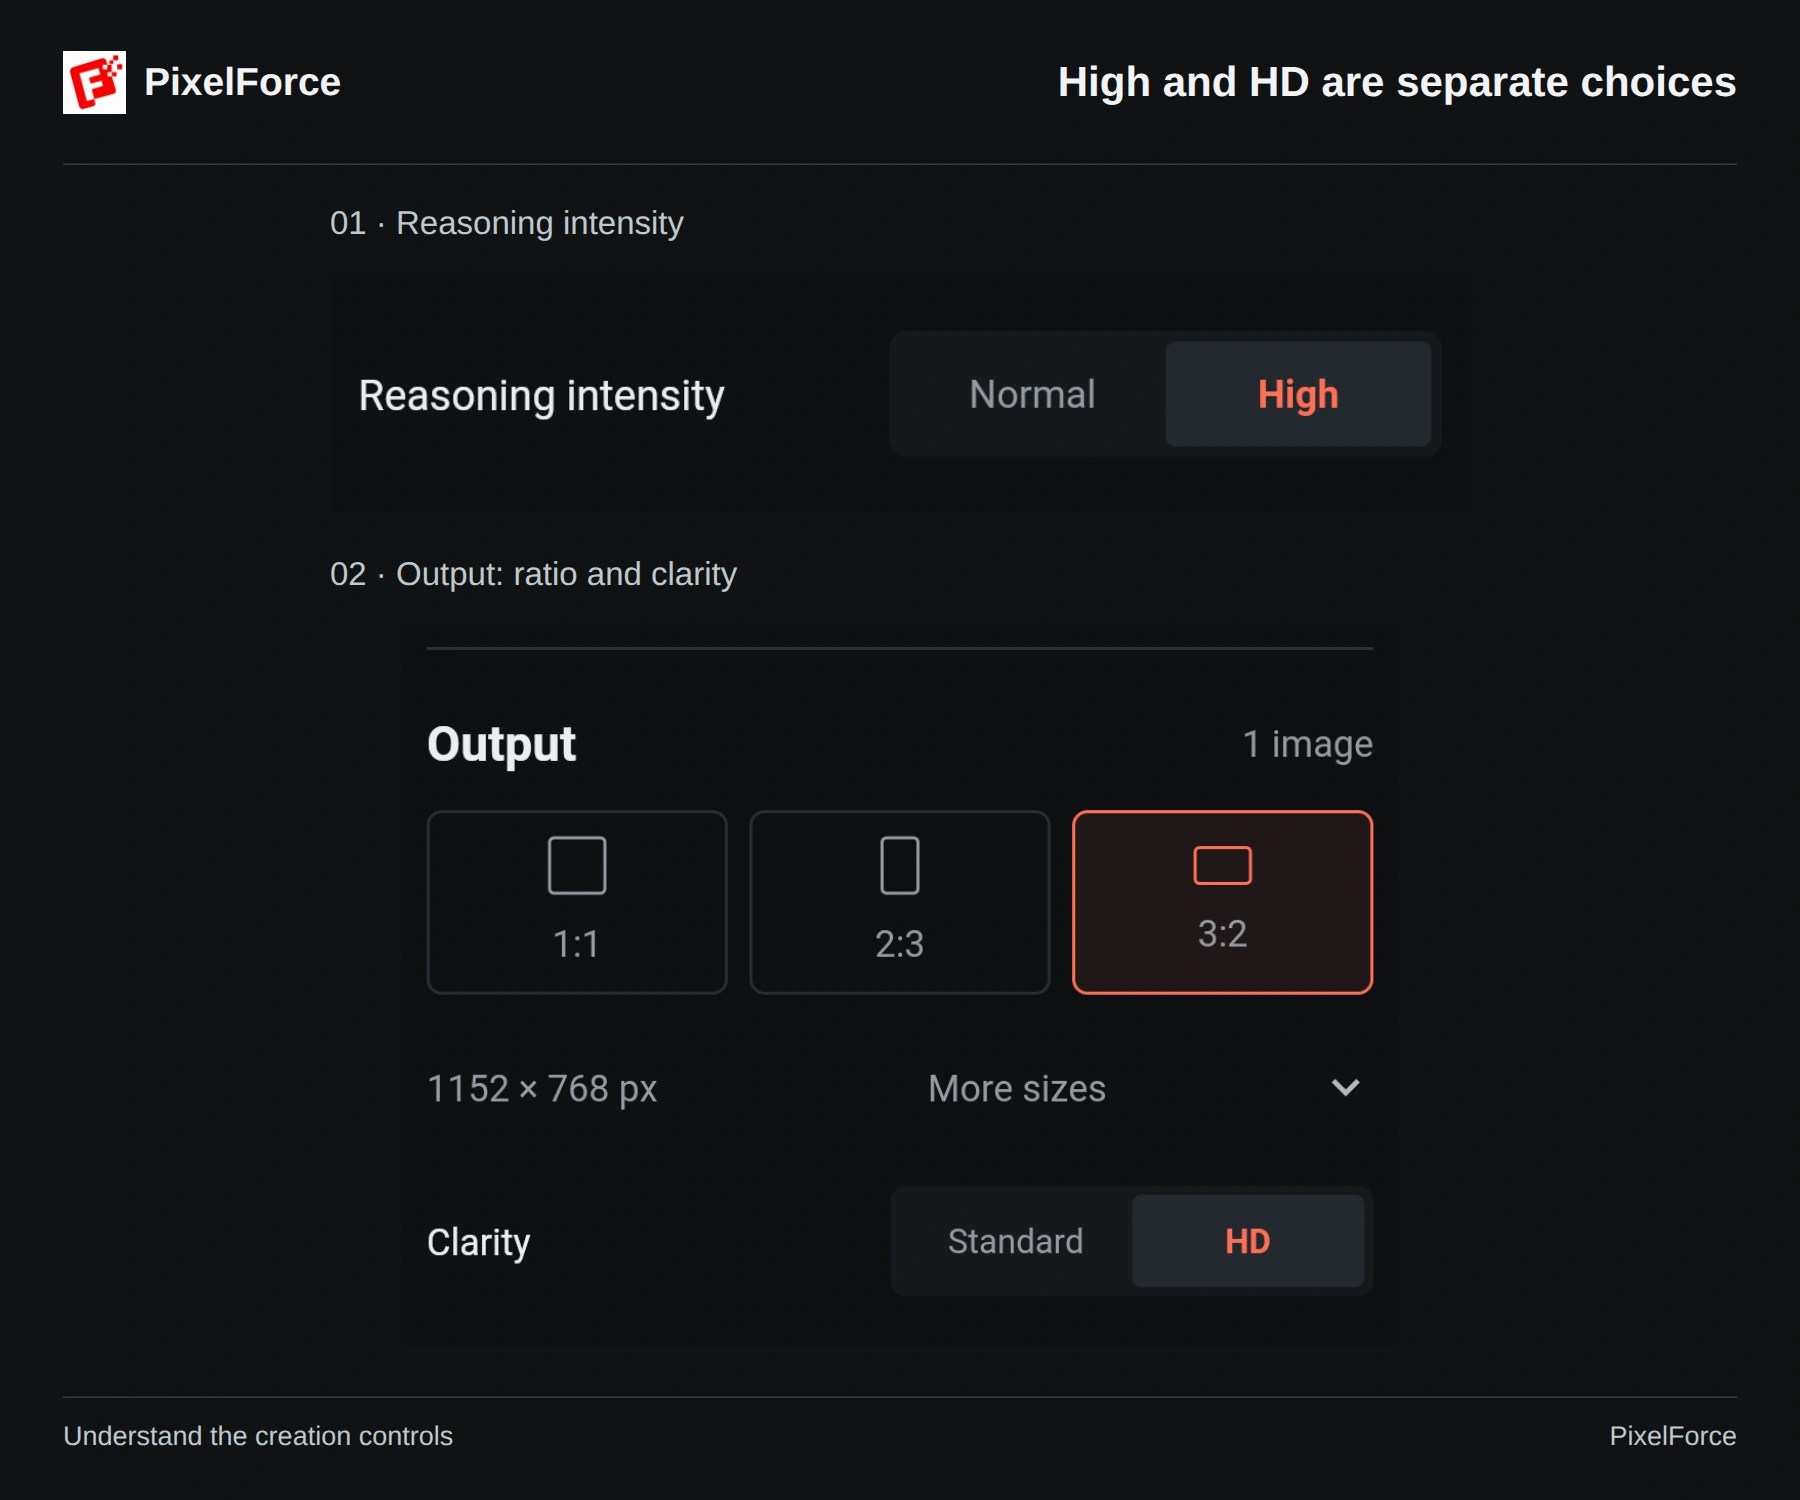
The illustration separates the reasoning selector from the output section of the same tool. Do not read a screenshot's quote as a fixed price for your task. AI Upscale has its own 2K output and no extra HD selector; Background Cutout and Outpaint also have different output controls. A tool with one supported intensity may not show a selector at all.
Ratio, size and the space around your subject
Choose a ratio for the place where the image will appear. A square is useful for a balanced tile, a portrait canvas for vertical content, and a landscape canvas for a wide composition. Available tiles and More sizes come from the current tool; check the selected dimensions where they are shown.
The same ratio can describe different pixel dimensions. A 1:1 image is square, not necessarily 1024 × 1024. When Original is offered, it uses the confirmed source dimensions; it is not an image-enhancement command. Clarity remains a separate choice.
Allow enough room for the subject, clothing and product details. For a full-length person or a long garment, say so in the prompt as well as choosing a suitable canvas. A ratio alone is not a framing instruction. If you need to extend an existing image's edges, use AI Outpaint rather than expecting every size selector to preserve and expand the source.
Redraw strength
Redraw strength describes how much reinterpretation to allow, not the amount of AI effort. Lower values ask for more conservative changes; higher values allow a stronger departure from the reference or source. Increase it gradually and compare results instead of assuming the highest value is best.
The tool's purpose still applies. In a garment-preserving workflow, a higher value does not mean the garment's pattern, text, cut or construction may be replaced. For general AI Retouch, explain what should change and what should stay the same. See Preserve clothes and AI Retouch.
Some background workflows only offer the slider after you choose a background reference. If it is hidden or fixed, first check the tool and its current inputs. Do not add an unrelated reference just to expose a slider.
Subject layout and source position
Where Subject layout is offered:
- Locked asks for a conservative layout around the source subject.
- AI reframe gives AI more freedom to reorganize the composition. It is not a promise of pixel-identical placement or a way to unlock garment changes.
Adding a custom mask can lock the layout so the marked regions stay aligned. The layout selector may also depend on the selected intensity; use only the choices currently offered.
The Source position grid chooses where the source sits within the output composition. Available anchors follow the source and output ratios: a square source on a wider canvas offers left, center and right; on a taller canvas it offers top, center and bottom. Matching ratios usually leave only the center available. Disabled anchors are intentional, not nine independent placement options.
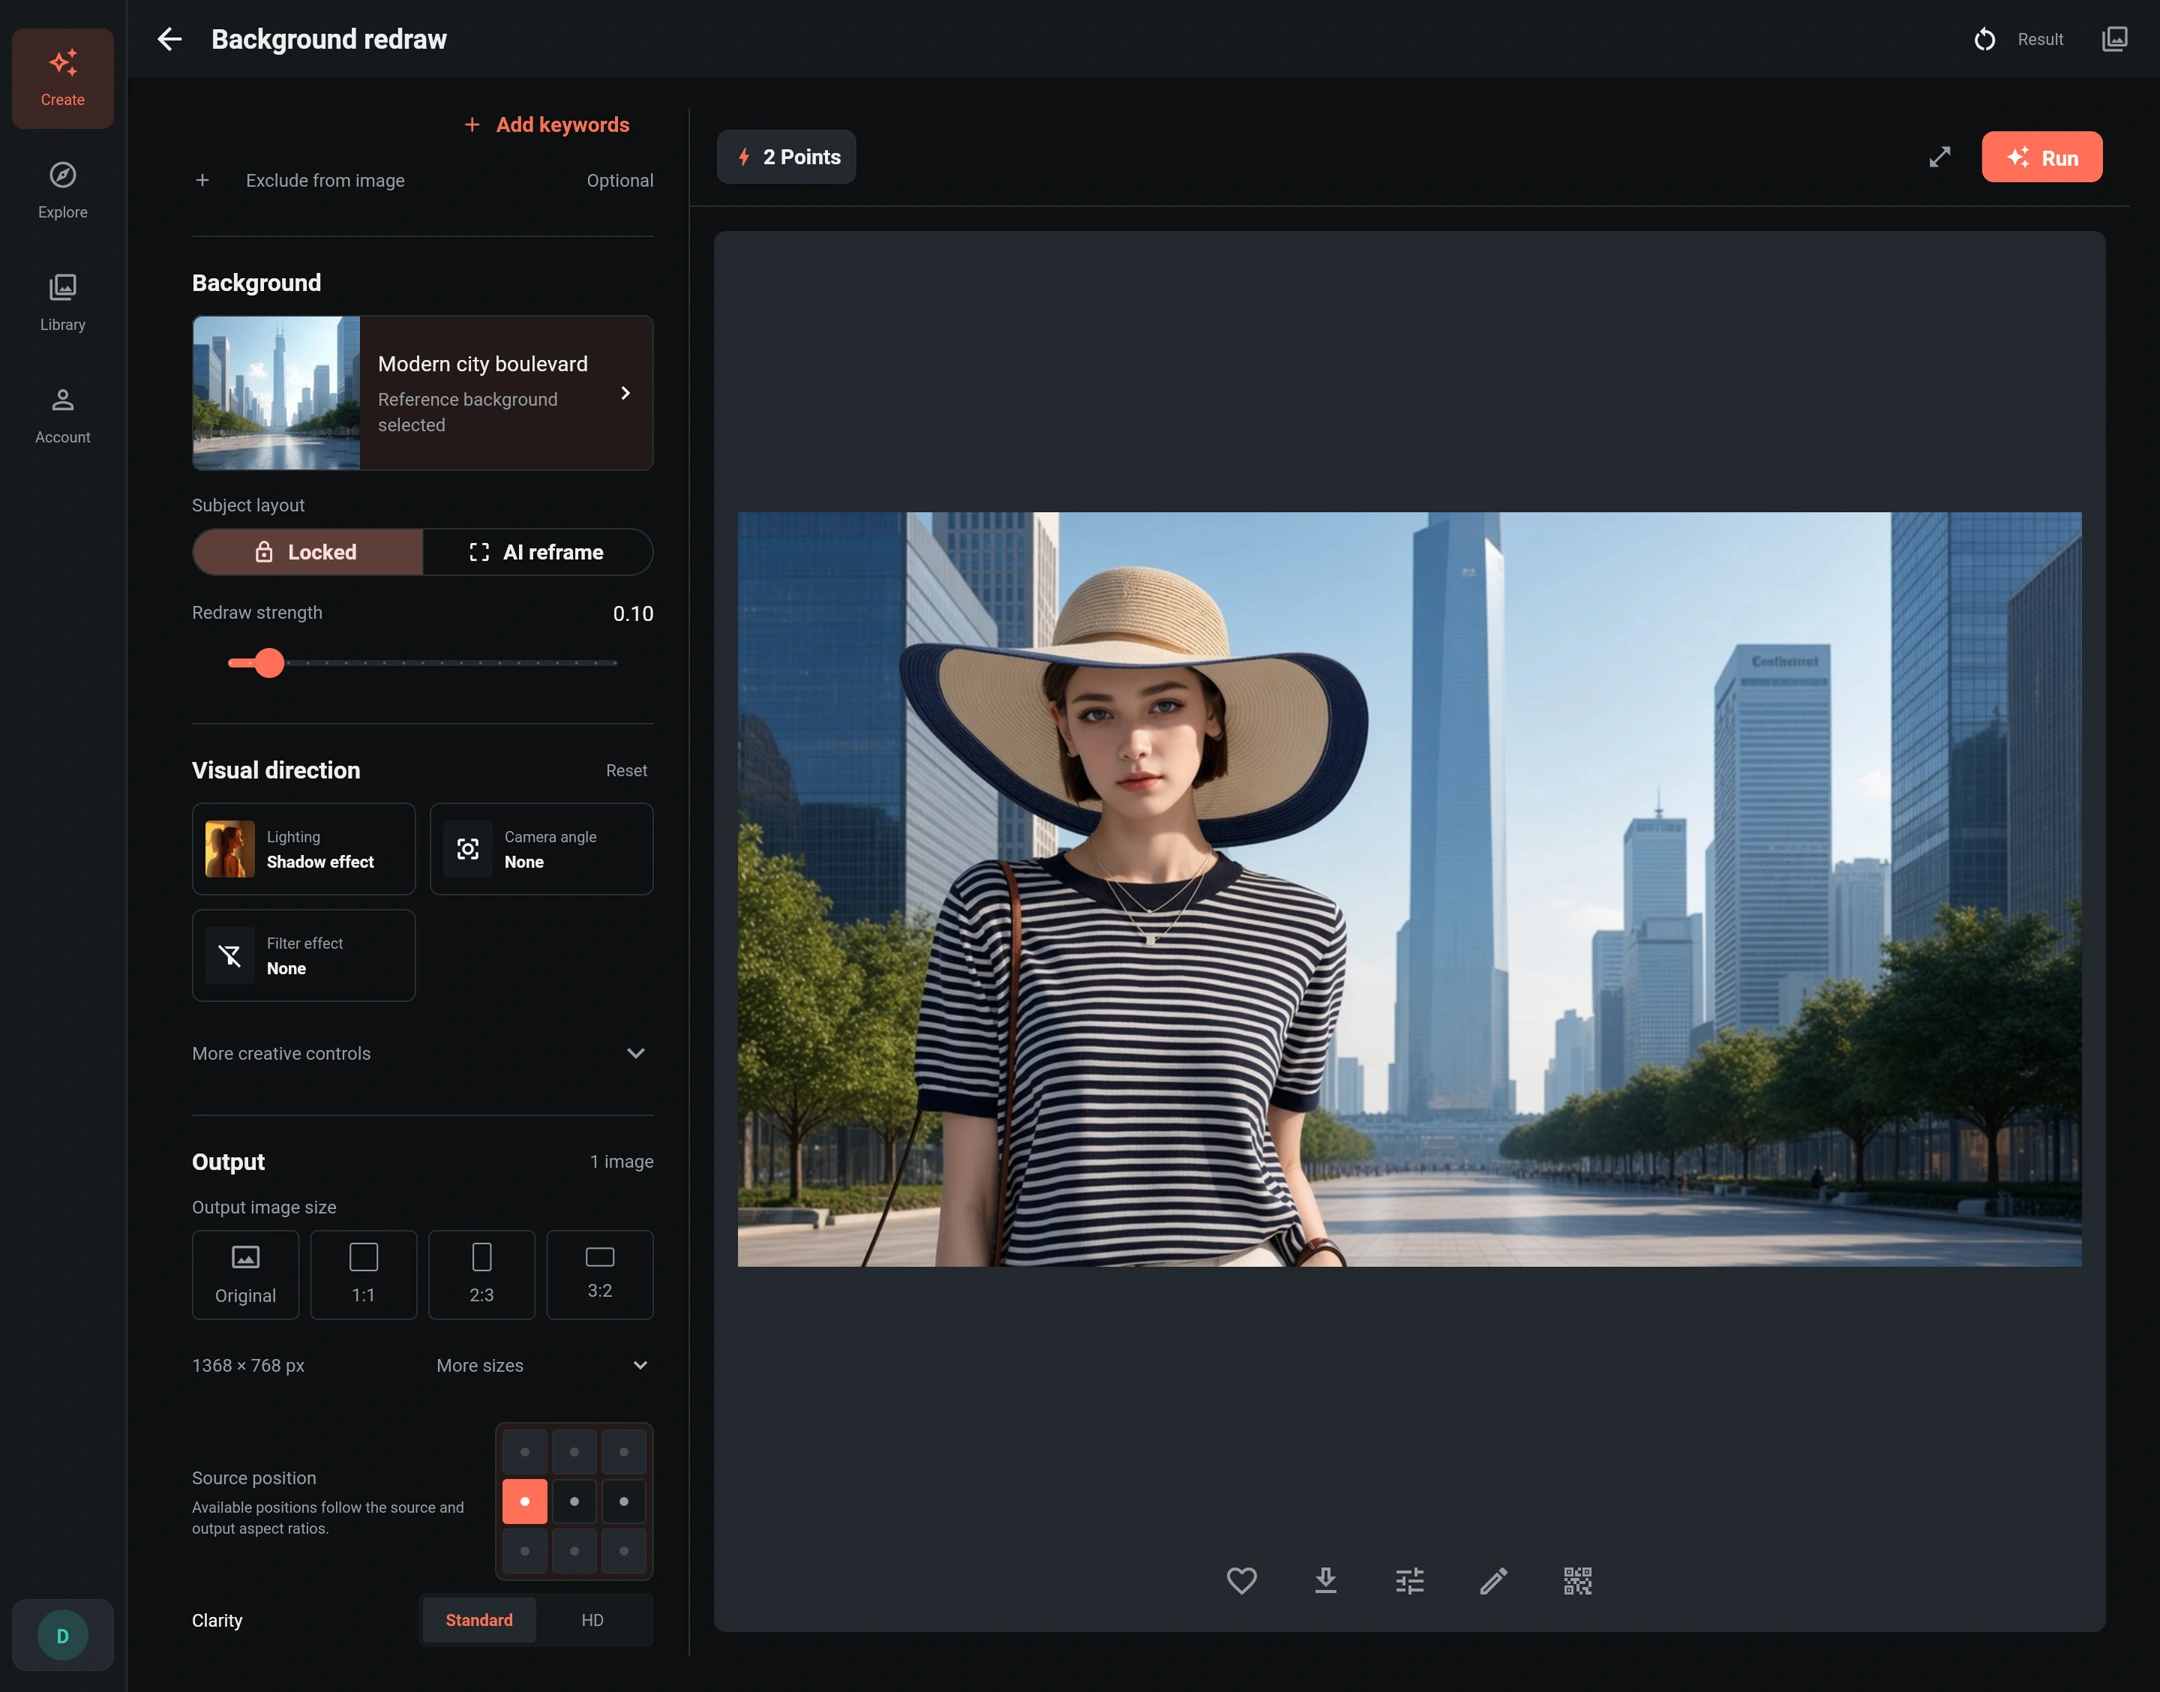
This Background redraw example shows a wide 16:9 canvas and a left-center source position. Moving the anchor is not a manual drag of the face or garment. Review the whole composition after generation; results can reinterpret lighting and scene details.
Lighting, filters and other visual choices
Visual direction groups different kinds of guidance. Lighting describes illumination, camera angle describes viewpoint, expression concerns the face, and filters influence the overall visual treatment. More creative controls can reveal photography styles, magic effects and painting styles where supported.
- Open the option you want to change, such as Lighting.
- Browse the thumbnails or search for a name, then select one choice.
- Choose Apply to confirm. Closing the picker without applying leaves the previous choice unchanged.
- Reopen that same option to replace it. A second lighting choice replaces the first; it does not add another light preset to that slot. Choose None and apply to clear it.
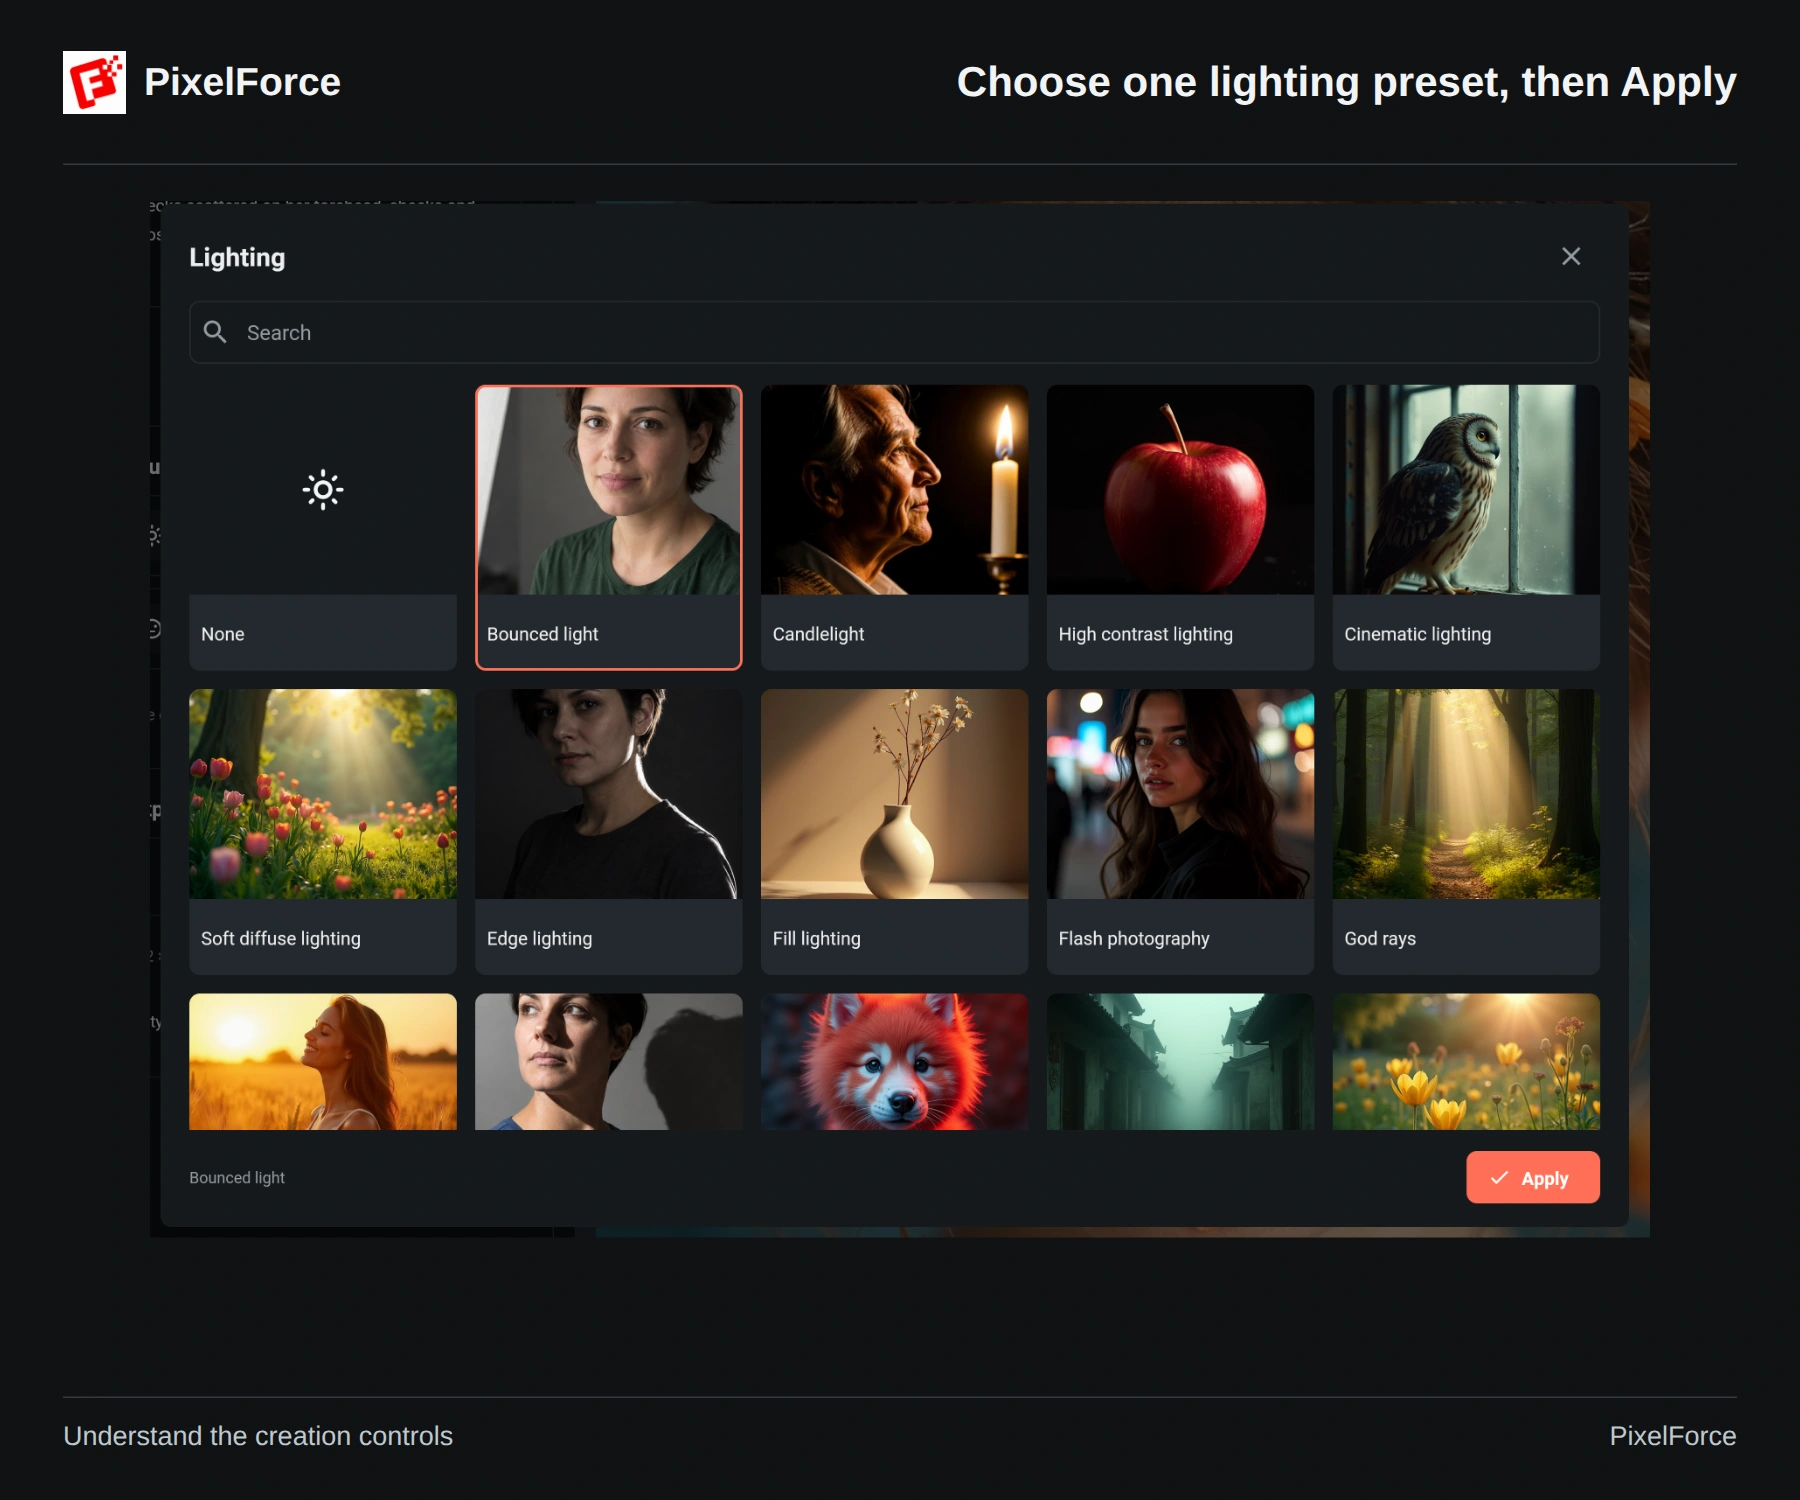
Thumbnails are visual references, not previews of your exact finished image. Start with a few compatible choices. For a natural product photograph, a coherent lighting choice is often enough; leave magic effects off unless you actually want them. A prompt asking for natural colors can conflict with a strong creative effect.
Reset beside Visual direction clears that section. Reset all is broader and can remove your source, prompt and other inputs; do not use it just to clear one filter. Choosing a preset does not apply a local filter to an existing result: a new AI generation is needed. For local adjustments, use Image Editor.
Model and background references
Use a model reference when the tool needs a person or identity, and a background reference when you want to guide the environment. They are different input roles; selecting a model does not replace the garment source.
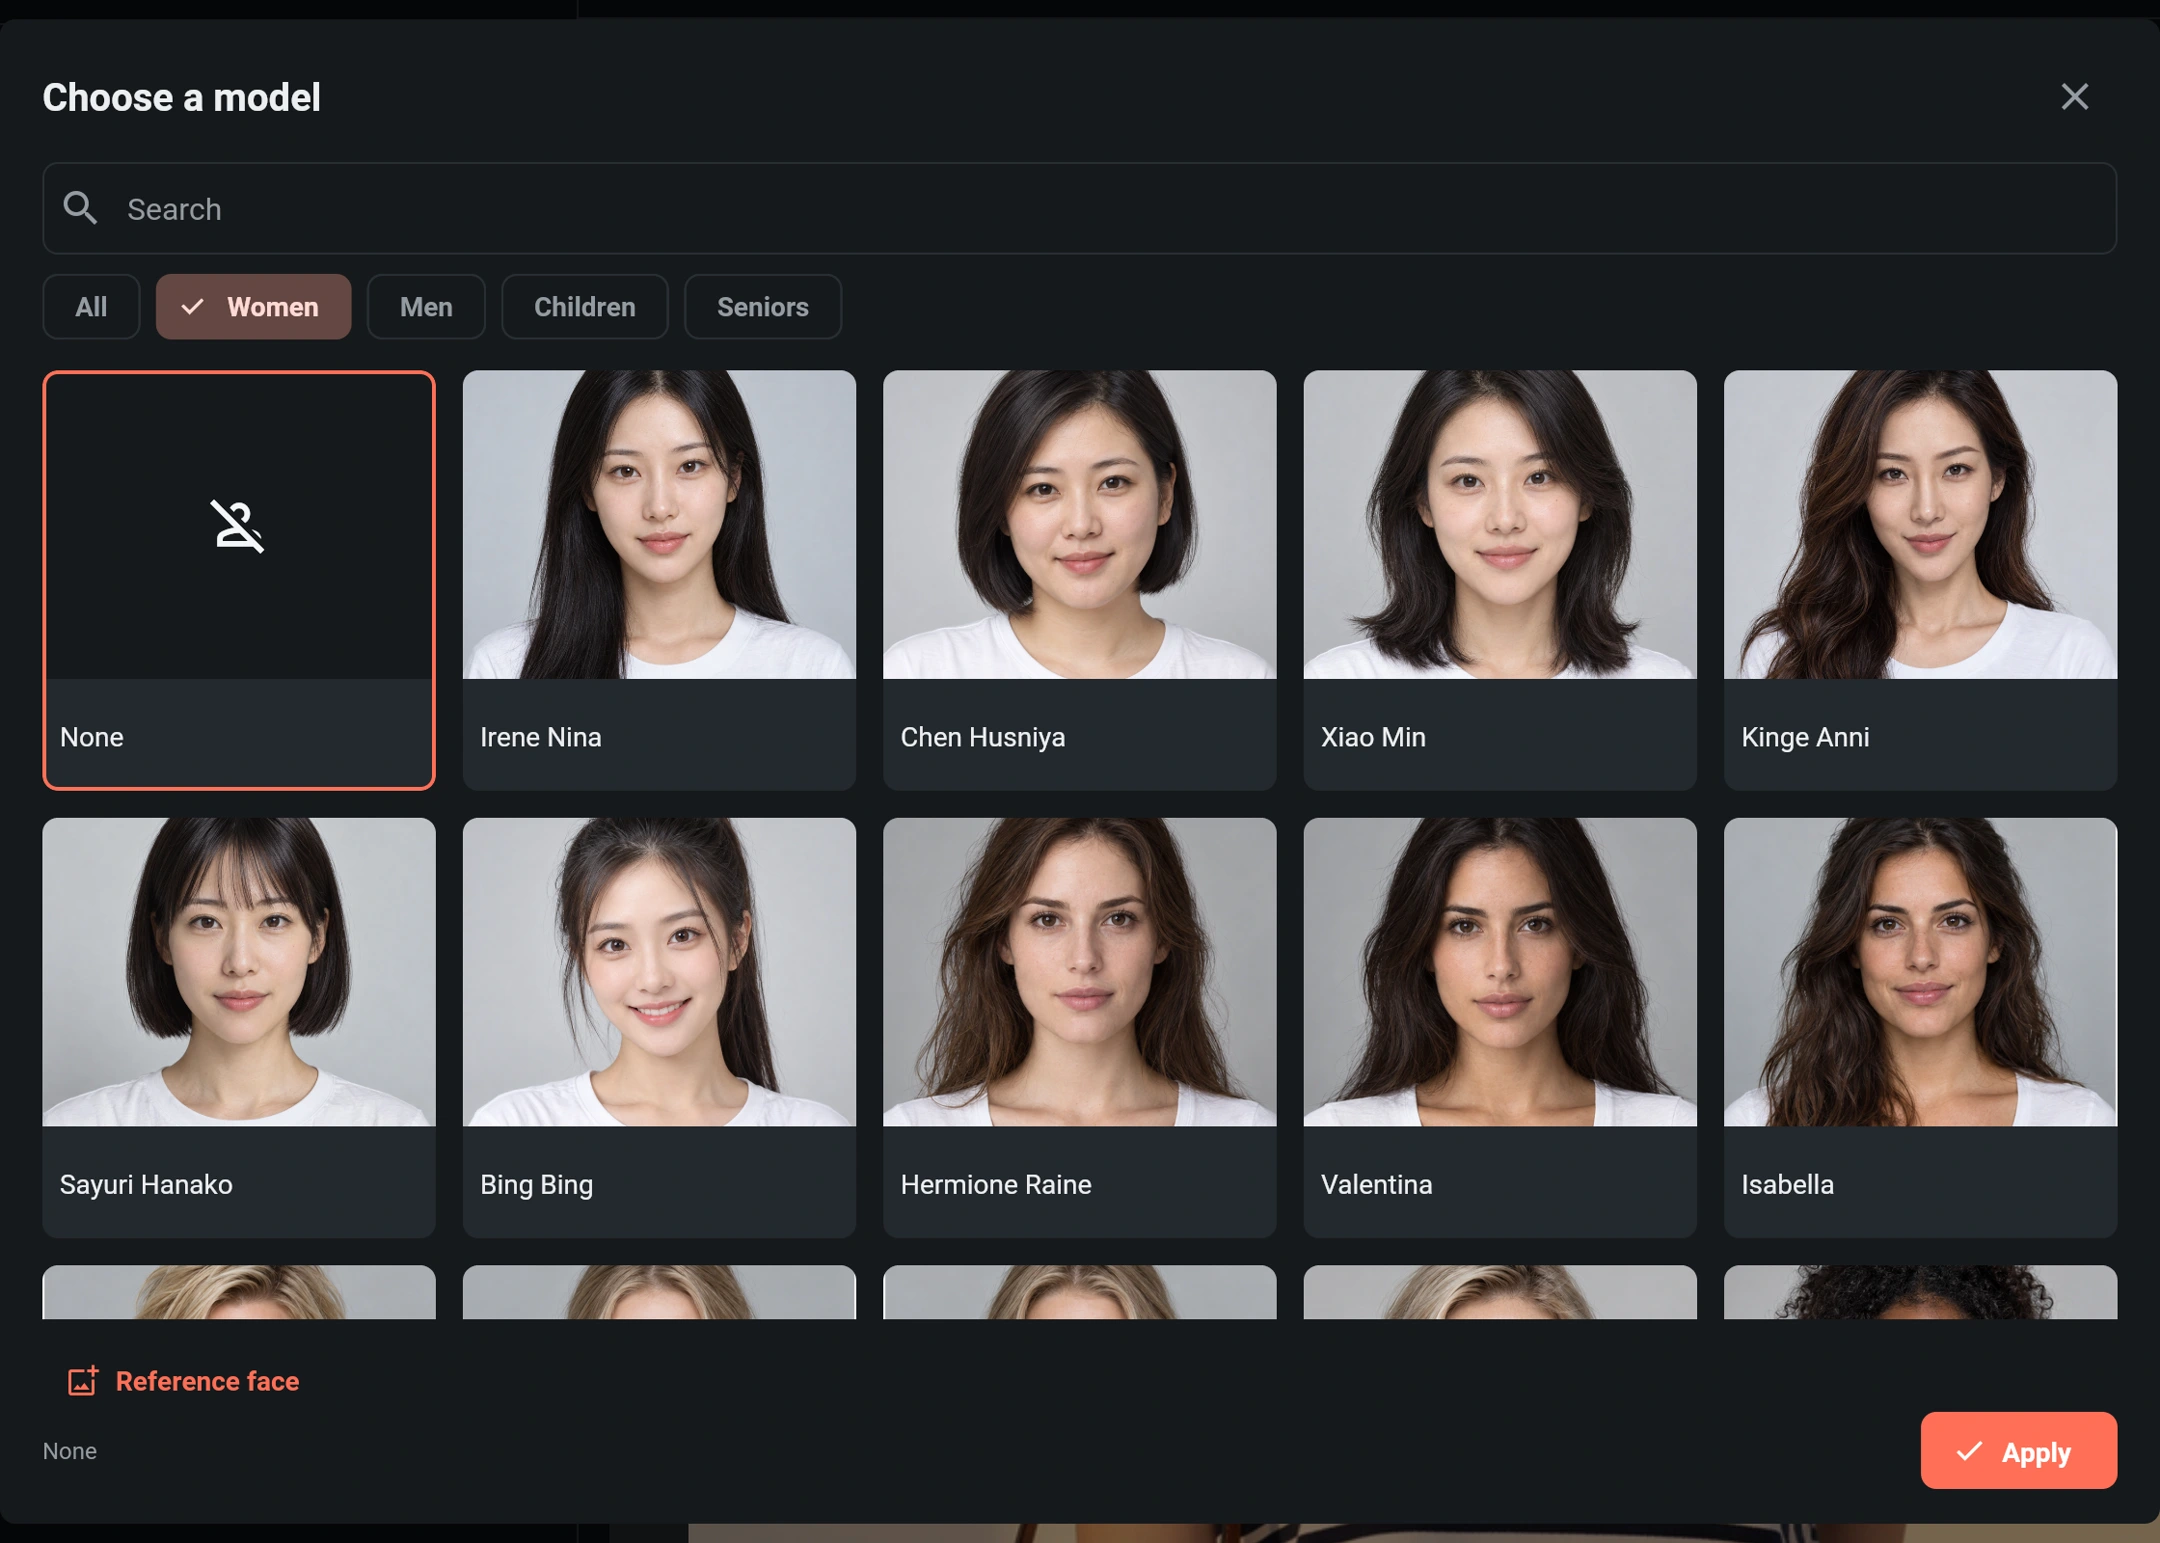
The model picker offers categories, search and, where enabled, a reference-face upload. Select a model and choose Apply. Closing without applying cancels the pending selection. Selecting a library model and uploading a custom face are alternative identity choices, not two identities to combine.
In a background picker, use the available template, uploaded image or no-reference choice to suit your aim. Keep the prompt consistent with it: do not select a studio reference while asking for an unrelated outdoor setting unless that combination is intentional. Only use images you have permission to process.
Image count and generation points
Many tools produce one image and do not expose an image-count selector. In AI Portrait Studio, the selected shots determine the session's output count; that is different from increasing the count in a text-to-image form. Review the selection and its total before starting.
Changing intensity, clarity or the number of selected shots can change the quote; changing the ratio alone does not necessarily change the points shown. Writing a prompt, selecting a reference or opening a picker is not itself a paid generation. Read how points work for reservations and settlement rather than estimating a price from a tutorial screenshot.
A quick check before Run
- Confirm the current tool and all required inputs. Check that source, person, background and mask each have the intended role.
- Read the prompt and any optional negative prompt. State the wanted change and the details to preserve; use negative instructions for things to avoid, not to cancel a contradictory reference.
- Check intensity and clarity separately, then ratio, supported dimensions, strength, layout and any visual choices that apply.
- Wait for the current points quote to finish updating and check your balance. Insufficient points cannot be used to start a generation.
- Select Run once and follow that task. If an accepted task stops updating, use Check task rather than creating another one. See task progress and recovery.
While a task is active, controls can be locked to protect its inputs. Switching settings later does not change the accepted task. If Run is unavailable, check the missing inputs, selected portrait shots, connection and quote state instead of repeatedly clicking it.