Portrait retouch
Keep the portrait you like, with a more polished finish. Portrait retouch helps refine the appearance of skin and facial detail without asking you to paint over each area. It is for retouching an existing photo, not choosing a different model or creating a themed photoshoot.
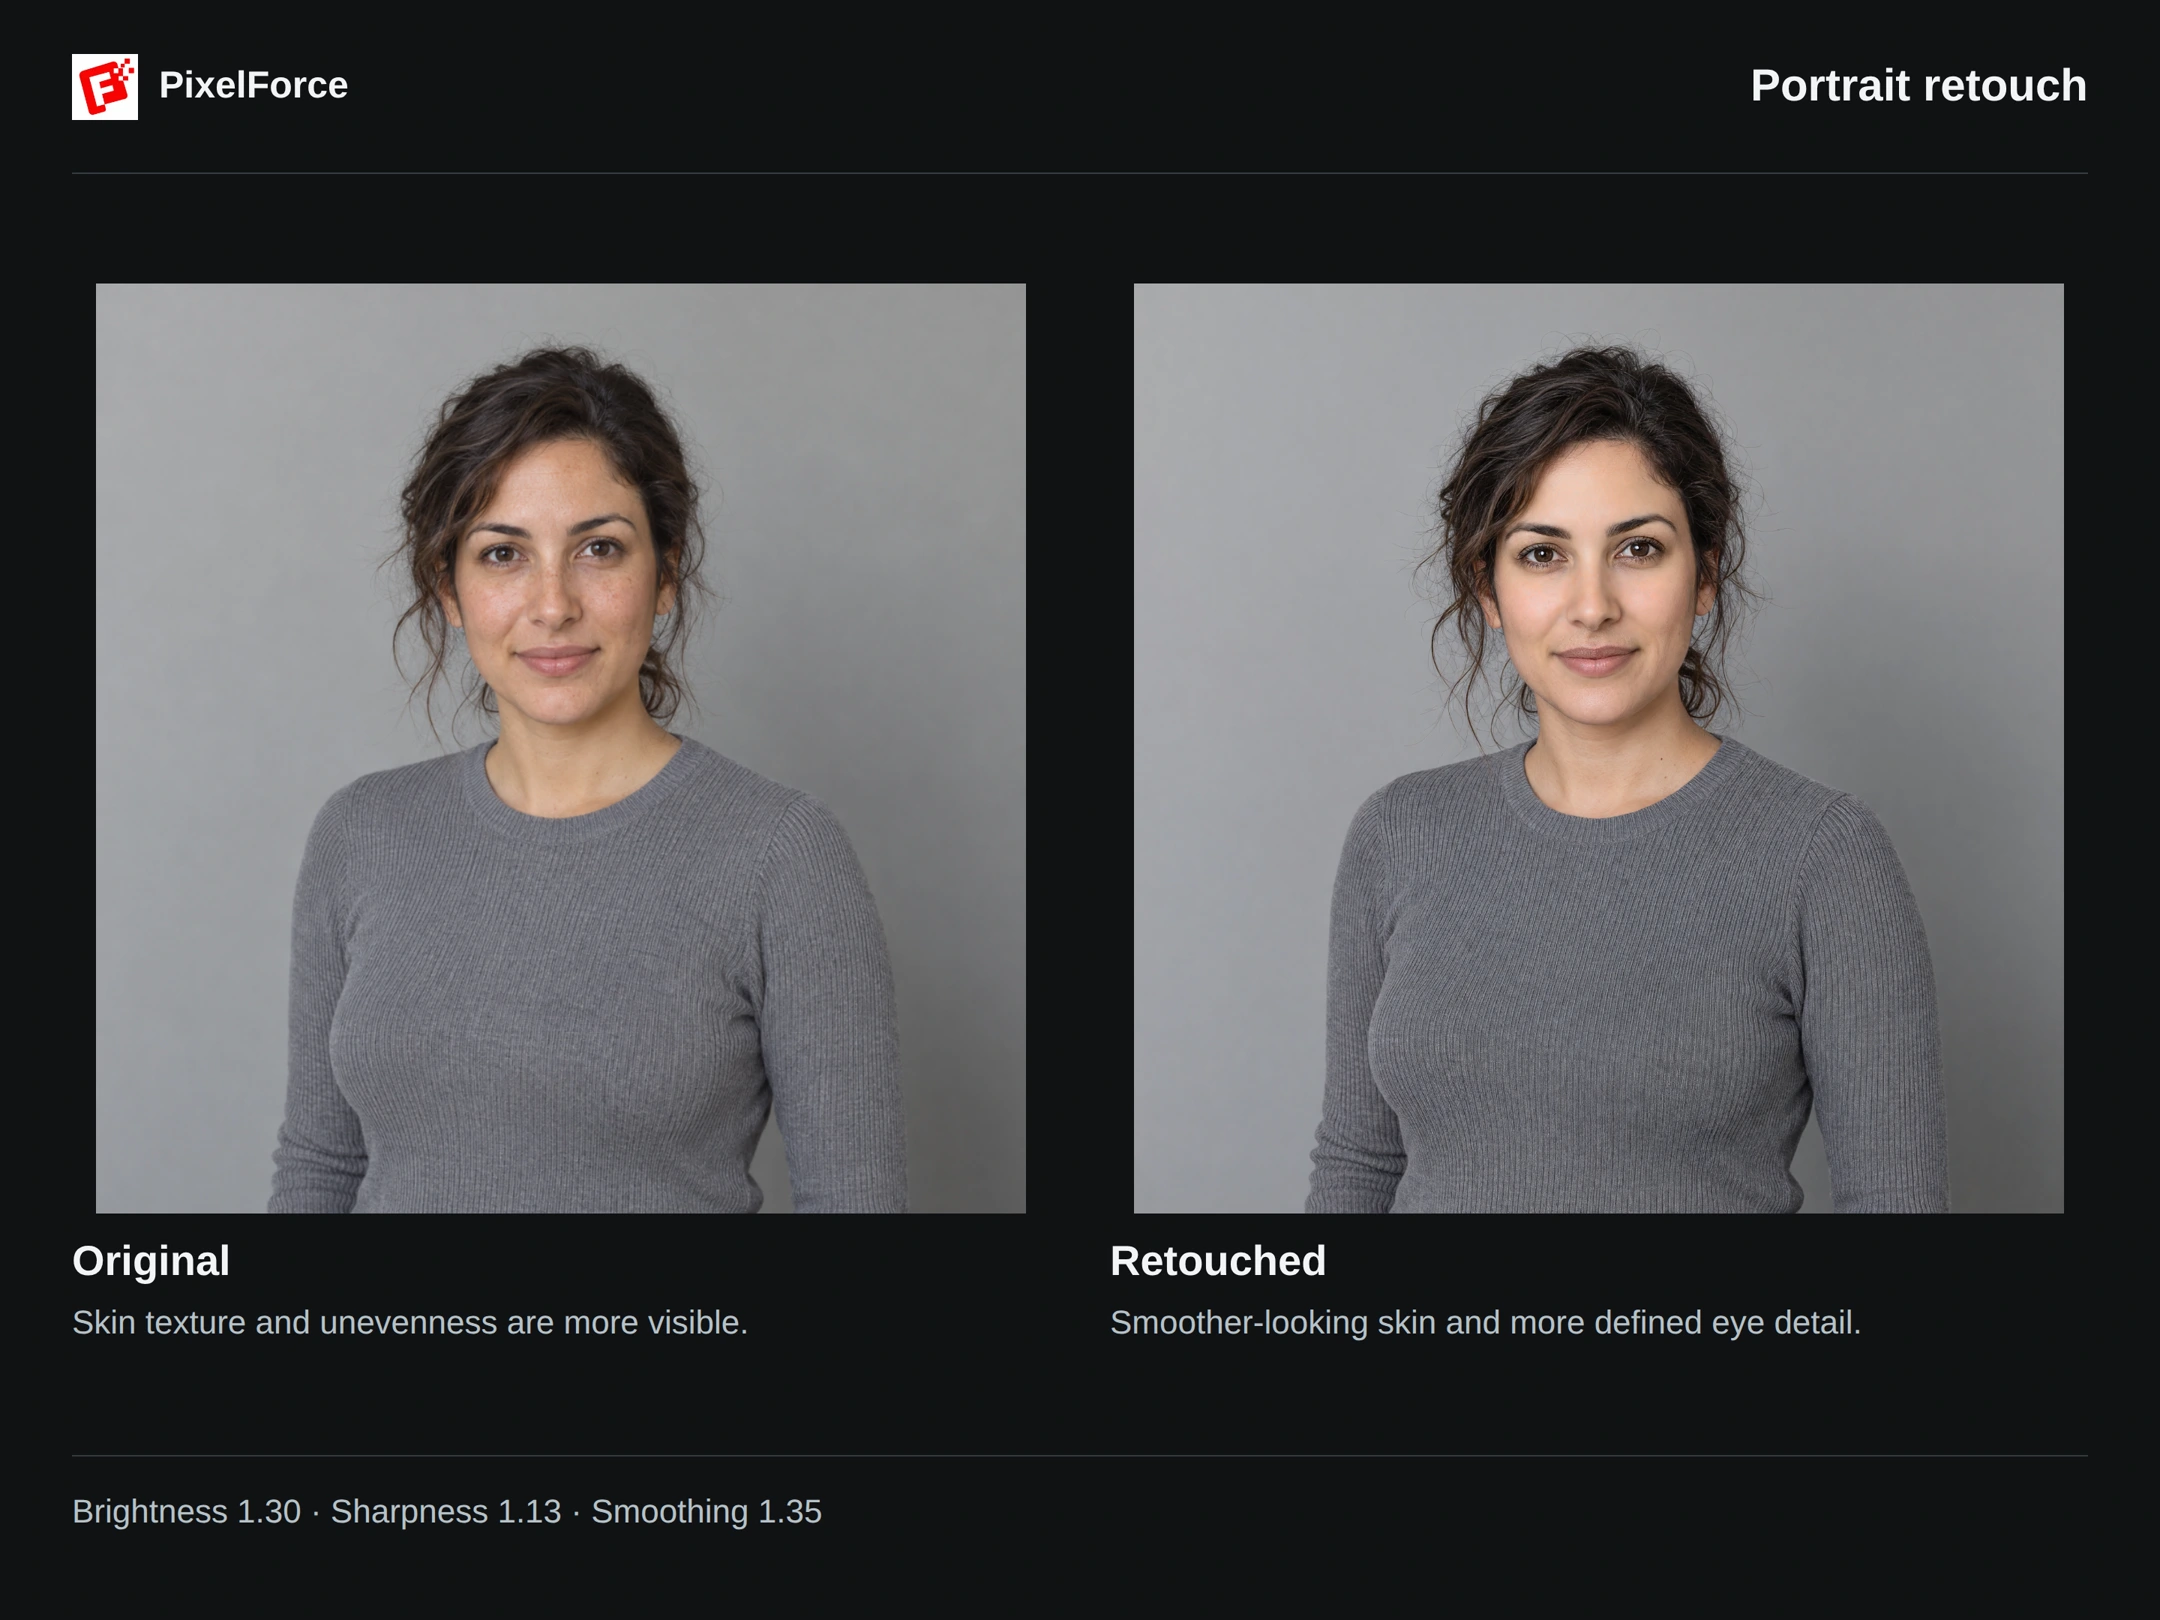
What changes in this example?
Look at the face, not just the overall brightness:
- The forehead and cheeks look smoother, with less visible unevenness in skin texture and tone.
- Shadows around the eyes are softer, while the brows, lashes and eye detail look more defined.
- The overall finish is more polished, while the gray knit top and simple gray background remain part of the portrait.
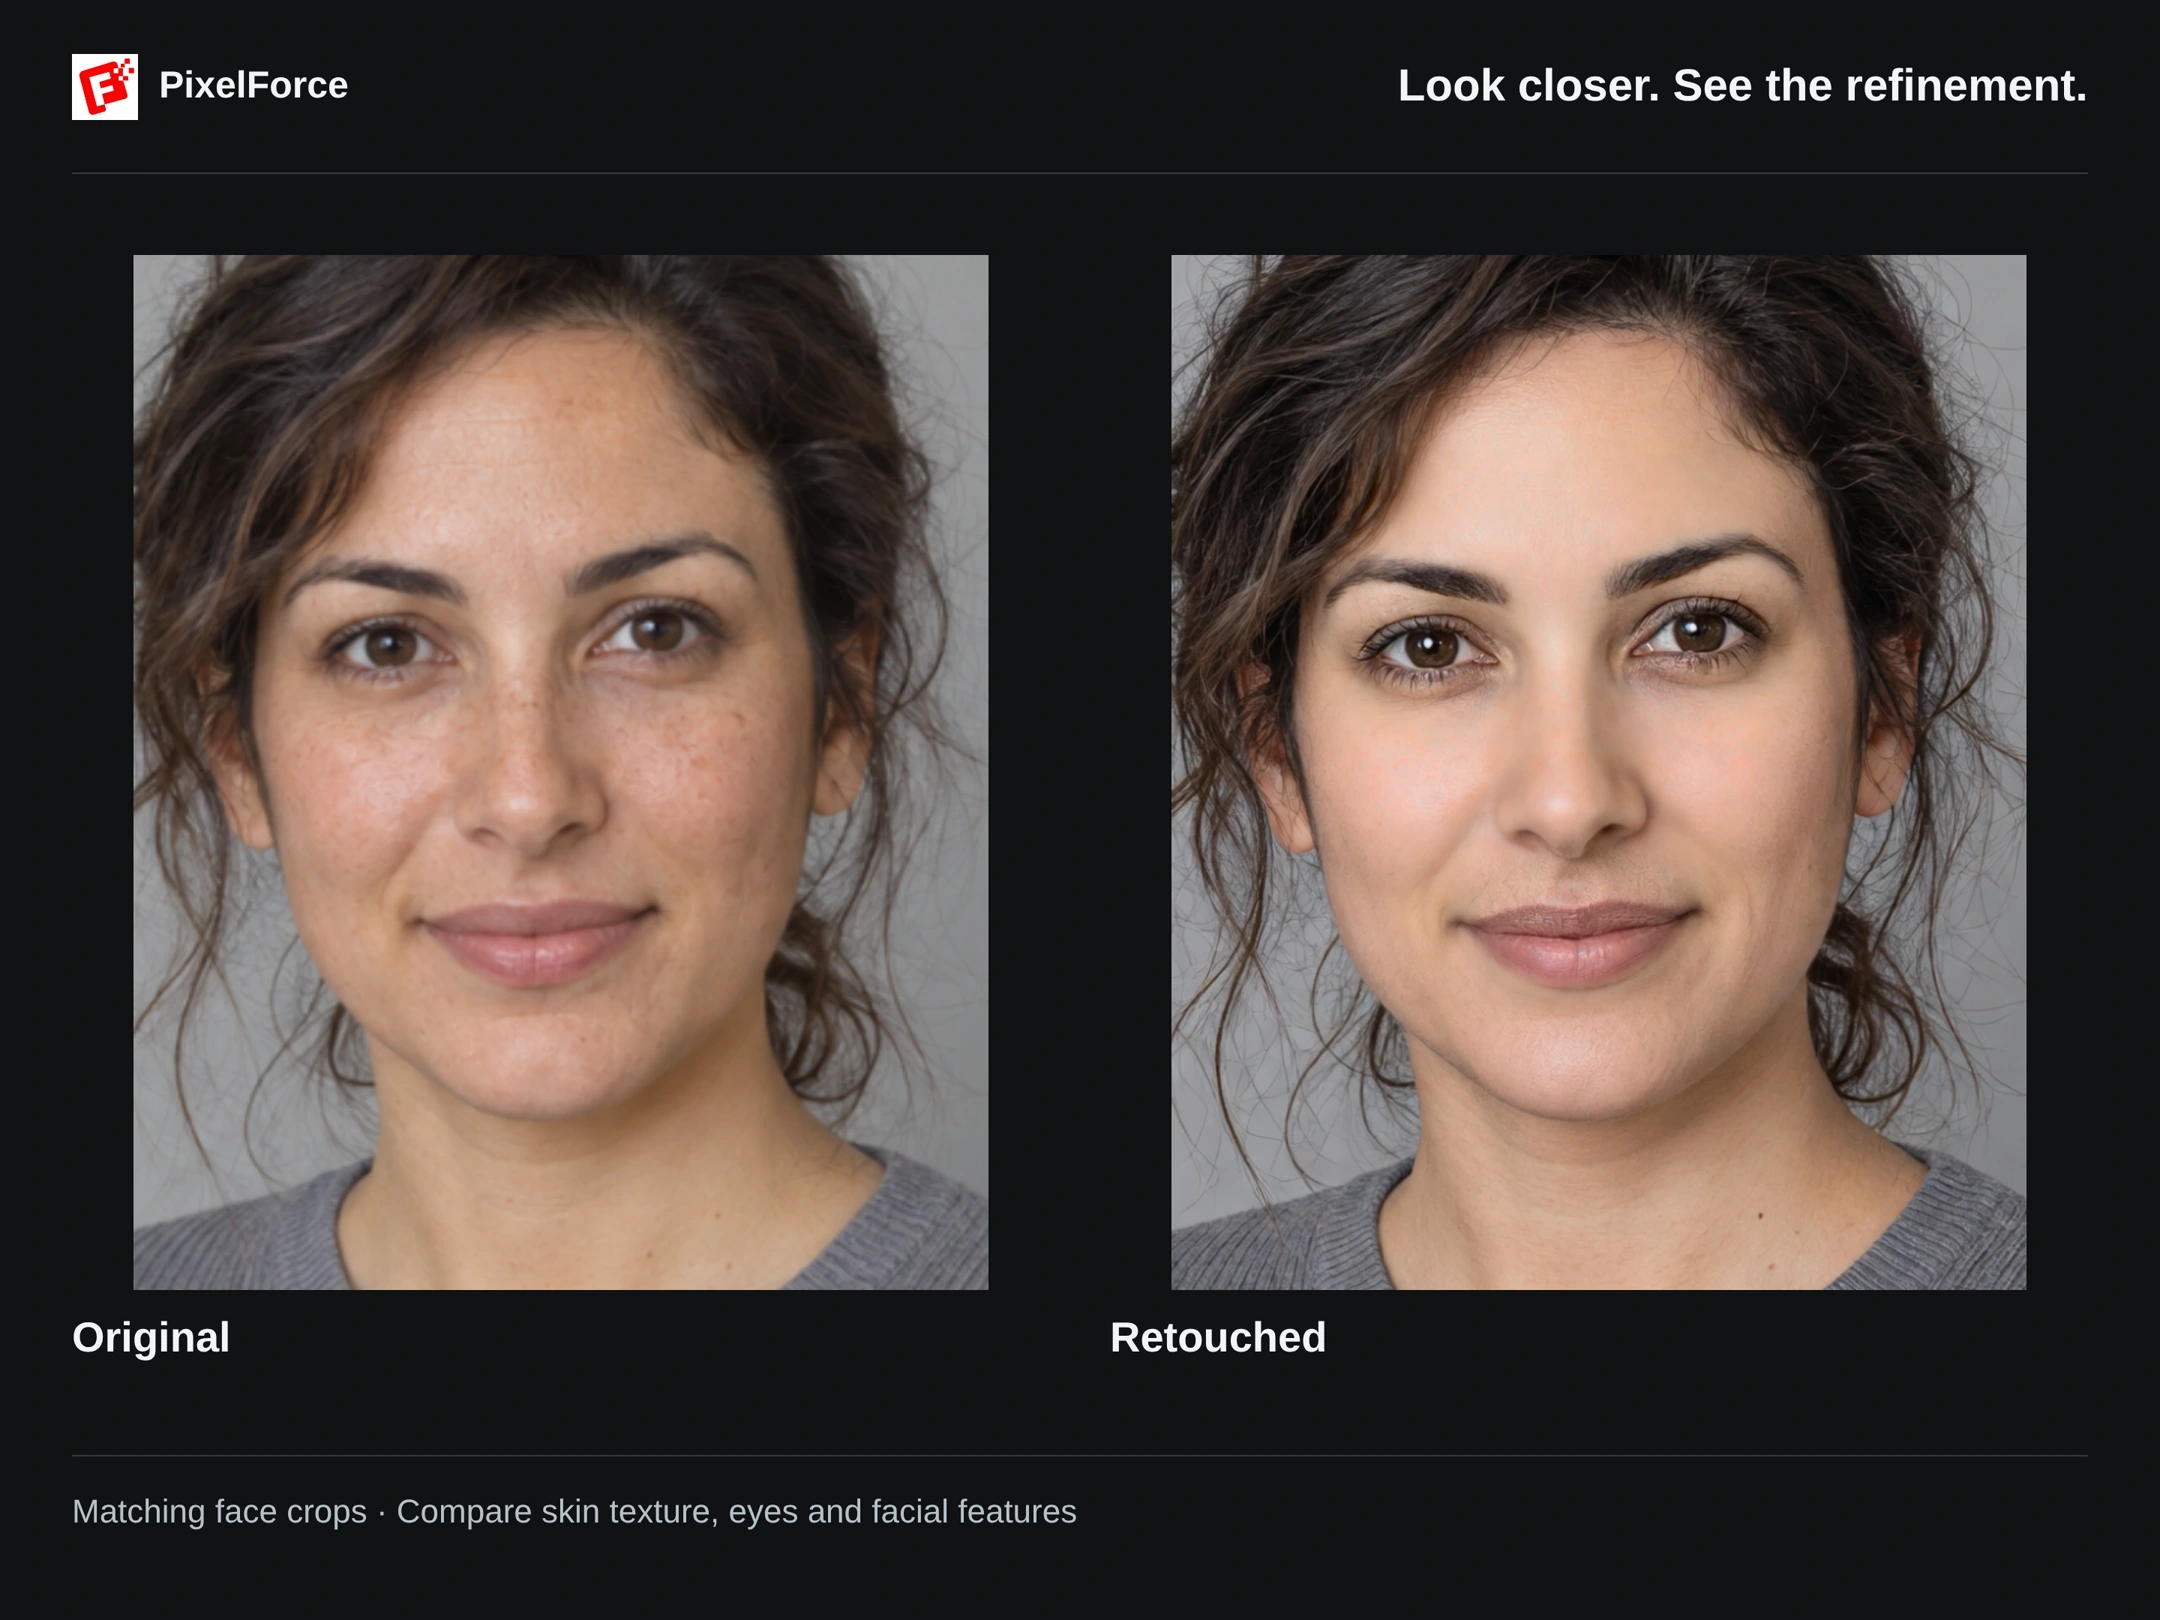
The close-up below uses the same relative area from both images so you can inspect the facial detail. AI retouching can also alter small features and framing: the full result is not a pixel-for-pixel copy of the original with a filter applied. Compare both the face and the complete photo before deciding whether the effect suits you.
Retouch your photo
1. Add your portrait
Open Portrait retouch from Create or Explore and add one photo. On Android and iOS, choose a photo from your library, take a picture or browse files. On the Web, select an image from your computer.
Start with a clearly visible face, good focus and enough light to see the skin and eyes. A heavily filtered or blurred source gives you less detail to work with. Use Edit inputs to check the image and keep any framing you want to preserve.
2. Describe the finish you want
The prompt is optional. A short, specific request is more useful than a long list of beauty terms. This example uses the following text in Your prompt:
Create a natural, polished beauty portrait while preserving the person's identity, inherent skin tone, facial structure, and original composition.
That asks for a polished portrait while stating what should stay recognizable. You can add a priority such as keeping freckles or retaining visible skin texture. Treat those instructions as a request to review against the result, not a guarantee that every detail will remain unchanged.
3. Adjust the face controls
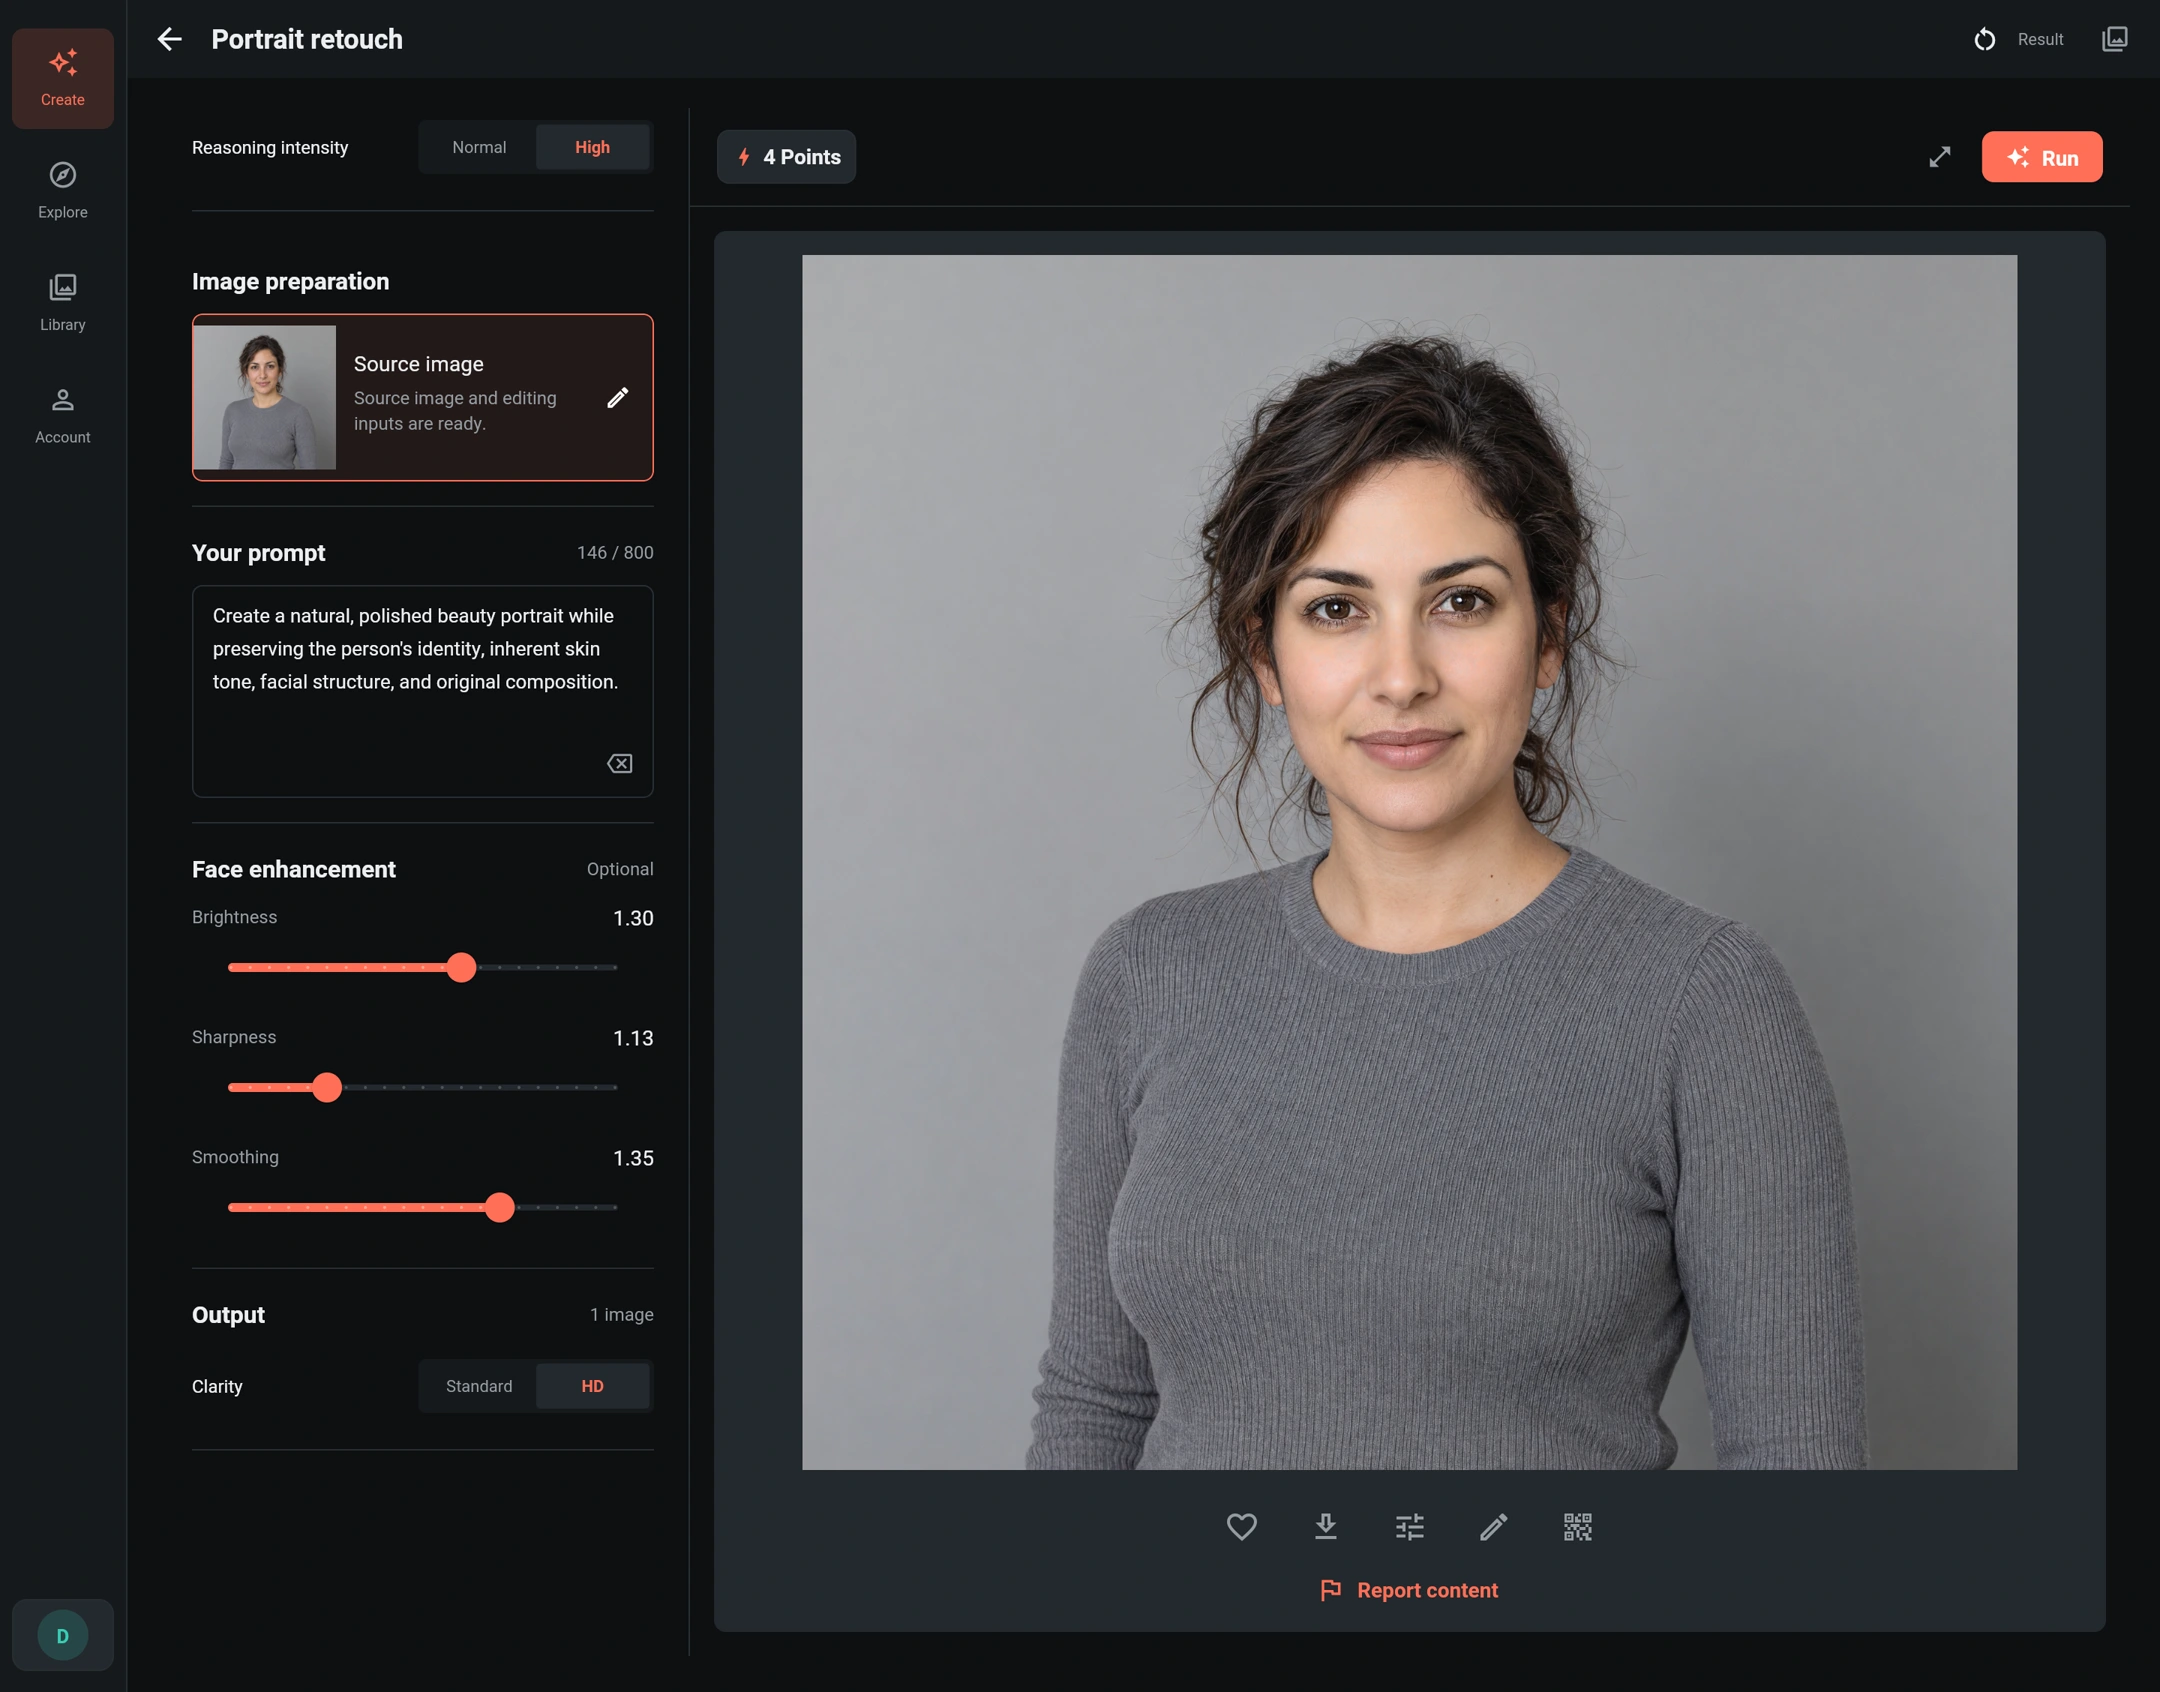
Under Face enhancement, adjust the three sliders. Here are the values used in this example, not universal settings for every portrait:
| Control | Example value | What to look for |
|---|---|---|
| Brightness | 1.30 | A brighter-looking face without washed-out highlights or an unwanted change to the person's skin tone. |
| Sharpness | 1.13 | More defined eyes, brows and fine detail, without harsh edges. |
| Smoothing | 1.35 | More even-looking skin without losing all texture or distinctive features. |
The controls currently range from 1.00 to 1.50. Move one slider at a time and make small changes; pushing all three to the maximum is not necessarily more flattering. These numbers are adjustment settings, not percentages of skin detail removed or a promise of a particular result.
4. Choose output settings and review the result
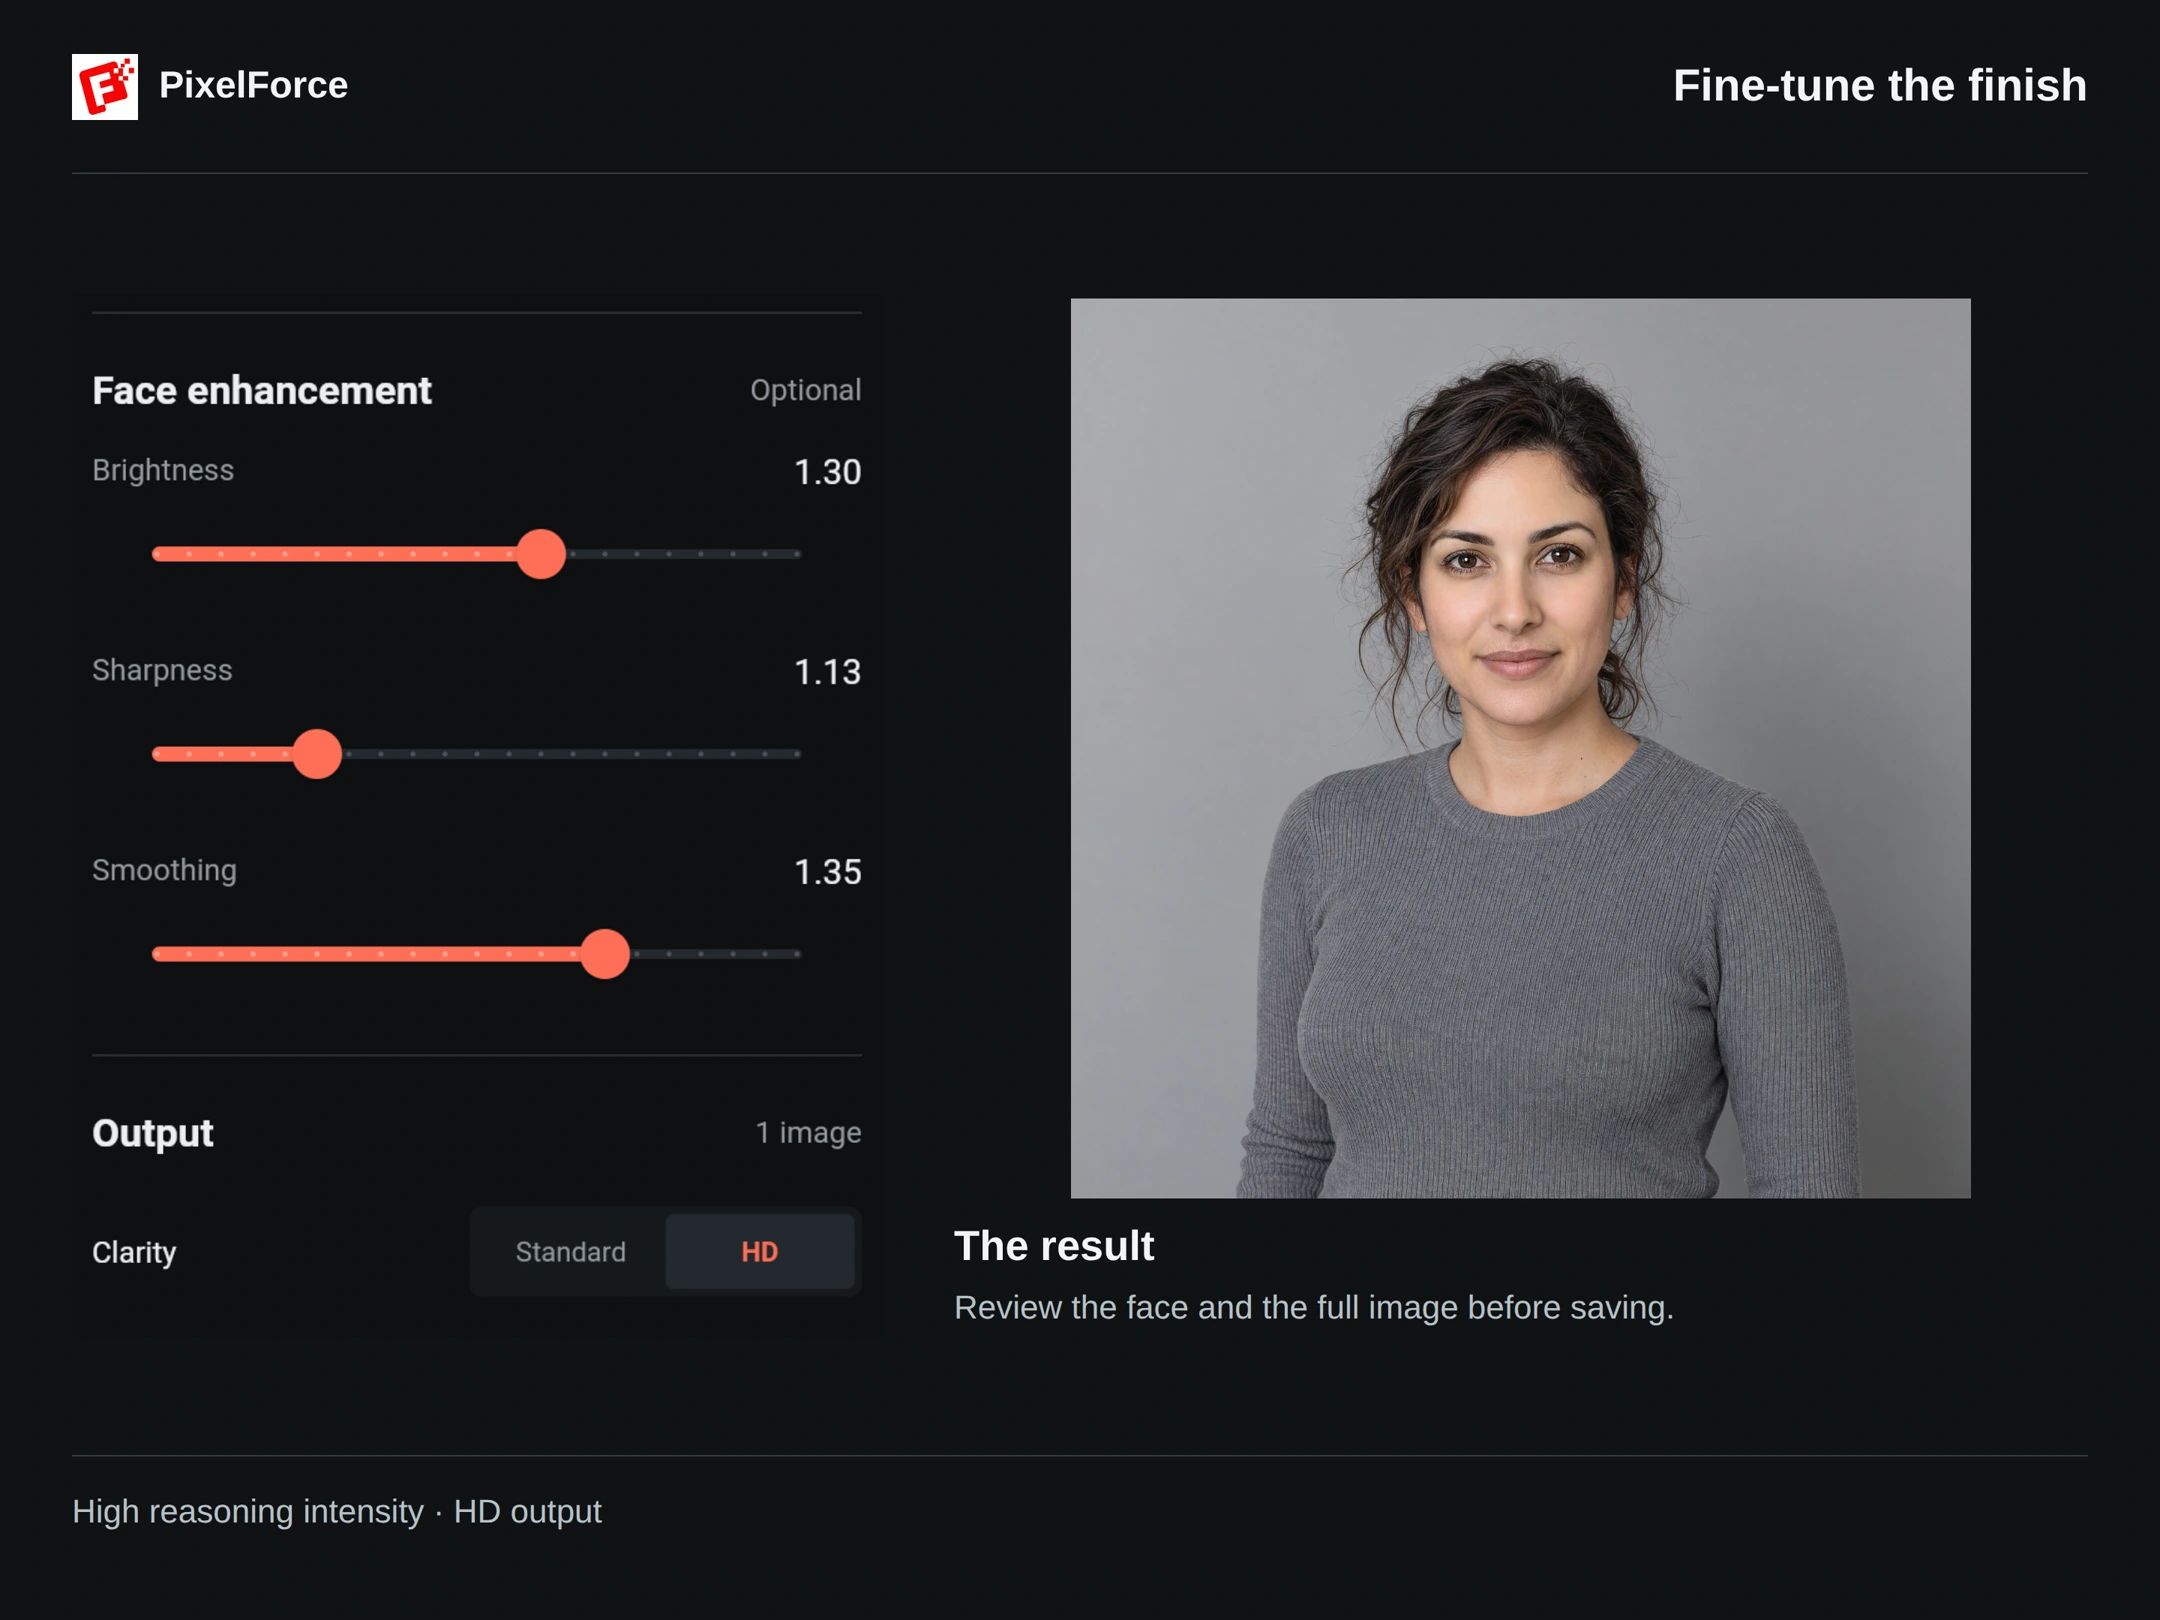
For this example, Reasoning intensity is High and Clarity is HD. Higher reasoning intensity uses more AI resources to produce finer detail and better results; it is separate from the beauty-strength sliders. Standard and HD concern output clarity, not how much the face should be smoothed. Check the points quote after changing these options, then select Run.
Open Result and inspect the image at a useful zoom level. This example starts with a 1024 × 1024 px source and produces a 2048 × 2048 px result. Those are this example's actual dimensions, not a promise for every input or processing mode.
Save the original result when you are happy with it. A preview scaled to fit the screen is useful for composition; the saved file is better for checking fine detail. To try another setting, open the result in Library, choose Reuse settings and adjust the original input rather than repeatedly retouching an already smoothed result.
Keep the result feeling like you
- Check the eyes, lips, nose, face shape and expression against the source, not just the skin.
- Decide whether freckles and other distinctive marks should remain. Ask for them explicitly and verify the result.
- Inspect the hairline and skin edges for halos, and the cheeks for overly smooth or waxy texture.
- Check the full image for changes to the crop, clothing details or background. Do not use a result that changes something important to you.
If the effect feels too strong, return to the original photo, reduce smoothing or brightness and try a more restrained request. More output pixels do not undo an unwanted facial change.
Choose the right tool
Use AI Relight when your main goal is to change the lighting direction. Use AI Portrait Studio for a new themed portrait, or Model Recast to change the person shown. For cropping, color adjustments and other manual edits without another generation, use Image Editor.