Model Recast
Keep the outfit and framing of a photo while changing the person wearing it. Model Recast uses your source image together with a model-library identity or an uploaded portrait. It is for recasting a person, not redesigning the garment or arranging a new pose.
Source, reference and result
This example starts with a person wearing a wide-brimmed hat and a striped top. A separate headshot supplies the intended identity. The finished image reflects that reference while carrying through the hat, striped top, shoulder strap and half-body framing.
The example also selects Golden hour lighting. That choice explains the warmer skin tones, wall and shadows; these changes are not an unavoidable part of replacing an identity. Leave lighting and photography style unselected when you want to stay closer to the original photograph.
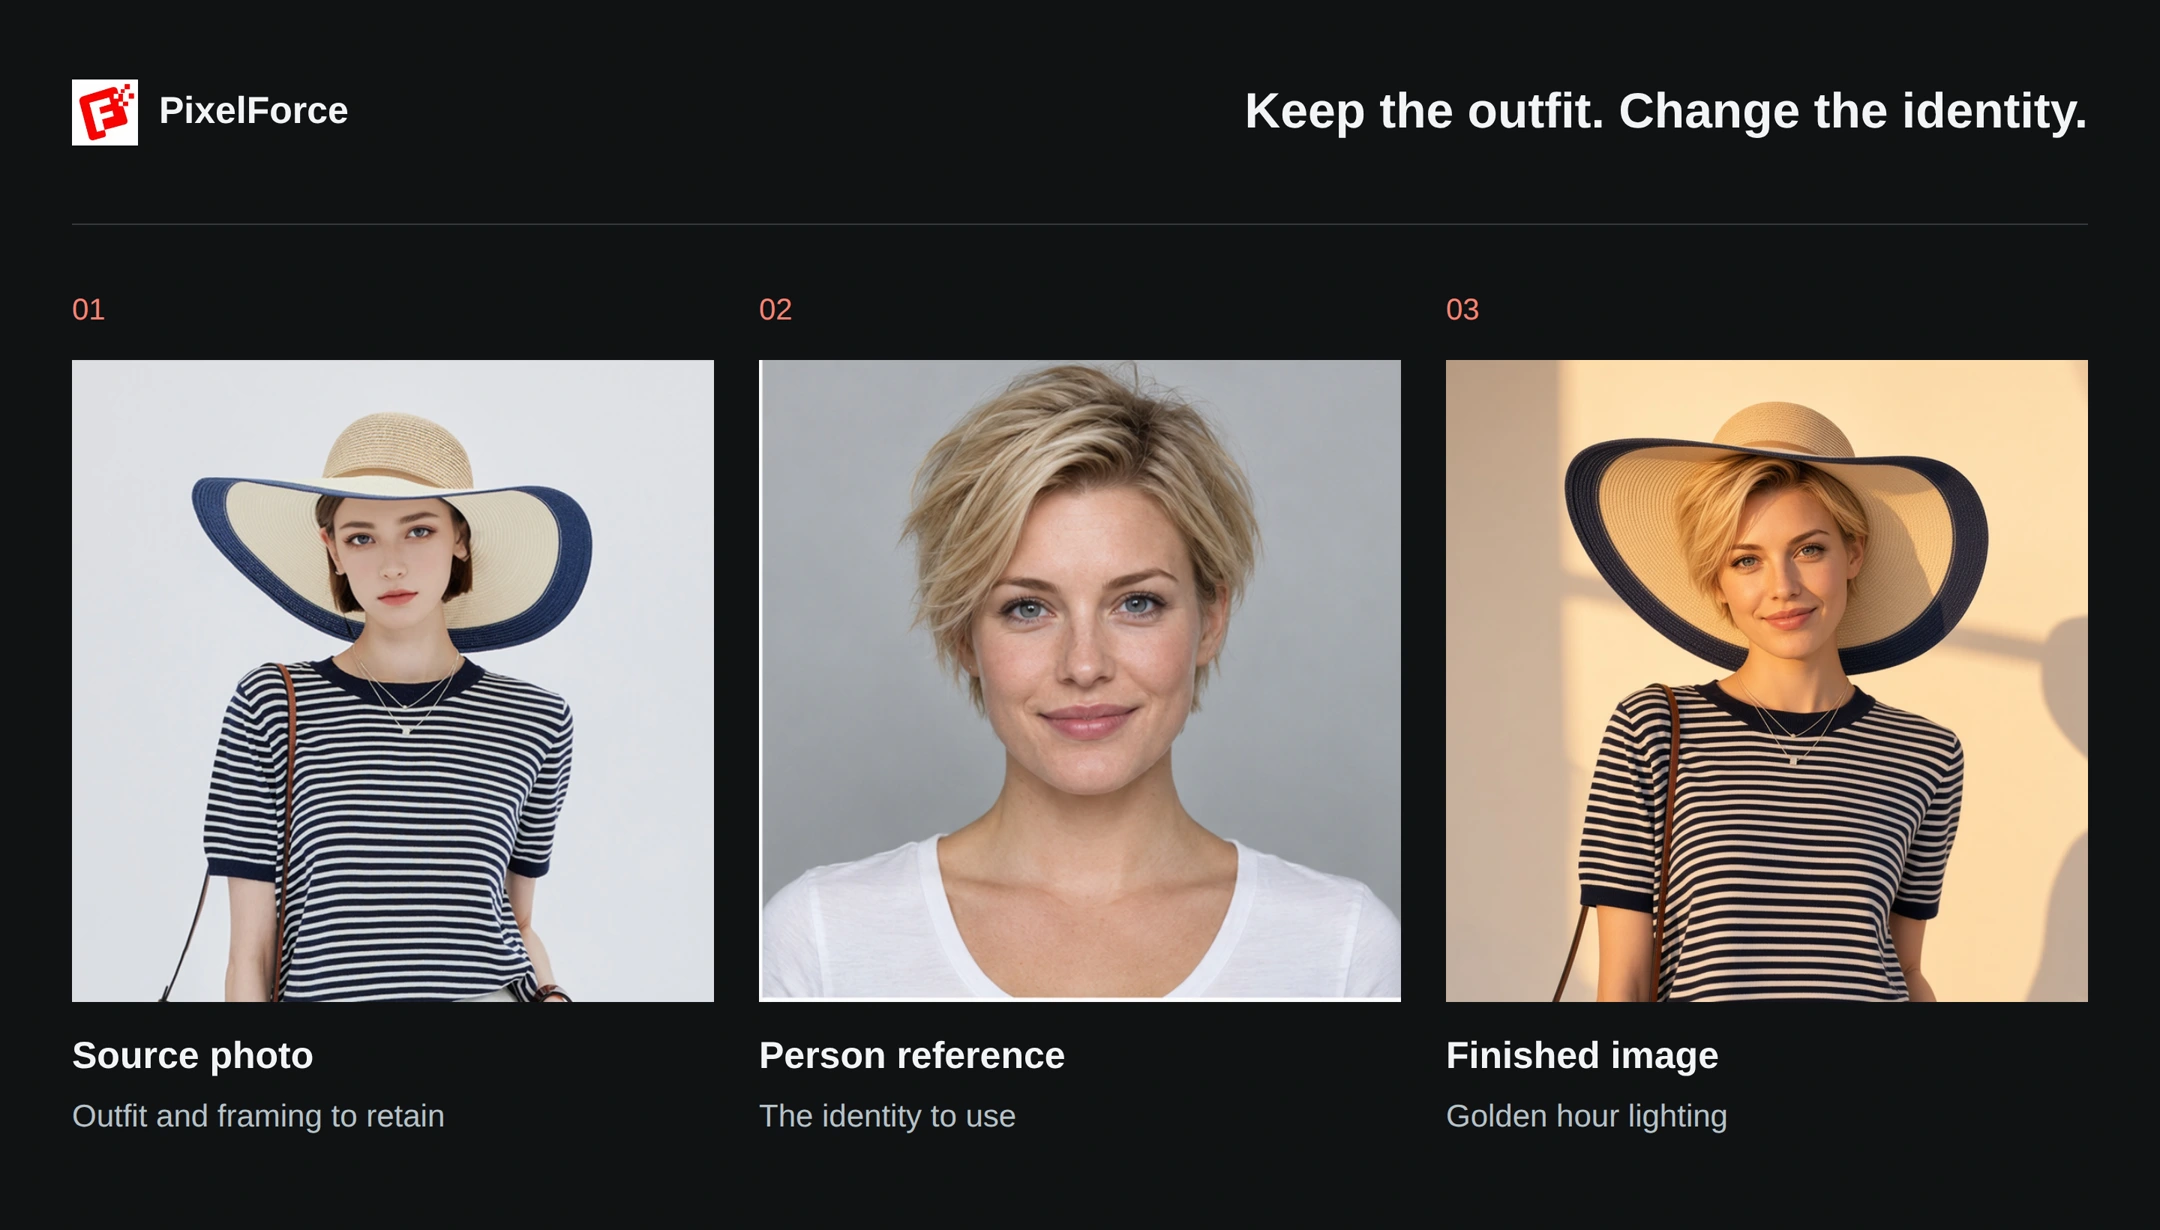
Keep the two input roles separate: the source defines what to keep; the person reference defines who to use. The reference portrait's clothes and background are not the outfit and setting to copy.
Step 1: Add the source photo
- Open Model Recast from Create.
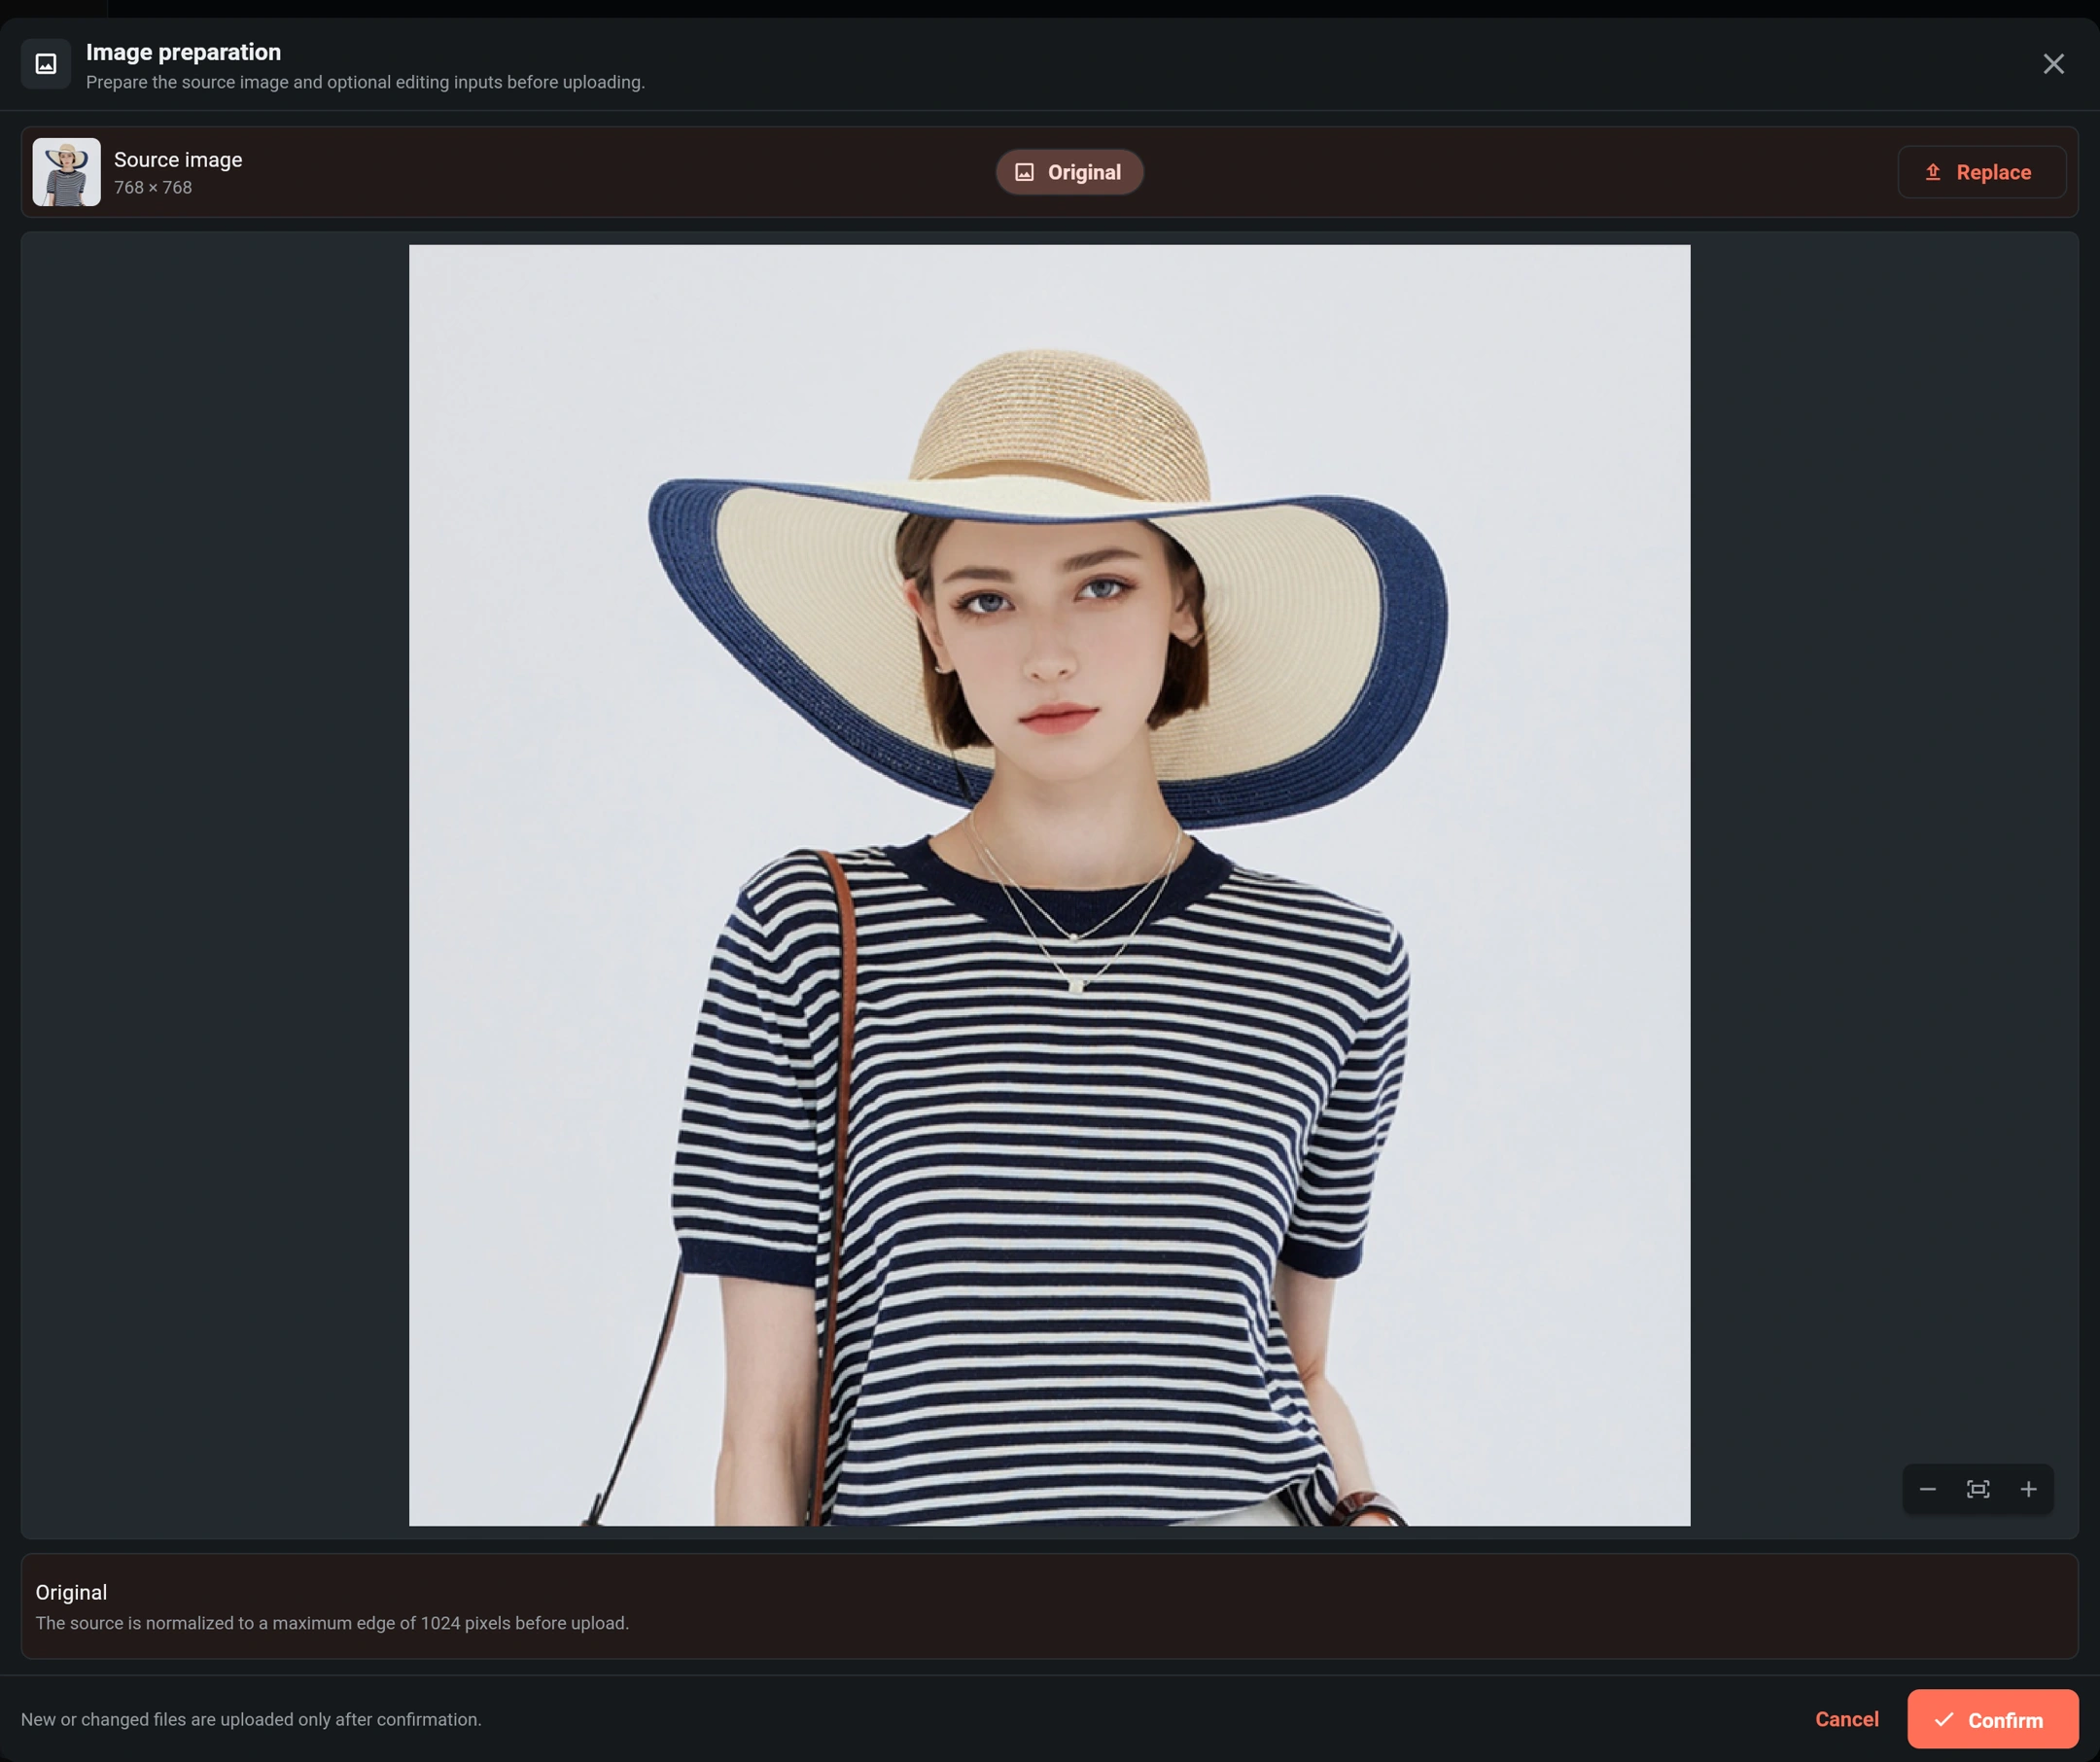
- Open Image preparation and choose the photo containing the person to replace. Web uses a file picker; Android and iOS offer Photo library, Take photo and Browse files.
- Check the preview. The face should be visible, along with the hat, neckline, sleeves, patterns and garment area you need to retain.
- Select Confirm. To change the source later, reopen image preparation and select Replace.
Start with a single-person photo. The current form does not offer individual face selection for group photos, and this scene does not require a painted mask. Do not crop the source down to a headshot if you want the clothing and body framing retained.
Step 2: Choose the person reference
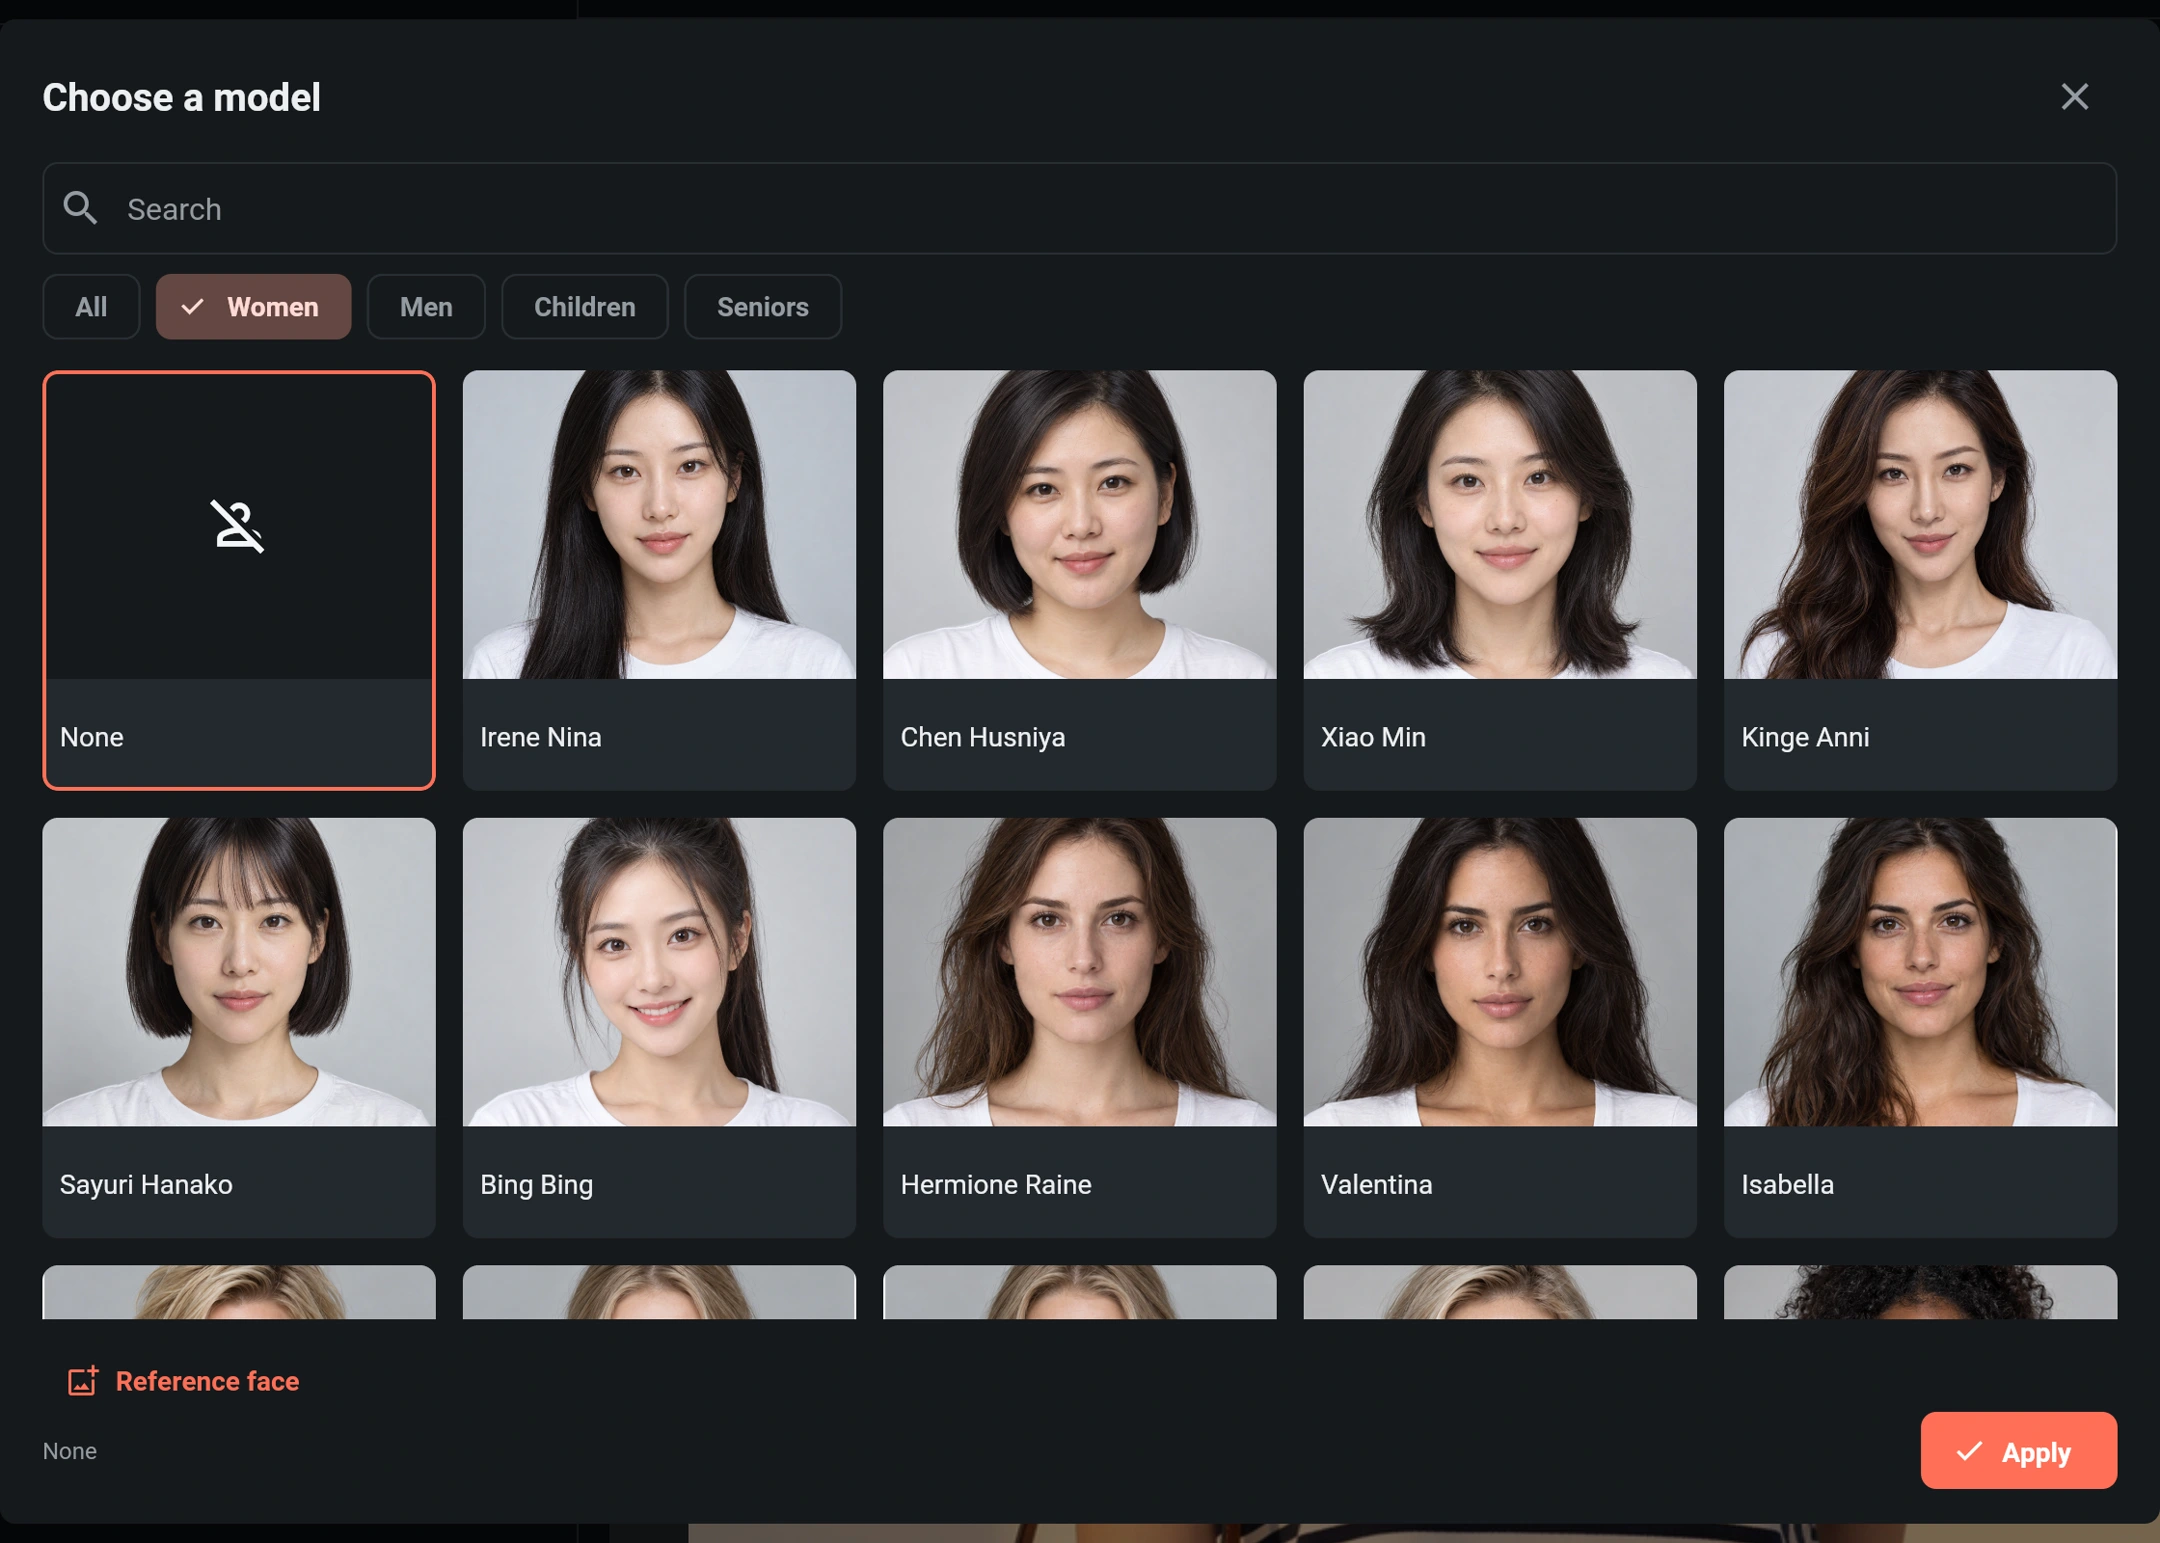
Open Person reference to choose a library model or upload the intended person's portrait. Use one method at a time.
Choose from the model library
- Browse All, Women, Men, Children or Seniors in Choose a model, or search by name.
- Select a model and check the selected item.
- Select Apply to return the choice to the form. Closing the picker does not apply a new library selection.
Upload your own portrait
- Select Reference face at the bottom of the same picker.
- Choose a clear portrait you are authorized to use.
- After upload, check the reference thumbnail and Reference uploaded status in the form.
This example uses an uploaded portrait, not a library model. Prefer one person, facing forward or slightly to the side, with unobstructed eyes and visible hair. Blur, heavy filters, occlusion and tiny faces inside group photos reduce useful identity information. Identity-reference uploads allow a longest edge of up to 2048 pixels; larger dimensions do not guarantee exact facial reproduction.
Use only photos and identities you have permission to process. Check the permitted uses before sharing or commercial publication, and do not present a generated image as a real person's experience or endorsement.
Step 3: Review lighting and output
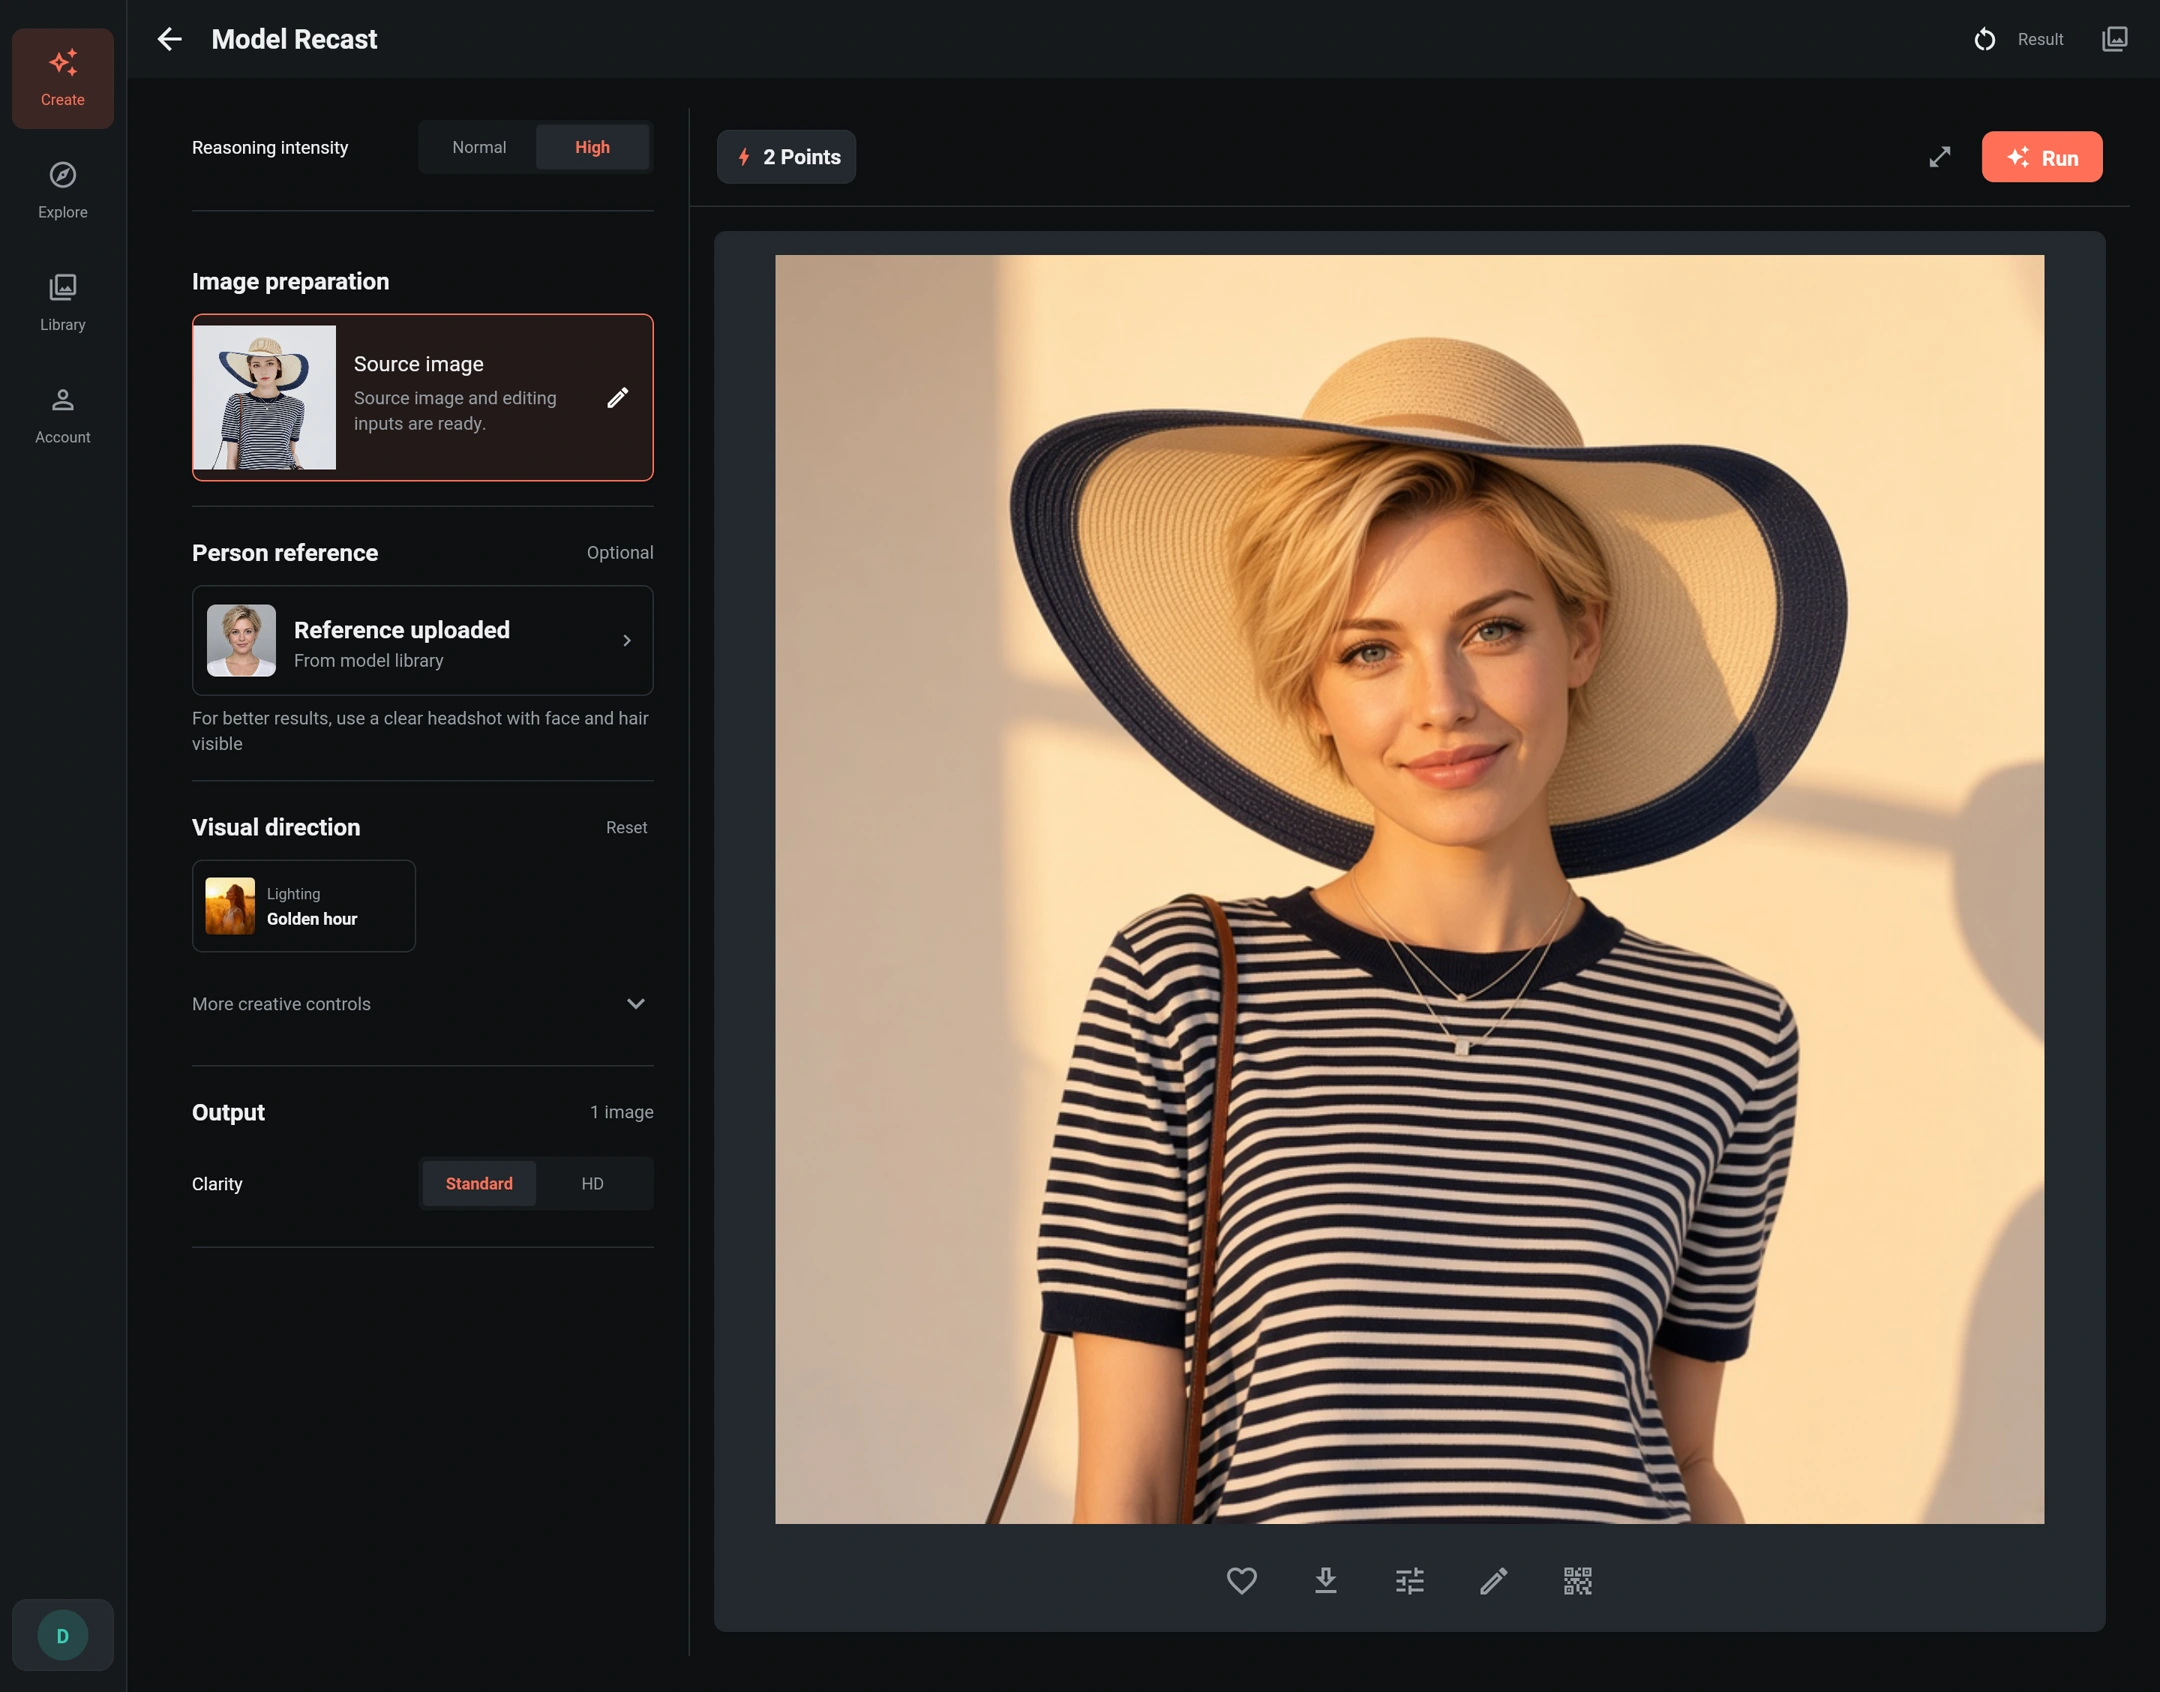
Start with a small number of settings, inspect one result, then adjust. The example uses:
| Setting | Example choice | What to consider |
|---|---|---|
| Person reference | Uploaded portrait | Do not use the source photo as the identity reference by mistake |
| Reasoning intensity | High | Higher reasoning intensity uses more AI resources to produce finer detail and better results; check the current points quote |
| Photography style | Unselected | Start without an additional photographic treatment |
| Lighting | Golden hour | Adds warm lighting; leave unselected to stay closer to the original |
| Clarity | Standard | Check identity and clothing first; choose HD when you need a larger output |
With an uploaded portrait, you do not need a long prompt describing the person's appearance. The visible visual controls are photography style and lighting. They guide photographic treatment, not a new pose, outfit or background arrangement. HD increases output resolution; it does not turn a half-body source into a full-body photograph.
Step 4: Generate and inspect
- Check the source, person reference and settings, then review the points quote beside Run. Use the quote shown at submission; different settings may affect the cost.
- Select Run once and wait for that task. If submission is unconfirmed, check the existing task instead of submitting repeatedly.
- Open the result preview and compare it with the source and reference.
| Check | Look for |
|---|---|
| Identity | Facial shape and features that fit the reference; hair color alone is not enough |
| Face transitions | Natural joins at the hairline, ears, hat brim, chin and neck |
| Clothing | Color, stripes or patterns, text and logos, neckline, sleeves, material and accessory placement |
| Composition | Subject position, body proportions and the original visible framing |
| Lighting | Warm tones and shadows consistent with the selected lighting, rather than an unintended garment-color change |
Check every image individually. A successful identity change does not remove the need to inspect garment details. Save the image once you are satisfied. For a specific correction, use Edit image from the result to continue in AI Retouch; a new AI edit has its own quote.
Common questions
Why is the result warmer?
This example selects Golden hour. Leave lighting and photography style unselected when you want a closer match to the source. Change one setting at a time to understand its effect.
What if the identity is not close enough?
Check that the intended portrait was uploaded, then try a clearer reference with less occlusion and a face angle closer to the source. More appearance text is not a substitute for a useful reference, and HD is not an identity-consistency guarantee.
What if I also want a different pose or background?
Use Garment-preserving redraw for a new pose or composition while retaining the outfit. Use Background redraw when the setting is the main change. Model Recast starts from the structure of the source photograph.
Can someone else reuse these settings?
Use the result's sharing action to create a QR code. The recipient can import the inputs and settings and generate their own task; see Sharing and importing. Model Recast needs its retained source and reference inputs, so QR restoration is unavailable once the originating task is older than 30 days. Save important images promptly.