White-background product photo
Put the subject first. White-background product photo removes a distracting background and places your product or person on solid white, ready for a product listing, catalog or further design work.
You receive two useful outputs from one task: the finished white-background PNG and a high-quality subject mask for your own editing workflow. The mask is more than a rough silhouette: it captures fine edge transitions, including delicate hair strands.
One source, two useful outputs
This example starts with a portrait against an outdoor city background. PixelForce separates the person from the surroundings and produces a white-background image, together with the matching grayscale subject mask. Product photos and clothing shots use the same workflow.
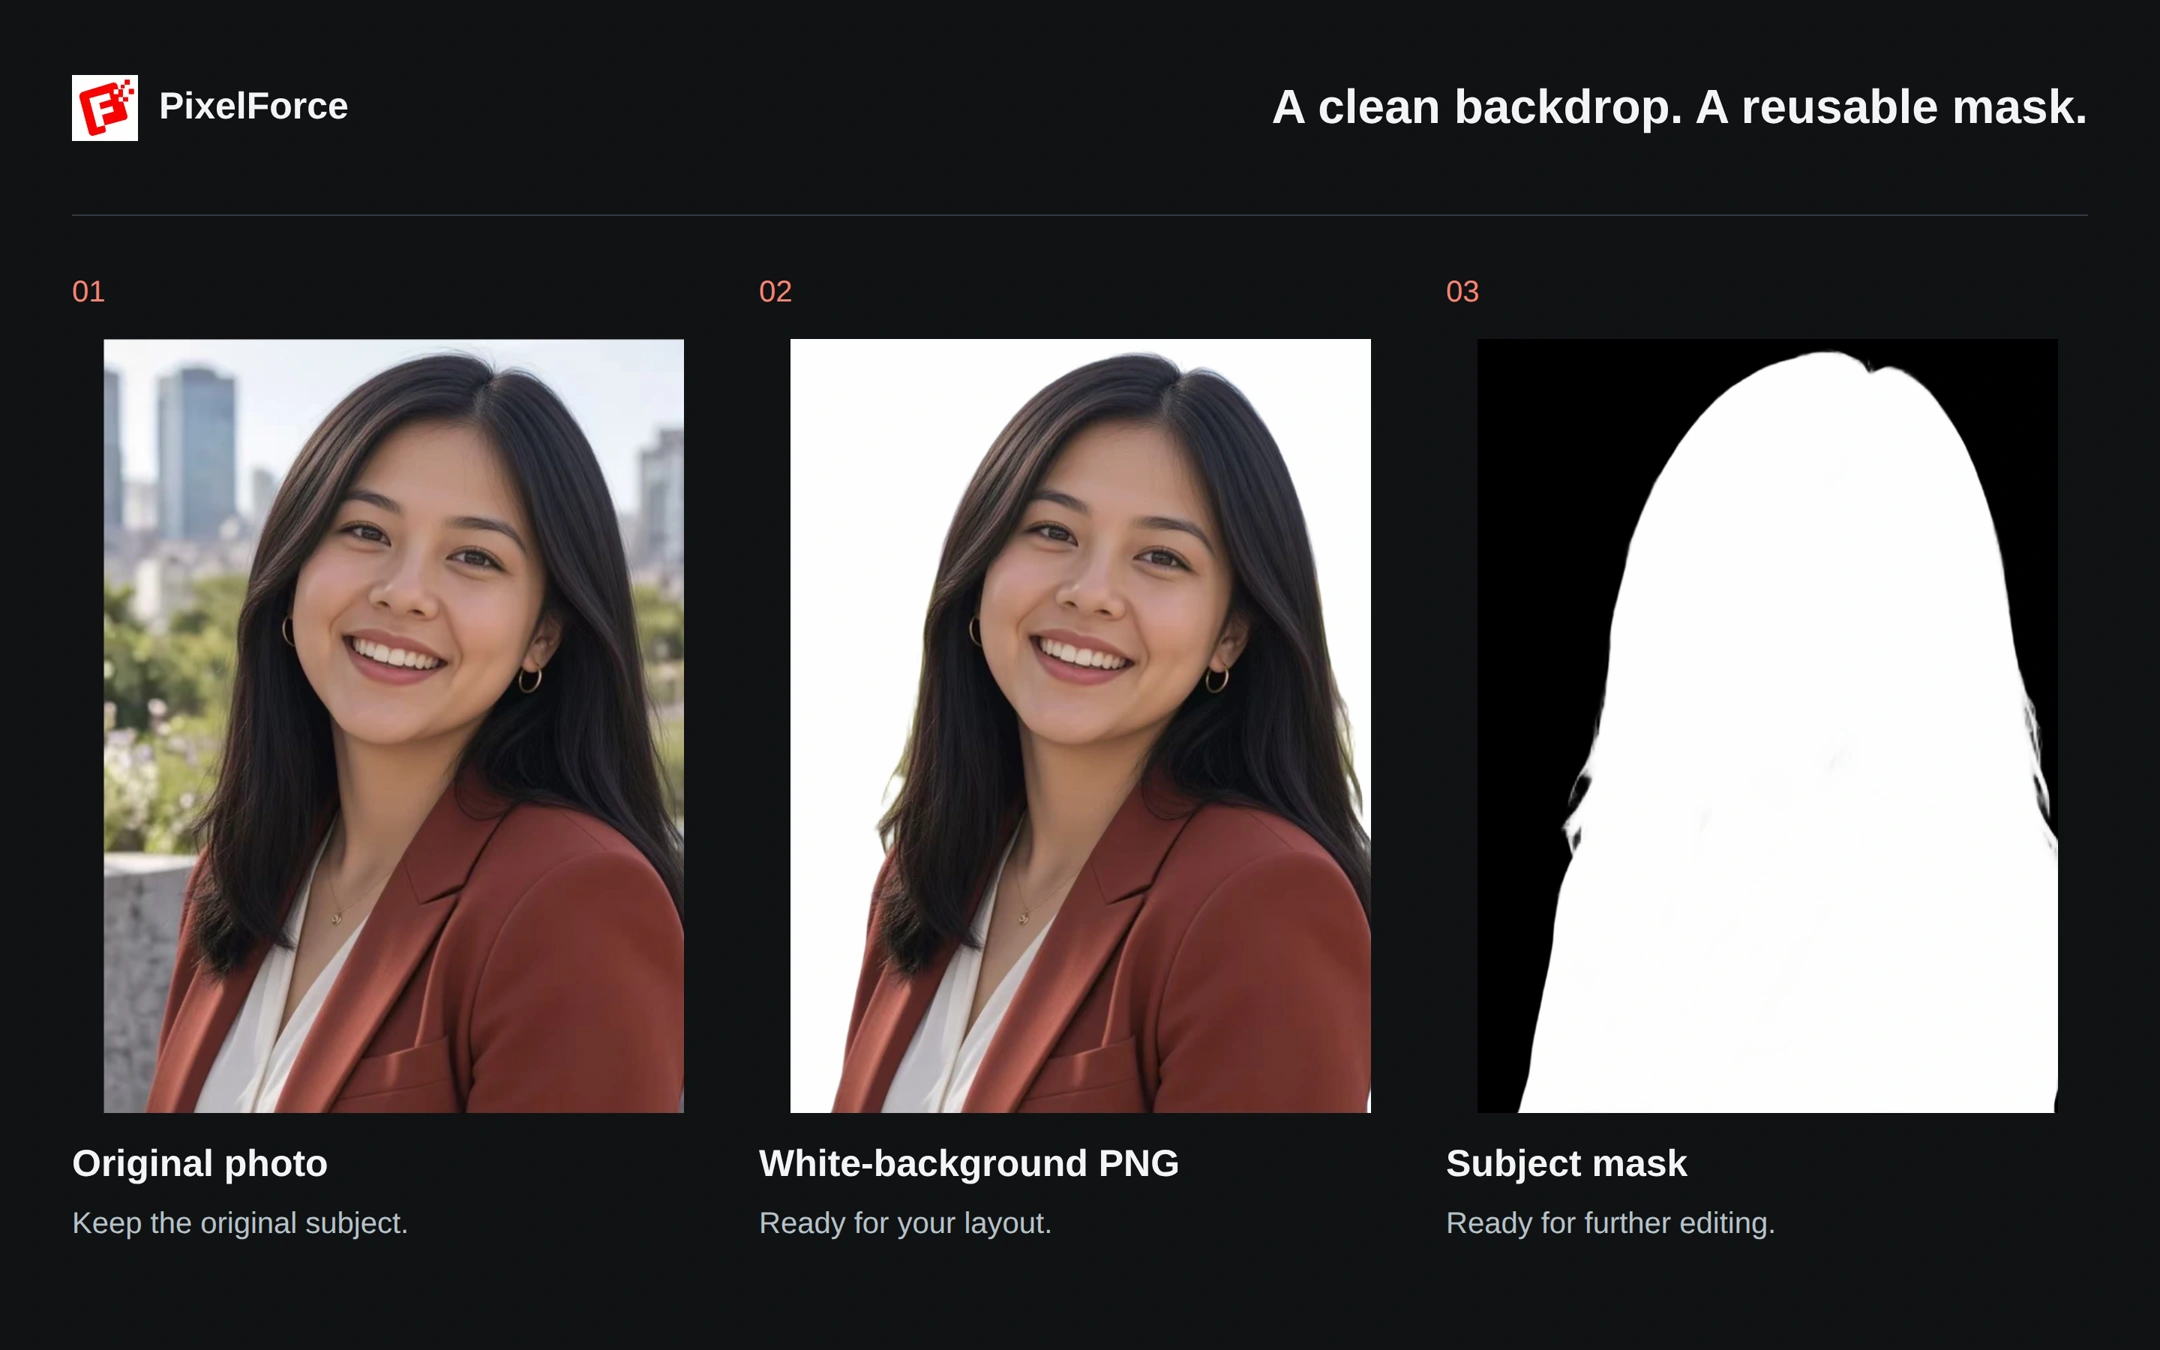
Use the white-background image in a listing or layout. The separate PNG mask tells an image editor which parts belong to the subject. It is an auxiliary output of the same task, not a second charged photograph or a second Library work.
1. Prepare the original image
Open White-background packshot from Create or Explore. This opens Background Cutout with the white-background preset already selected.
Add a clear original photo. Keep the whole subject within the frame, leave space around the edges, and avoid cutting off straps, sleeves, handles or loose hair. In the image-preparation window, check the original photo and confirm it when ready.

For products, start with a photo that already shows the correct color, shape and construction details. This tool separates the subject; it does not invent a new product, replace clothing or change the camera angle.
2. Keep the background white
Leave Transparent background off and set Background color to white, #FFFFFF. You do not need a prompt.

Check the points shown in the workspace, then choose Generate. This scene does not expose a High/Normal reasoning selector or a Standard/HD selector; there is no need to look for those controls.
When the task finishes, inspect the full outline before saving the primary PNG. On a phone, switch to Result to view the completed image.
3. Use the high-quality subject mask
Choose Subject mask in the completed result's action bar to open the separate mask preview. Its own save action exports the mask, while the main image's save action exports the white-background photograph.
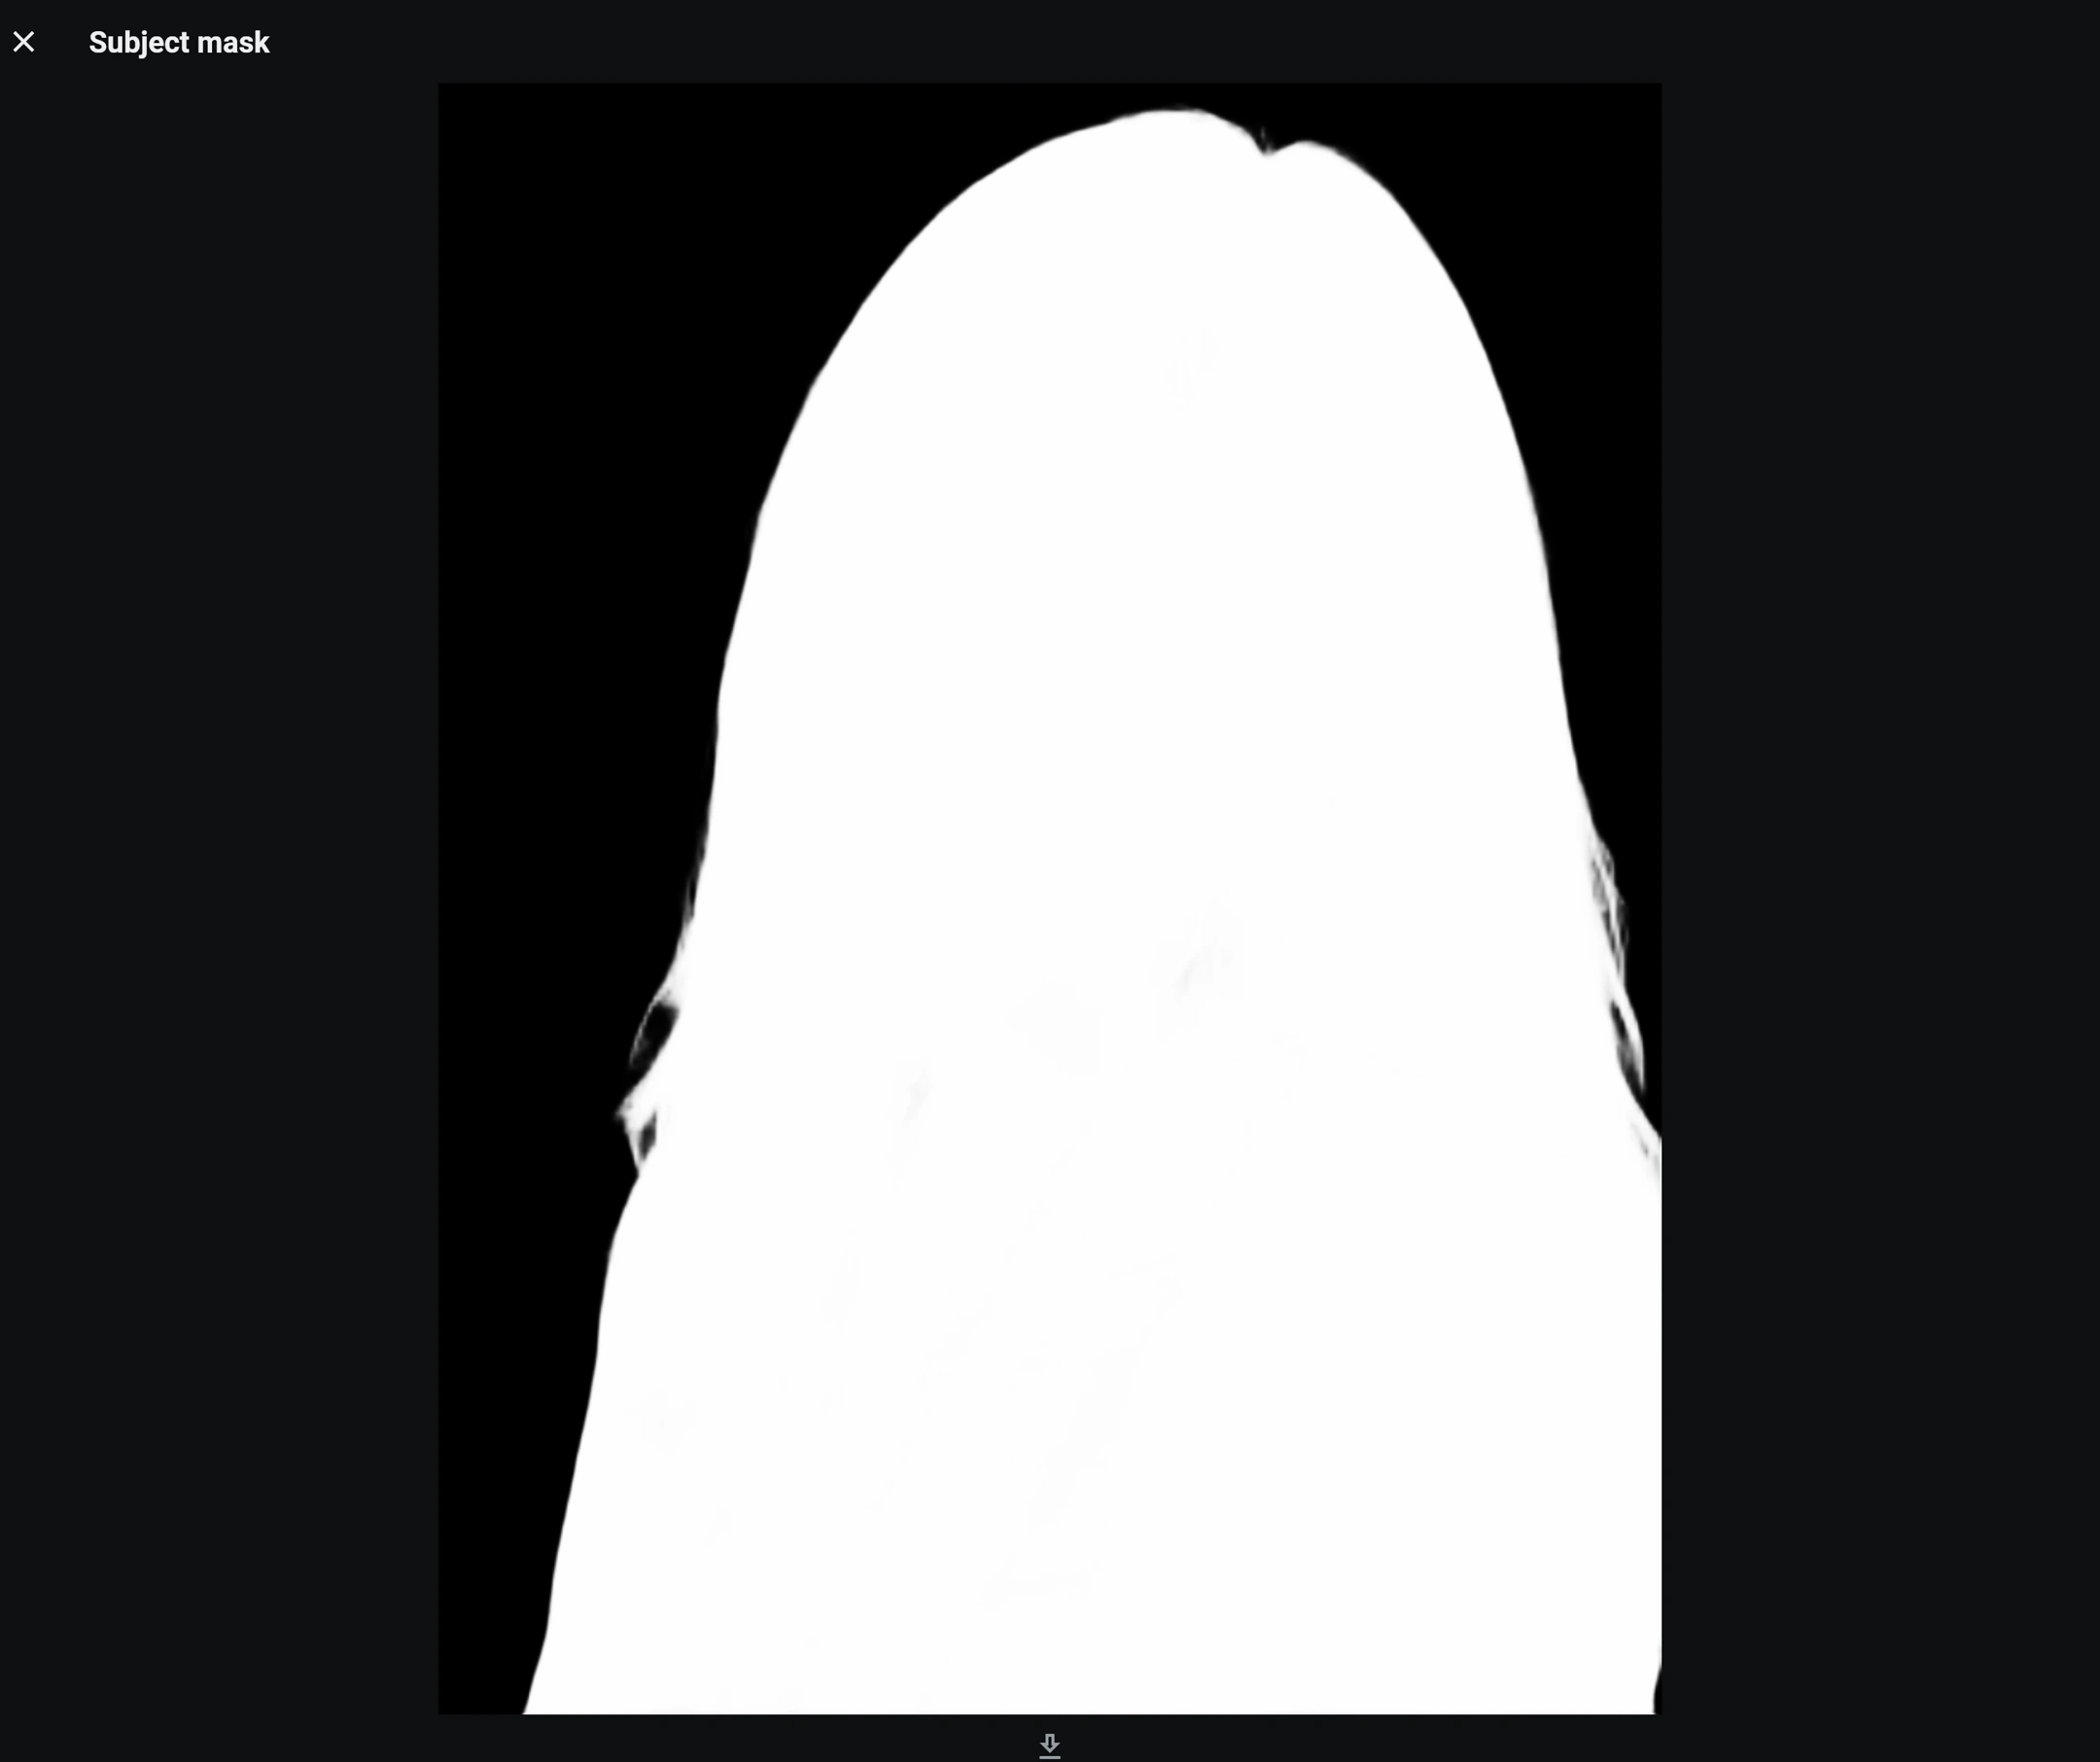
The mask follows the original image's dimensions and alignment. In this grayscale mask:
- White keeps the subject.
- Black removes the background.
- Gray edge pixels preserve partial transparency and soft transitions, useful around fine hair.
Use the original photo and its mask together in an editor that supports layer masks, for example to place the subject on a branded background, refine a layout, or continue compositing without tracing the outline again. Keep their size and position aligned; do not crop or resize only one of them.
Fine hair, not just a hard outline
High-quality masking helps cleanly separate fine hair from the background rather than cutting a hard shape around the head. This enlarged view shows the same area of the original, the white-background output and the actual mask.
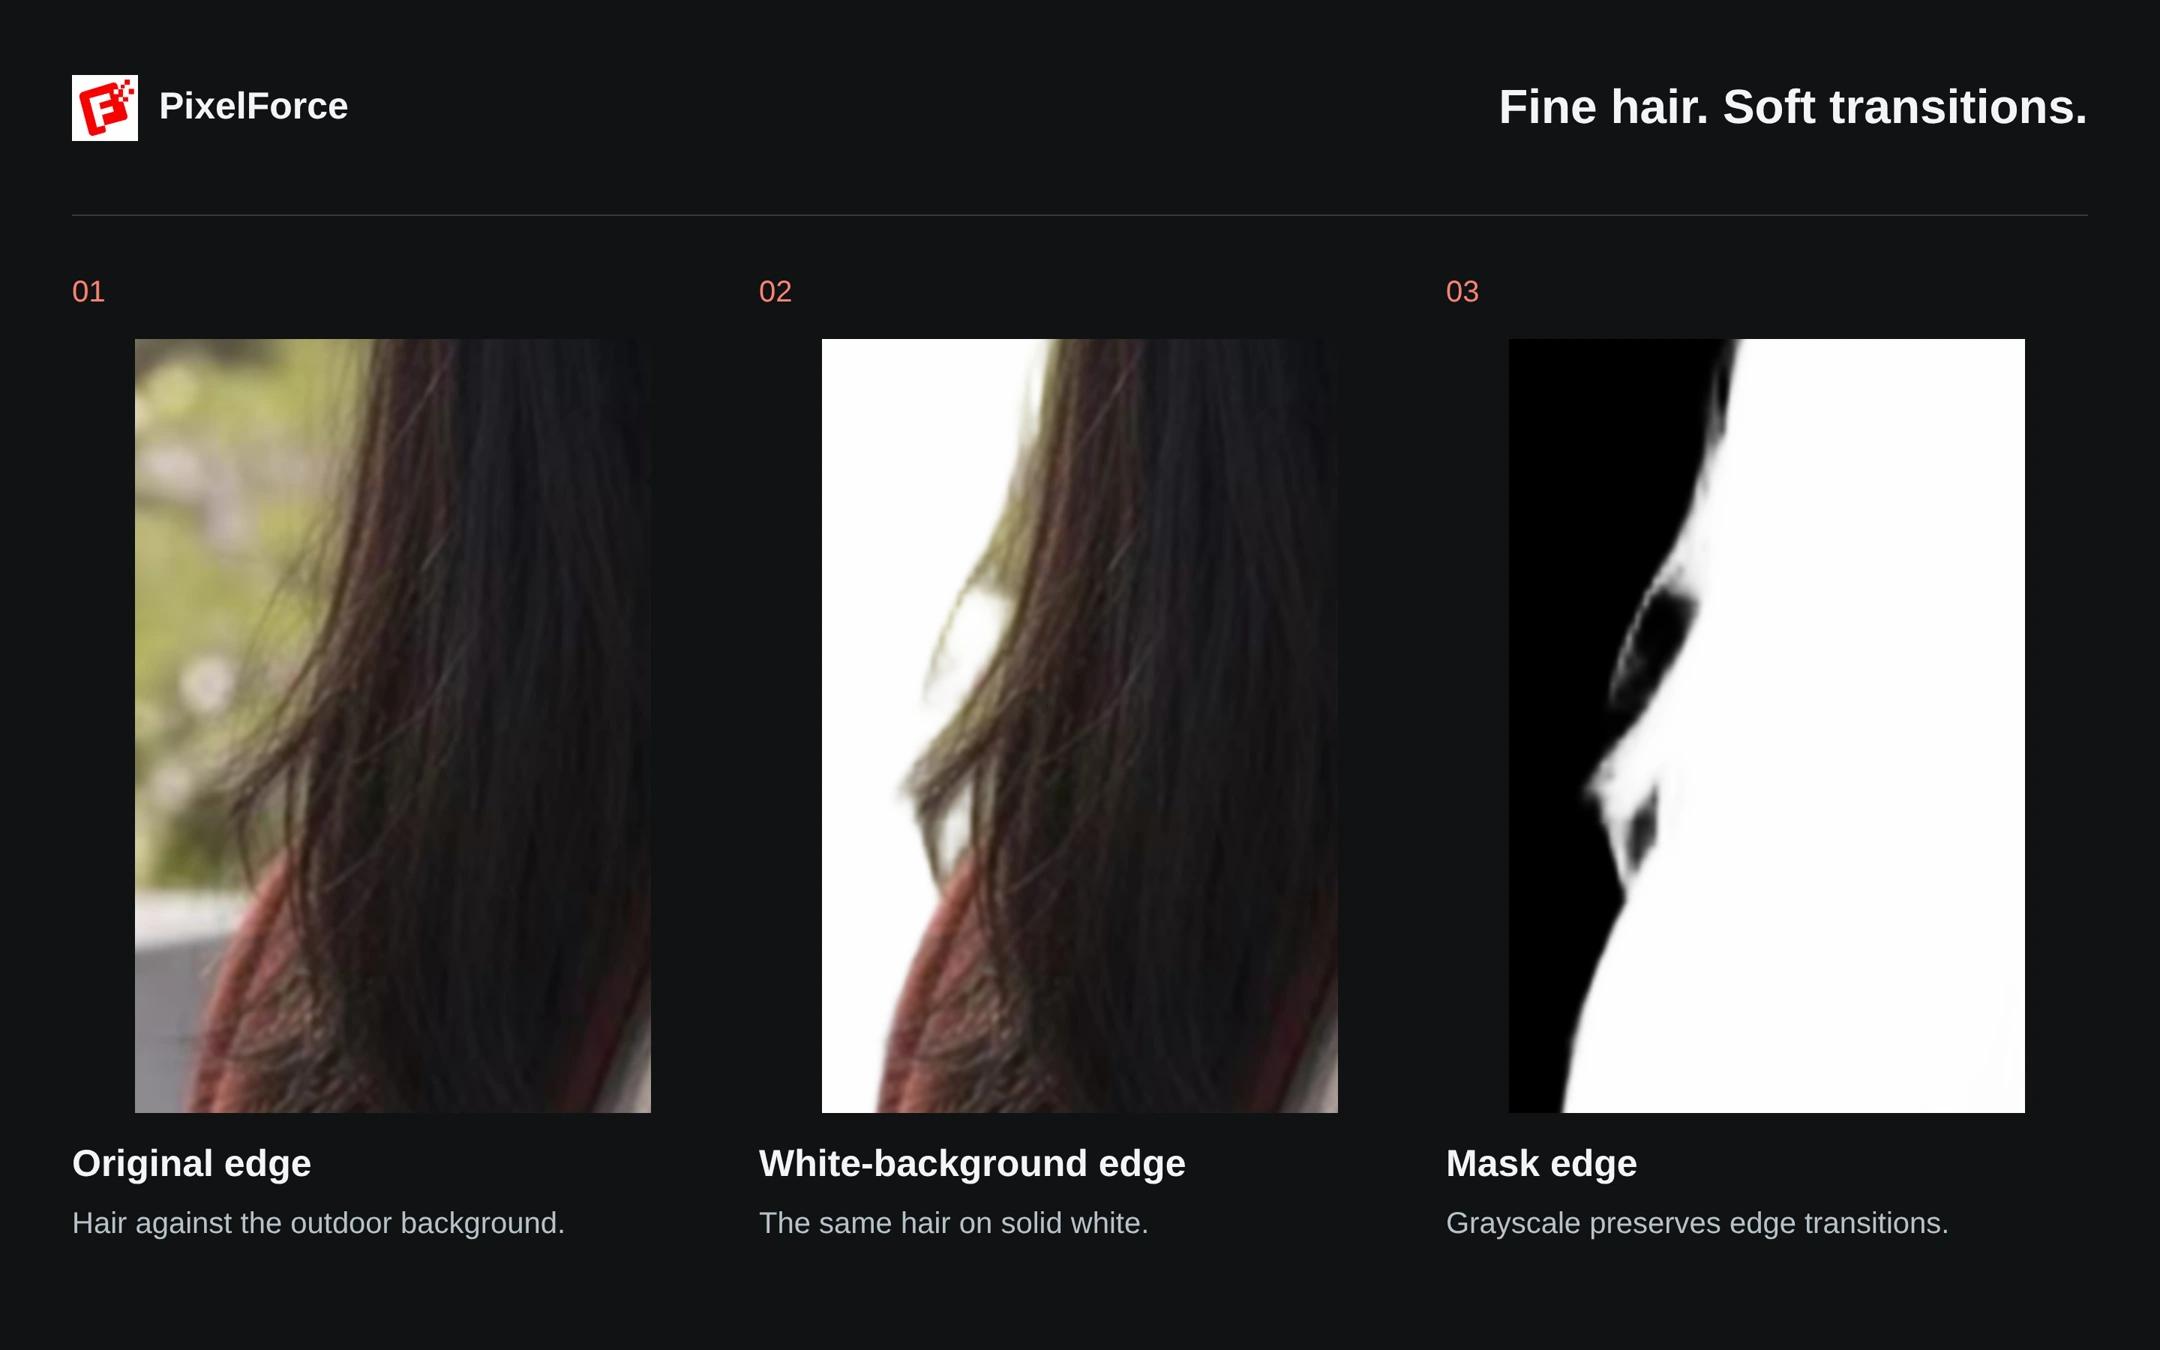
The mask retains gradual edge values around the hair, while the white-background result removes the outdoor background. Still inspect the image at full size: motion blur, low contrast, glass and semitransparent material can make an edge more difficult to separate.
Reuse a work or change the background
In Library, open the work's menu and choose Reuse settings. Reuse restores the original source photo, its preparation dimensions, the transparency setting and the saved background color. It does not use the finished white-background image as the new source or start another task automatically.
A fresh entry through White-background packshot starts with white selected and waits for a new image. A reused work keeps its own saved color and mode, so check them before generating again. You can also choose another solid color or enable transparency in the same form; see Background Cutout.
Before publishing a product photo, check color, pattern, text, shape and fine construction details, especially thin straps, ties and openings. The white backdrop should make the original product easier to see, not change it. For new surroundings and integrated lighting instead of a flat backdrop, use Background redraw.