AI Upscale
Give an image you already have a clearer, larger presentation. AI Upscale enhances one photo with native 2K output, helping make fine edges and textures easier to see.
This example starts with a soft 1024 × 1024 px portrait and produces a 2048 × 2048 px result. The enhancement notes were left blank. The eyes, loose hair and blue knit top give you several places to judge the difference.
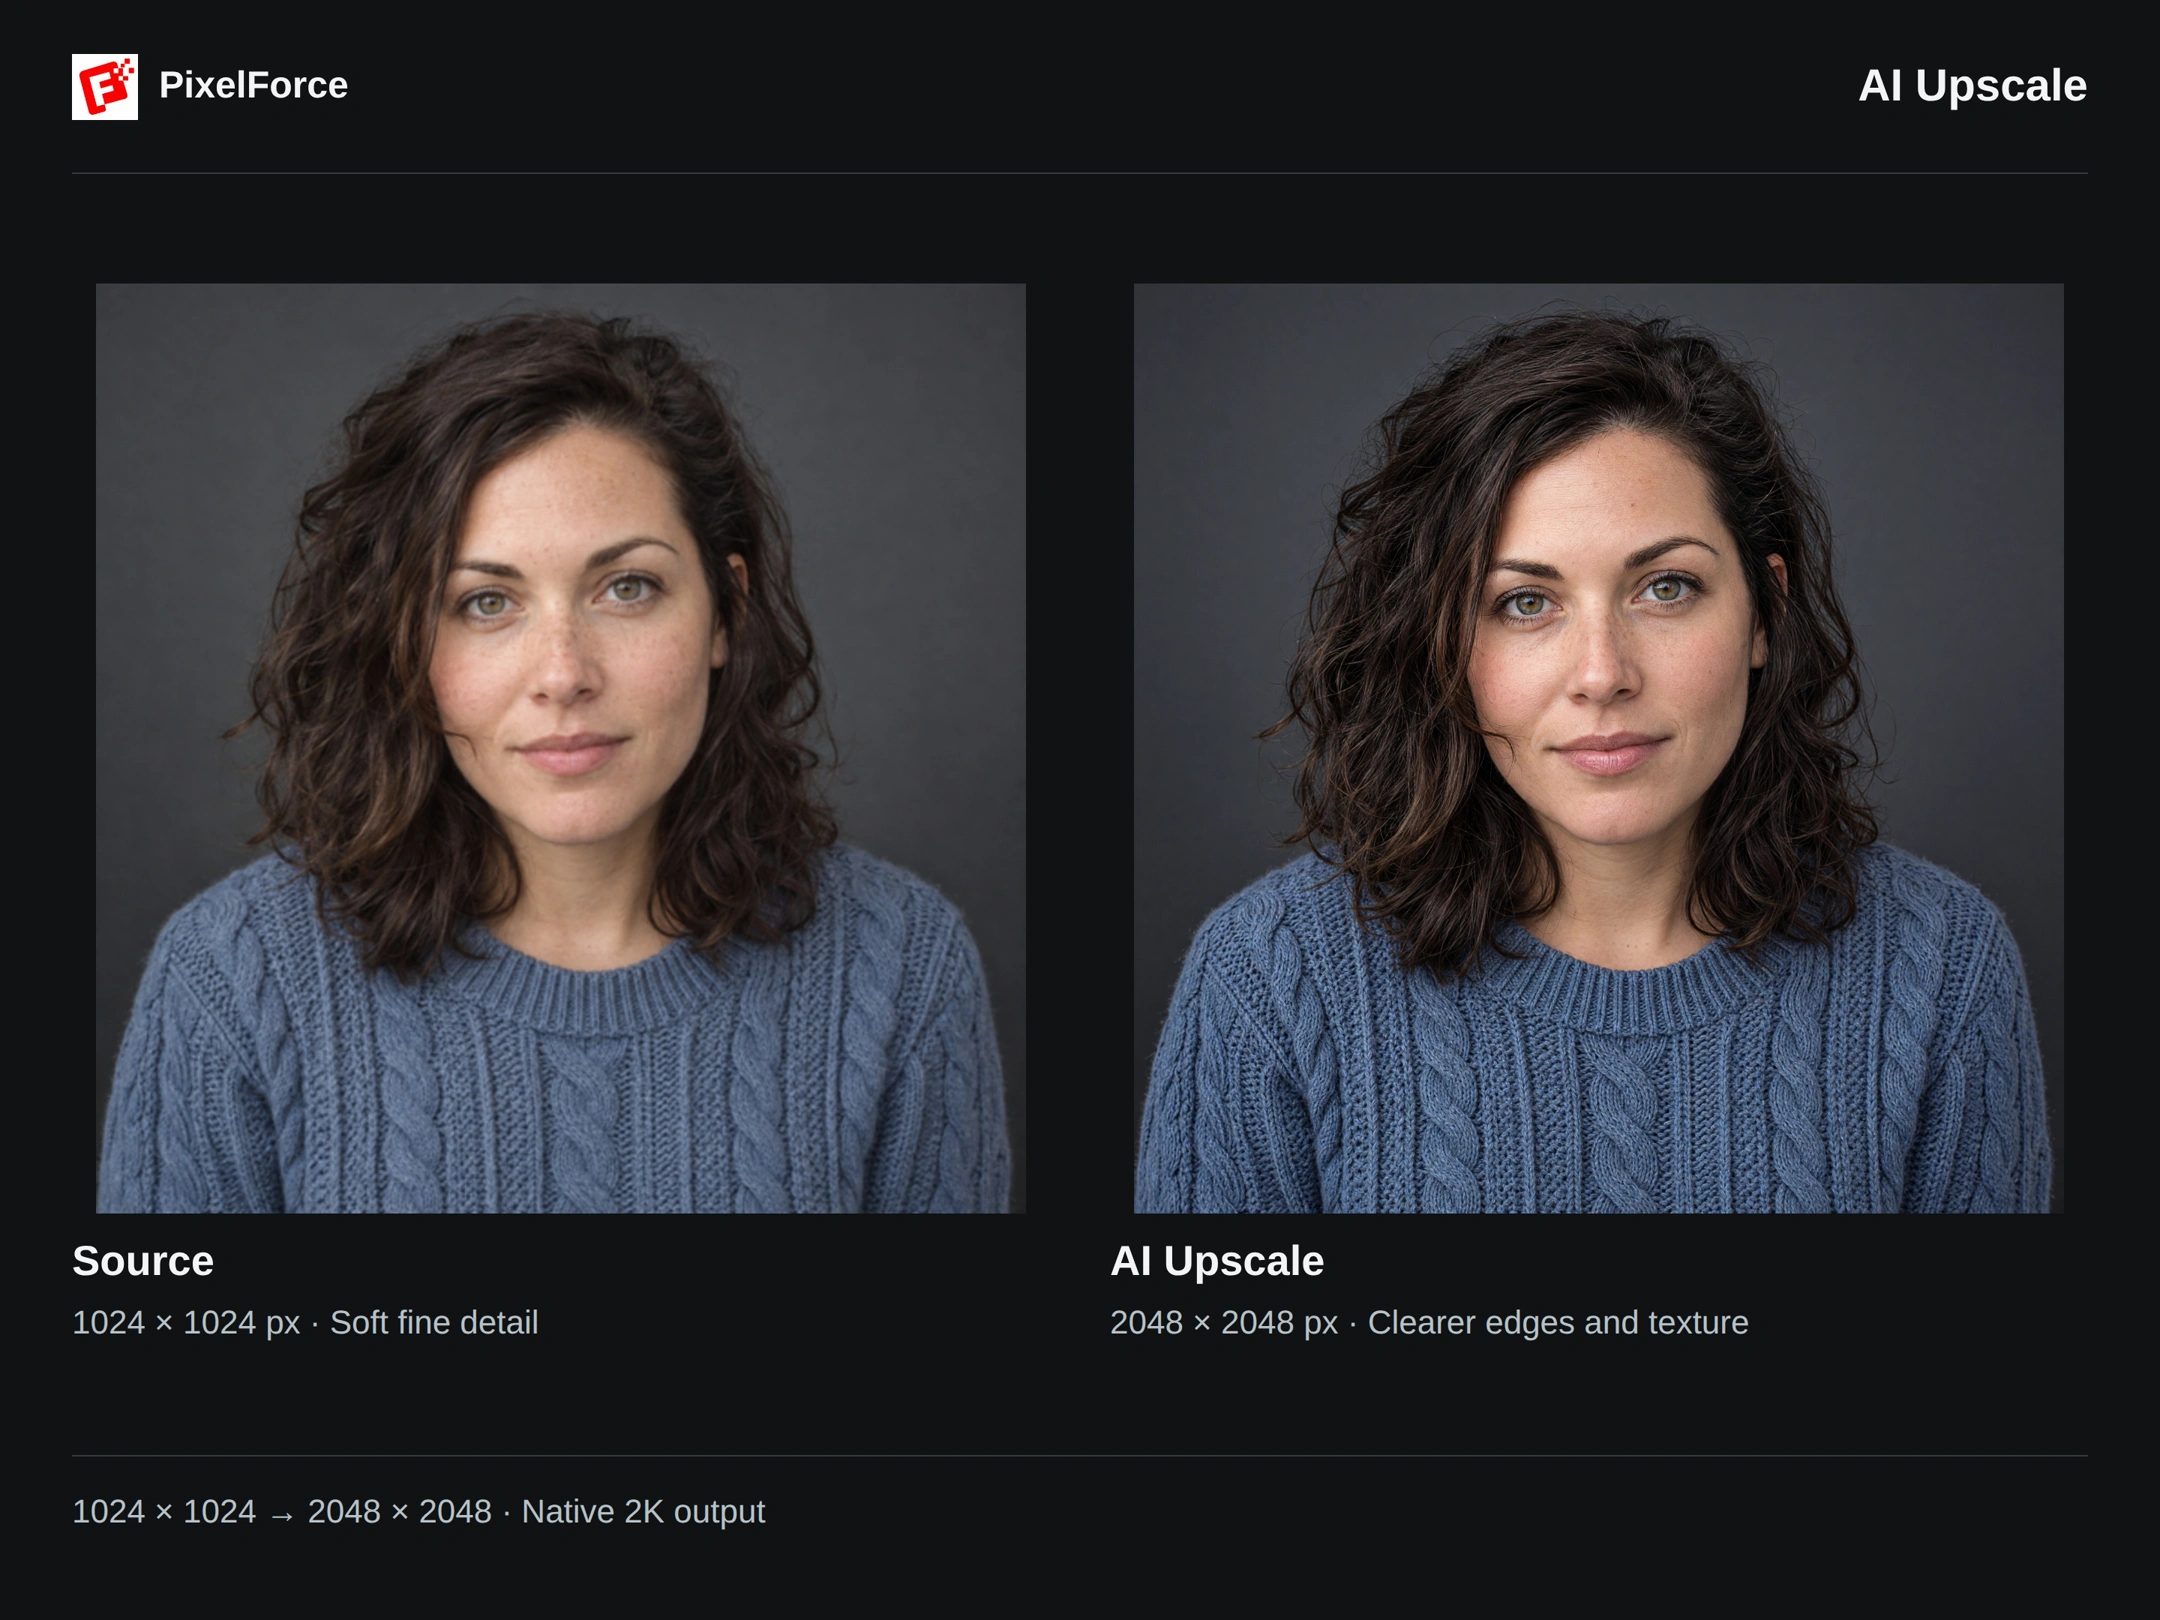
Look beyond the image size
A larger file is only part of the result. Zoom in to see what has become easier to read, then check whether the details still belong to the original photo.
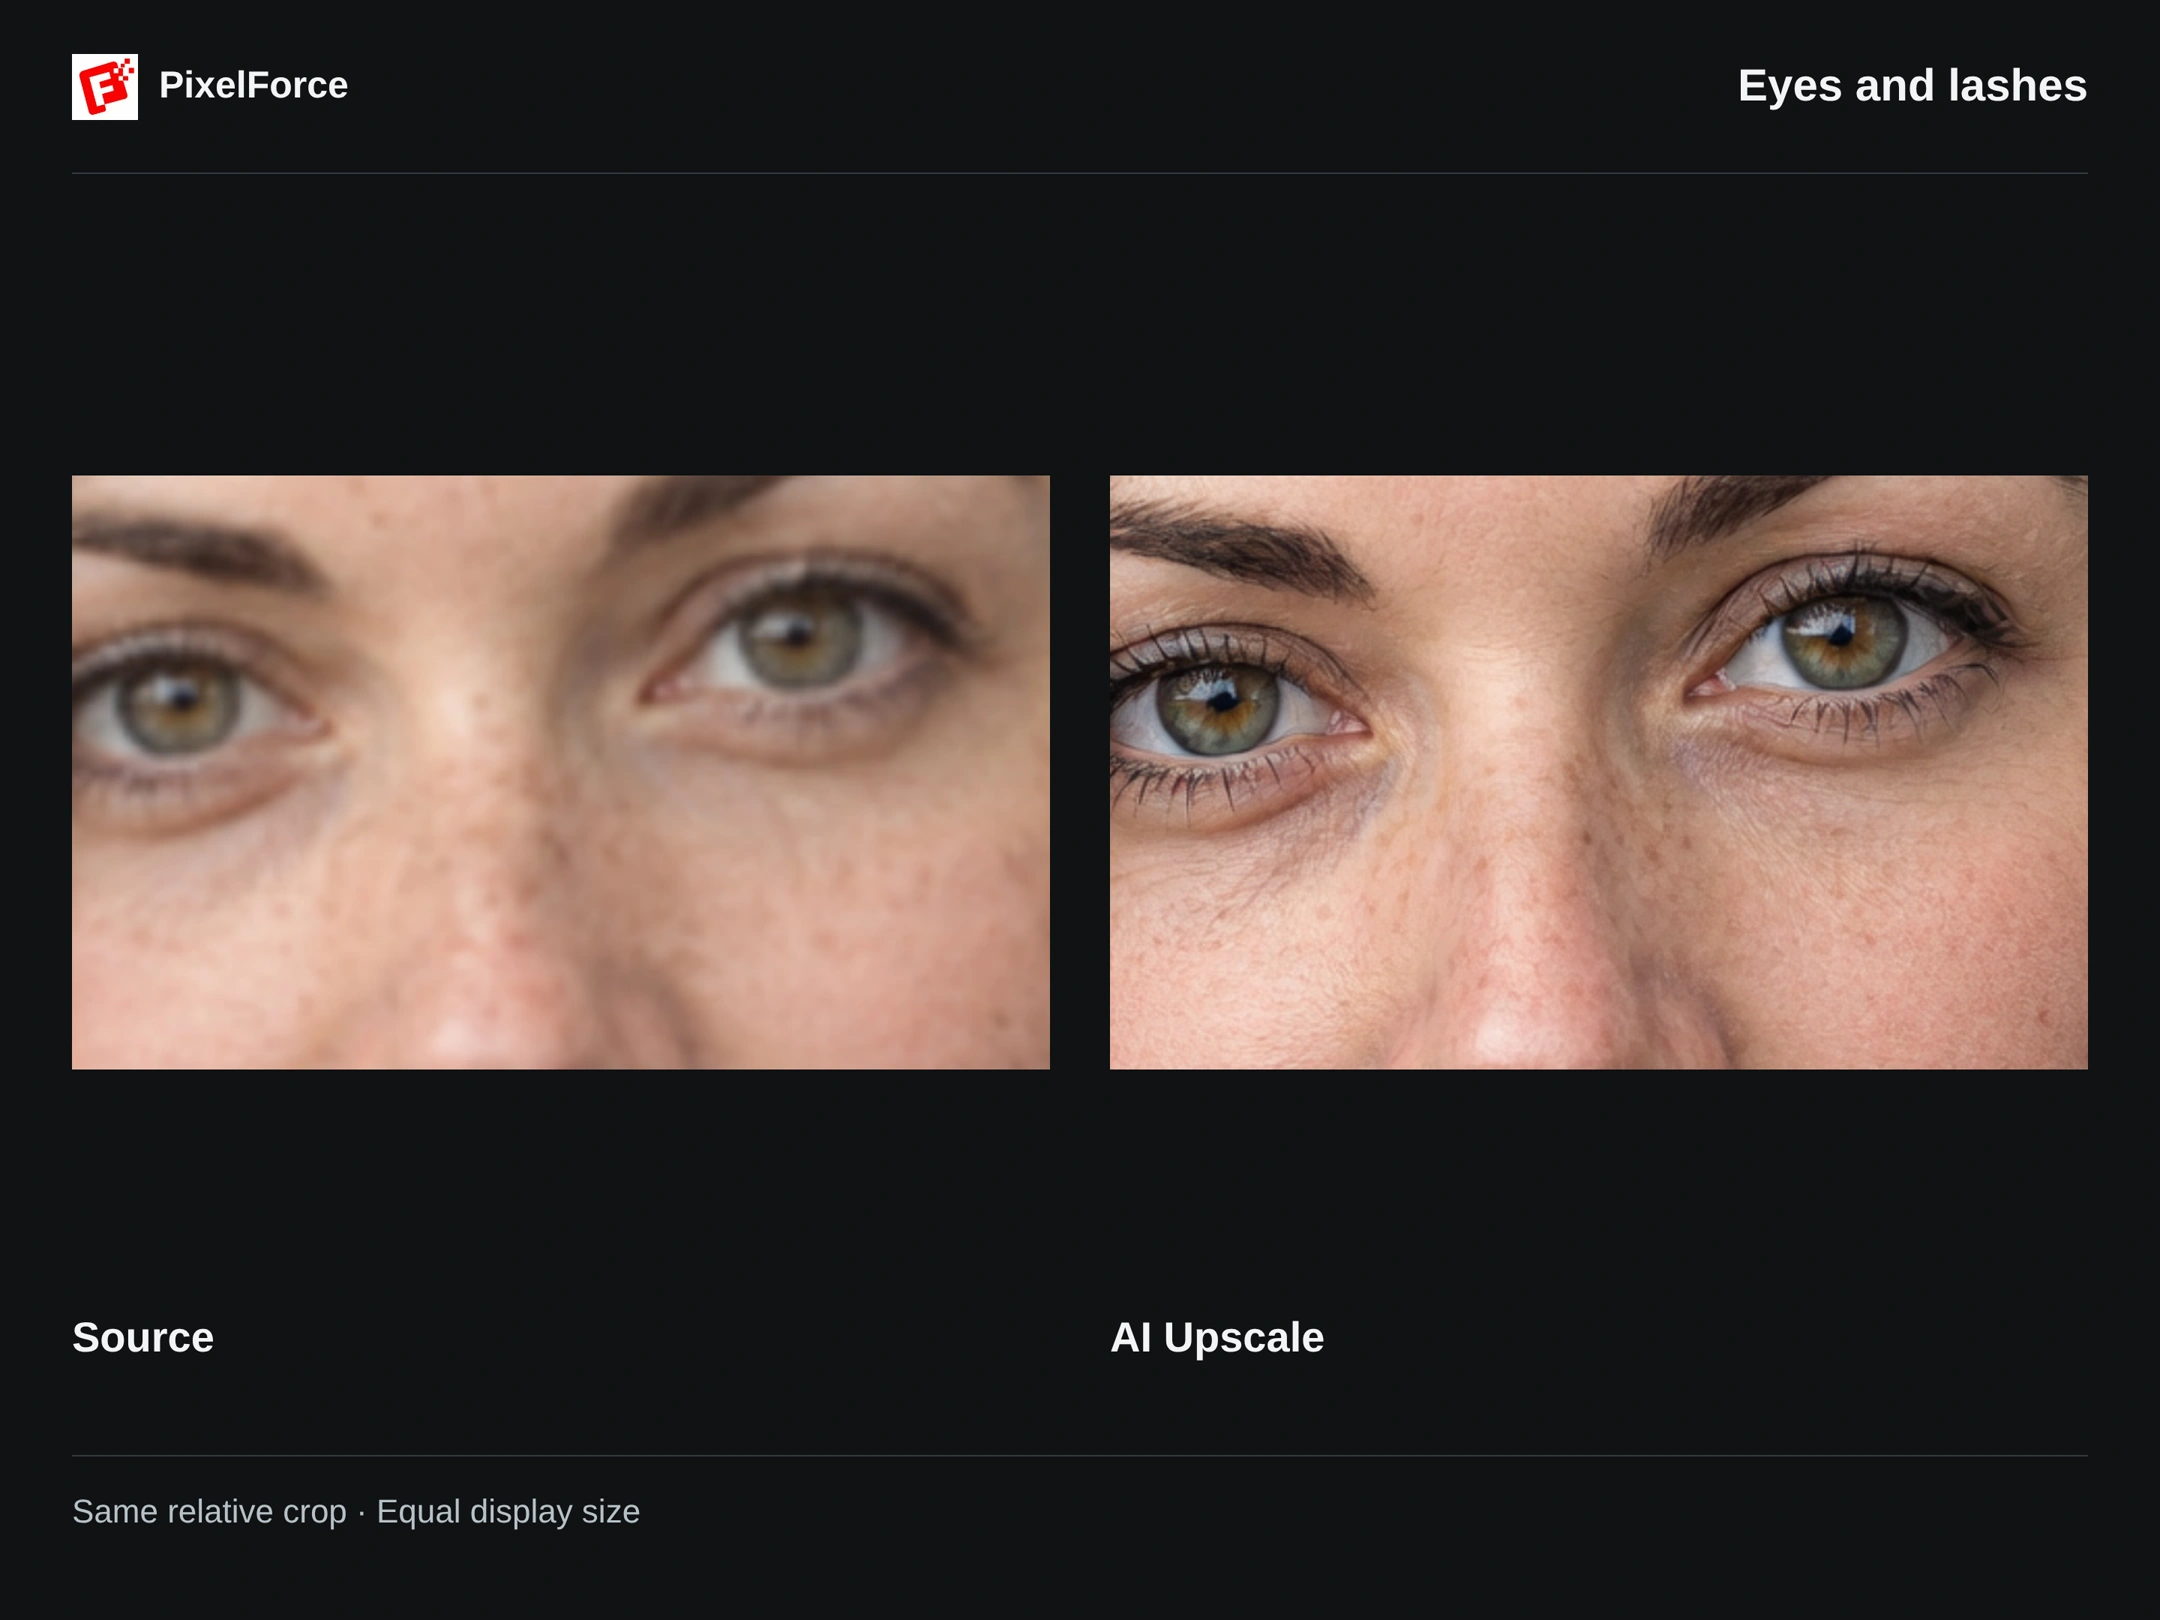
Eyes and lashes
The eye edges and lashes look more defined in the result, and the iris detail is easier to see. Compare the eye shape, gaze and color as well as sharpness. Added lashes or a changed expression are not the same thing as a faithful improvement.
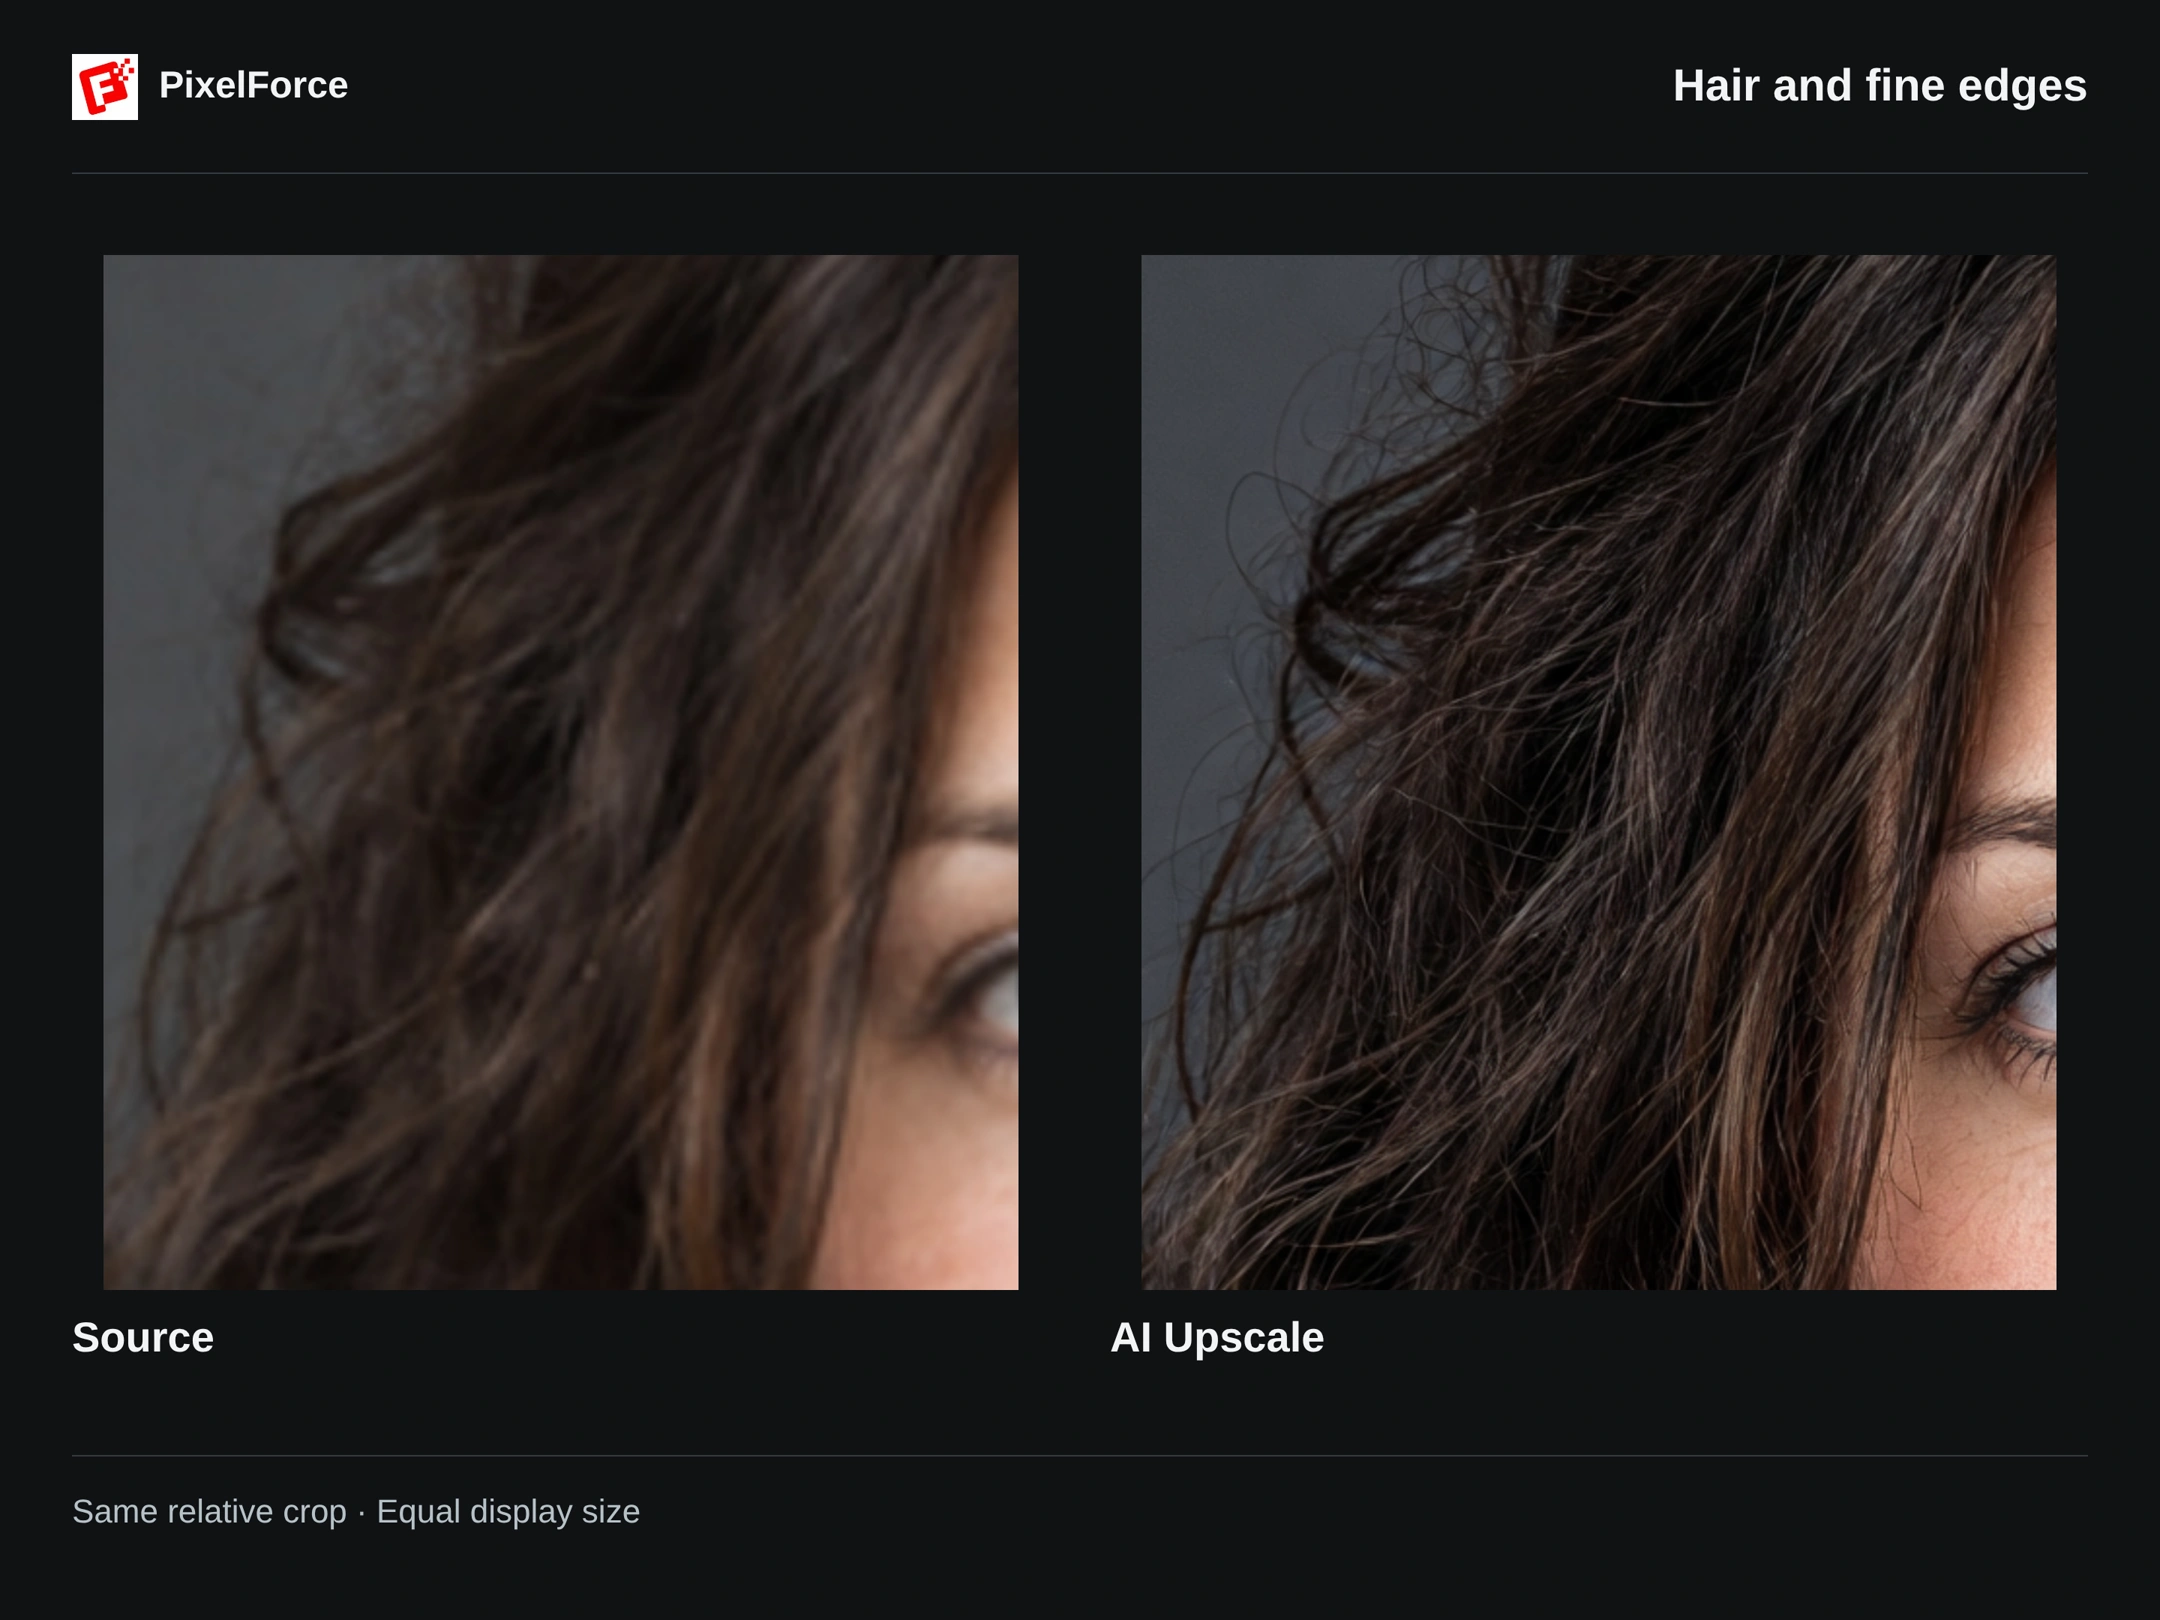
Hair and fine edges
Separate strands are easier to distinguish, including the loose hairs around the curls. Look for a natural transition between the hair and background, without bright halos or harsh outlines.
Knit and fabric texture
The small stitches and yarn texture are more legible in the enlarged result. Check the cable pattern, neckline and blue color too. AI can reconstruct texture rather than recover the exact fibers that were present in the original.
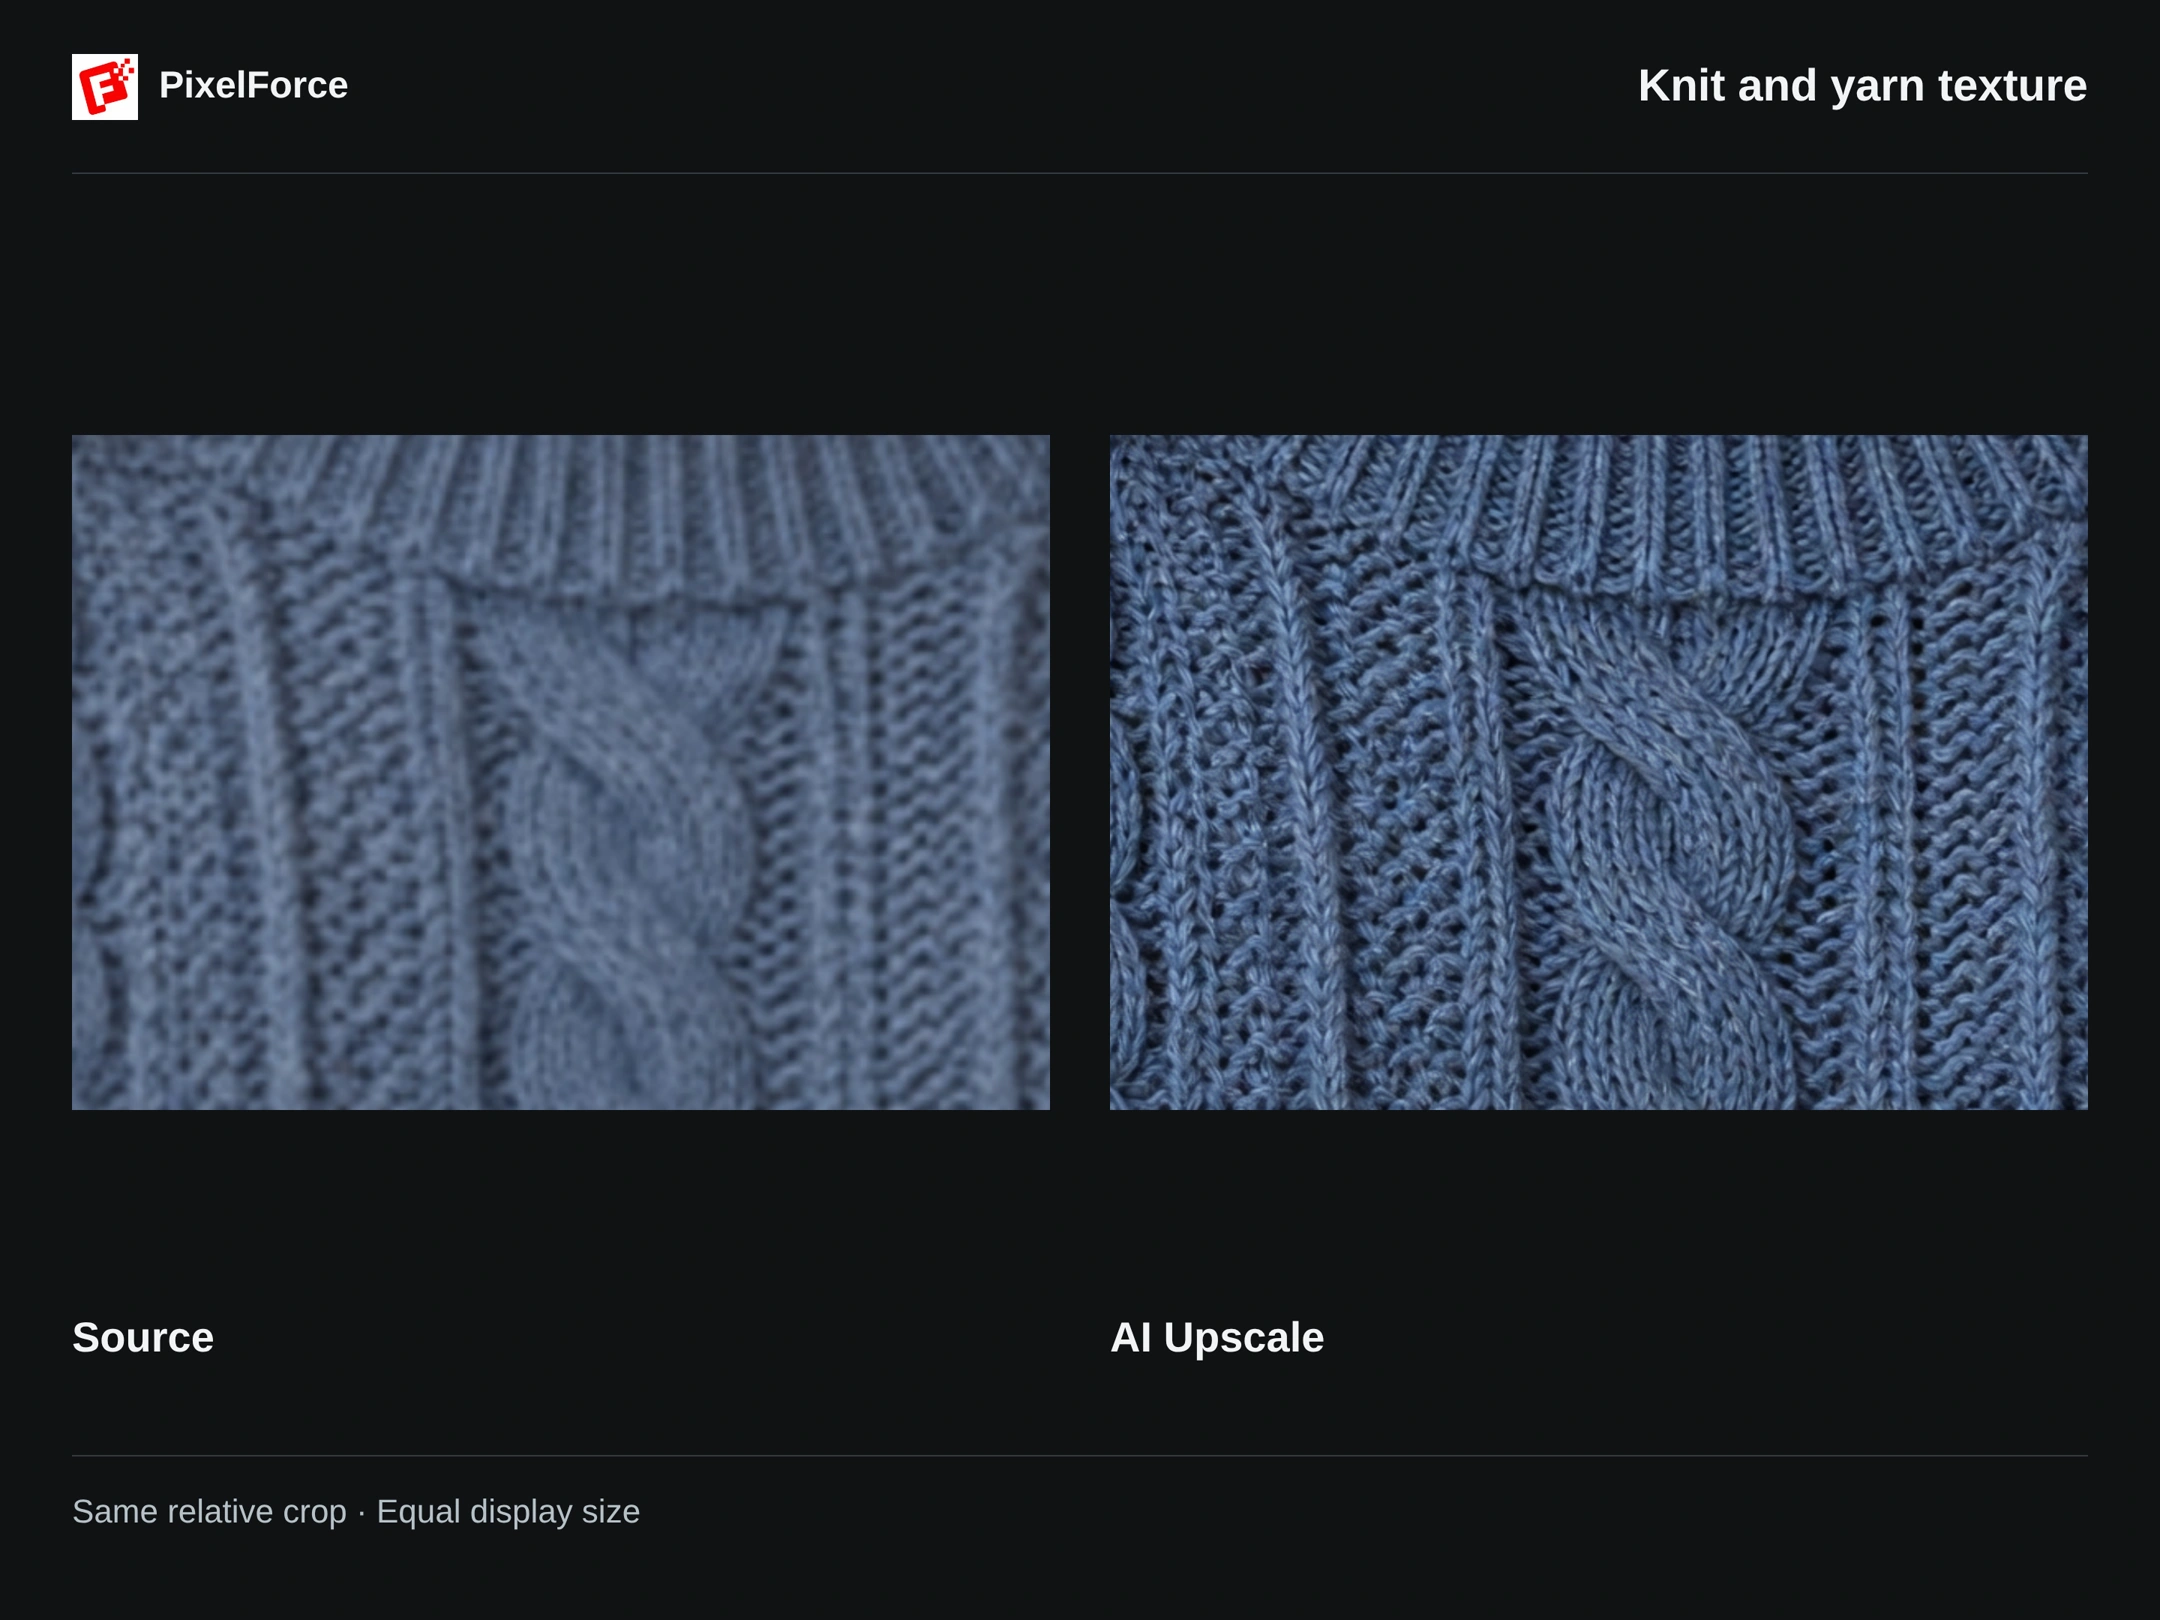
Each close-up uses the same relative area of the source and result, shown at the same display size. This makes the detail comparison useful even though the files have different pixel dimensions. Small shifts in features or framing may still be visible: AI enhancement is not an exact restoration of missing detail.
Enhance your image
1. Add the photo
Open AI Upscale from Create or Explore and add one image. On Android and iOS, choose from your photo library, take a photo or browse files. On the Web, select a file from your computer.
Use Edit inputs to check the photo and keep the framing you want. Start with a recognizable subject and visible structure. A small but reasonably focused image is usually a more useful starting point than one that is badly out of focus or heavily compressed.
2. Add enhancement notes if needed
Open Enhancement notes (optional) when you have a particular priority. This example leaves the field empty and uses the scene's default enhancement.
For another photo, you could write:
Refine fine hair strands and fabric texture. Keep the person's features, clothing pattern, colors and composition unchanged. Avoid smoothing and halos.
Keep notes within the current 240-character limit. Ask for clarity, gentle noise reduction or natural texture; use another tool when you want a new person, outfit or background.
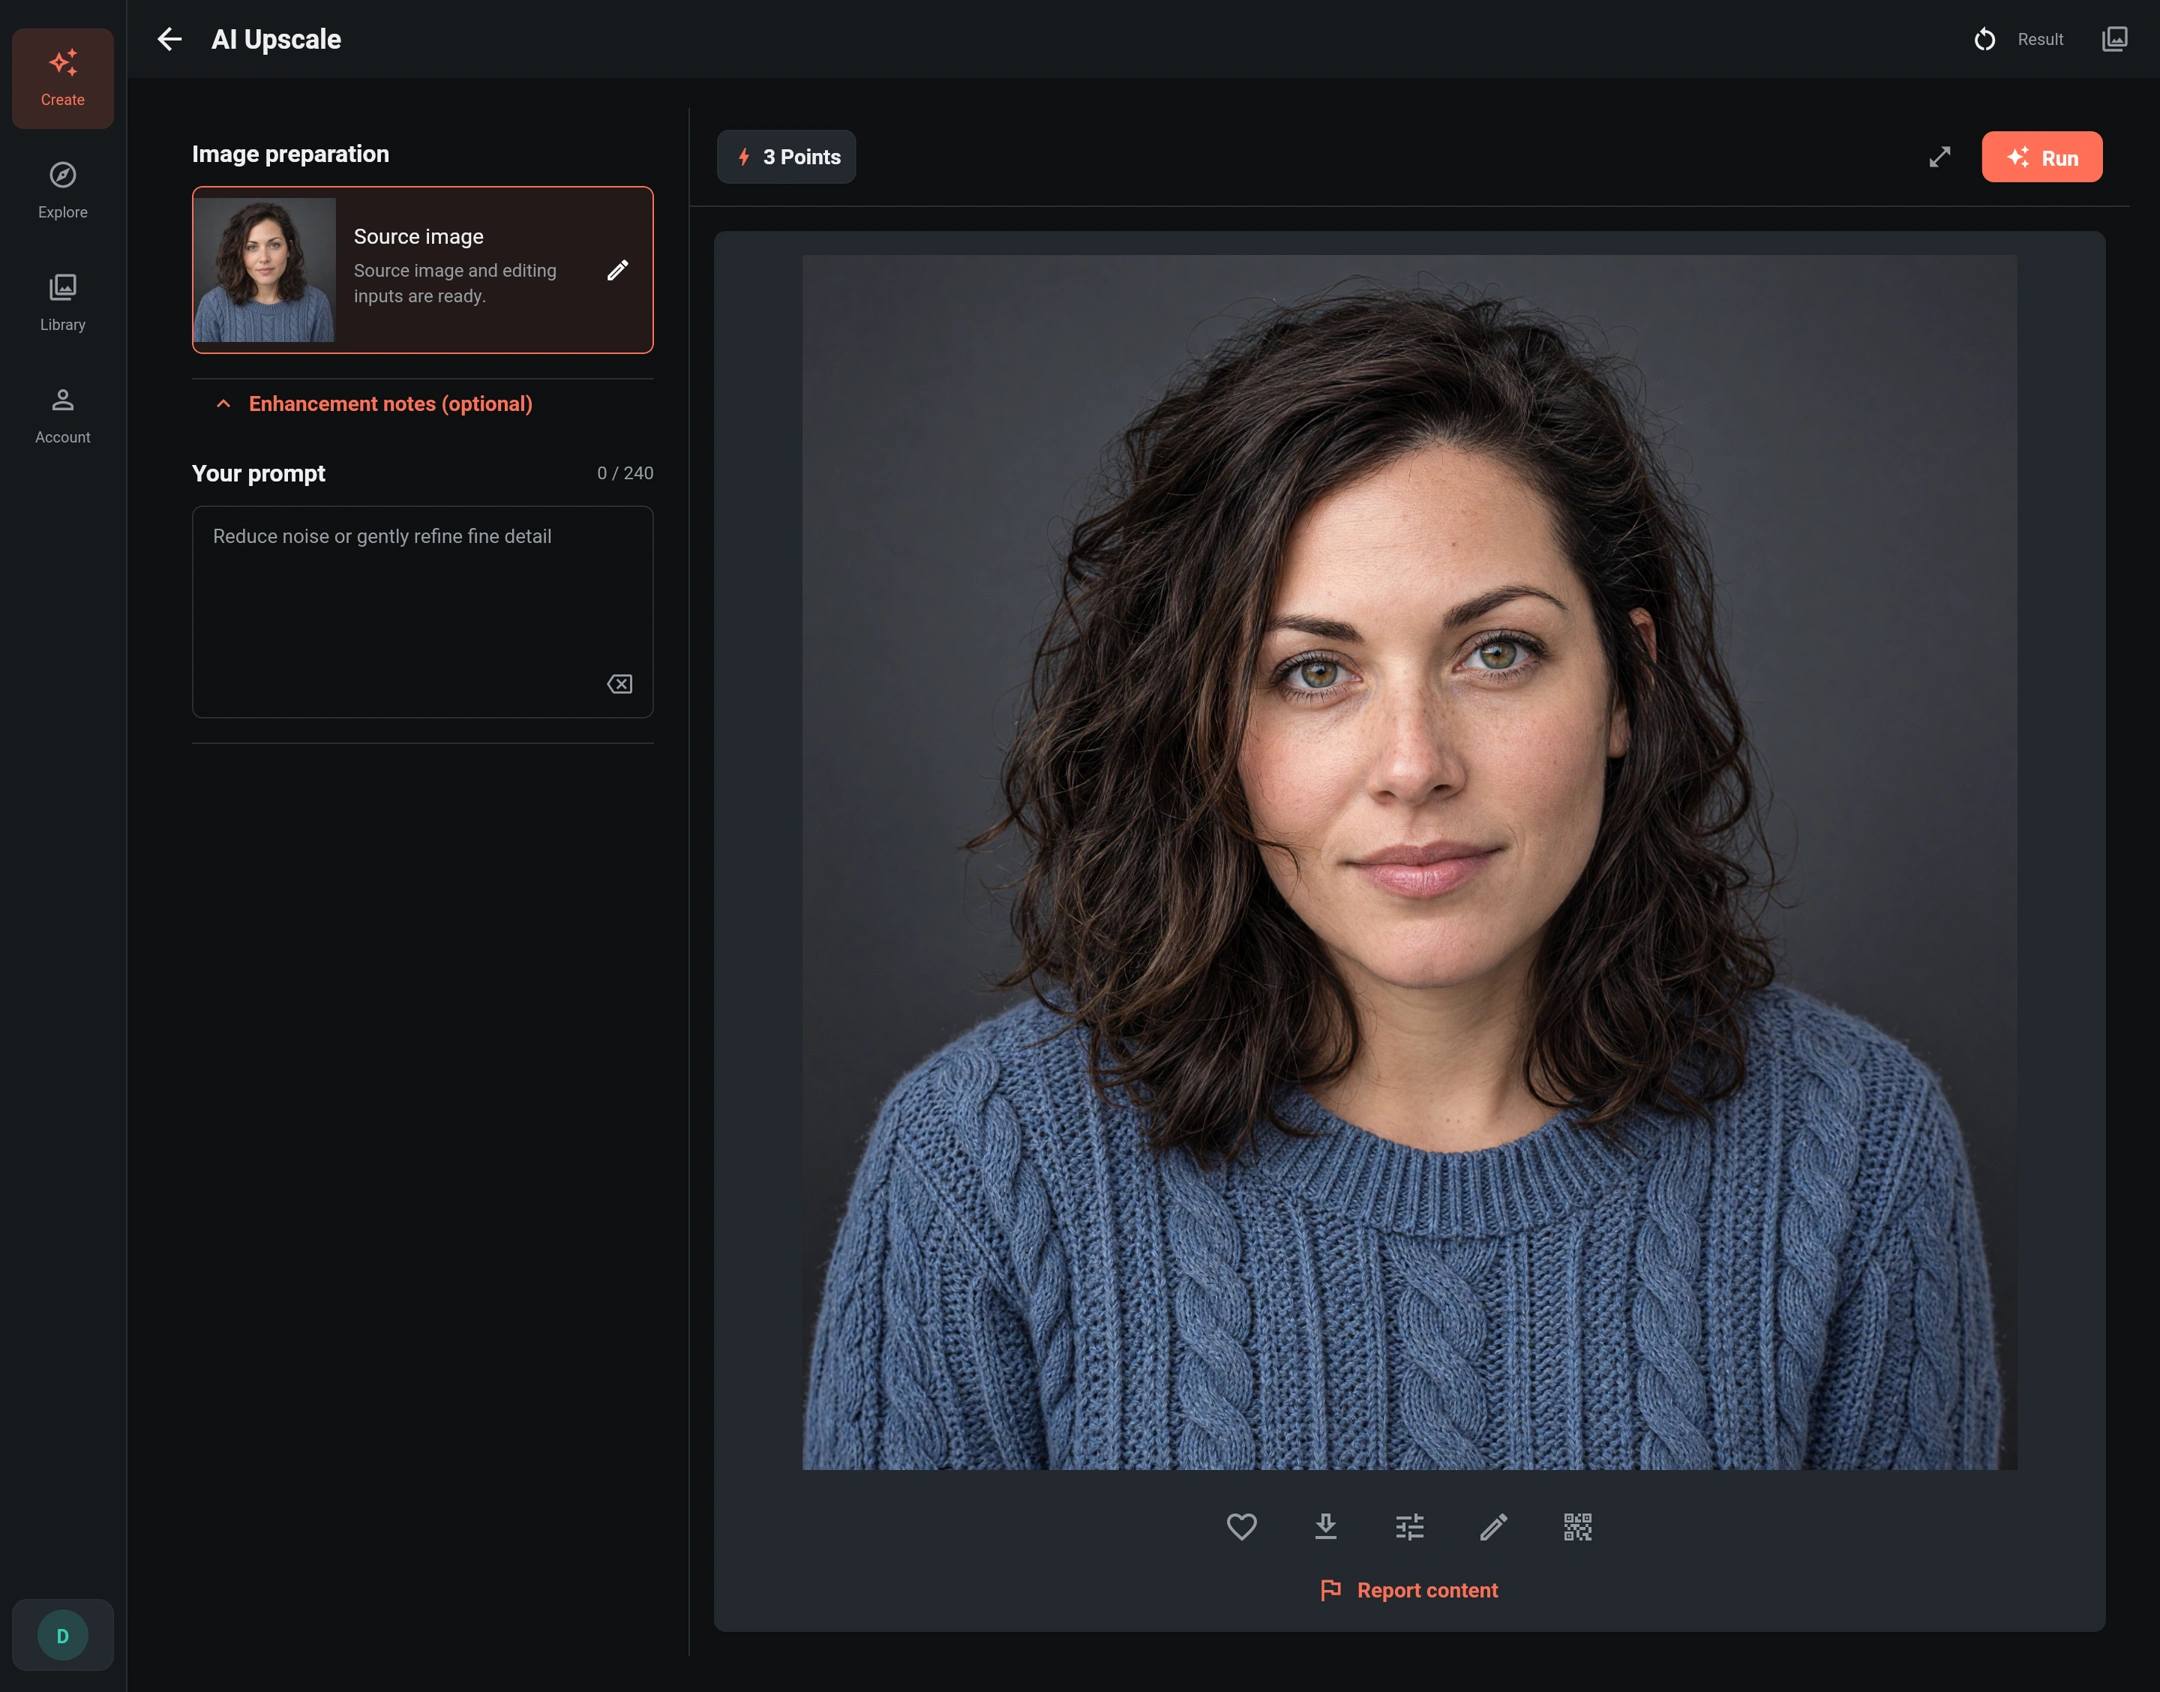
3. Run and inspect the result
Check the current points quote, then select Run. AI Upscale includes native 2K output; there is no separate reasoning-intensity, HD, style or mask setting to choose.
Open Result and first check the complete composition. Then enlarge the eyes, hair, fabric or product details that matter to you. For this square example, both width and height increase from 1024 to 2048 pixels: twice the length of each edge and four times the total pixel count, not four times the guaranteed detail.
Save the original output when the result suits you. A preview fitted to your screen may hide the difference between the two files. For another attempt, use Library → Reuse settings to return to the original input and adjust the notes, rather than repeatedly enhancing an already generated result.
Choose and check your source
- Portraits: compare the eyes, lips, face shape, hairline and distinctive marks. More defined skin texture should not come at the cost of a different-looking person.
- Clothing and products: inspect seams, cable or printed patterns, logos, lettering, small fittings and colors. Do not accept a result that changes a detail your customer needs to see accurately.
- Severely blurred images: AI may produce a plausible detail, but it cannot establish what an unreadable letter or hidden feature originally looked like.
- Sharp source images: you may notice the larger file size more than a dramatic visual change. Review at a useful zoom, not just as two small thumbnails.
Input preparation retains the full frame and aspect ratio. Images whose longest edge exceeds 1024 pixels are reduced proportionally before processing; small images are not stretched to a preset input shape. Check the dimensions of your actual output, especially for non-square photos.
For facial beautification rather than resolution enhancement, use Portrait retouch. Use AI Relight to change the lighting direction, or Image Editor for local cropping and manual adjustments.