AI Retouch
Keep the photo you like, and change the part you have in mind. AI Retouch can add an object, try a different color or material, or change the mood of a scene without starting from a blank canvas.
This guide follows three completed edits: a bouquet added to an empty vase, a gray sofa reimagined in teal velvet, and a summer courtyard turned into an autumn scene. Each example includes the exact prompt, a full before-and-after comparison and a video of the actual run.
Make your first edit
- In Create or Explore, open AI Retouch and choose your source photo. You can also select Continue editing on a generated result; select the intended photo first if the result contains several images.
- In image preparation, keep the complete subject in frame. Make any crop or rotation changes you need, then select Confirm. Wait for source preparation to finish.
- Write what should change, where it should change, and what should stay. A specific instruction works better than a broad request such as “make it nicer.”
- Review Redraw strength, High or Normal, output size and Clarity. Leave visual effects unselected when you want the existing lighting and photographic style to remain recognizable.
- Check the points shown beside Run, then select Run once. Wait through the task statuses until the image appears. Queueing, generating and checking image compliance are stages of the same run, not requests to submit again.
- Open the result and inspect it alongside the original. Check the edited region, its edges, lighting, shadows and the details you asked to preserve. Use Save image when you are happy with the result.
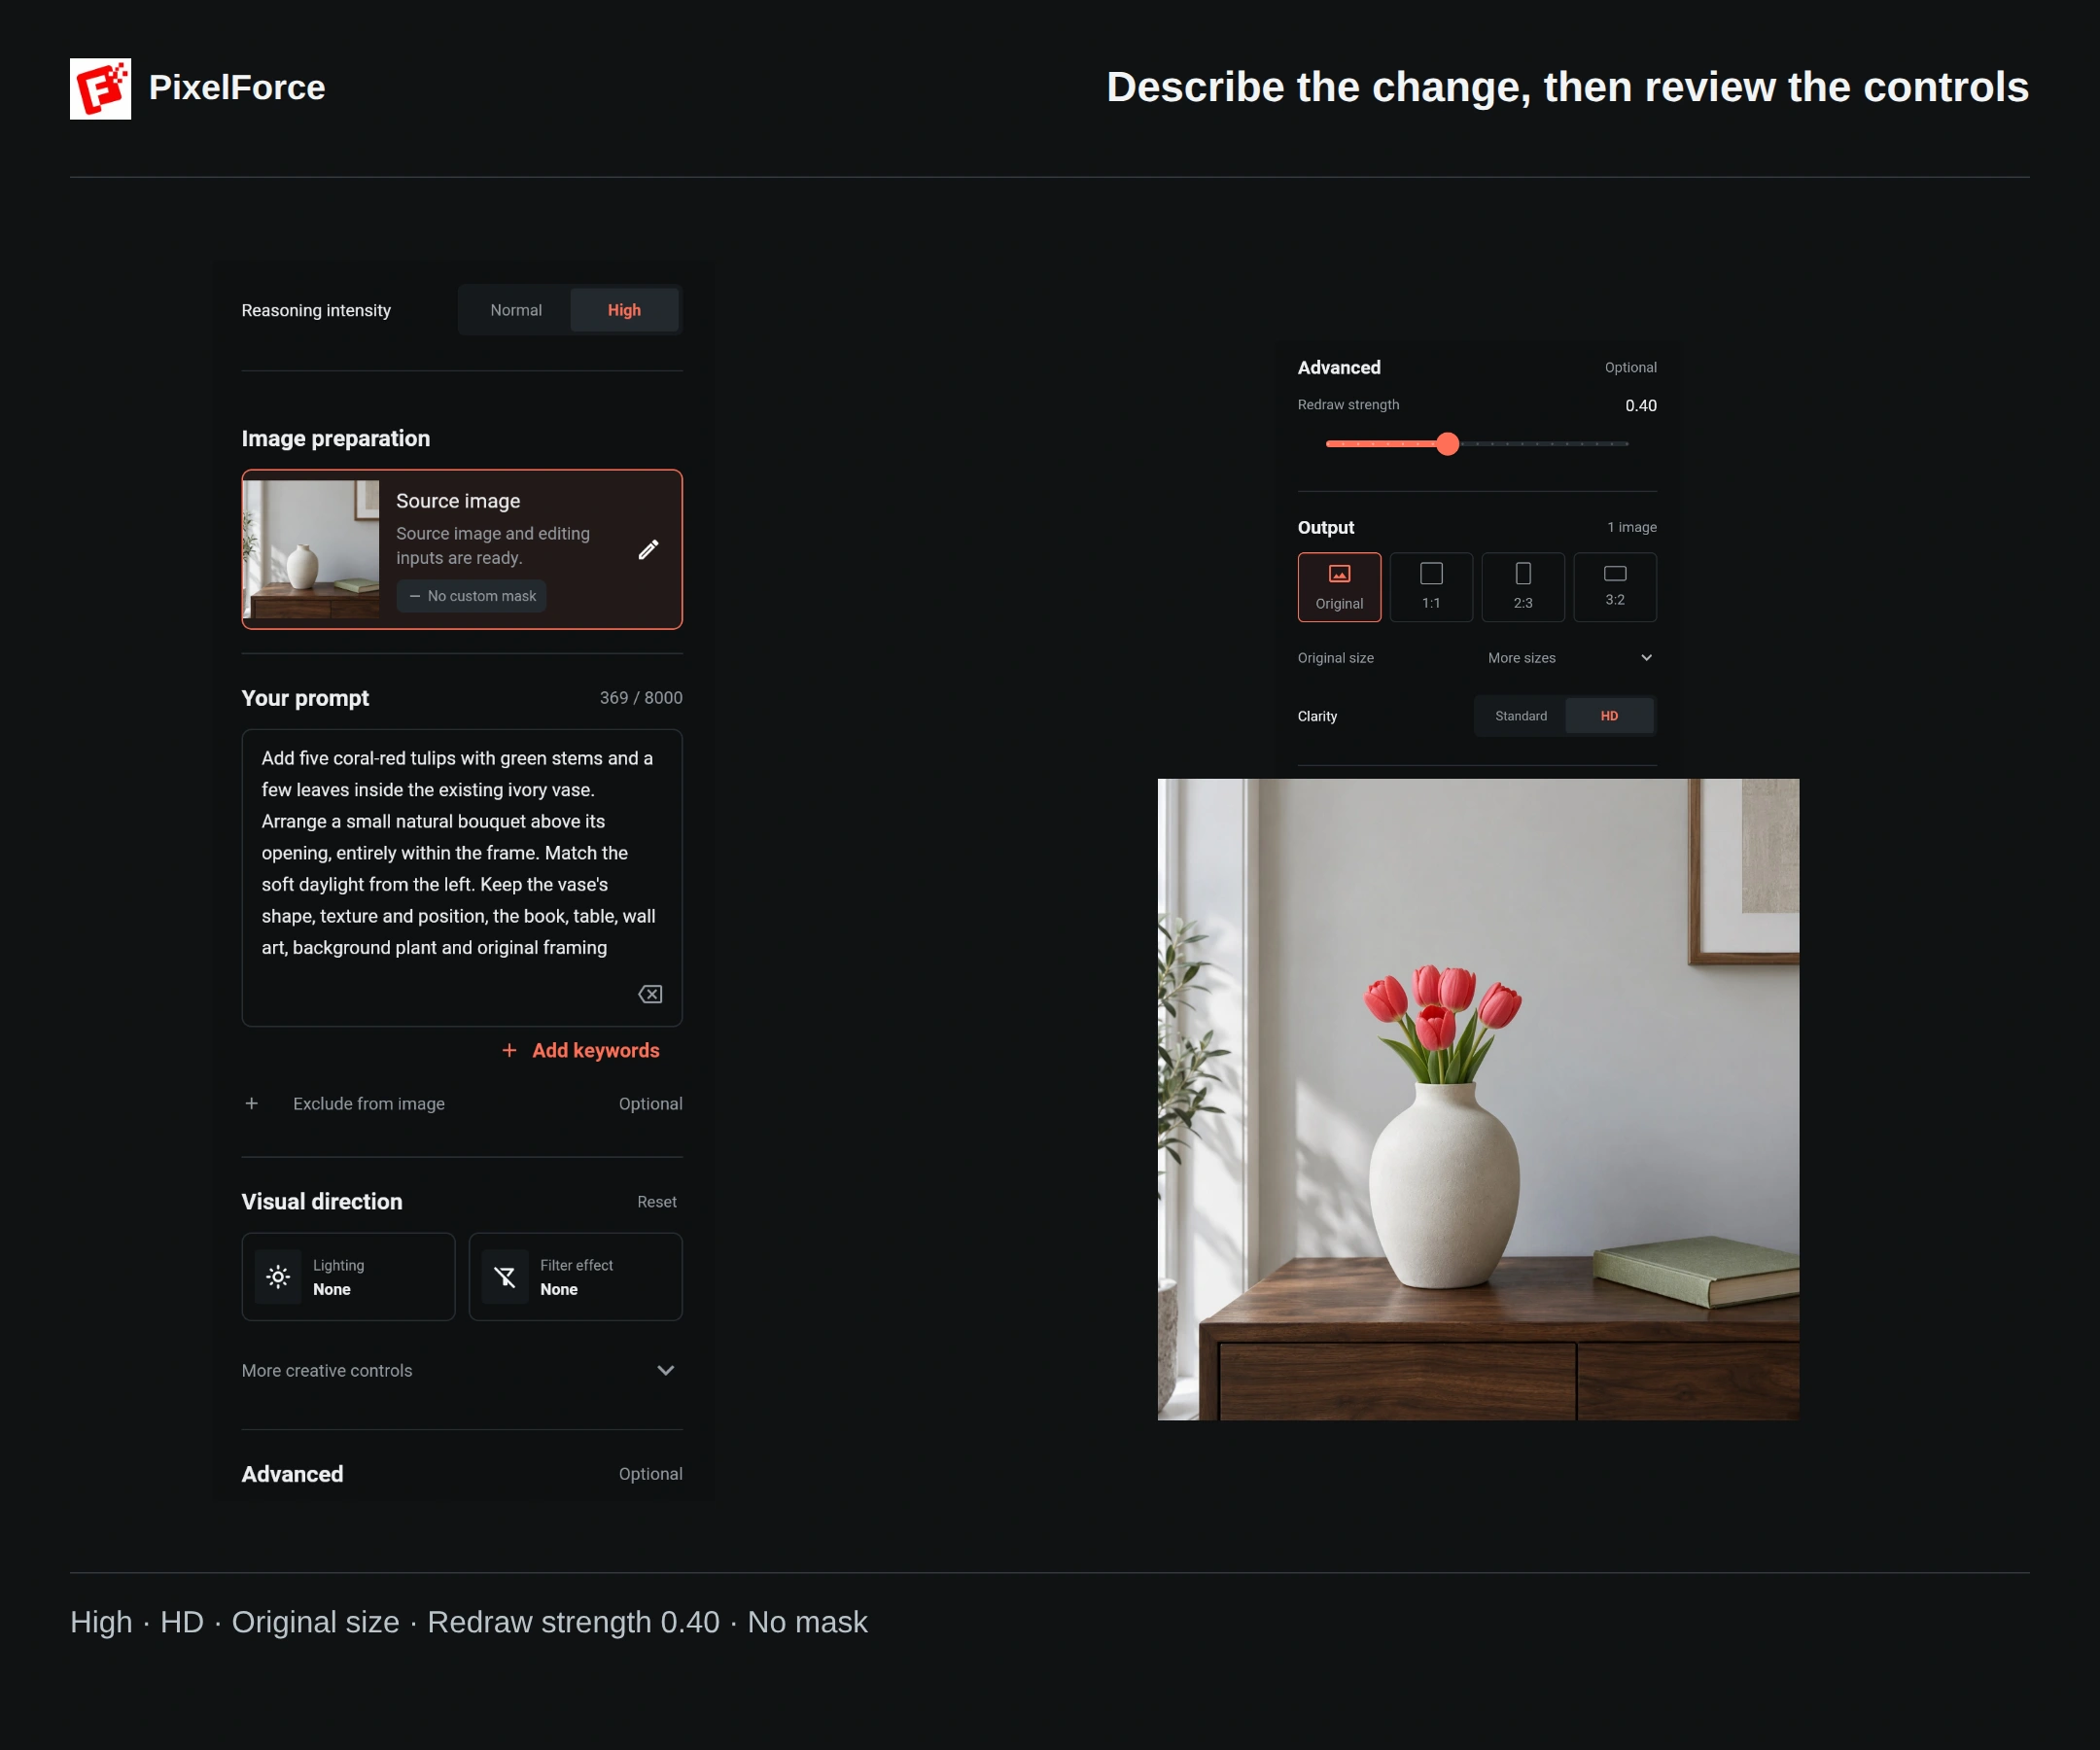
Settings used in all three examples
| Setting | Actual selection | What it means |
|---|---|---|
| Reasoning intensity | High | Uses more AI resources to produce finer detail and better results. Check the current points quote. |
| Redraw strength | 0.40 | A starting point for these examples, not a universal best value. Lower values generally favor a subtler edit; higher values allow more reinterpretation. |
| Output size | Original size | Requests the prepared source's proportions. It does not promise the original file's exact pixel dimensions. |
| Clarity | HD | Separate from High. The prepared inputs are 1024 × 1024; these completed results are 2048 × 2048. |
| Mask and visual effects | None | These examples rely on their written instructions, without a painted mask or extra lighting, filter or magic selections. |
Keep your untouched original. Source preparation may resize a large upload before generation. For a first attempt, change one main thing and keep the other controls steady; it is easier to tell which change helped.
Example 1: Add flowers to a vase
The empty ivory vase already has a place in the room and soft daylight from the left. The instruction adds a small bouquet to that vase, rather than replacing it or rearranging the room.
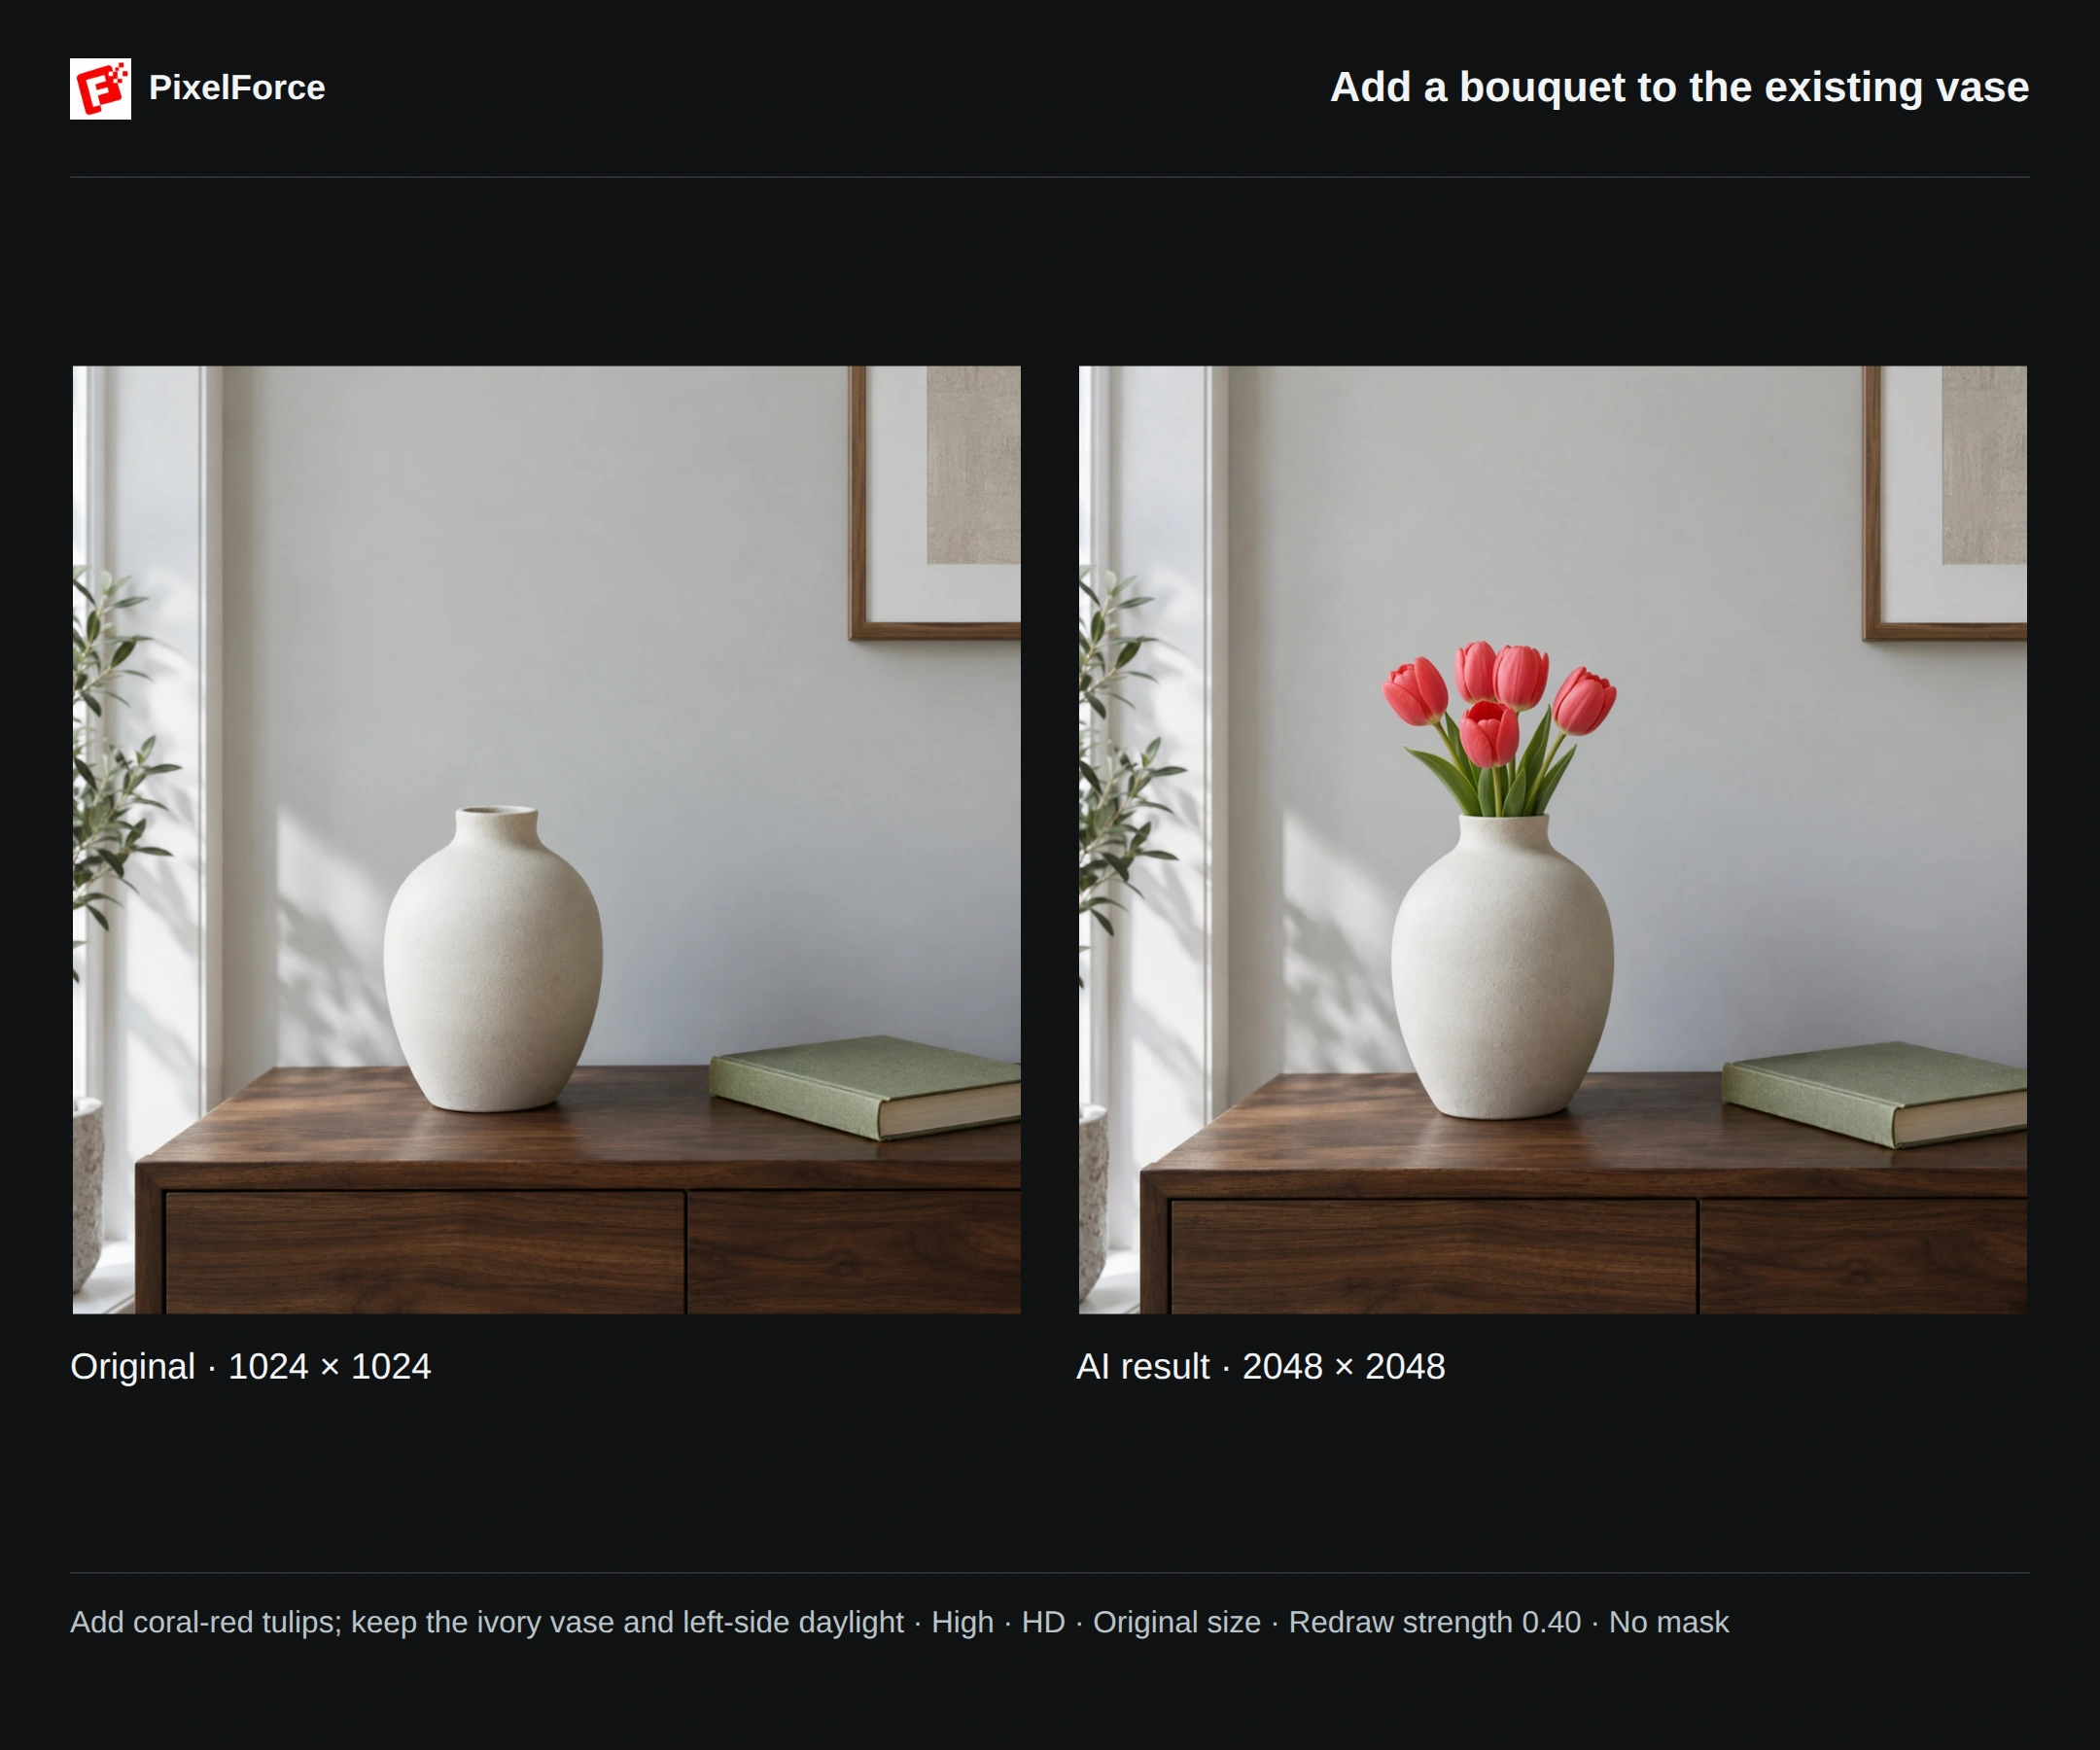
Prompt used
Add five coral-red tulips with green stems and a few leaves inside the existing ivory vase. Arrange a small natural bouquet above its opening, entirely within the frame. Match the soft daylight from the left. Keep the vase's shape, texture and position, the book, table, wall art, background plant and original framing unchanged. Photorealistic; no second vase or text.
The useful parts are what to add, where to place it and how to light it. The result shows five red tulips with stems entering the existing vase. Inspect the vase opening, stem placement, flower shadows and surrounding objects before keeping the image; a prompt is an instruction, not a pixel lock.
Example 2: Change sofa upholstery
Try a color and material together: light-gray linen becomes deep teal velvet. The prompt also names the structure to retain, so the request is about upholstery, not a different sofa.
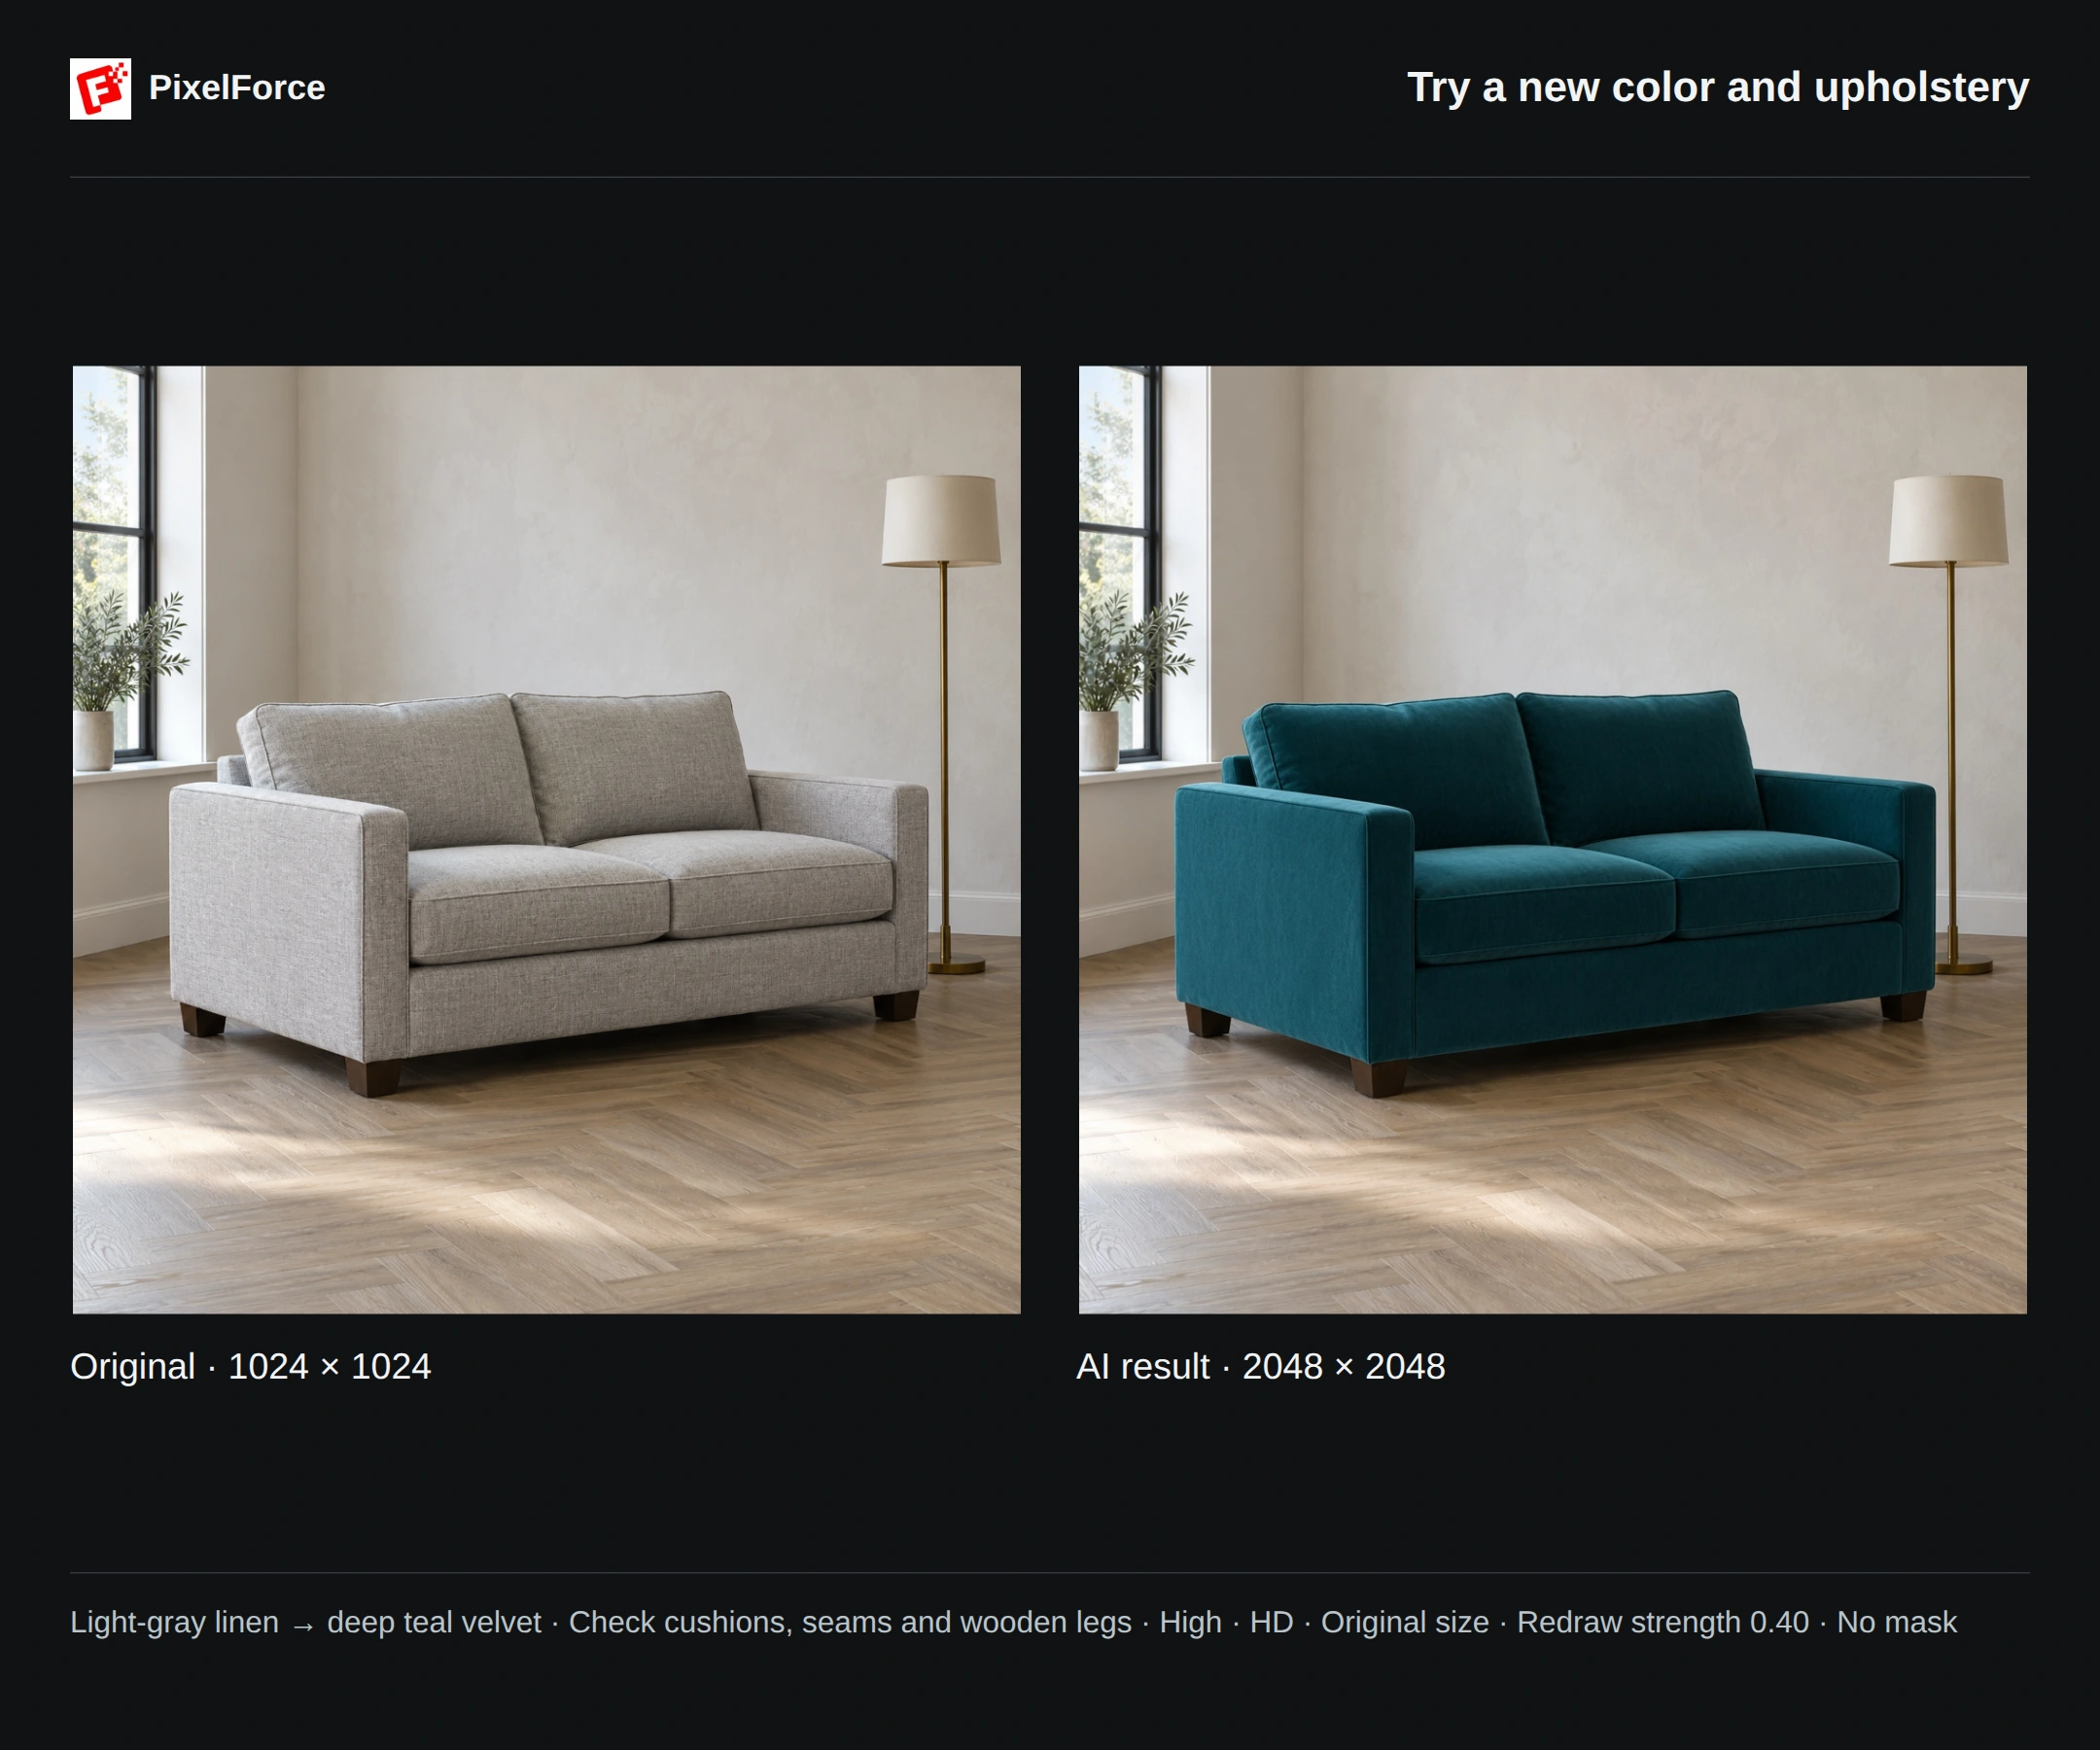
Prompt used
Change only the sofa upholstery from light-gray linen to deep teal velvet, with a subtle directional sheen and realistic fabric shading. Preserve the sofa's silhouette, two back cushions, two seat cushions, seam placement, proportions and dark wooden legs. Keep the window, plant, lamp, wall, floor, camera angle and original framing unchanged. Do not add pillows, furniture or text.
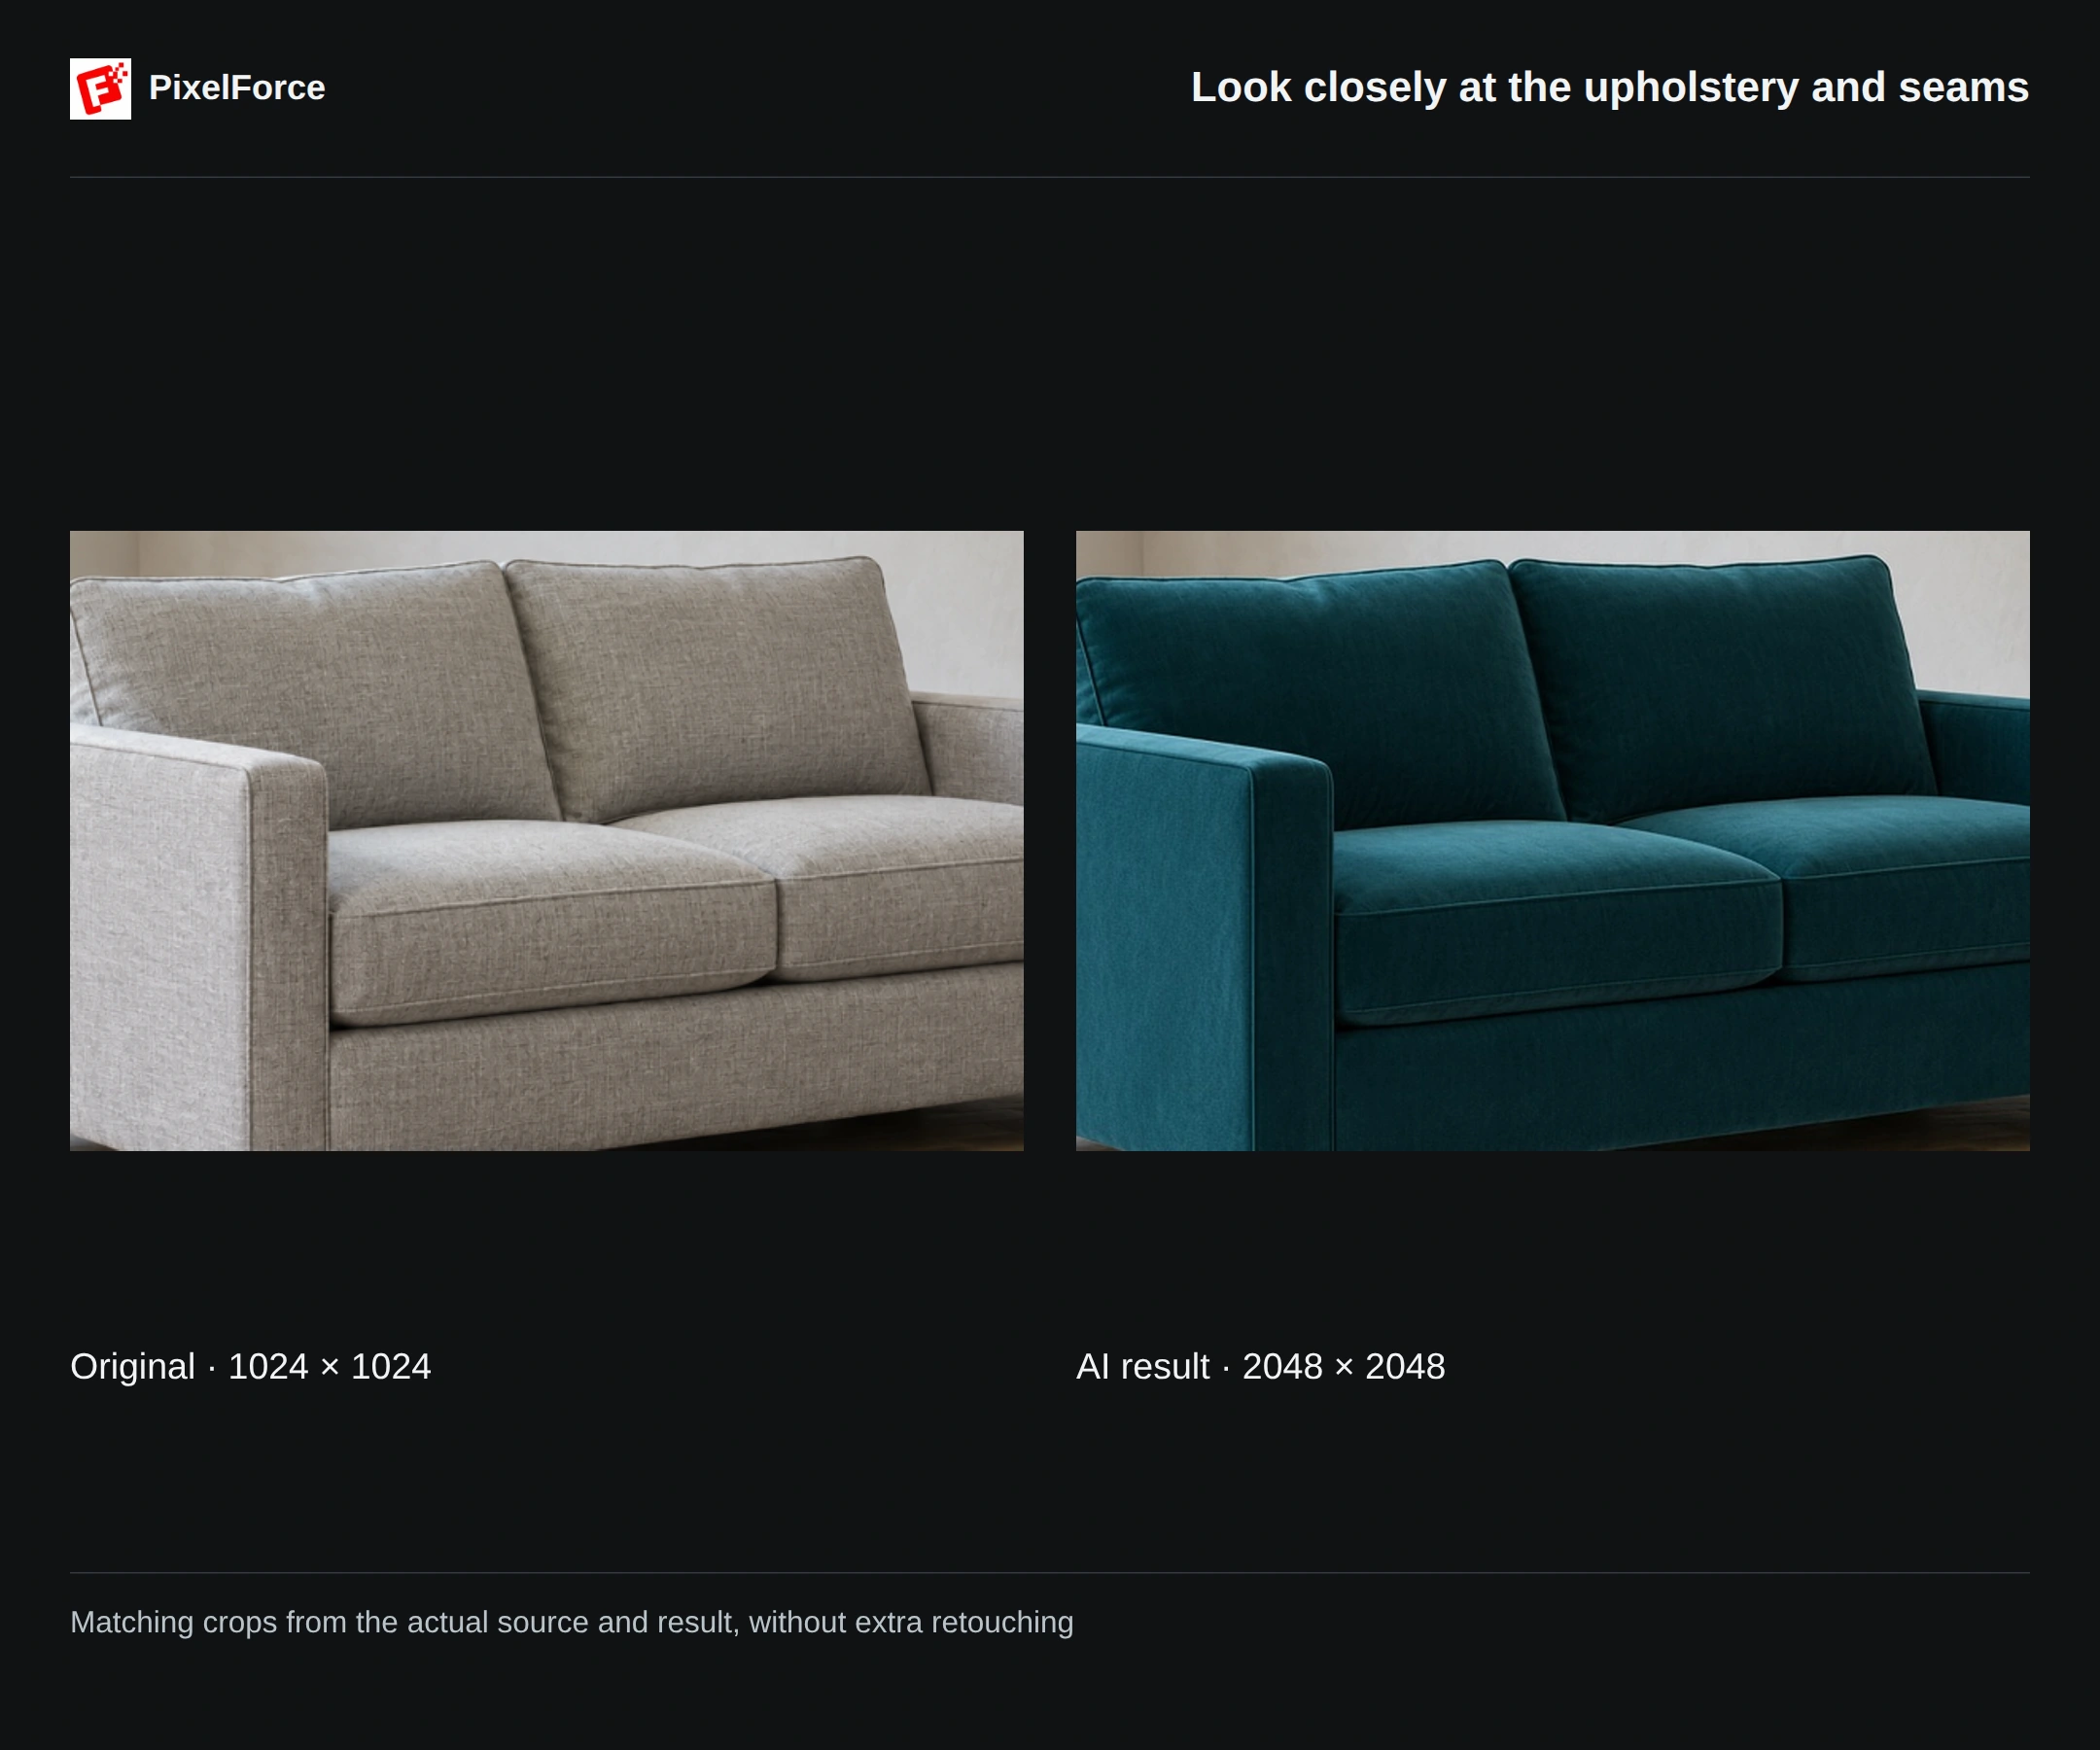
The finished sofa has a darker teal finish and soft fabric shading. Look beyond the color: check the two back cushions, two seat cushions, seams, armrests and visible wooden legs. A material change can reinterpret texture and stitching, so compare any product-critical details carefully.
For a color-only change with an explicit color picker, use Smart Recolor. AI Retouch is more useful when the request also involves material, objects or a broader visual change.
Example 3: Turn summer into autumn
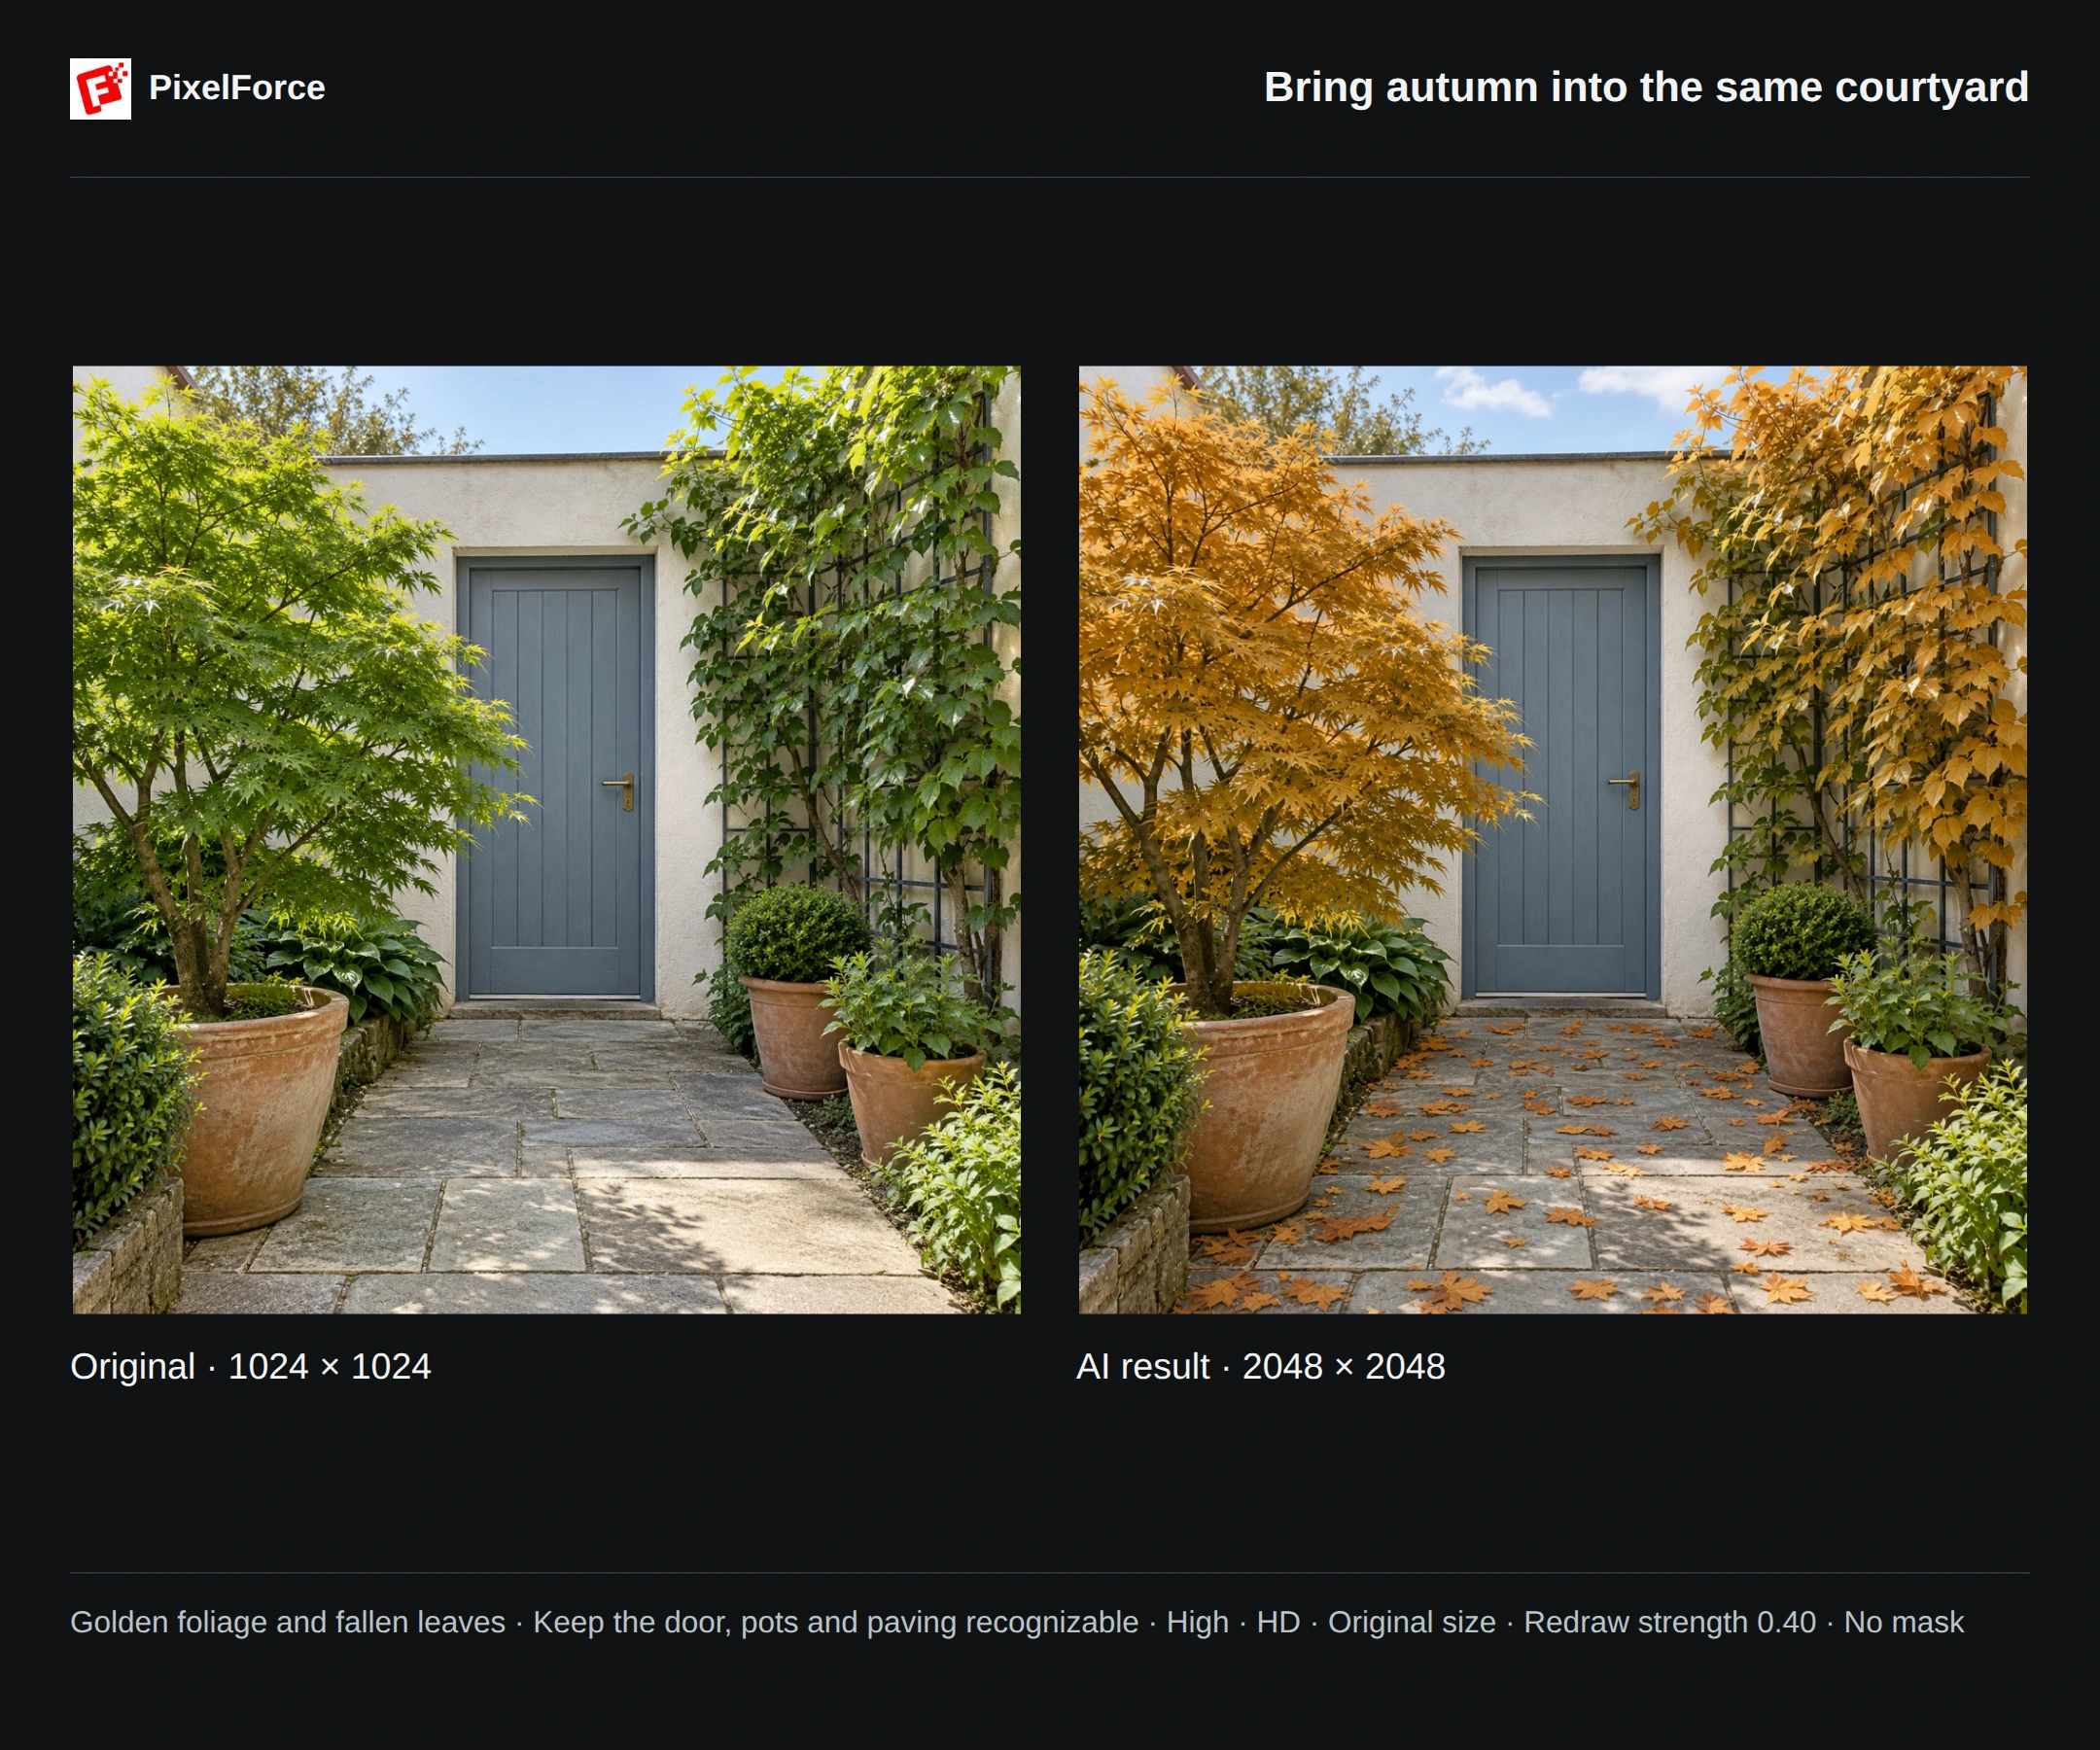
Describe the seasonal changes and the parts of the courtyard that anchor the composition. Here, foliage turns golden and fallen leaves appear on the path, while the blue door and terracotta pots remain recognizable.
Prompt used
Turn this summer courtyard into a natural early-autumn scene. Change the existing maple and climbing-vine foliage to muted golden yellow and warm amber, and add a few fallen leaves on the stone path. Keep the dusty-blue door, brass handle, white wall, trellis, terracotta planters, paving joints, camera position and framing unchanged. Retain the same daylight direction. No new buildings, people, snow or text.
Check the door, handle, pots, paving and camera perspective, as well as the foliage. “Keep unchanged” tells the AI your intent, but small changes can still occur. For a dedicated background replacement workflow, see Background Redraw.
The three videos retain source preparation, parameter review, the actual Run action, task progression and result arrival. Only the middle waiting section plays at 8× speed; the result reveal plays at normal speed. Video length is not a generation-time estimate.
When to use a mask
None of the three examples above uses a mask. If the AI changes too much around your target, open Edit inputs on the source and switch to Mask to give it a more specific area to work on.
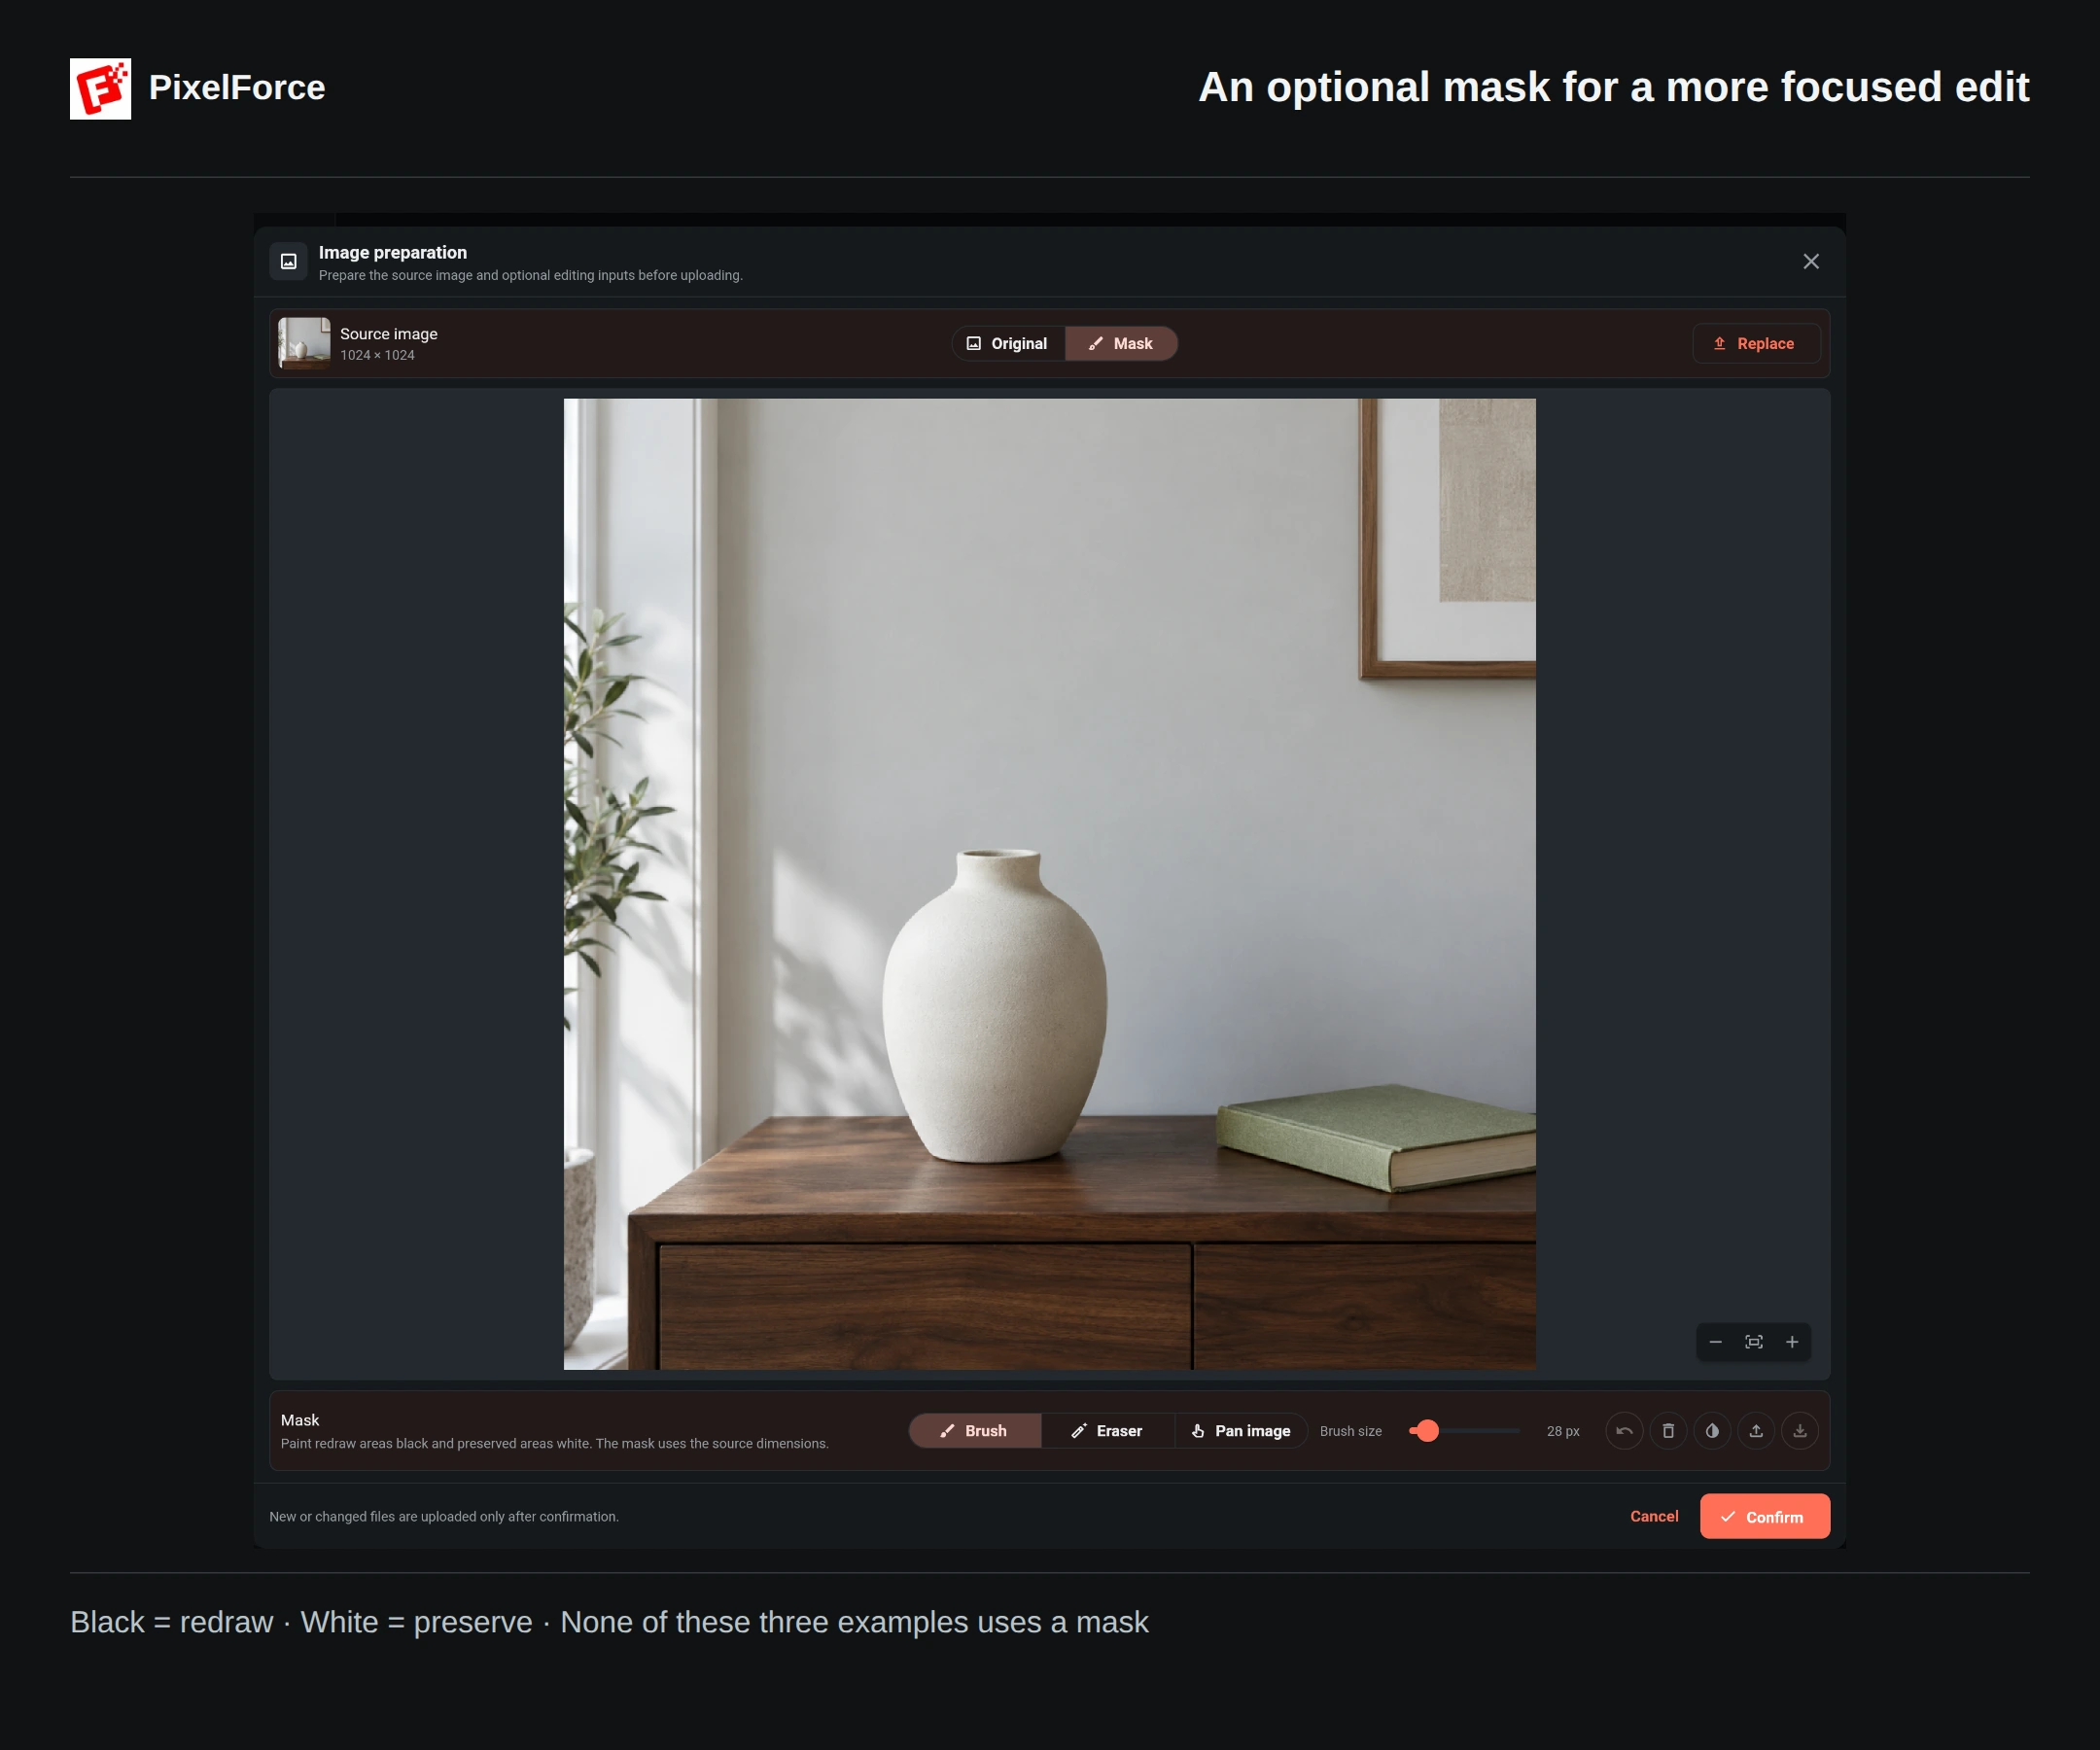
Use Brush to paint the intended redraw region black; white marks the region to preserve. Include enough room for the change: for flowers, paint the space above the vase opening as well as the opening, not just the vase body. Review the mask at the same framing as the source and select Confirm when ready.
A mask guides the edit; it does not guarantee that every unmasked pixel stays identical. Always inspect boundaries and nearby details. For removal rather than adding or replacing something, Object Eraser is the more focused tool.
Refine without losing your starting point
- The change is too subtle: simplify the prompt to one clear target, then try a slightly higher redraw strength. Review the new quote before another run.
- Too much has changed: lower the strength, remove competing style or lighting selections, and consider a mask. Name the important construction details to retain.
- An added object looks pasted in: describe the existing light direction, scale and contact point, rather than adding more decorative adjectives.
- You want a variation: use Reuse settings from Library, or Continue editing for another edit based on the selected result. Neither action automatically submits a paid run.
- Source preparation failed: retry preparation before selecting Run. Do not proceed with a missing source or repeatedly submit a task already in progress.
AI Retouch is a generated edit and uses points according to the current quote. Cropping, text and local adjustments in Image Editor are separate from submitting an AI task. Save a satisfactory image before experimenting further.