AI Outpaint
Sometimes the photo is right, but the frame is too tight. AI Outpaint adds space beyond the existing edges, filling it with new image content that fits the scene. Give a subject breathing room or make a composition wider, without stretching the original to fit.
A wider view of the same setting
In this example, an orange camping chair sits on a wooden platform beside a lake. Extending the square photo's left and right edges gives the deck, water and mountains more room while keeping the chair as the focal point.
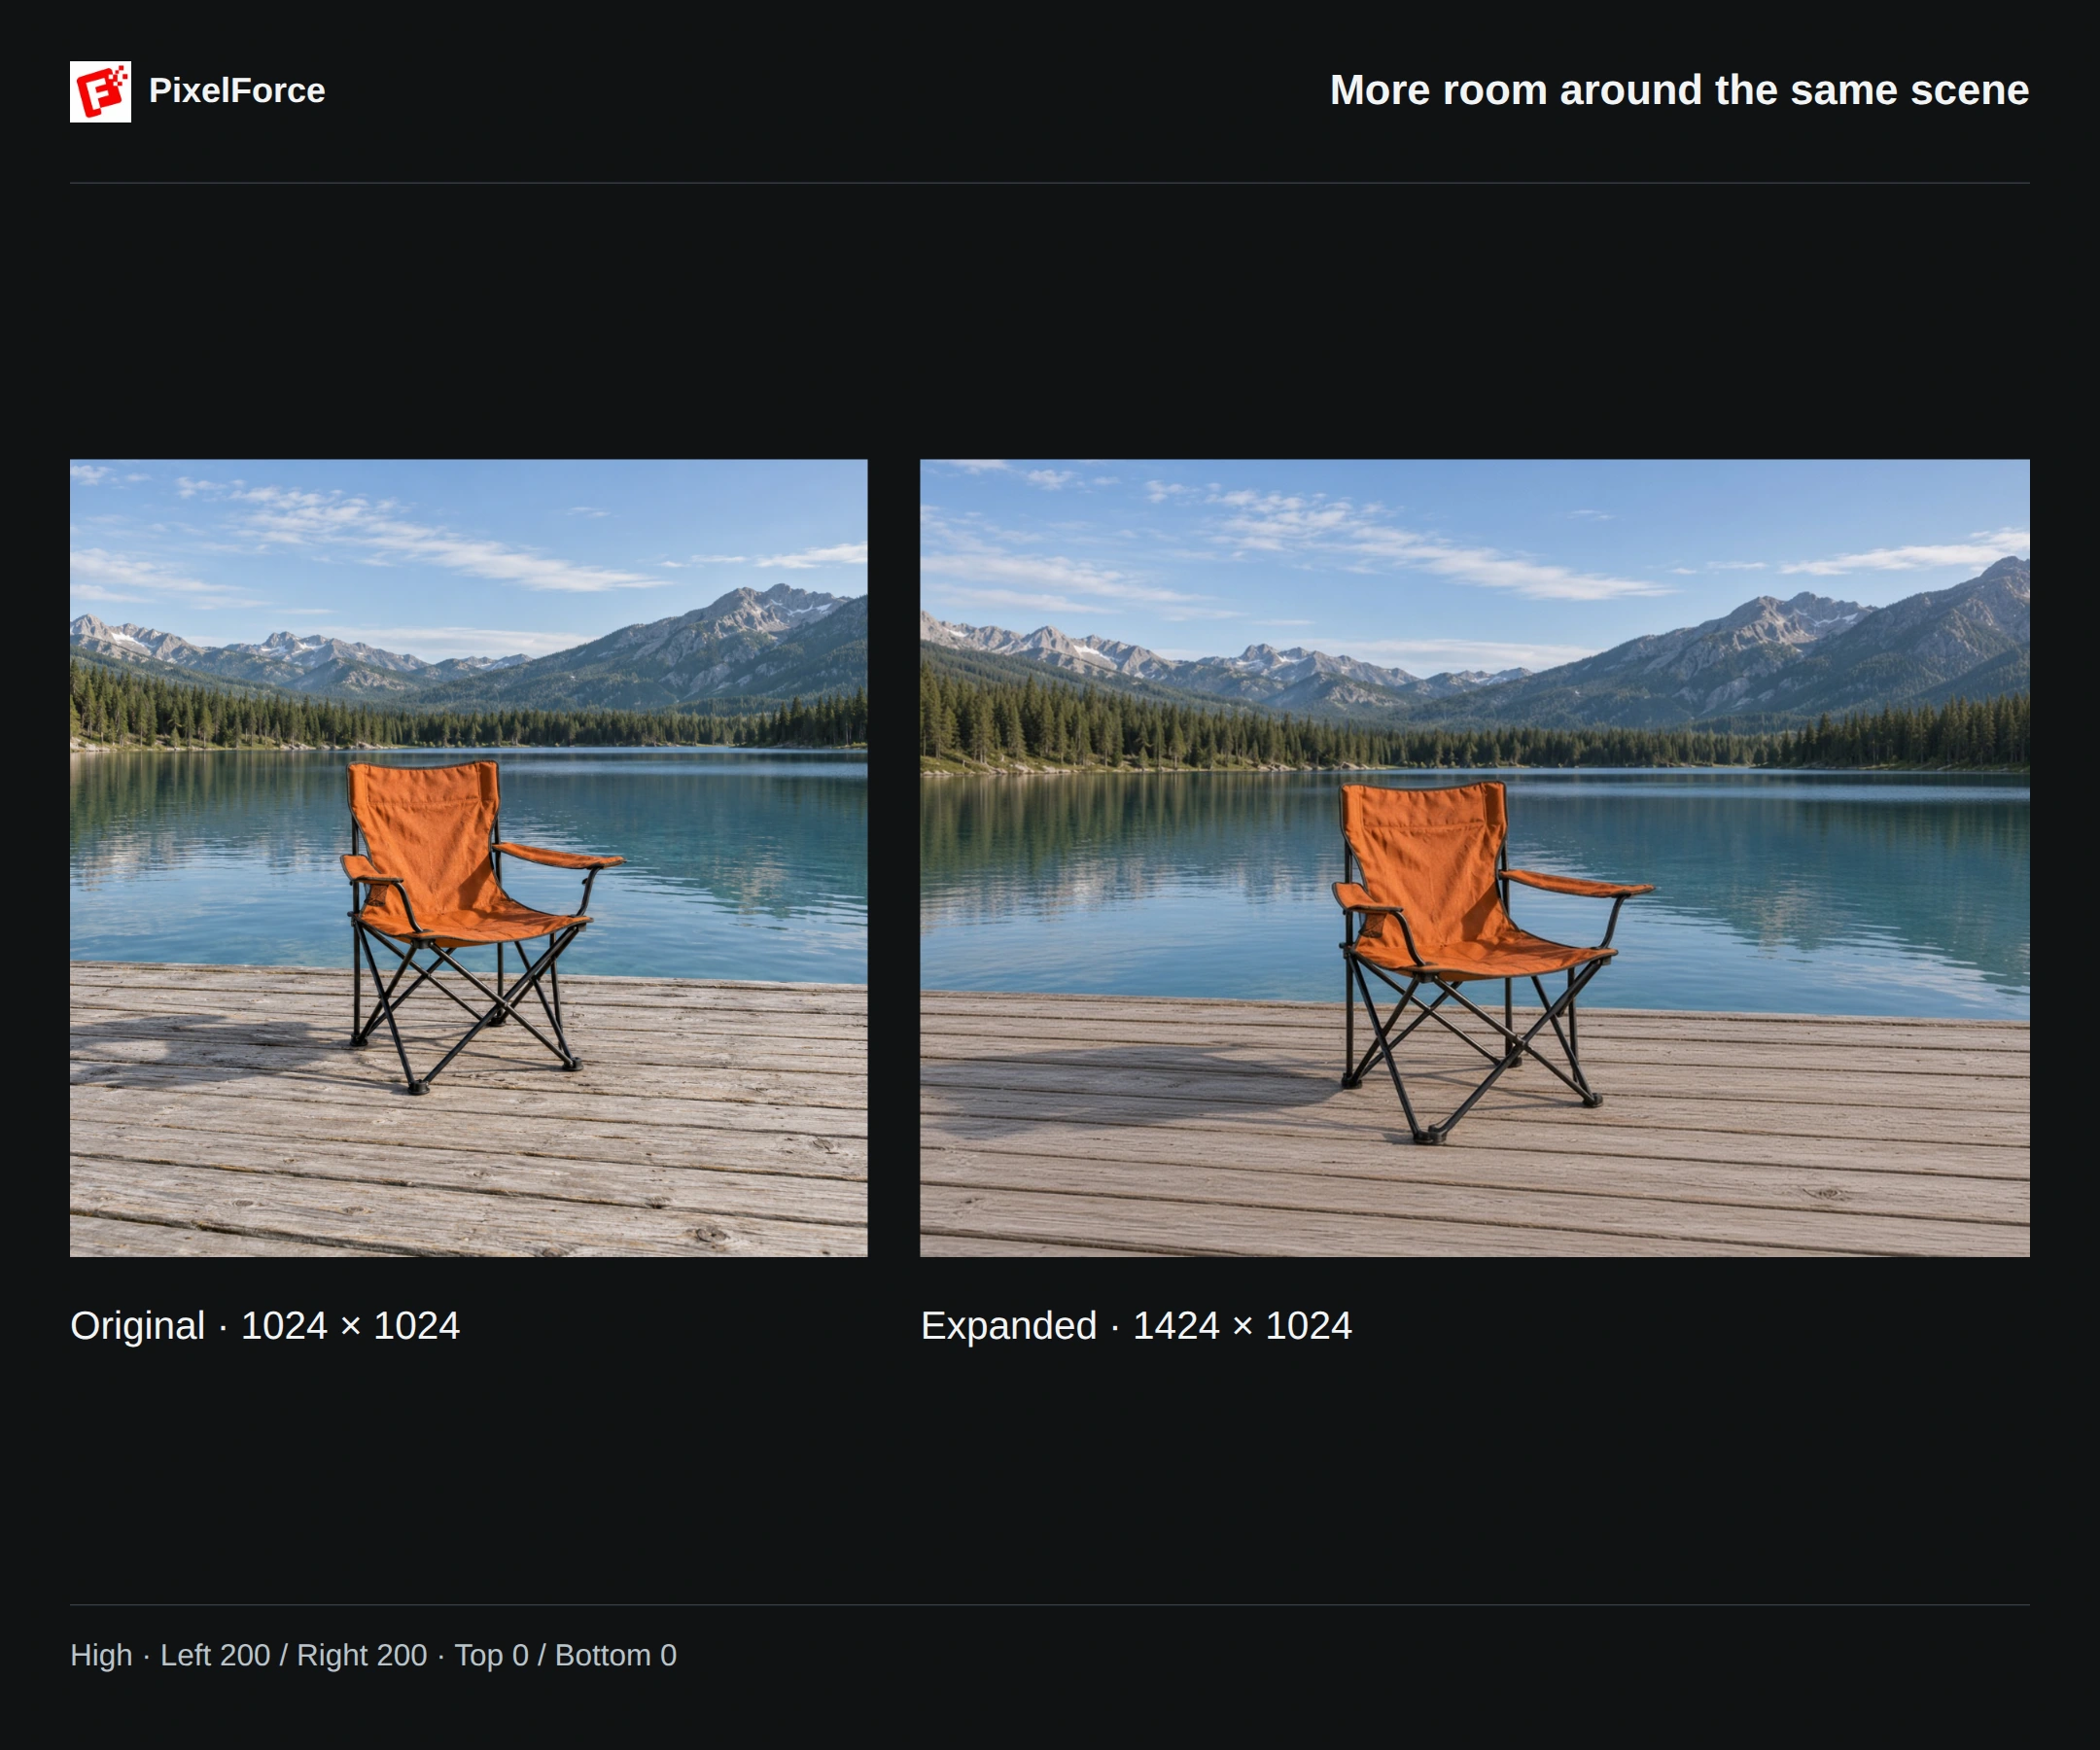
The task used High, with 200 pixels added on the left and right and no expansion above or below. The prepared source was 1024 × 1024 pixels; the saved result is 1424 × 1024 pixels. That is a wider composition, not a 16:9 preset.
Extend your photo
1. Prepare the source
Open AI Outpaint from Create or Explore, add your photo and choose Edit inputs. Keep the complete chair, its feet and shadow in the frame. The nearby deck, lake and shoreline give the edit useful context.
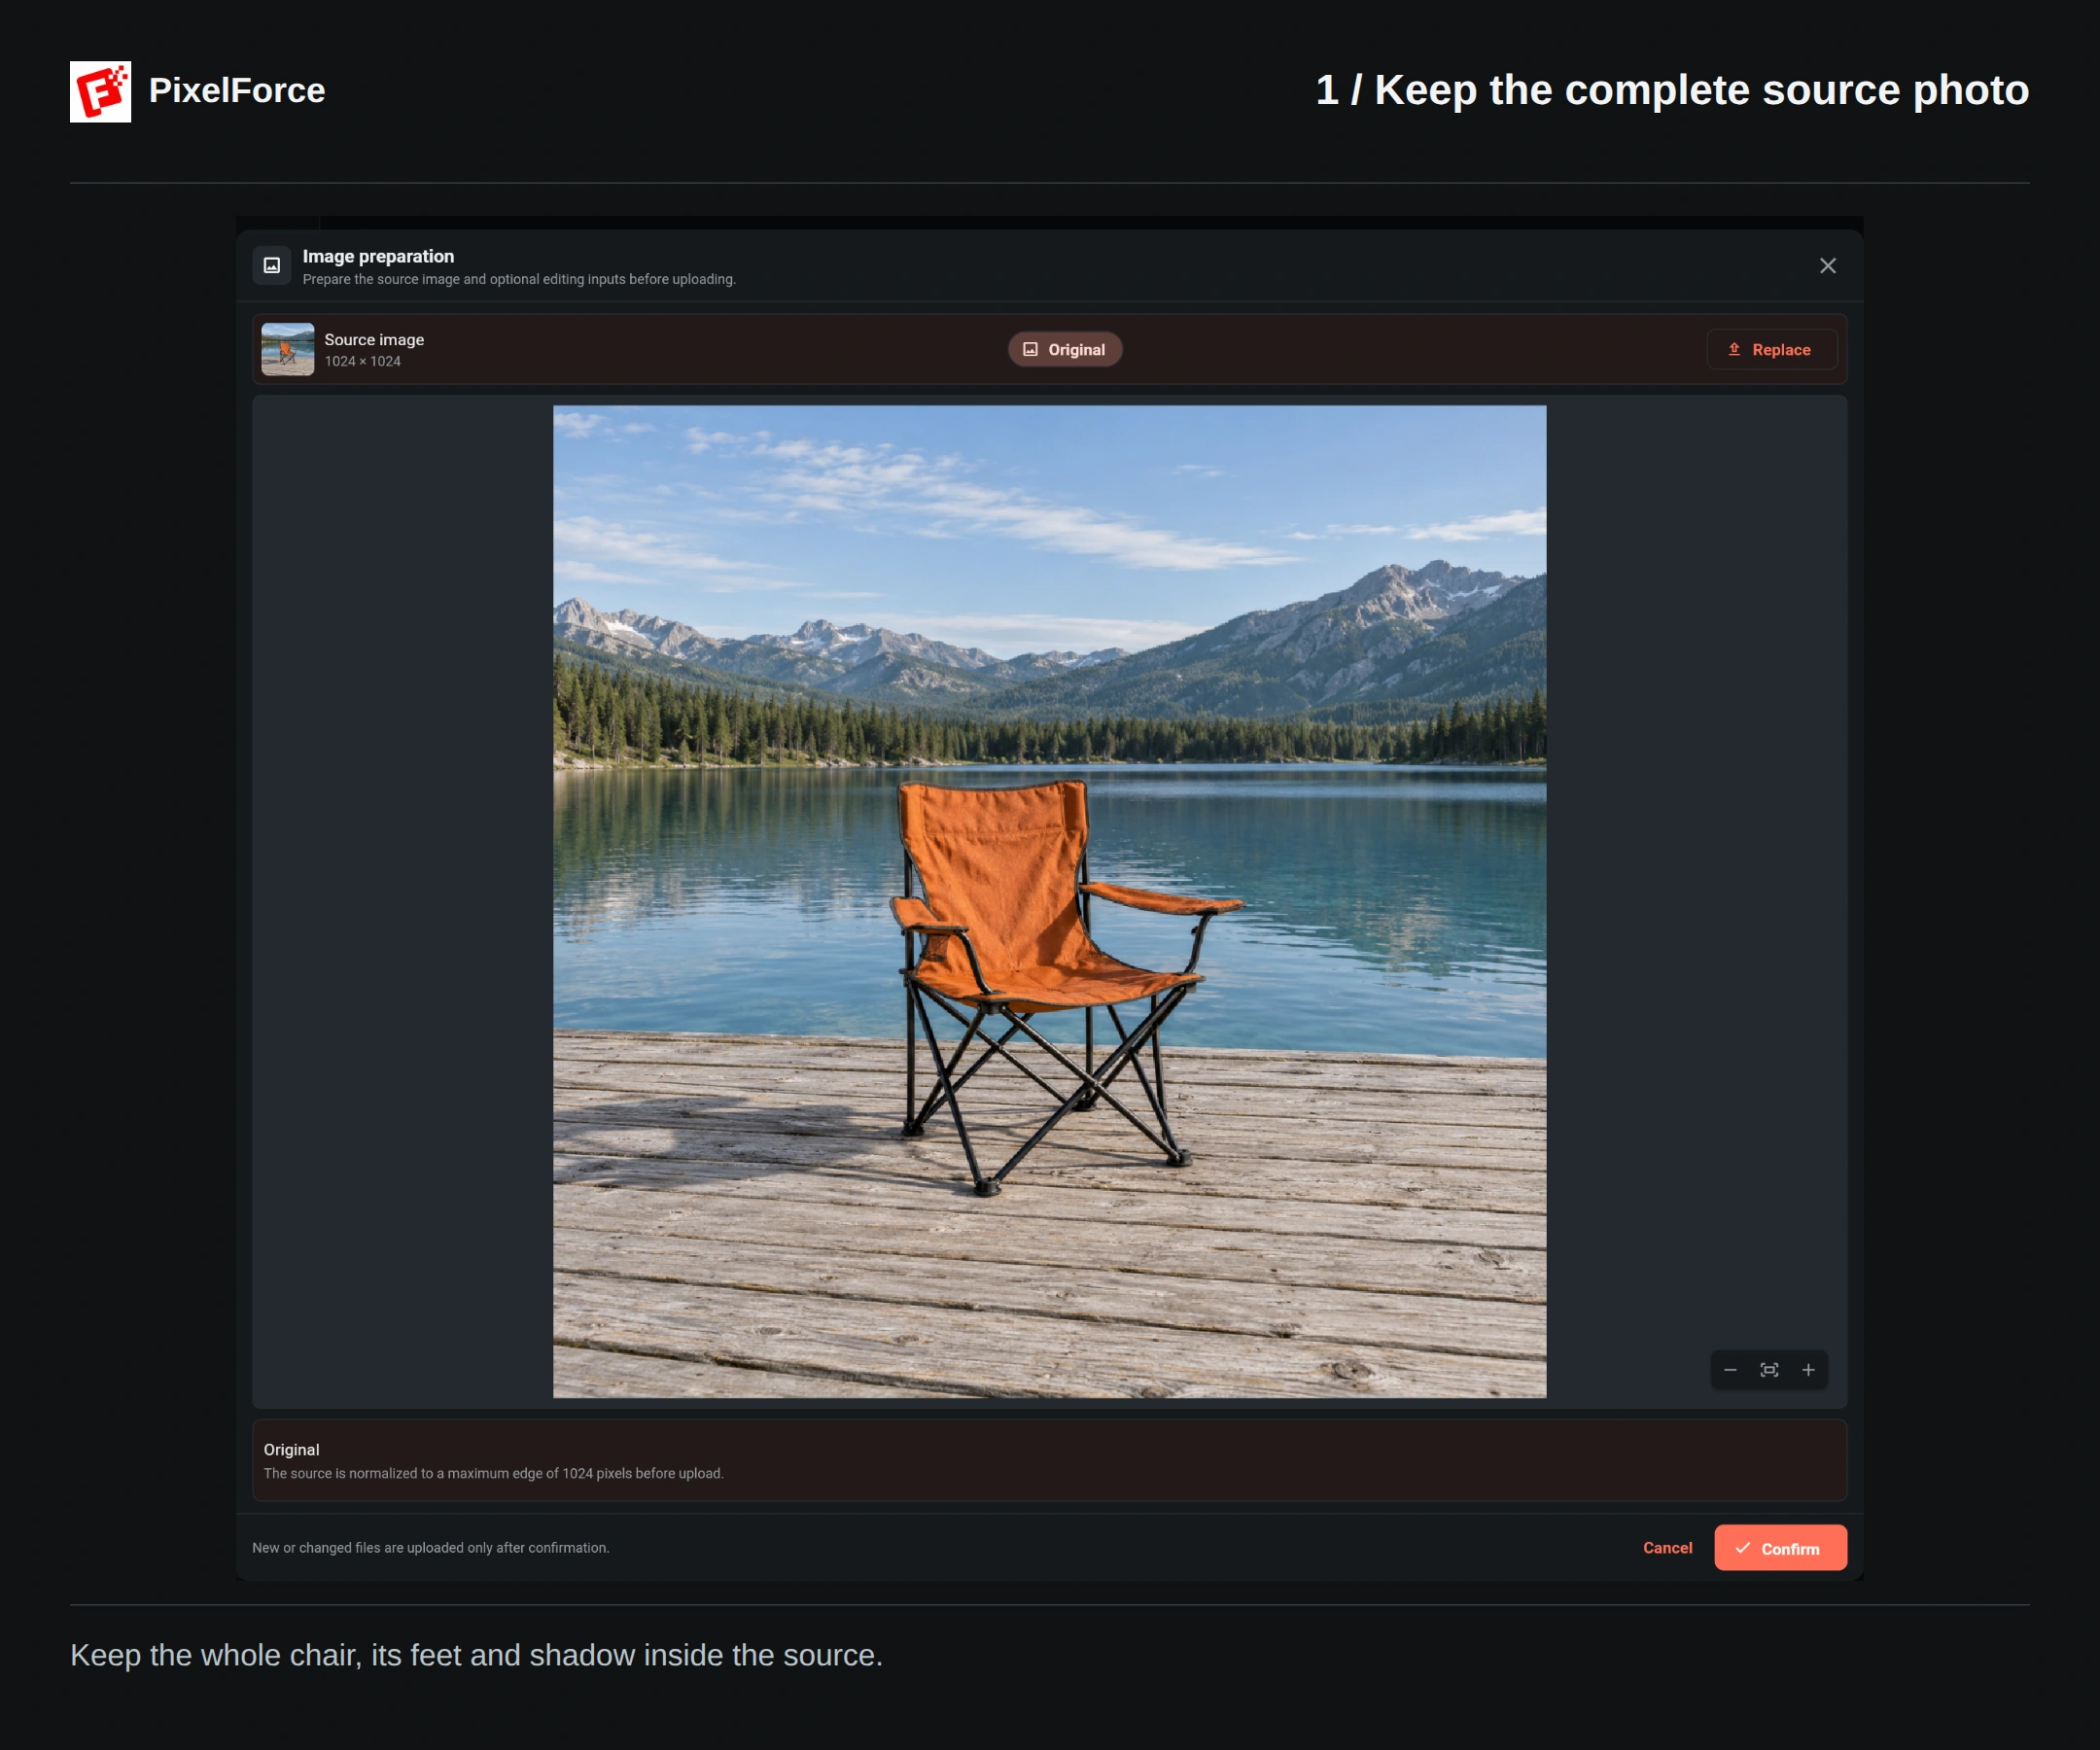
On Android and iOS, choose from your photo library, take a photo or browse files. On Web and desktop, use the file picker. Check the prepared image before choosing Confirm. Large sources may be resized proportionally before uploading; use the prepared dimensions when working out the new canvas.
2. Choose which edges to extend
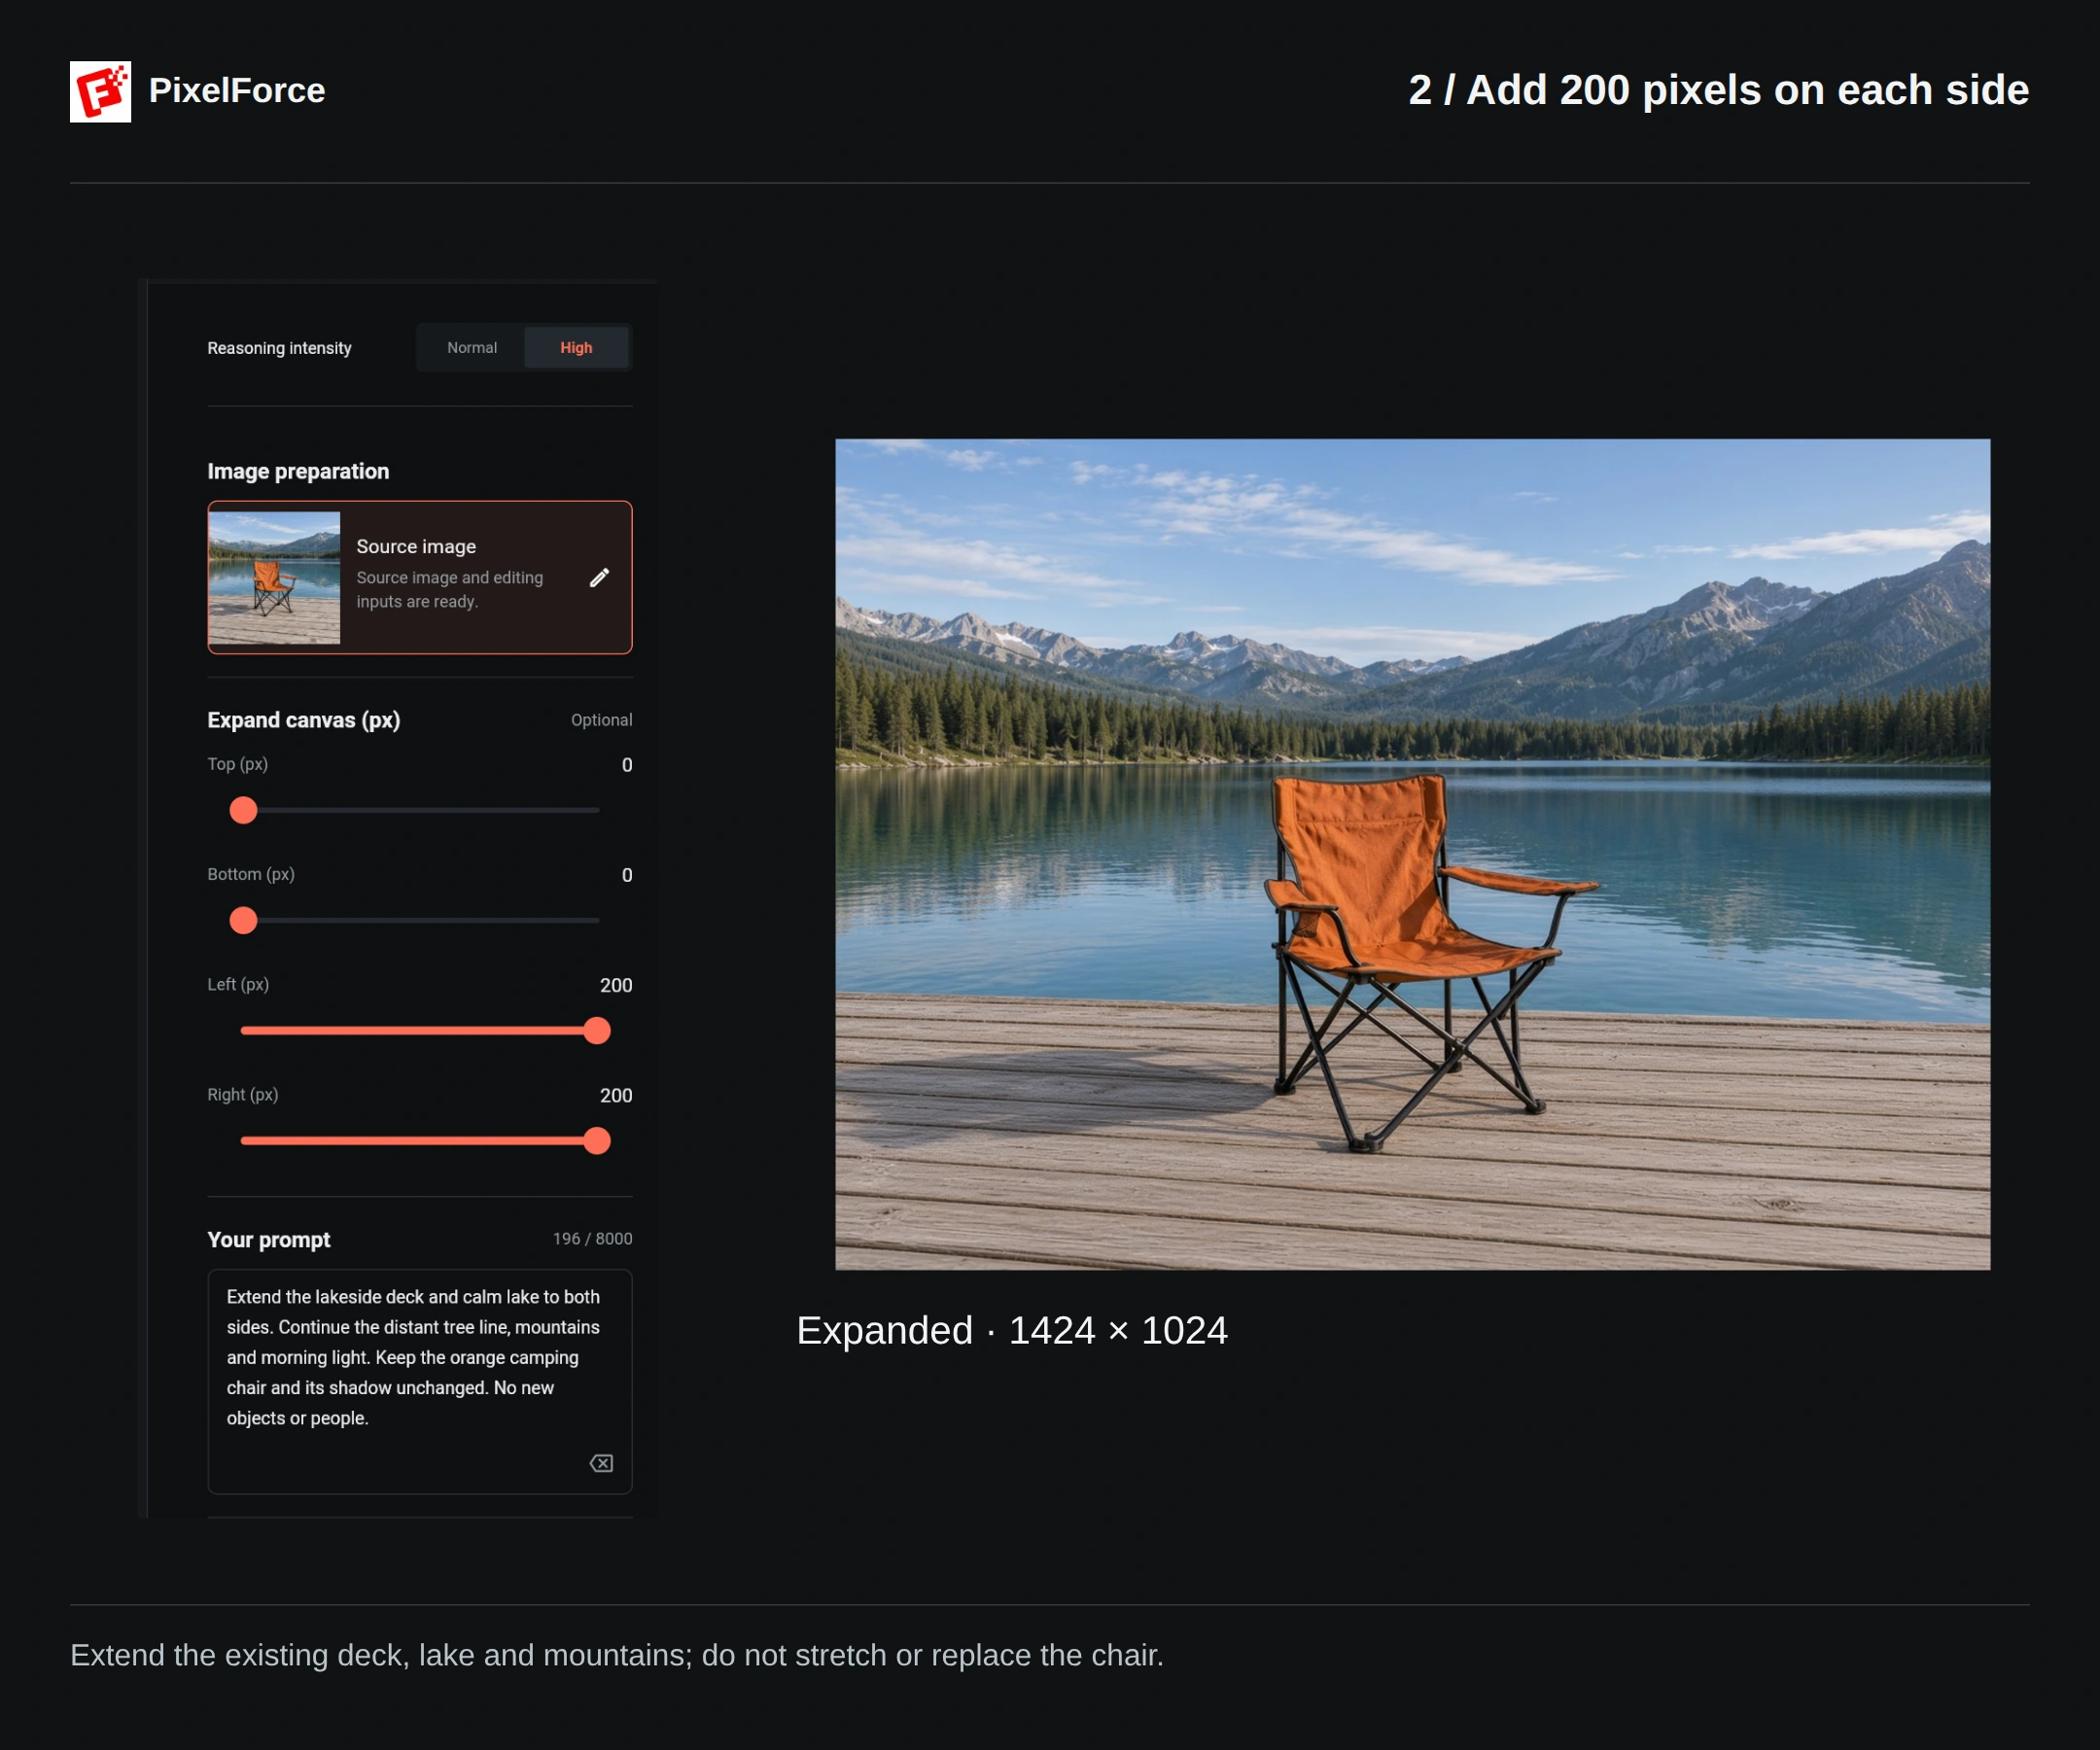
In Expand canvas (px), set each side independently. A value adds pixels beyond that edge; it does not crop that side.
| Setting | This example |
|---|---|
| Top (px) | 0 |
| Bottom (px) | 0 |
| Left (px) | 200 |
| Right (px) | 200 |
| Reasoning intensity | High |
Each edge currently supports 0–200 pixels, and at least one must be above zero. Left and right default to 100, so check them rather than assuming the form already matches this example. There is no separate aspect-ratio, output-size or Standard/HD selector, and you do not need to paint a mask.
Input canvas width = prepared width + left + right; height = prepared height + top + bottom. Here, 1024 + 200 + 200 gives 1424, while the height stays 1024. The provider may use a supported output resolution for other requests; check the final file rather than treating this calculation as a universal export-size guarantee.
3. Describe how the scene should continue
The prompt is optional, but a short, specific instruction helps keep the added area consistent. This example uses:
Extend the lakeside deck and calm lake to both sides. Continue the distant tree line, mountains and morning light. Keep the orange camping chair and its shadow unchanged. No new objects or people.
Describe the existing environment, its perspective and lighting, and name what should stay as it is. Avoid asking for a different setting, extra chairs or new people when your goal is simply a wider view.
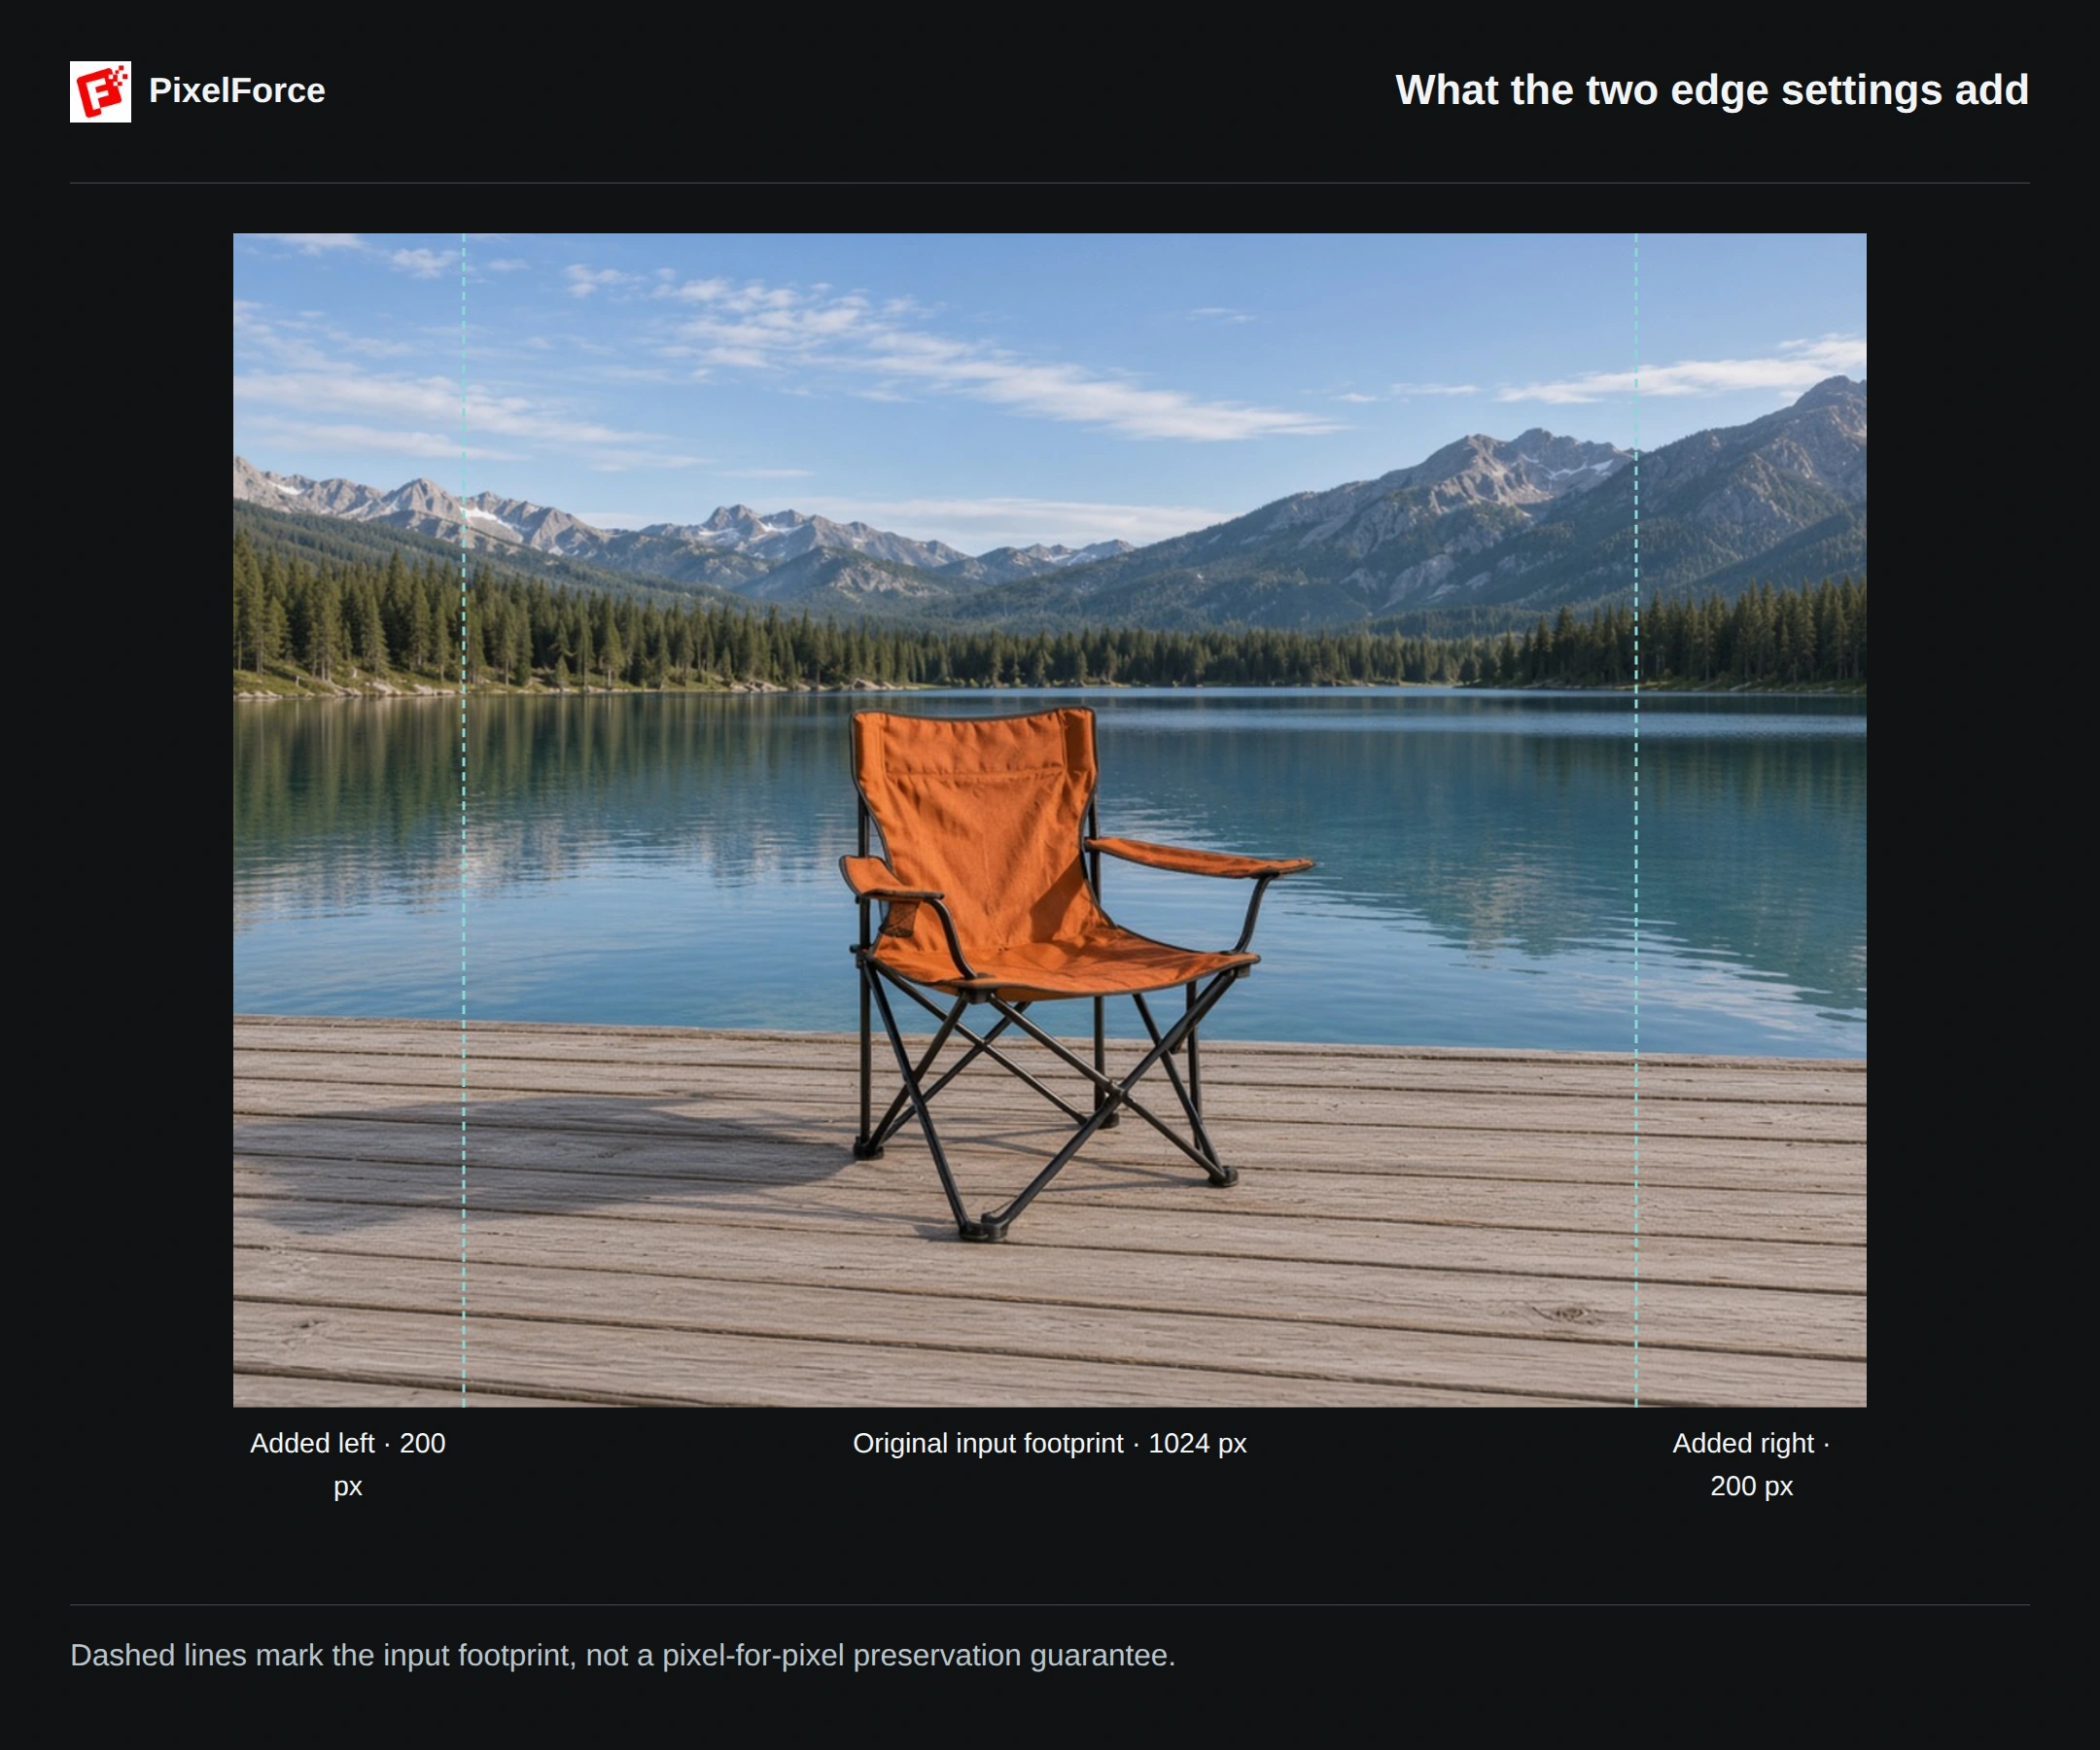
The marked side strips show where the canvas was extended. The dashed lines locate the original input footprint; they do not mean that every pixel inside it was copied unchanged. AI can blend across the boundary, so the original subject still needs checking.
4. Run and inspect
Review the source, all four edge values, your instruction and the current points quote, then choose Run. Wait for the task to finish before submitting another attempt. Open the image in Result and compare it with the source.
The walkthrough shows source preparation, settings and the completed example, then the full comparison. Generation waiting has been shortened; the video is not an estimate of how long your task will take.
Use Save image to keep the full-resolution result. A screenshot of the screen-fitting preview does not retain the same image detail.
Check the joins and the subject
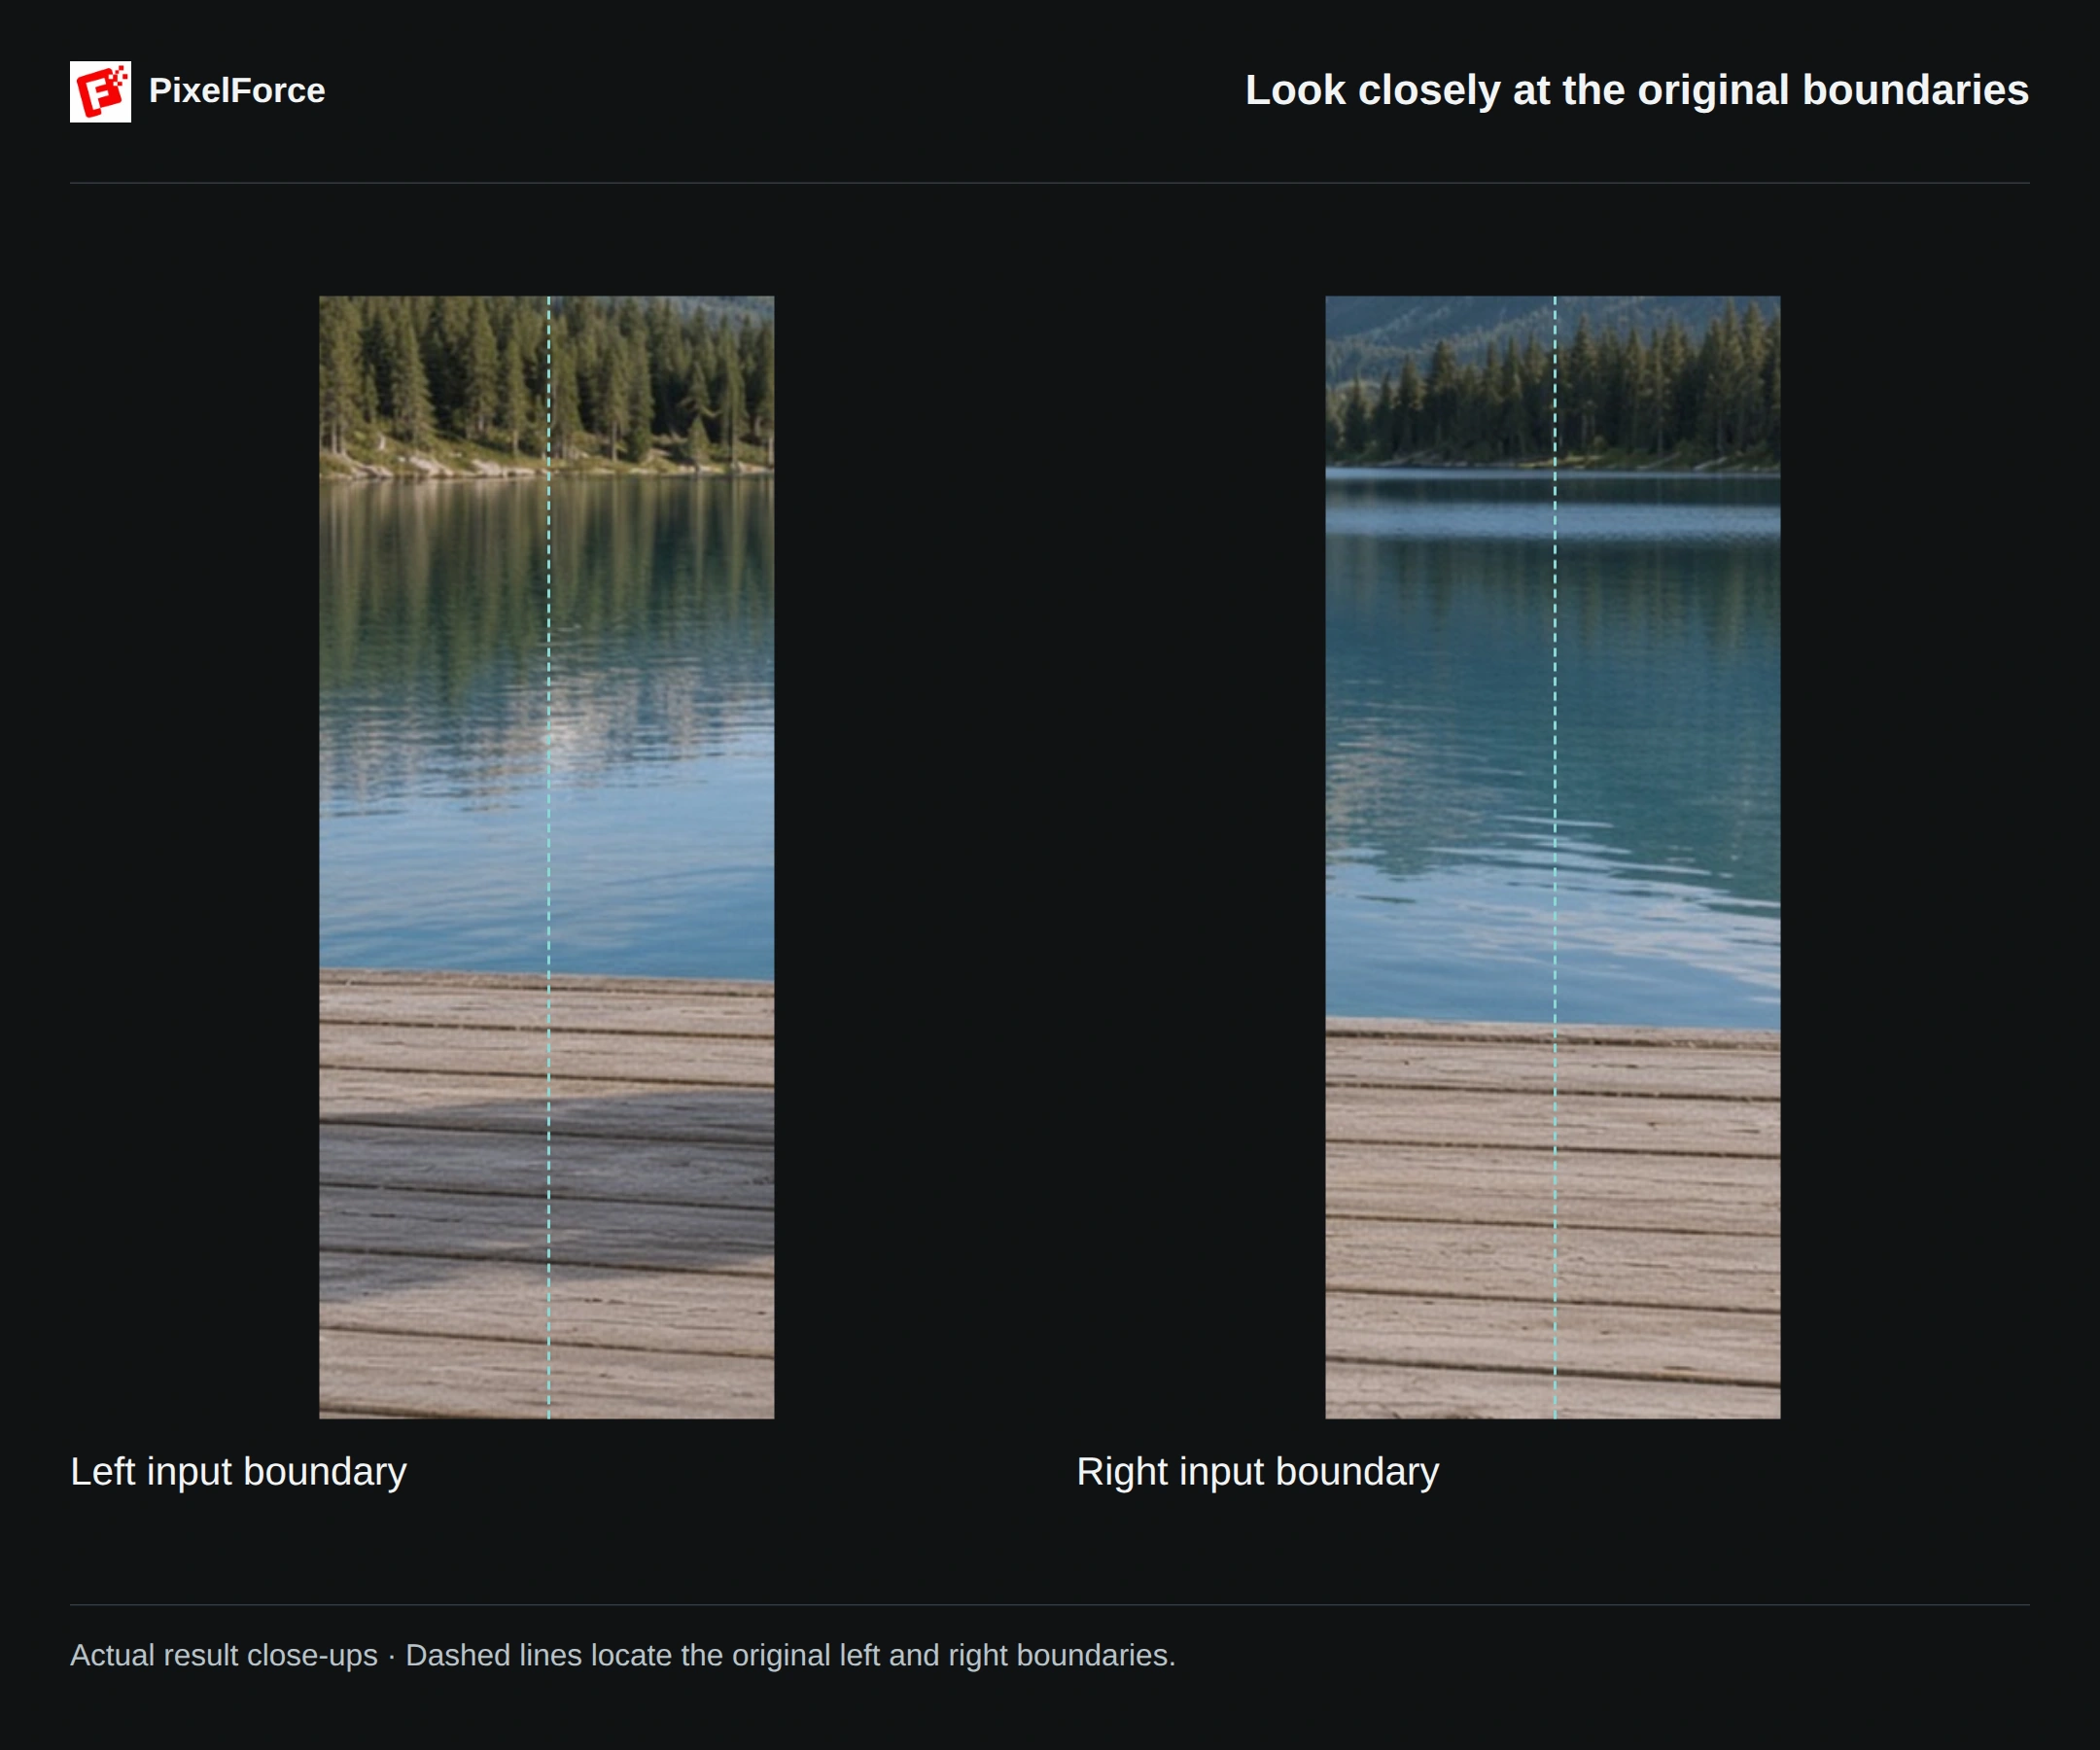
- Follow the background across the old edges. Look for breaks in the shoreline, repeated mountain shapes, abrupt changes in reflections, or straight vertical joins.
- Check the deck's perspective. Boards and wood grain should continue plausibly, without changing direction suddenly, becoming smeared or repeating in a copied-looking pattern.
- Inspect the chair, not just the new space. Compare its color, canvas folds, armrests, frame, feet and shadow. A wider view is not enough if important product details have changed.
- Check the whole composition. The source should not be unexpectedly cropped, stretched, duplicated or reframed. Outpainting creates plausible surroundings; it cannot recover what was really outside the photographed frame.
Refine one setting at a time
| What you notice | What to try next |
|---|---|
| The join looks abrupt | Try a smaller expansion, such as 100 pixels on each side, and describe the existing surface briefly. |
| The new area adds unwanted objects | Ask for only the current environment to continue, without new objects or people. |
| The subject changes | Ask explicitly to preserve it and inspect another attempt carefully. Text guidance is not a pixel lock. |
| You need more sky or foreground | Increase Top or Bottom rather than stretching the finished image. |
In Library, choose Reuse settings while the saved inputs are still available. Check that the original source and four edge values have been restored, adjust one thing and review the new quote. Reuse does not submit a task automatically.
For a new setting around the subject, use Background Redraw. To enlarge image detail rather than add surroundings, use AI Upscale. For a final crop or composition adjustment, use Image Editor.