Object Eraser
A stray can, a cable across a desk or a small distraction can take attention away from the subject. Object Eraser removes the unwanted object and fills the cleared area with detail that fits the surrounding scene. Use it to clean up a photo, not to replace one object with another.
A cleaner tabletop
In this example, the red aluminum can and its shadow distract from the cup and notebook. The instruction identifies both, so the edit can remove the can and rebuild the tabletop beneath it. In the result, the cleared area is filled with wood grain rather than left empty or replaced with a new object.
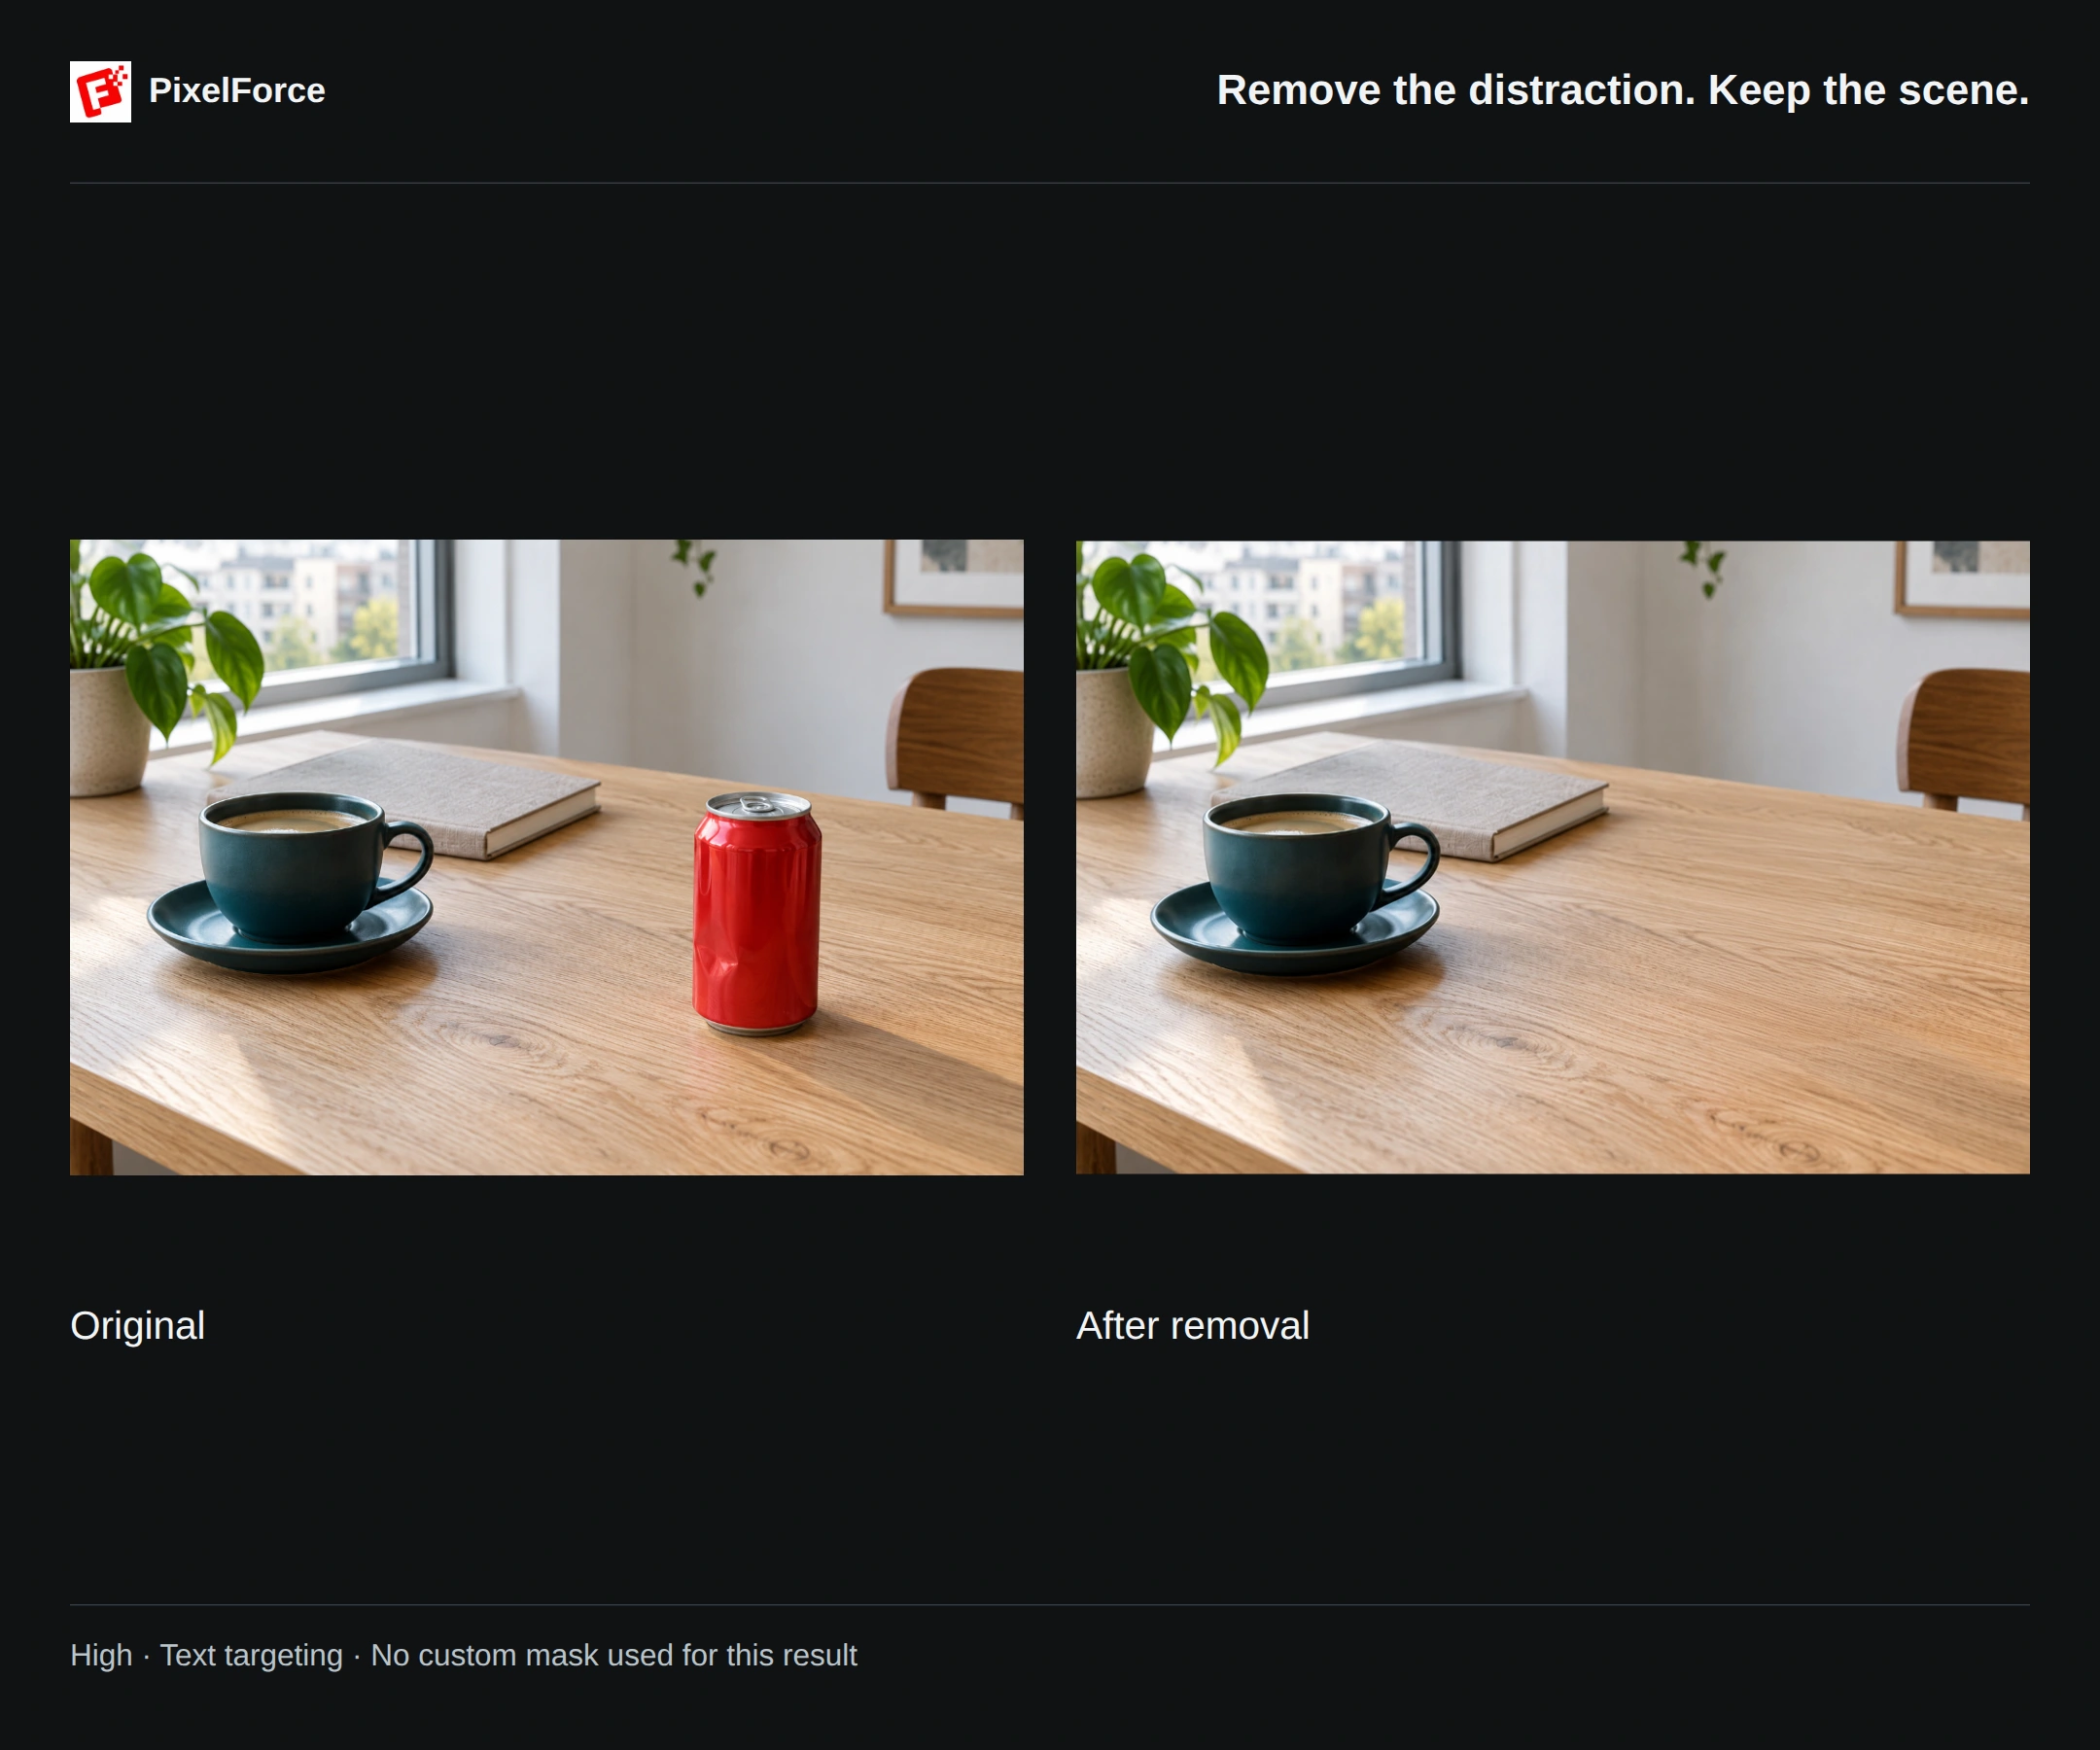
This example uses High reasoning intensity and a text instruction, without a custom mask. You do not always need to paint a selection in High mode: a clear description can identify an isolated object. A mask is useful when you need to distinguish between similar objects or define a more specific editing area.
Remove an unwanted object
1. Prepare the photo
Open Object Eraser from Create or Explore, add your photo, then choose Edit inputs. Keep the whole object and its relevant shadow visible. A clear boundary and some visible background around the object give the edit more useful context.
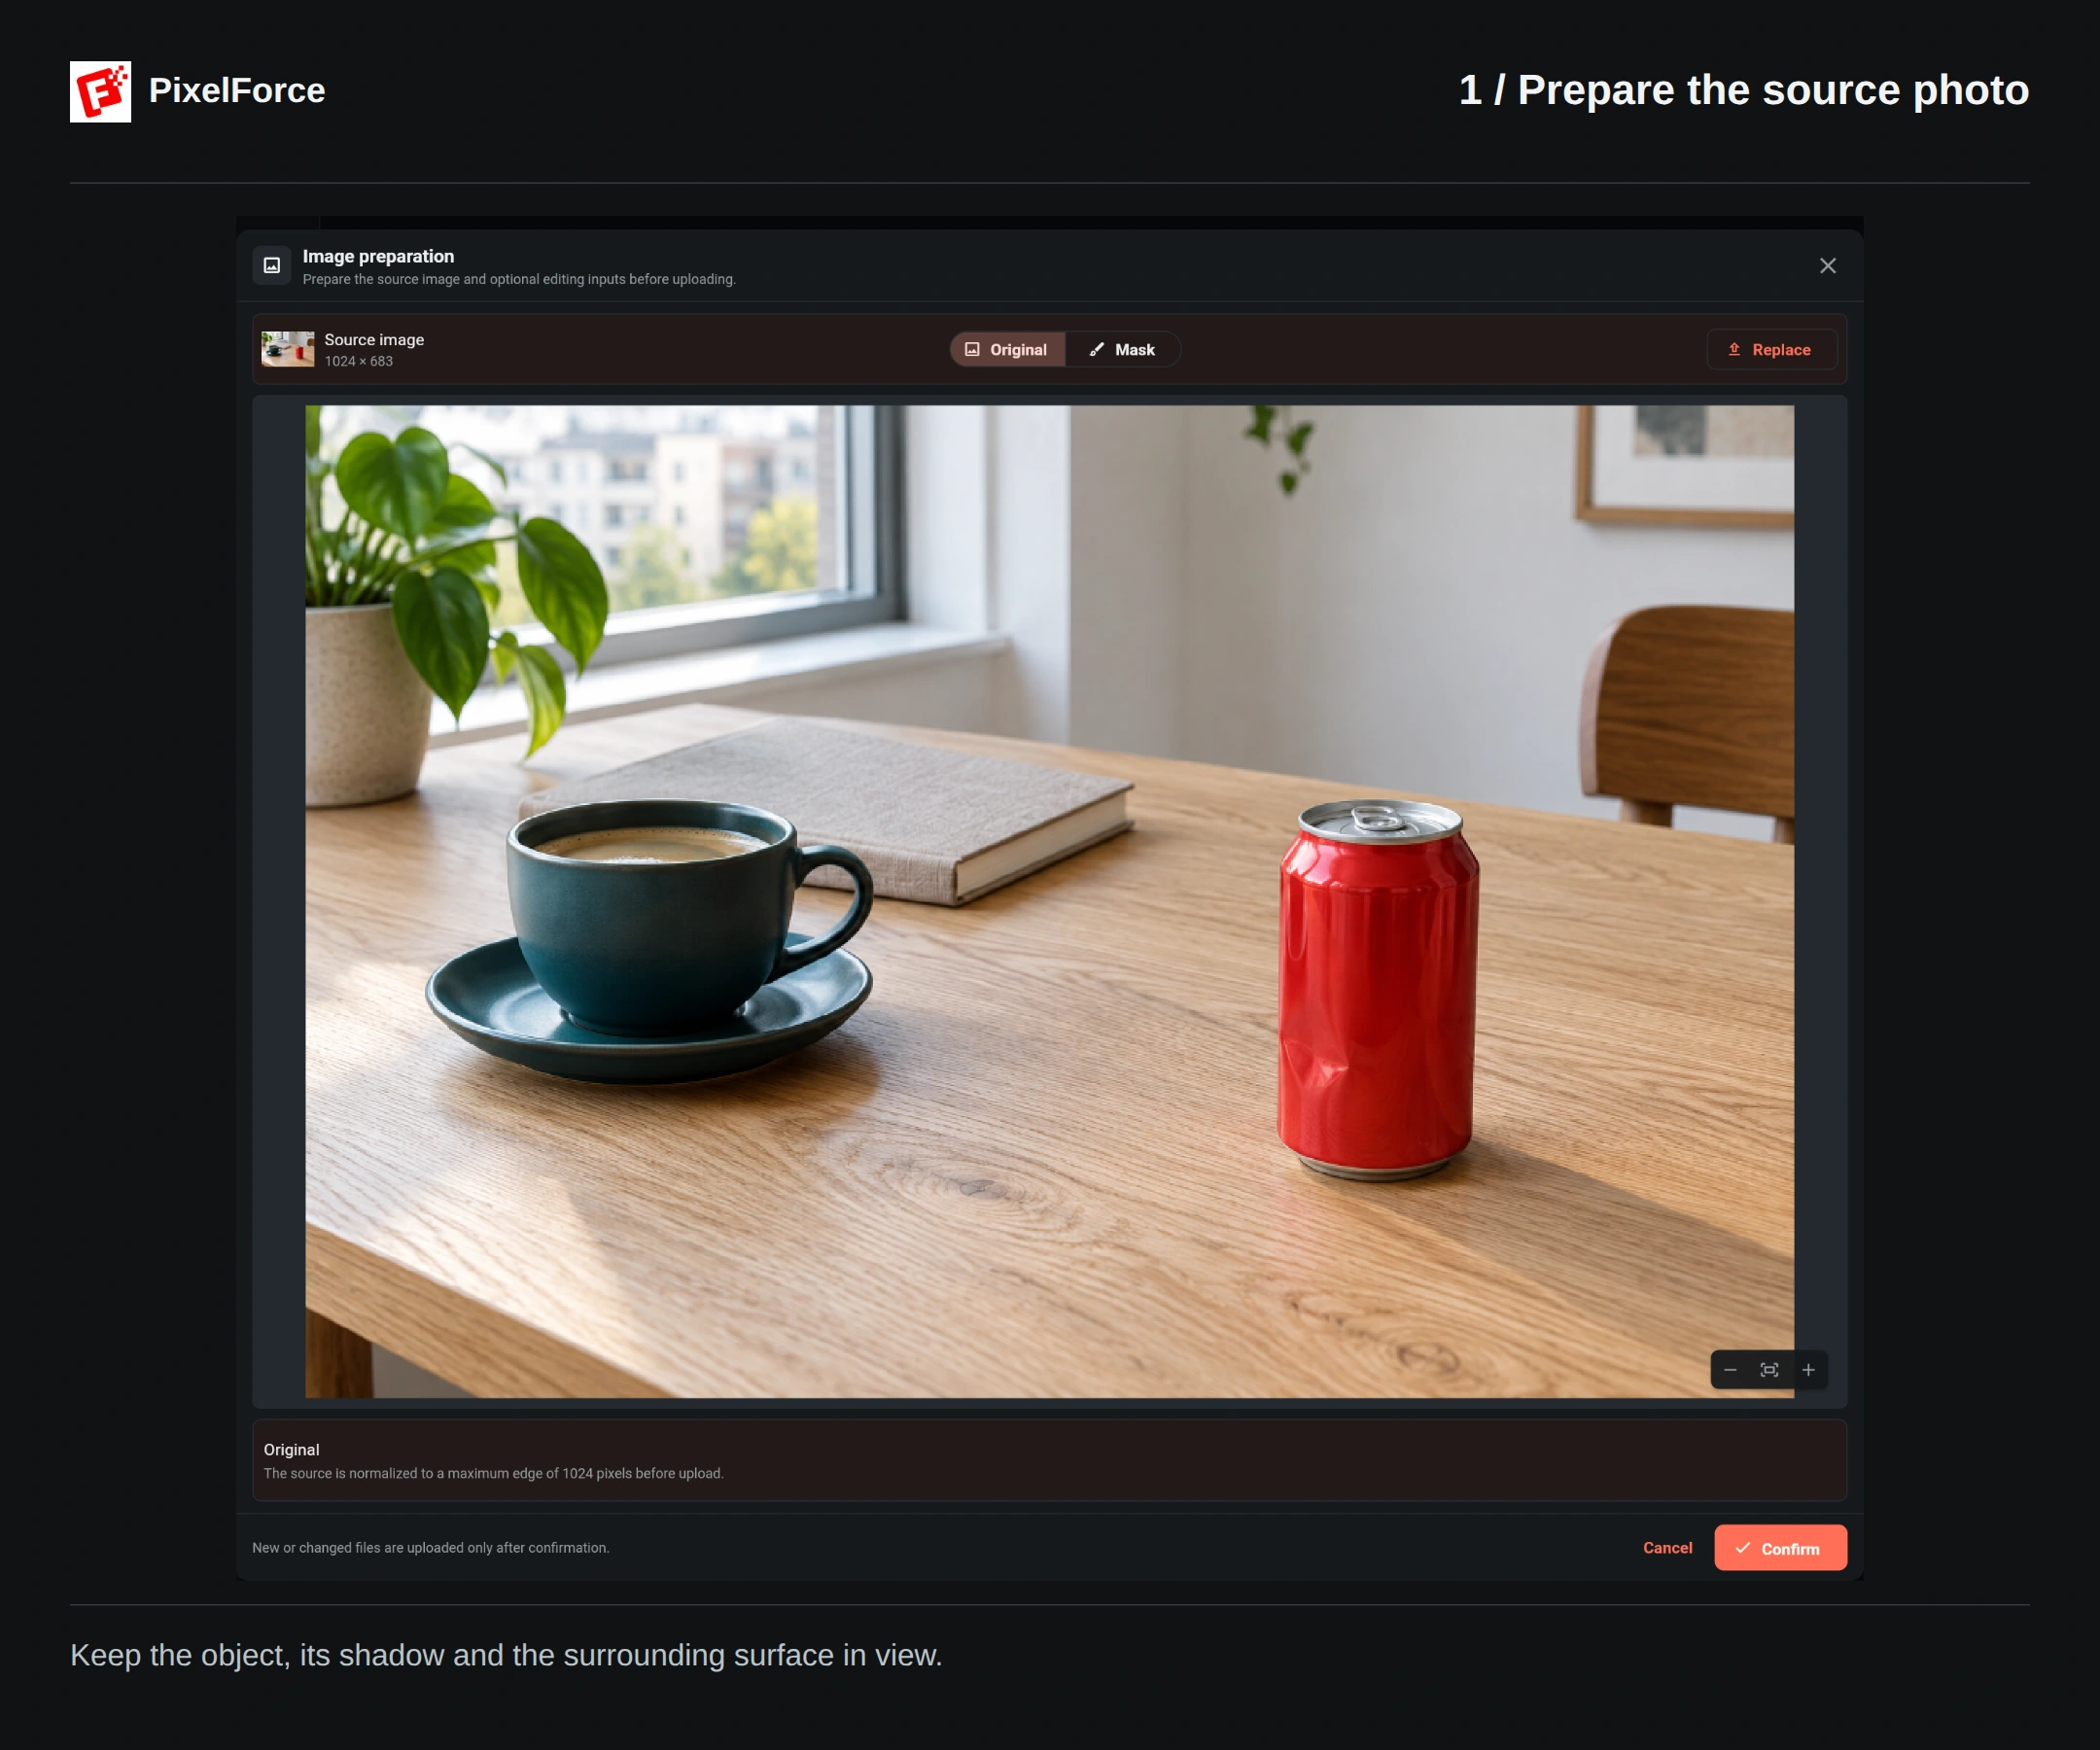
On Android and iOS, choose from your photo library, take a photo or browse files. On Web and desktop, use the file picker. Check the prepared image before choosing Confirm; the app may resize a large source before uploading it.
2. Describe what should disappear
For the example, select High and enter this exact instruction in Removal guidance:
Remove the red aluminum can and its shadow from the right side of the table.
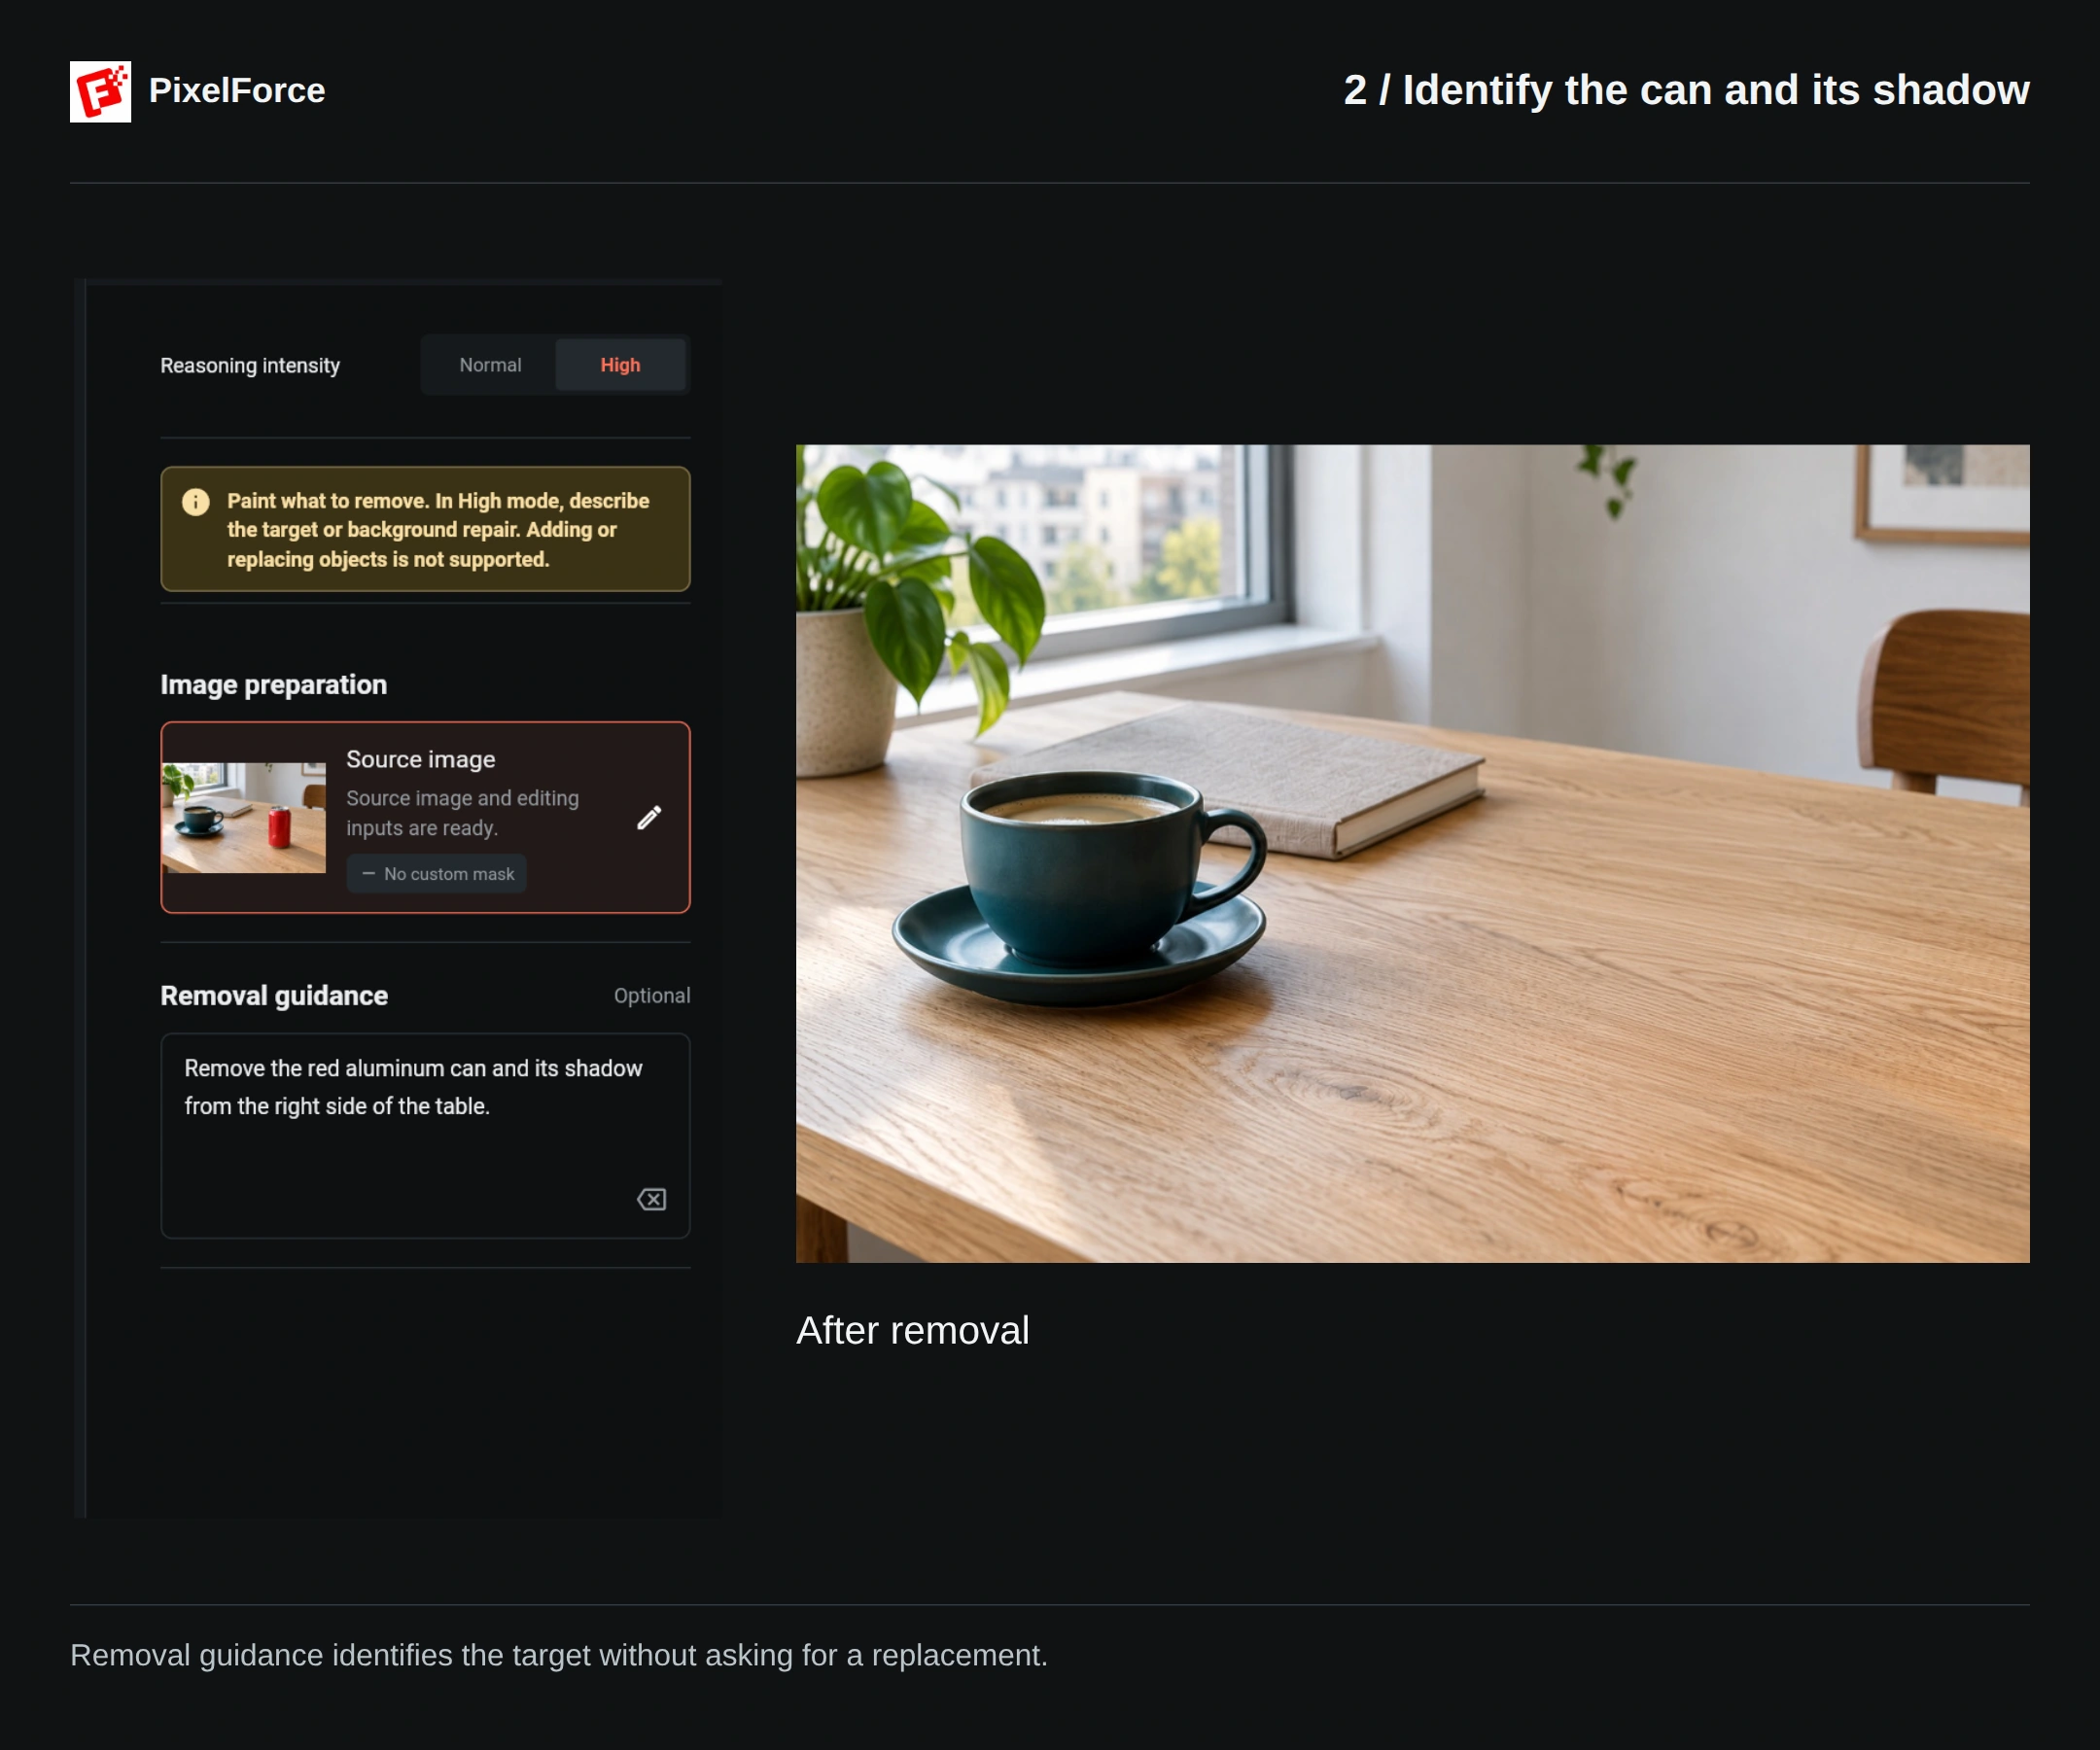
Be specific about the object, its position and any shadow or reflection that should also go. If the area needs more guidance, describe how the existing background should continue, for example: "Continue the surrounding wood grain naturally." Keep that instruction consistent with the photo.
High supports a removal description, a custom mask, or both. Do not leave both empty. Normal does not offer the text-guidance field; use a painted selection to identify what to remove. Available modes and the points quote follow the current scene settings.
3. Paint a selection when you need more control
This is an alternative to the text-only example, not an extra step it required. In Edit inputs, switch from Original to Mask, then use Brush to mark the object. Include its edges, contact shadow and any cast shadow you want removed. Leave a small margin around the target, but avoid covering the cup, notebook or other details you want to keep.
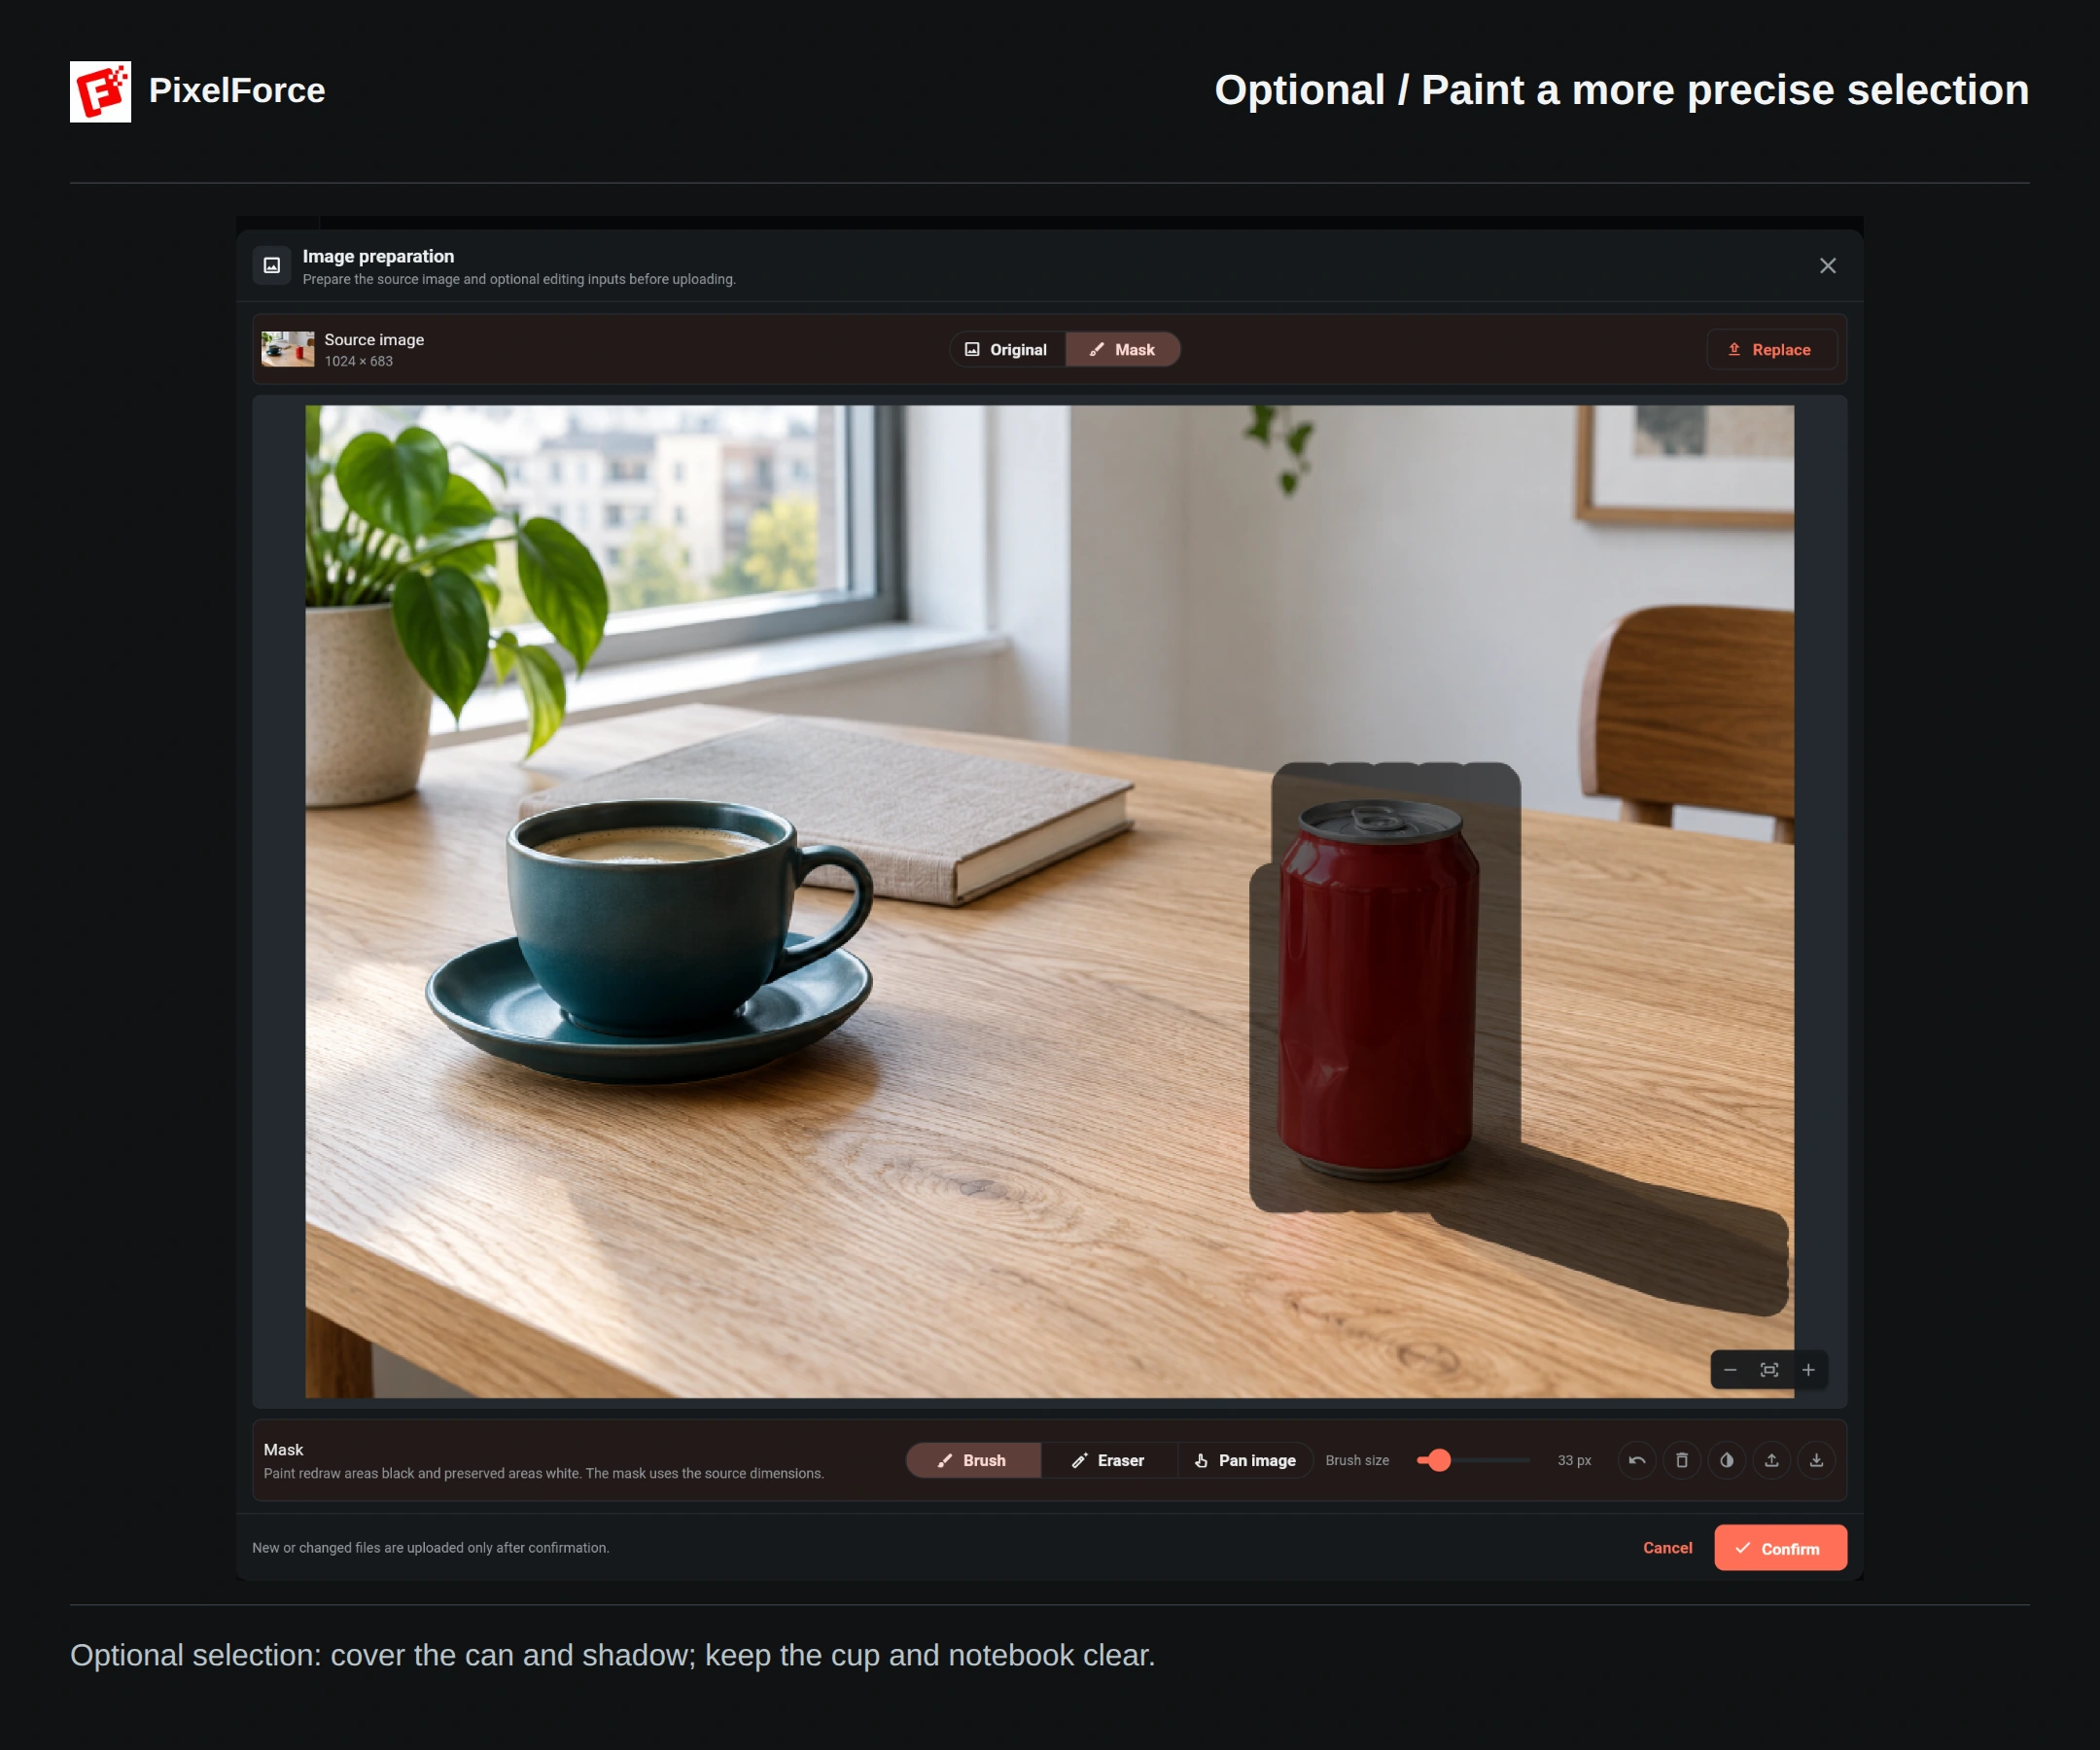
Use Zoom in and Brush size for closer work. Eraser removes excess selection; Undo reverses the last stroke. Choose Confirm to apply the prepared inputs. Cancel closes the editor without applying those changes.
When importing your own mask, black marks the area to redraw and white marks the area to preserve. The mask must line up with the source image. A Background Cutout subject mask uses a different convention; do not assume it is ready to use as a removal selection.
4. Run and inspect the result
Review the original, your instruction or selection, and the points quote, then choose Run. Wait for the task to finish before submitting another attempt. Open the image in Result to inspect the repair at a larger size.
The walkthrough moves from source preparation to the removal instruction, then the completed example and a before-and-after comparison. Generation waiting has been shortened in the edit; the video's duration is not a generation-time estimate.
Look beyond the missing object
An object can disappear while the repair still needs work. Compare the cleared area with the wood grain, texture and lighting immediately around it.
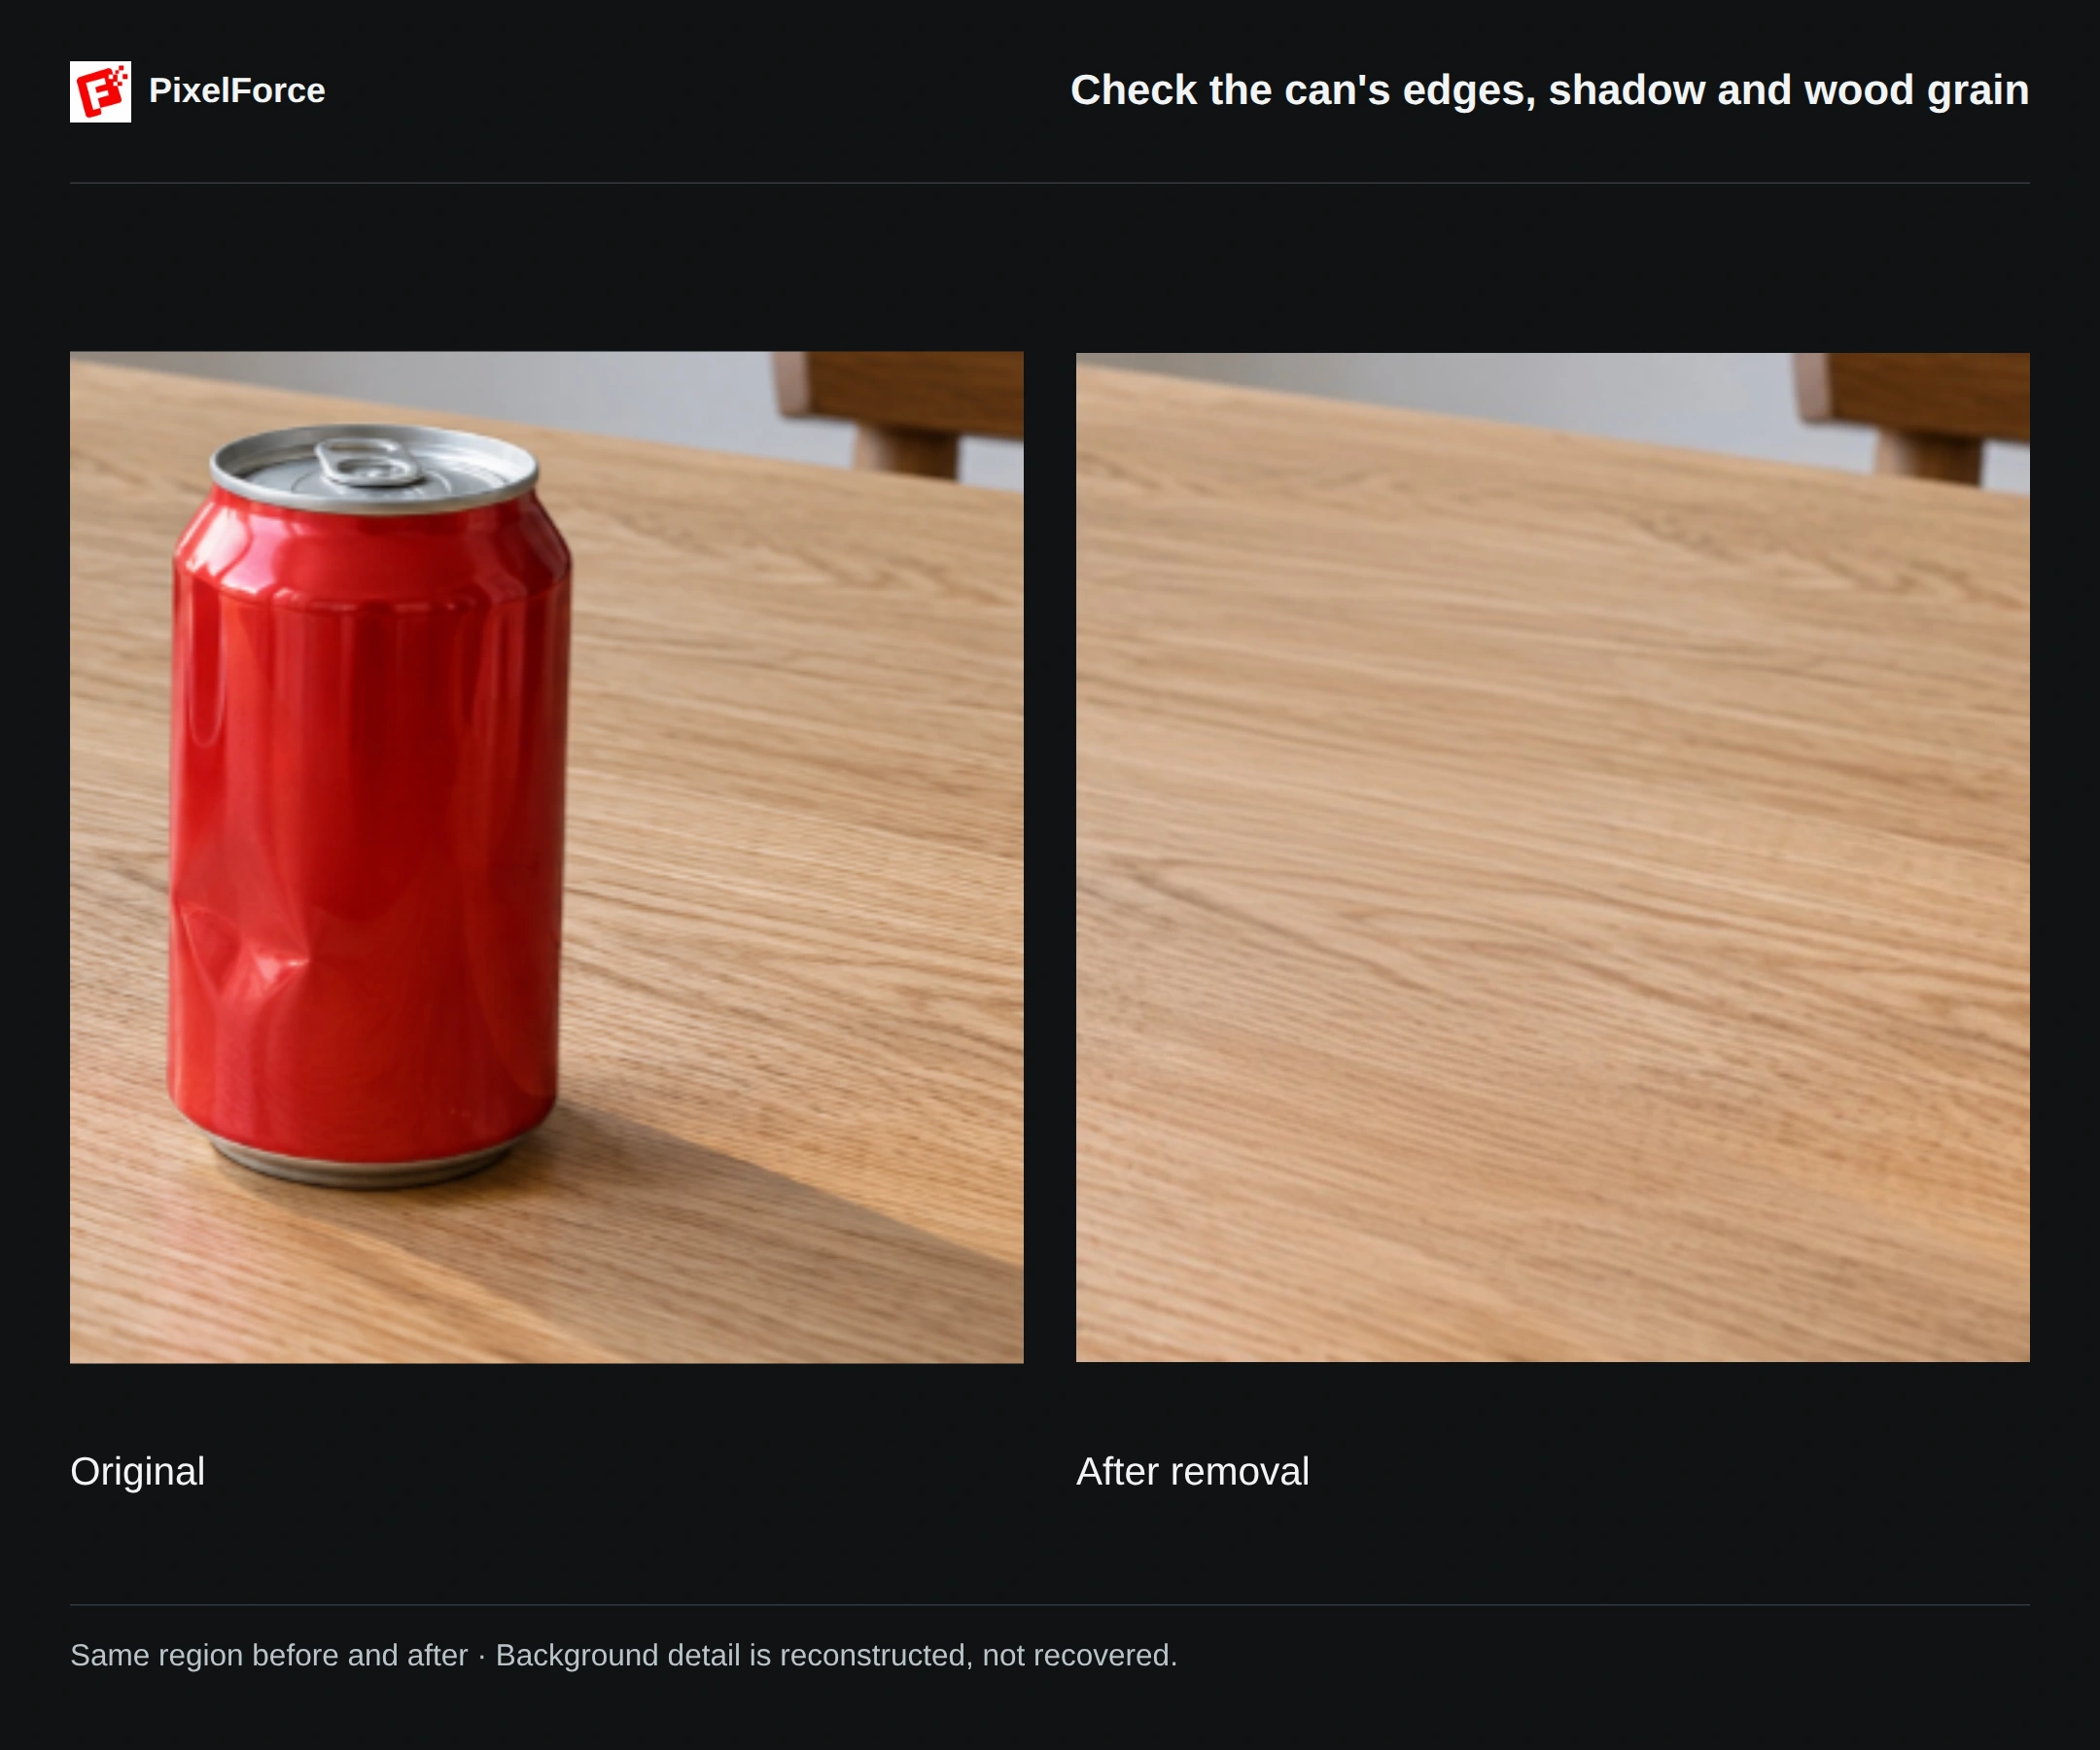
- Check the outline and shadow. Look for a red or silver edge, a dark contact mark, or a leftover cast shadow where the can stood.
- Follow the surface. Wood grain and other repeating detail should continue plausibly, without a blurred patch, an obvious seam or a copied-looking pattern.
- Check nearby objects. The cup, saucer, notebook and room should still look right. AI editing can alter details outside the target area, especially around overlaps.
- Keep expectations realistic. The tool creates a plausible background. It cannot recover the exact surface that was hidden behind the object, and tightly overlapping subjects or complex reflections are harder to repair.
Refine the target, not the whole photo
| What you notice | What to try next |
|---|---|
| The shadow remains | Include it in the selection, or explicitly mention it in the High-mode instruction. |
| The wrong object disappears | Add color and position to the description, or paint only the intended target. |
| A nearby detail changes | Tighten the selection and explain what should remain unchanged. Avoid selecting large unrelated areas. |
| The repair looks smeared or repetitive | Check the selected boundary and use a short instruction about the existing surface. Some backgrounds may need another attempt. |
In Library, choose Reuse settings to bring the saved source and settings back into the form, while those inputs are still available. Check the original input, make one focused change and review the new quote before running again. Reusing settings does not submit a task automatically or guarantee the same result.
For changes beyond removal, use AI Retouch. To remove the entire background instead, use Background Cutout. For a final crop or local adjustment, use Image Editor.