Image Editor
Have a photo you like, but want a tighter crop, warmer colors or a short title? Image Editor handles those finishing touches on your device. Local edits do not submit an AI generation or spend generation points.
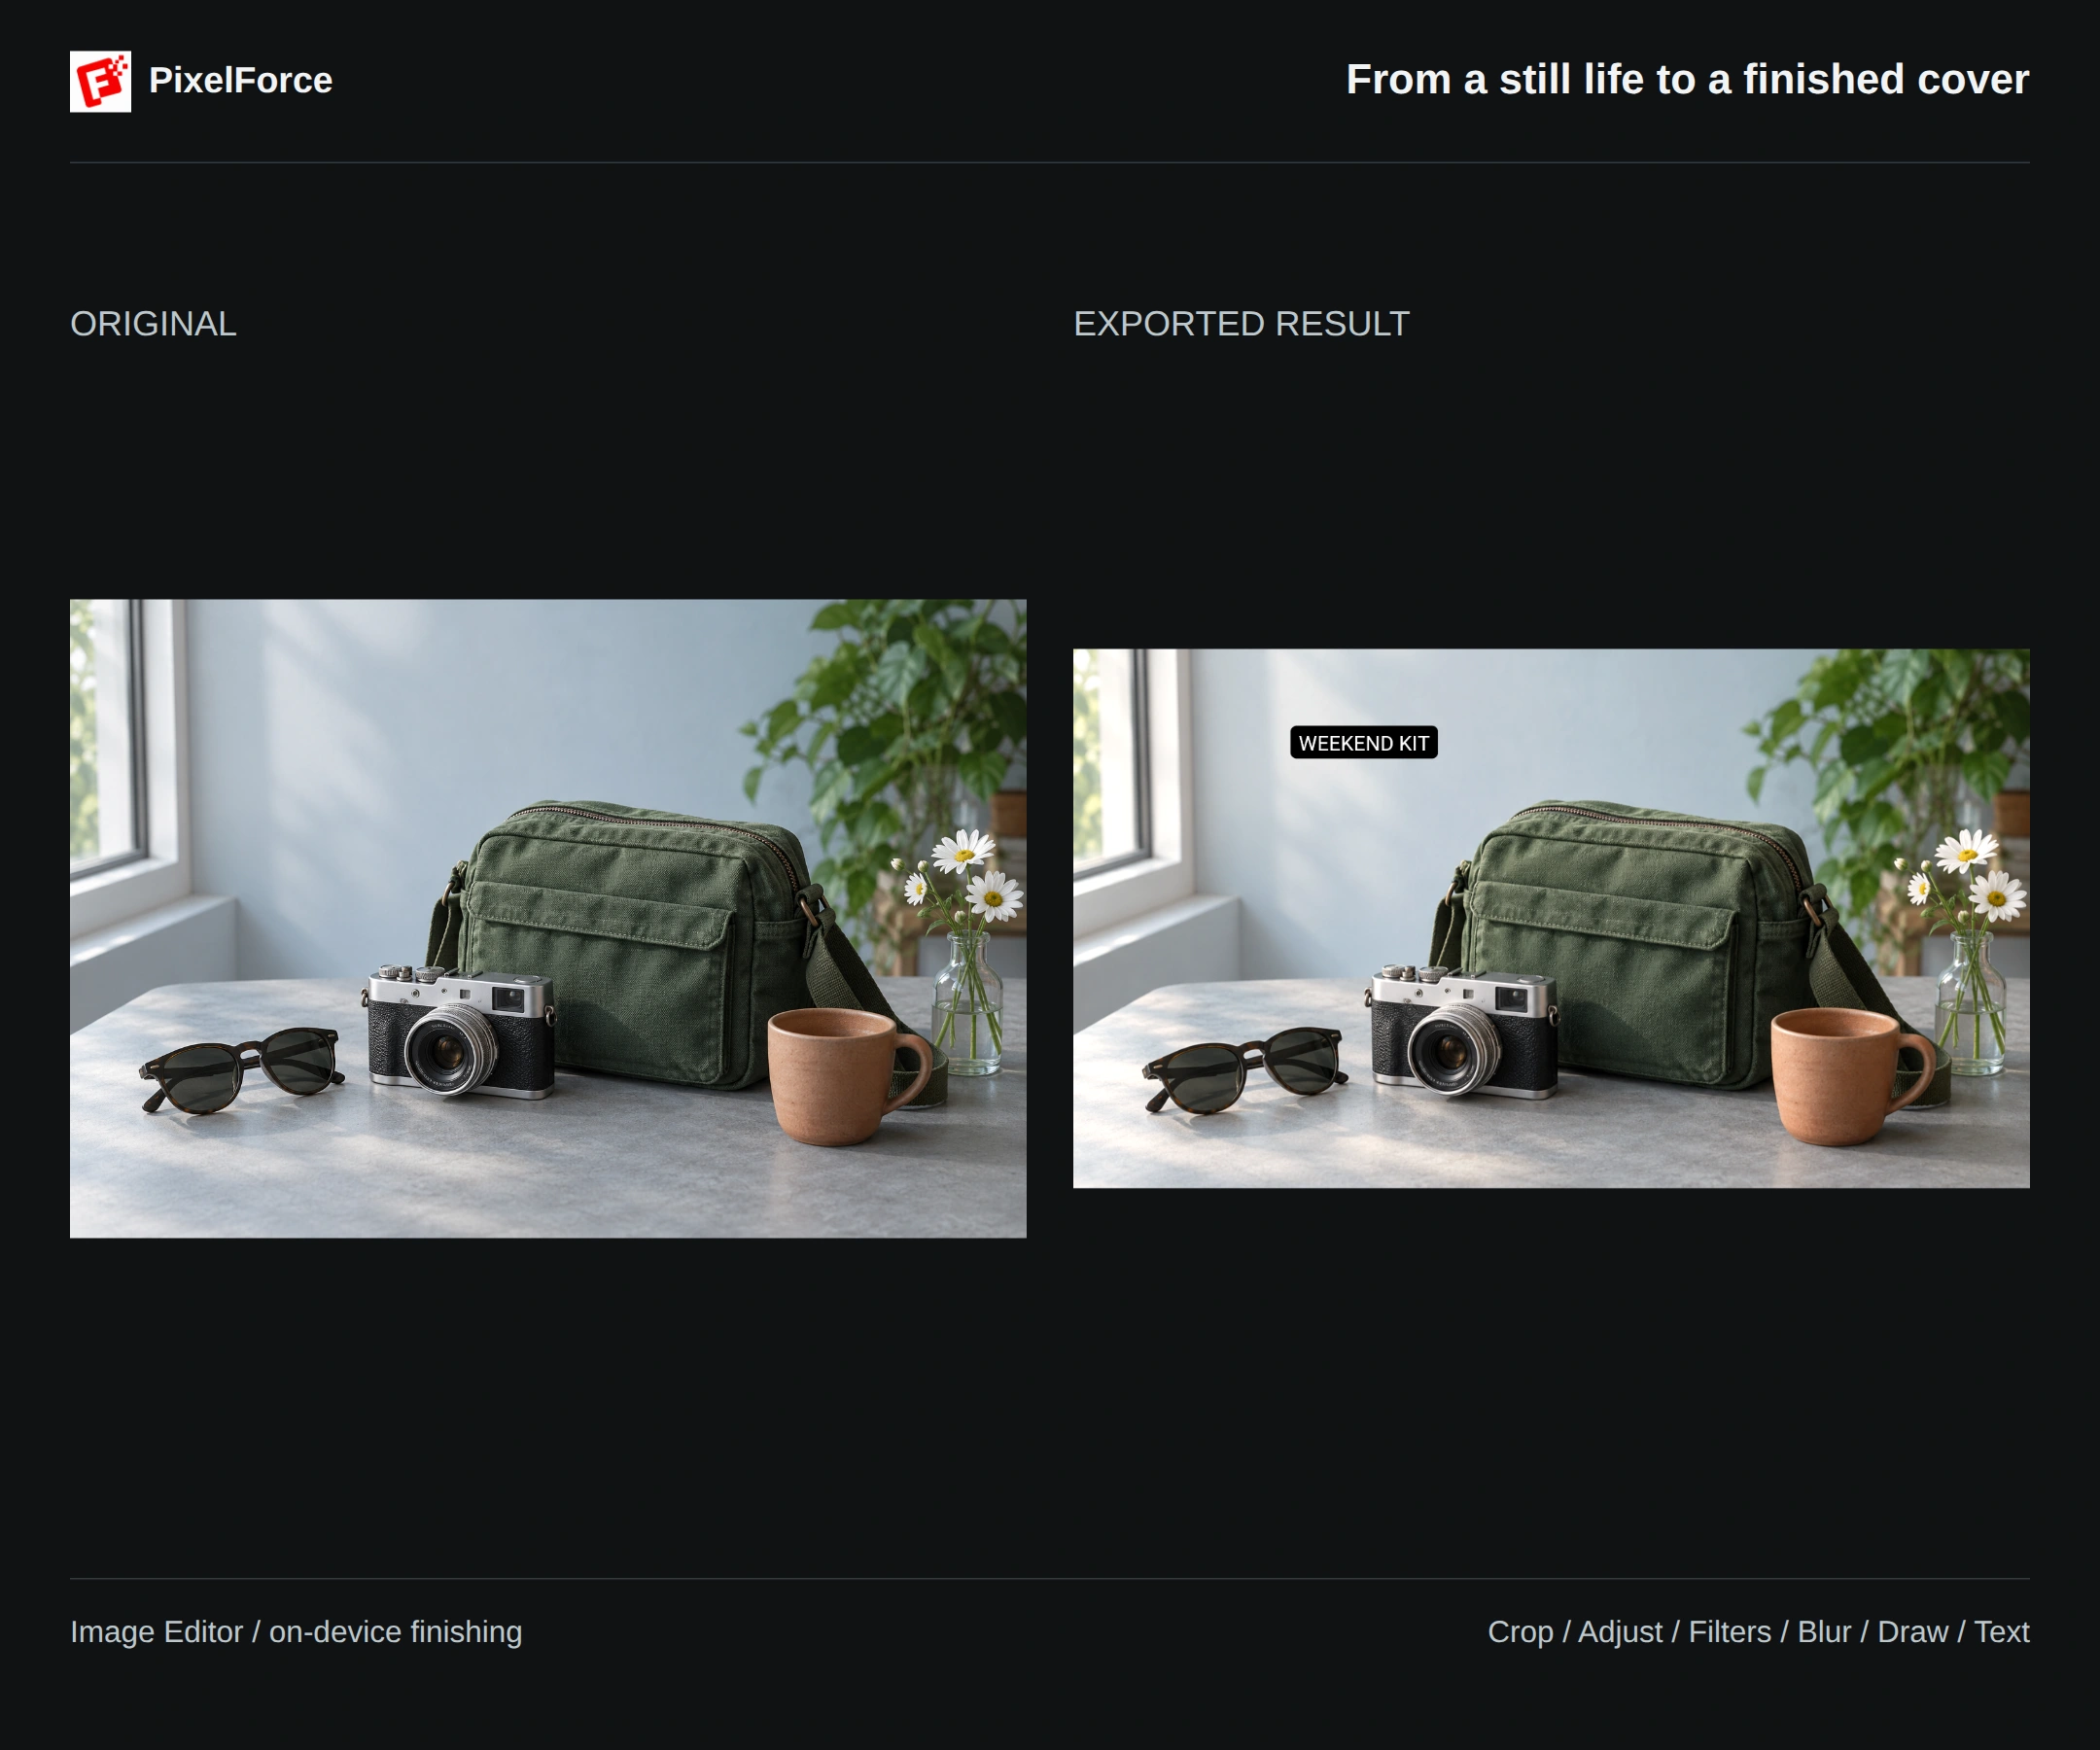
This guide uses a still-life photo of a camera, a shoulder bag and a cup. Each tool has its own example, followed by a finished "WEEKEND KIT" image that combines a crop, color adjustments and text.
Open a photo and find your tools
- Open Image editor from the quick-edit tools in Create, or from Explore.
- Select Choose an image. Web and desktop open a file picker; Android and iOS offer Photo library, Take photo and Browse files.
- Choose a tool from the bottom toolbar. When you finish with that tool, select Apply in the top-right corner to return to the main editor.
You can also use Edit image on a selected generation result or library image to open it directly. Continue editing opens AI Retouch for changes described in words.
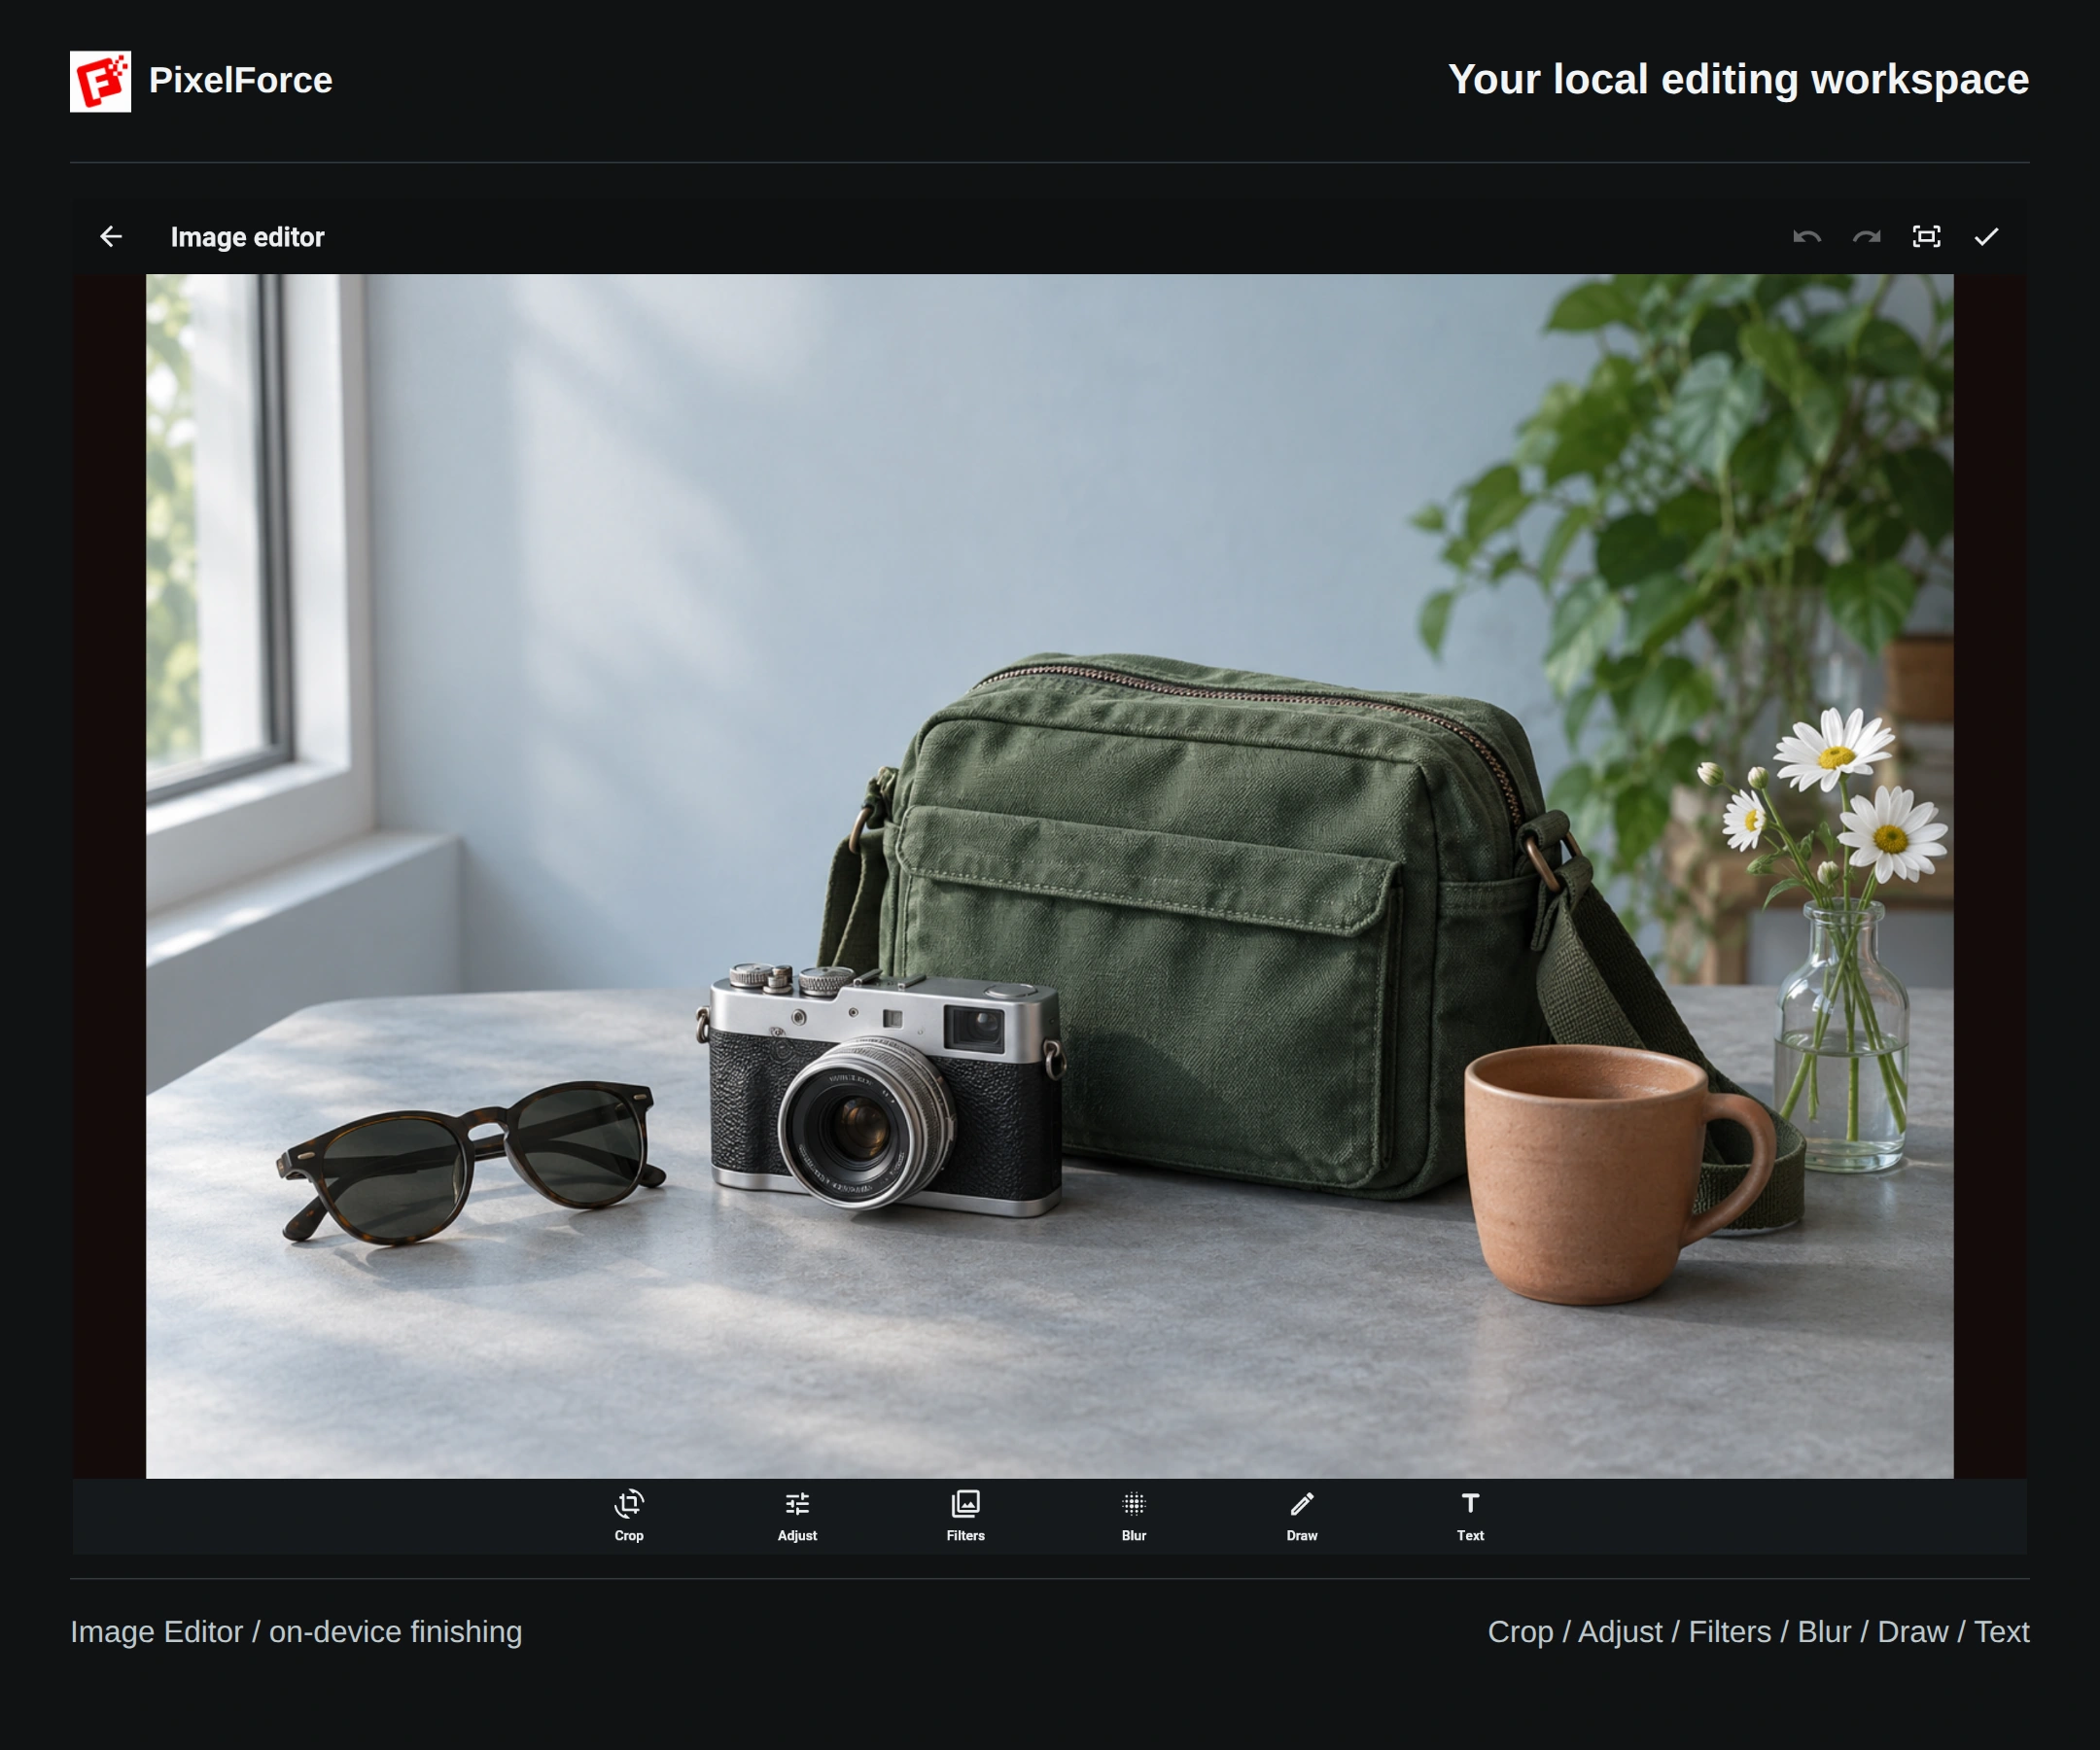
| Tool | Use it for |
|---|---|
| Crop | Framing, aspect ratio, rotation, mirroring and straightening |
| Adjust | Brightness, contrast, saturation, exposure and color temperature |
| Filters | Trying a different overall color treatment |
| Blur | Softening the whole photo for a title or design background |
| Draw | Arrows, shapes, annotations and local blur |
| Text | Titles, size, alignment, color and text backgrounds |
Crop, rotate and flip
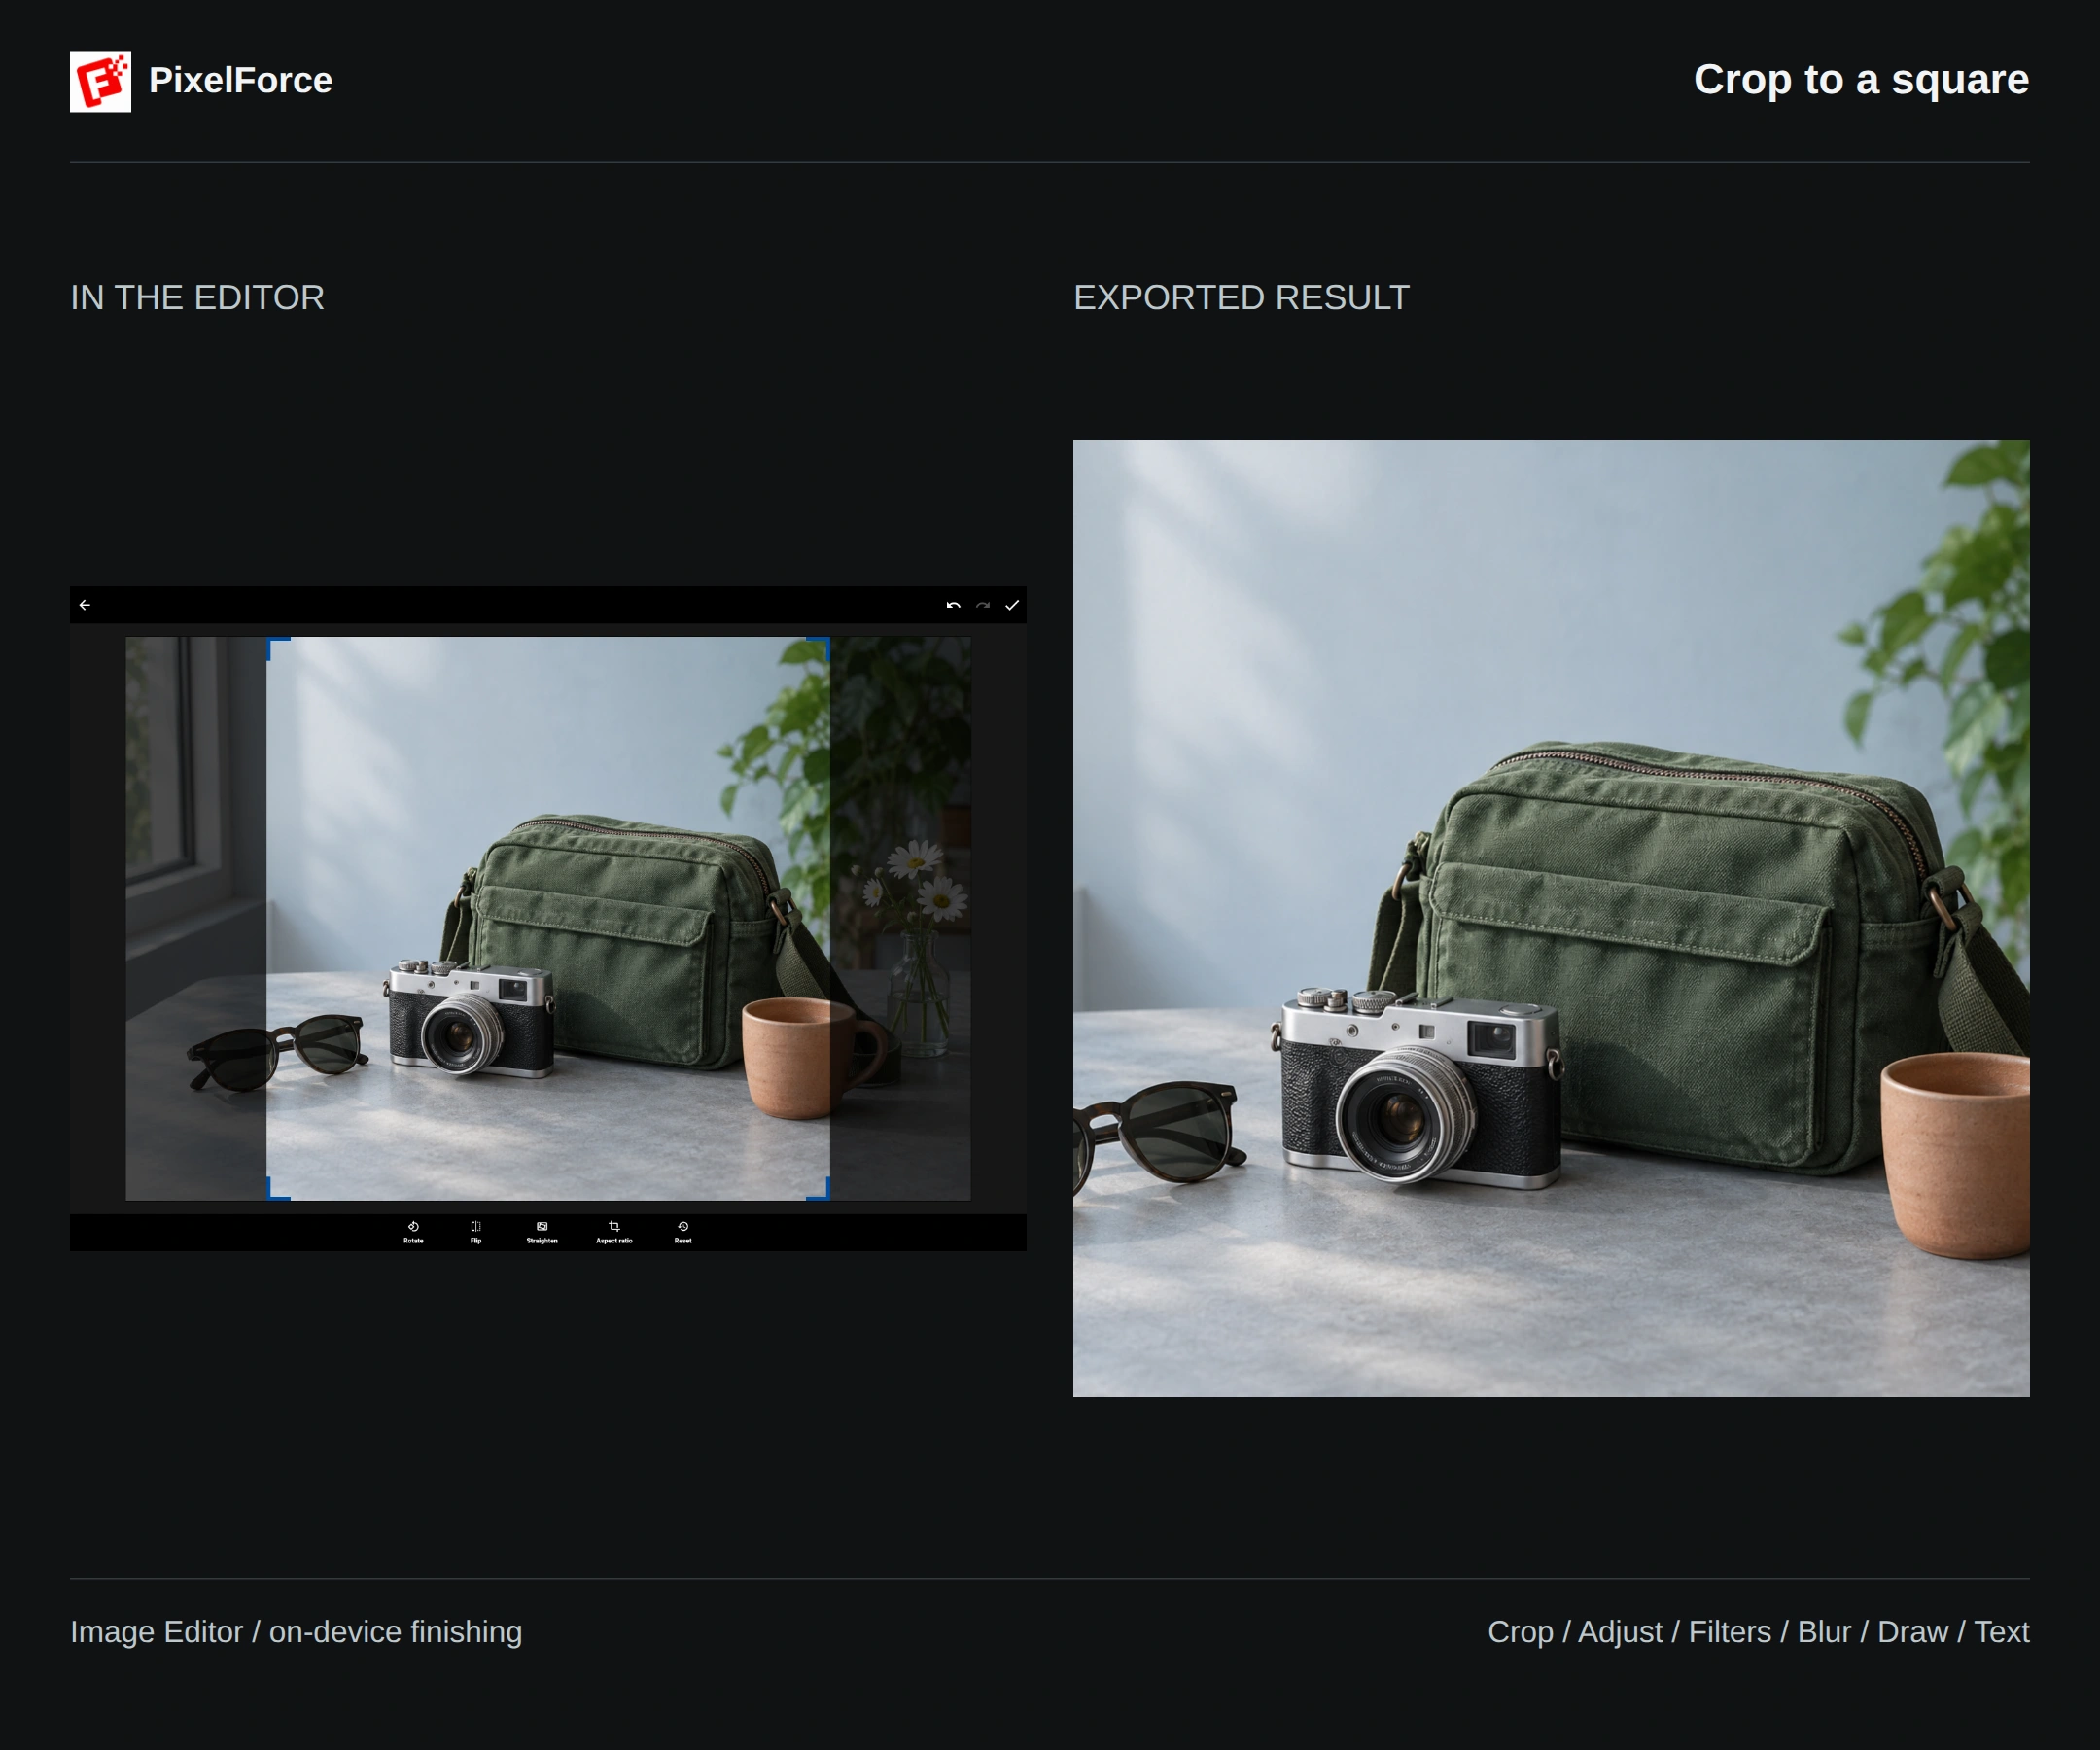
Open Crop, choose Aspect ratio, then 1:1. Adjust the crop or reposition the photo to keep the bag and camera in view, and select Apply. This example keeps the central objects and removes some of the setting on either side. Content outside the crop is left out of the result.
Available ratios include Original, 1:1, 4:5, 3:2 and 16:9, alongside free-form cropping. A square works well for avatars and product grids, 4:5 for portrait posts, and 16:9 for landscape covers.
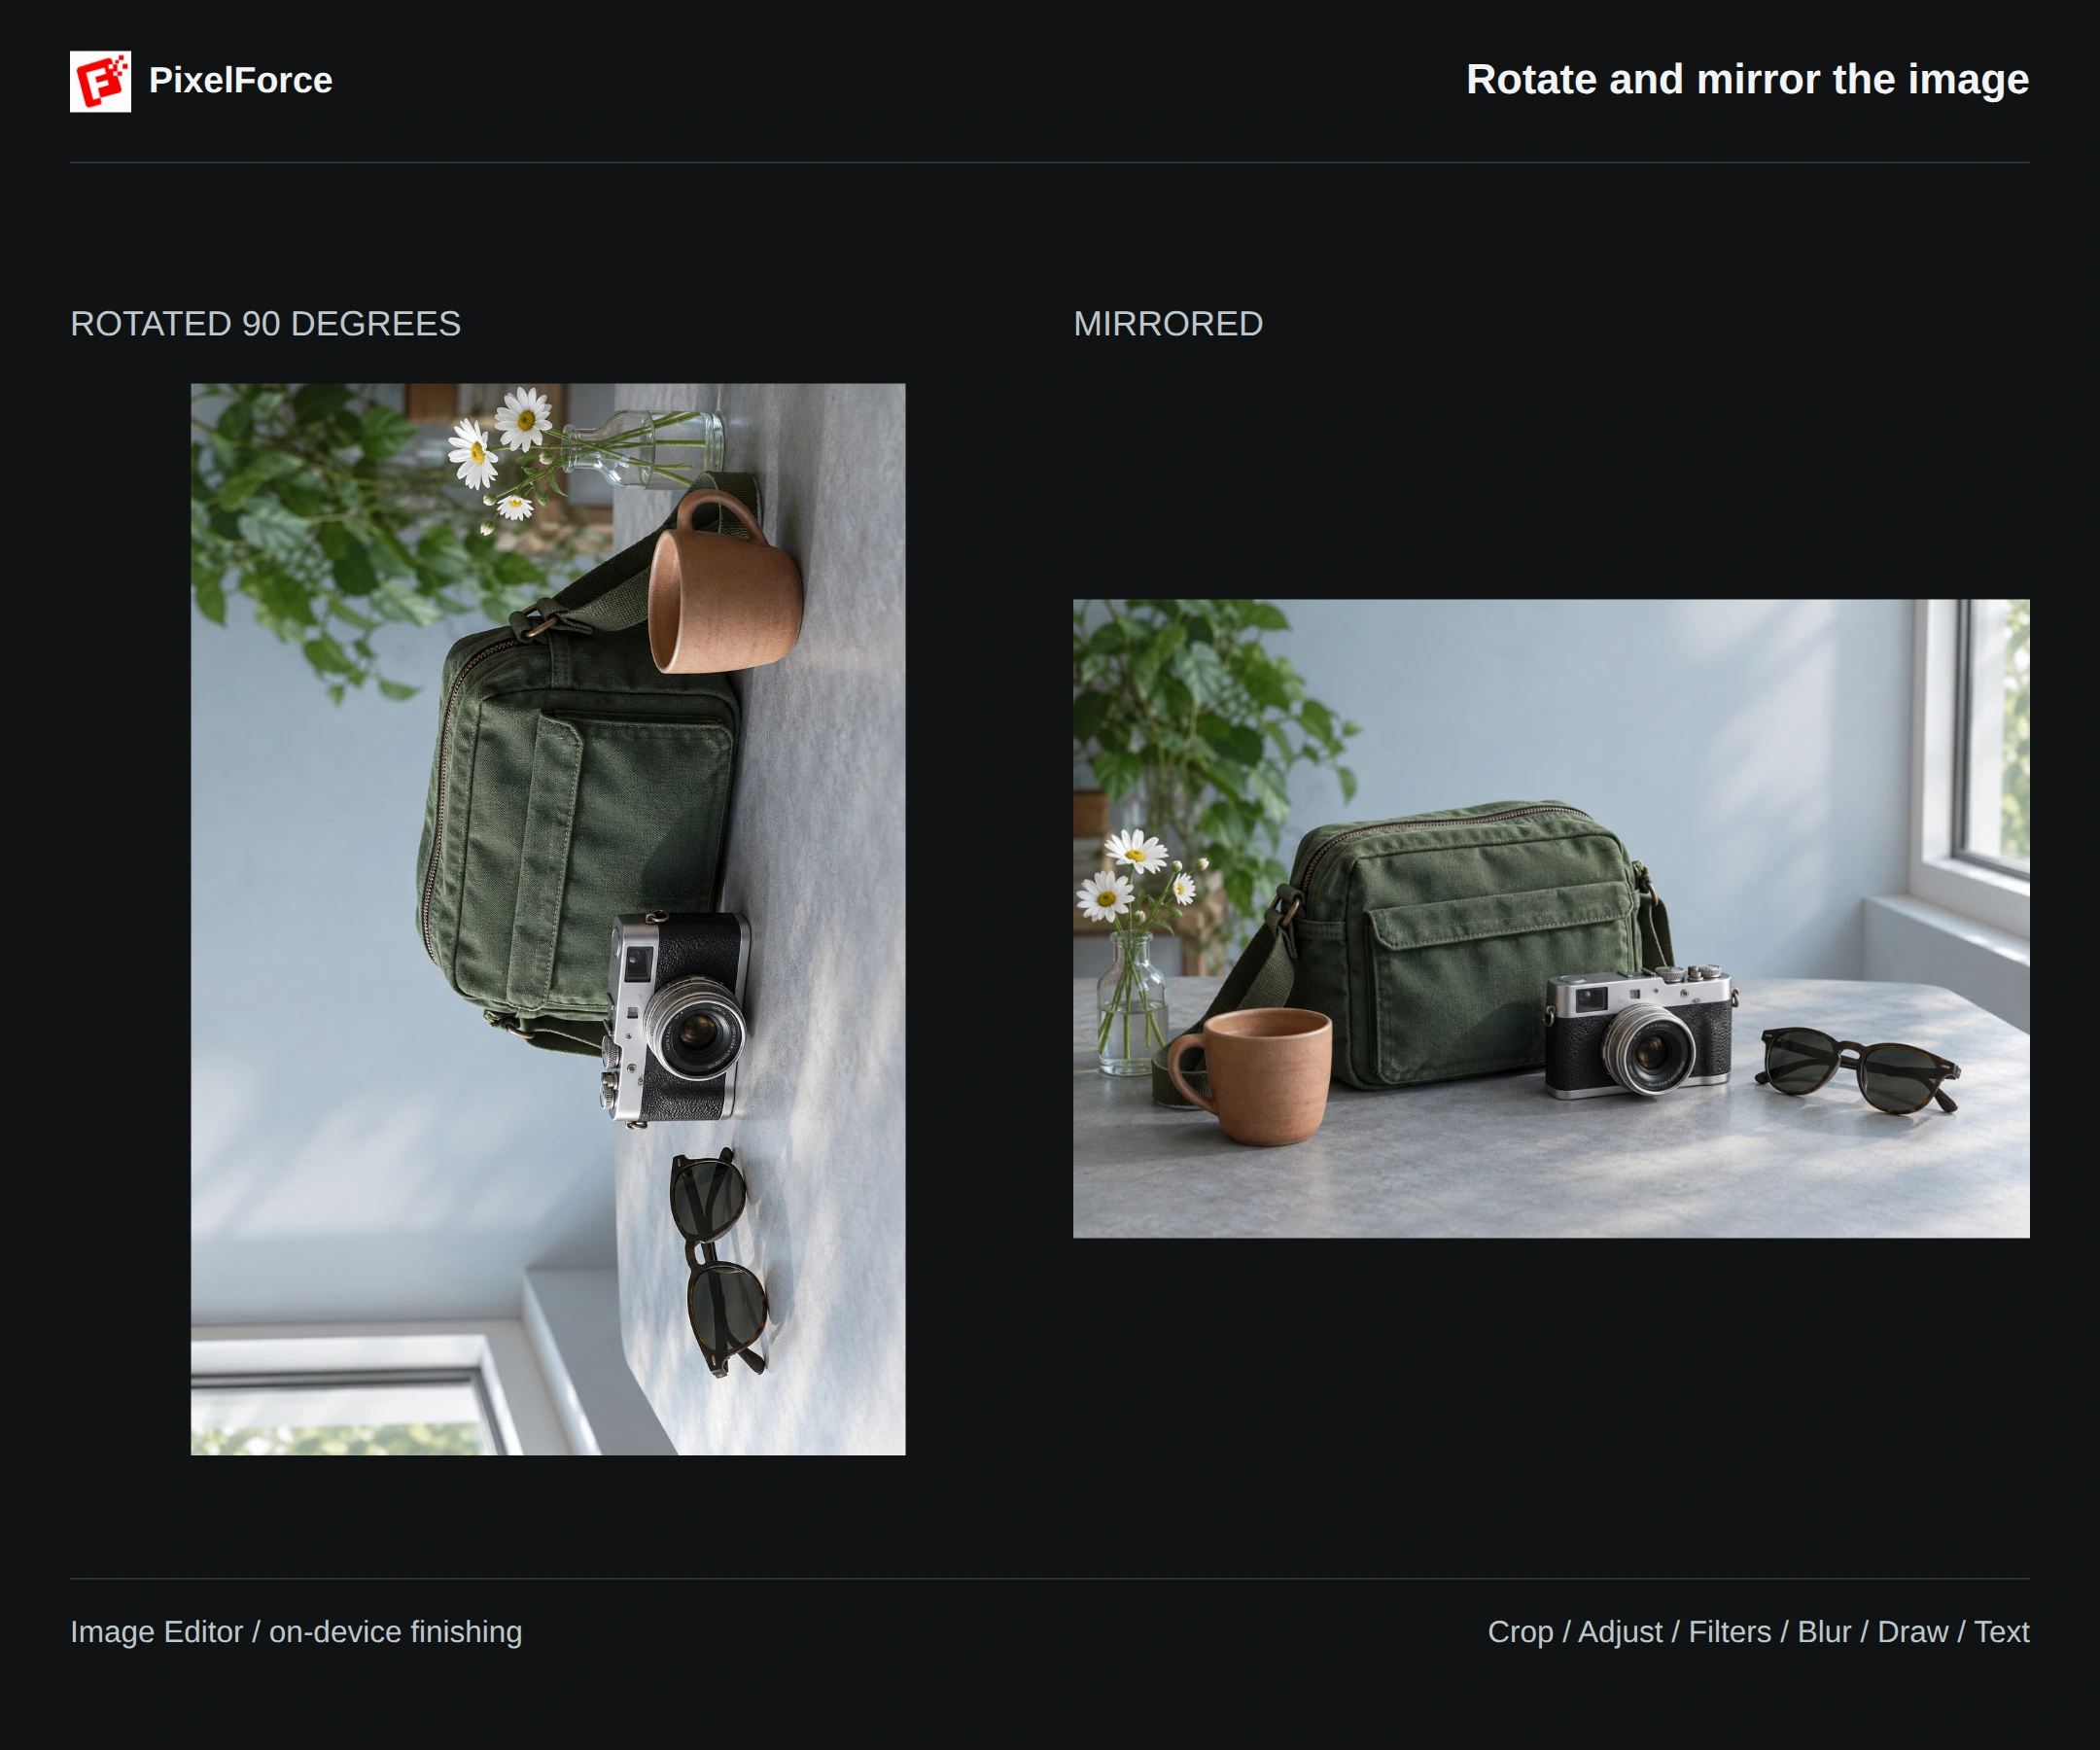
In the crop panel, Rotate turns the photo by 90 degrees each time. Flip mirrors it. Use Straighten for small angle or perspective corrections, and Reset to restore the crop tool's starting state. The examples below show rotation and mirroring separately.
Adjust light and color
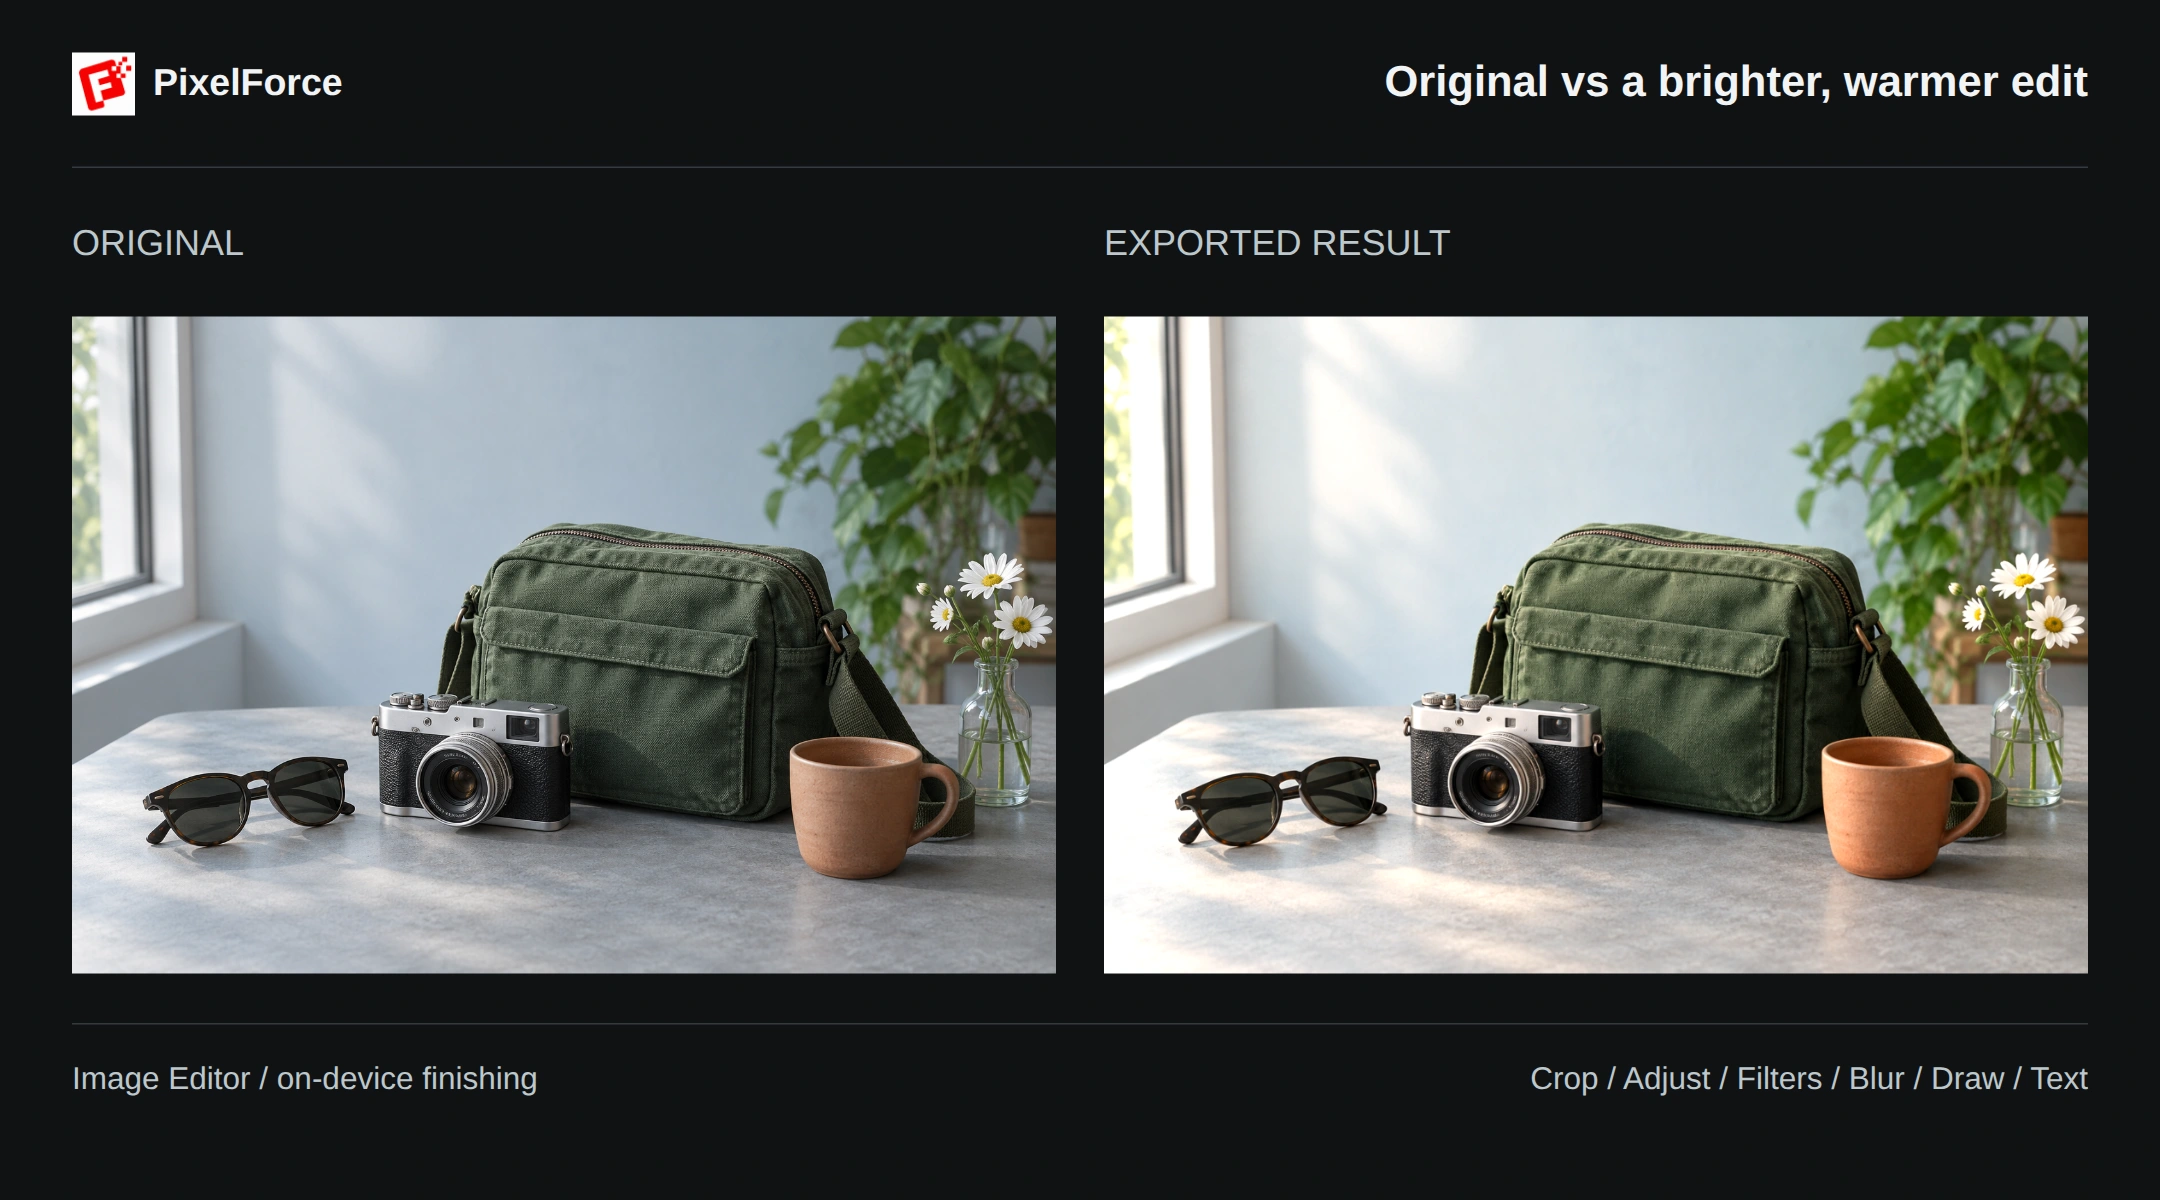
Open Adjust, select a setting, then move its slider. Here, increased brightness, contrast and saturation, along with a warmer temperature, make the change easier to see. Compare the unedited original on the left with the brighter, warmer result on the right: look at the wall, tabletop and bag.
| Setting | What it changes |
|---|---|
| Brightness | Makes the whole photo lighter or darker |
| Contrast | Changes the difference between light and dark areas |
| Saturation | Changes color intensity; keep product and skin colors natural |
| Exposure | Changes the exposure feel; watch for lost highlight detail |
| Temperature | Moves the colors warmer or cooler |
| Hue | Shifts the overall color palette for a creative treatment |
| Tint | Adjusts a green or magenta color cast |
| Fade | Softens the darkest tones for a gentler look |
Work on one setting at a time. Check the bag's color, the camera's metal surfaces and the cup's highlights before moving on. Use subtle adjustments when accurate product color matters.
See each adjustment in action
Expand a control below to compare the original with both adjustment directions and watch a loop of the real slider operation. Every example starts from the same unedited photo and changes only that control. The settings make the differences easy to see; they are not presets to copy onto every photo.
Brightness: make the photo darker or lighter
Brightness changes the overall lightness of the photo. Move left to darken or right to brighten. Watch the tabletop and pale wall, then check that the bag's shadow detail remains visible. Too much brightness can wash out light areas.
Contrast: soften tones or strengthen edges
Contrast changes the separation between light and dark. Lower it for softer tones; raise it to give the bag's seams and camera edges more definition. Watch the sunglasses and camera grip: strong contrast can hide detail in the darkest areas.
Saturation: mute or enrich the color
Saturation changes color intensity rather than overall brightness. The green bag and terracotta cup become more subdued or more vivid. For product photos, compare with the original so the edited color does not look stronger than the real item.
Exposure: adjust the sense of light
Exposure changes the photo's overall sense of light. Compared with brightness, pay particular attention to the brightest areas and reflections. Check the wall, tabletop and camera metal for retained detail. Raising exposure cannot recover highlights already missing from the source.
Hue: explore a different palette
Hue shifts the colors themselves rather than simply making them stronger. In this example, the bag and cup change color while their shapes stay the same. Use it for creative palettes; keep it neutral when accurate product color matters.
Temperature: cooler or warmer
Move left for cooler color or right for warmer color. The pale wall, tabletop and silver metal make the blue-to-warm shift easy to see. Start with a small correction, then decide whether you want a more pronounced cool or warm mood.
Tint: correct green or magenta casts
Tint shifts color between green and magenta, unlike temperature's cool-to-warm direction. Use the pale wall as a neutral reference. When correcting a cast, aim for natural-looking neutrals rather than tinting the whole photo a new color.
Fade: deepen or soften the shadows
Fade changes the character of dark areas. Move right to lift the blacks for a softer, gently faded look, or left for deeper shadows. Watch the sunglasses and camera grip, and stop while their texture remains visible.
Try a filter
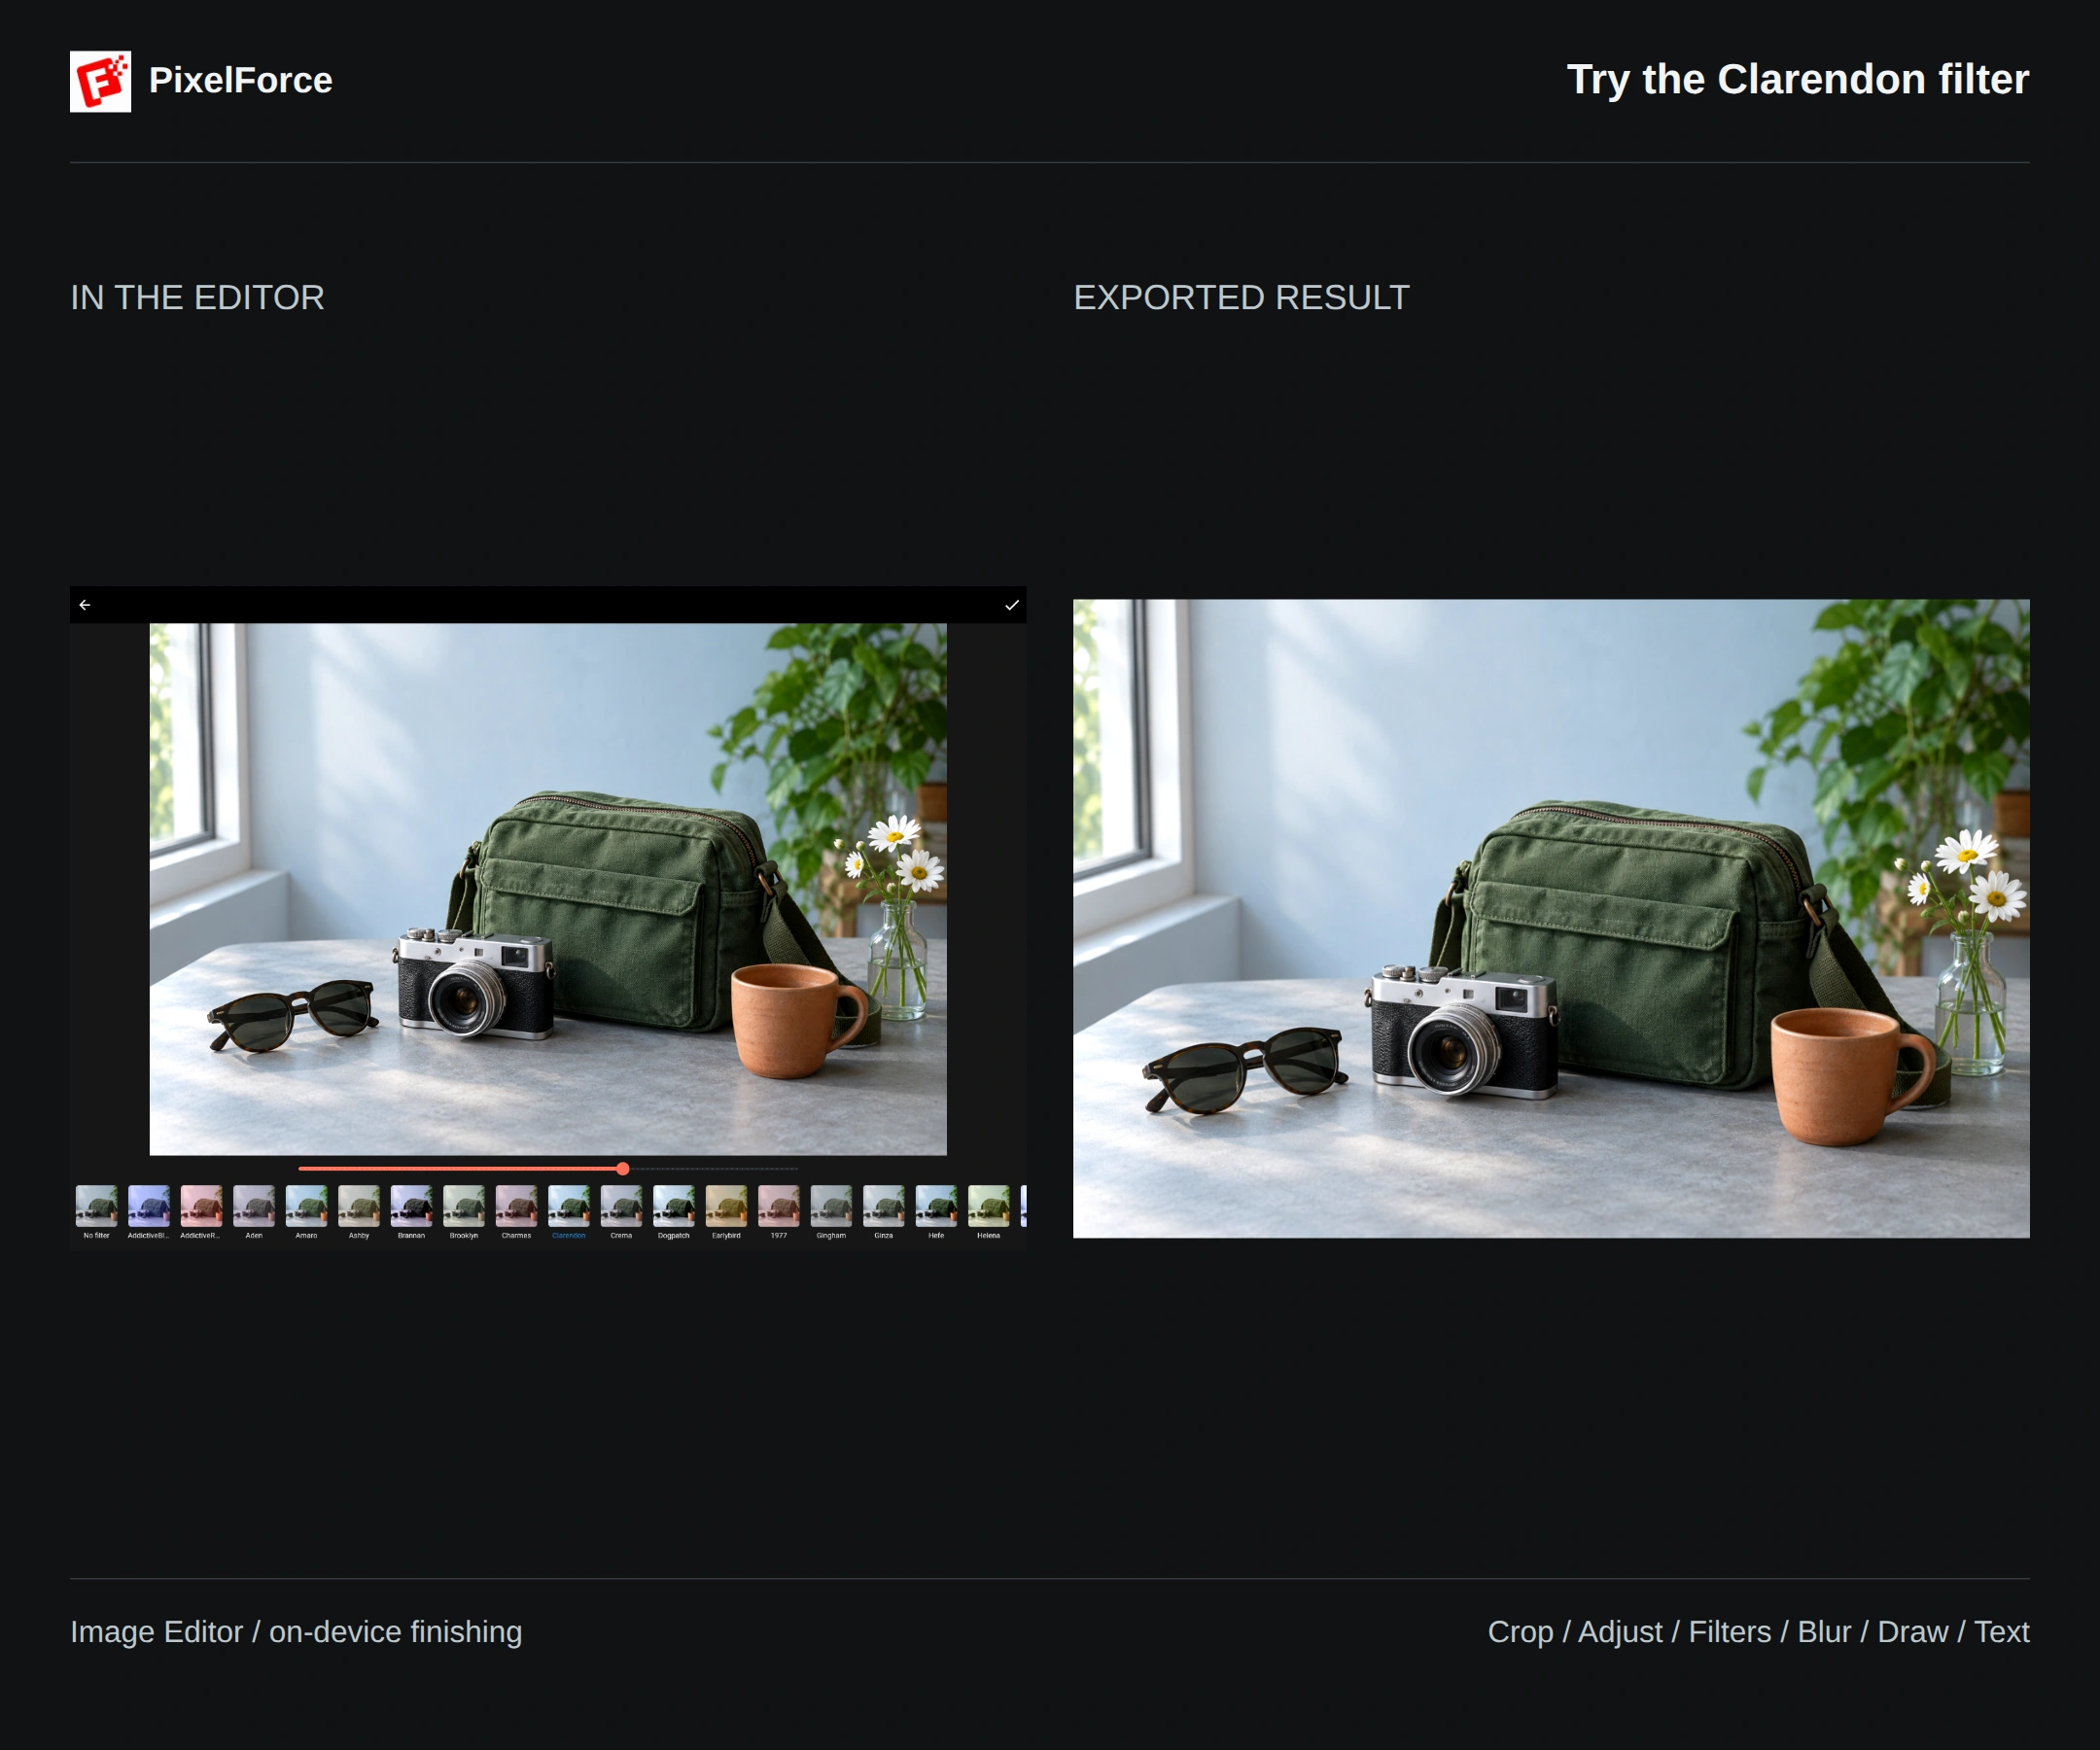
Open Filters and select a thumbnail to preview its effect. Browse horizontally for more choices. This example uses Clarendon, then lowers the strength for a stronger color treatment that still looks natural.
Here is the same original in five different styles. These comparisons use full filter strength so the differences are easy to see:
| Filter | What to look for |
|---|---|
| Clarendon | Stronger color and clearer light-dark separation |
| Gingham | Softer contrast and understated tones |
| Reyes | Warm, softly faded color |
| Juno | Richer color in the bag and cup |
| Inkwell | Black and white, with the emphasis on light and texture |
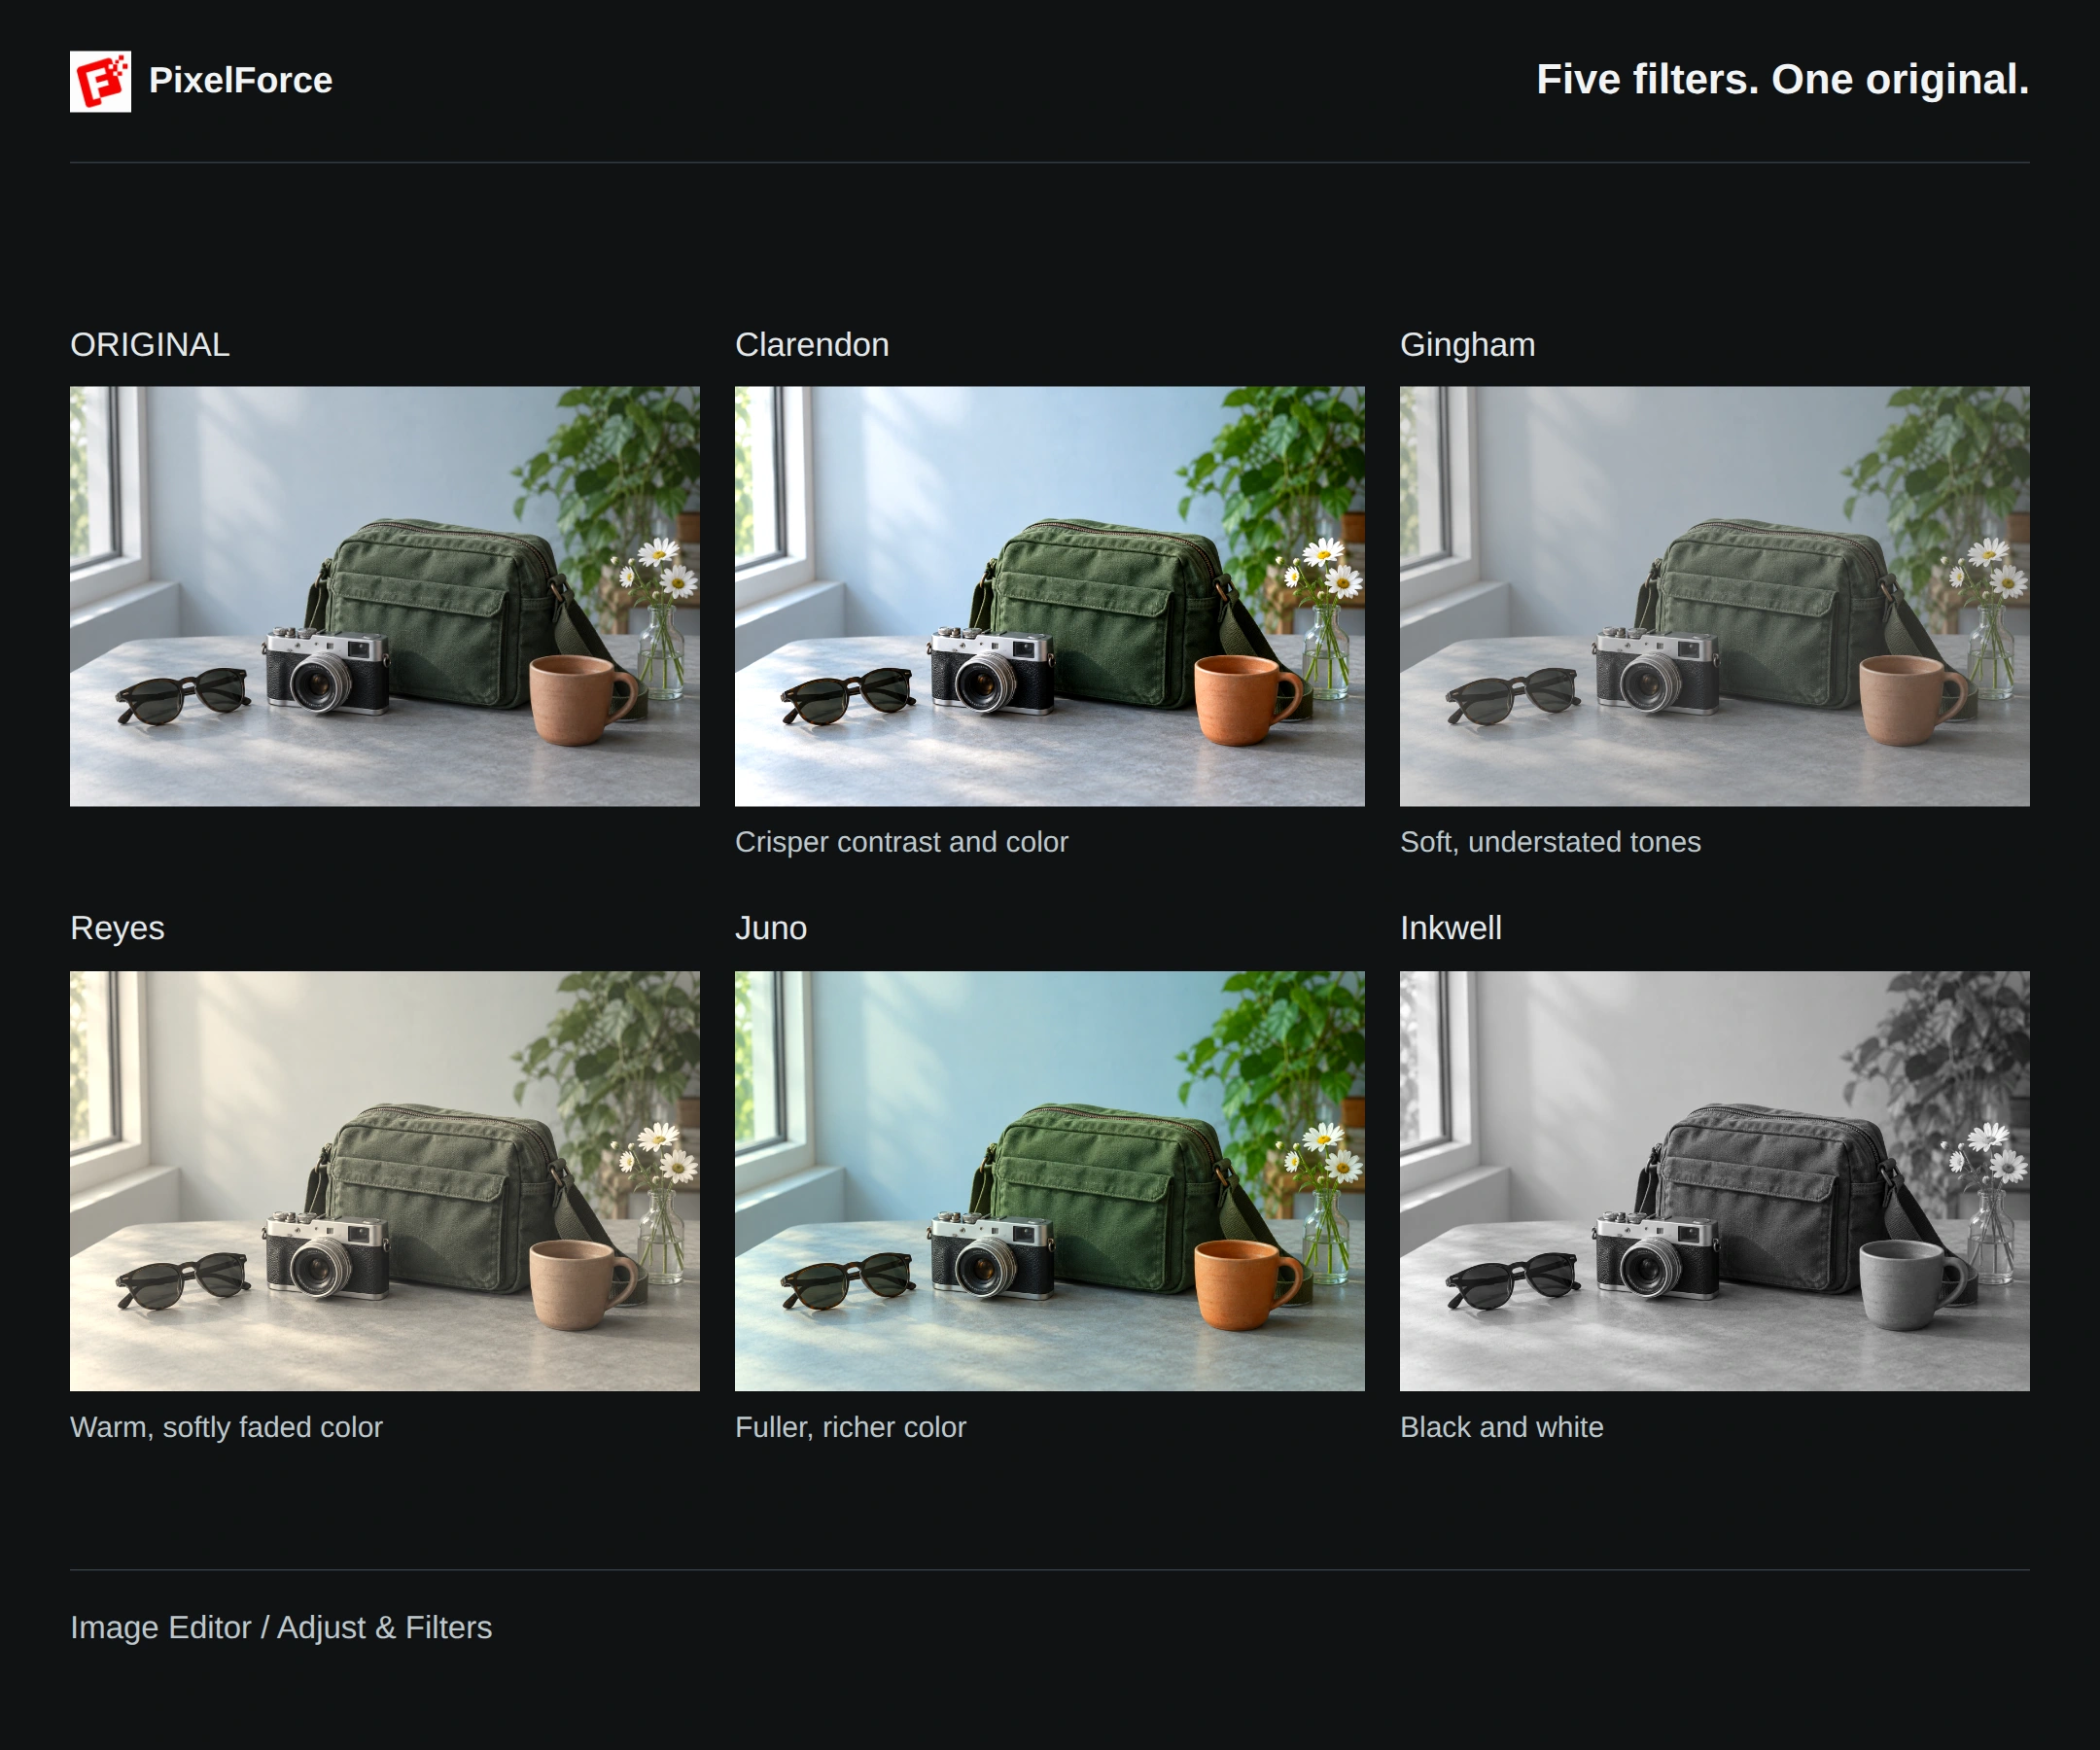
The loop selects all five filters, then returns to No filter. Switching filters previews a new style; it does not stack five filters on top of one another.
Choose No filter to remove the filter. Like a style but find it too strong? Lower its strength; the Clarendon example below uses a lighter effect. Filters can be combined with manual adjustments, so start with lower filter strength if you have already increased saturation or contrast.
Blur the whole image or a small area
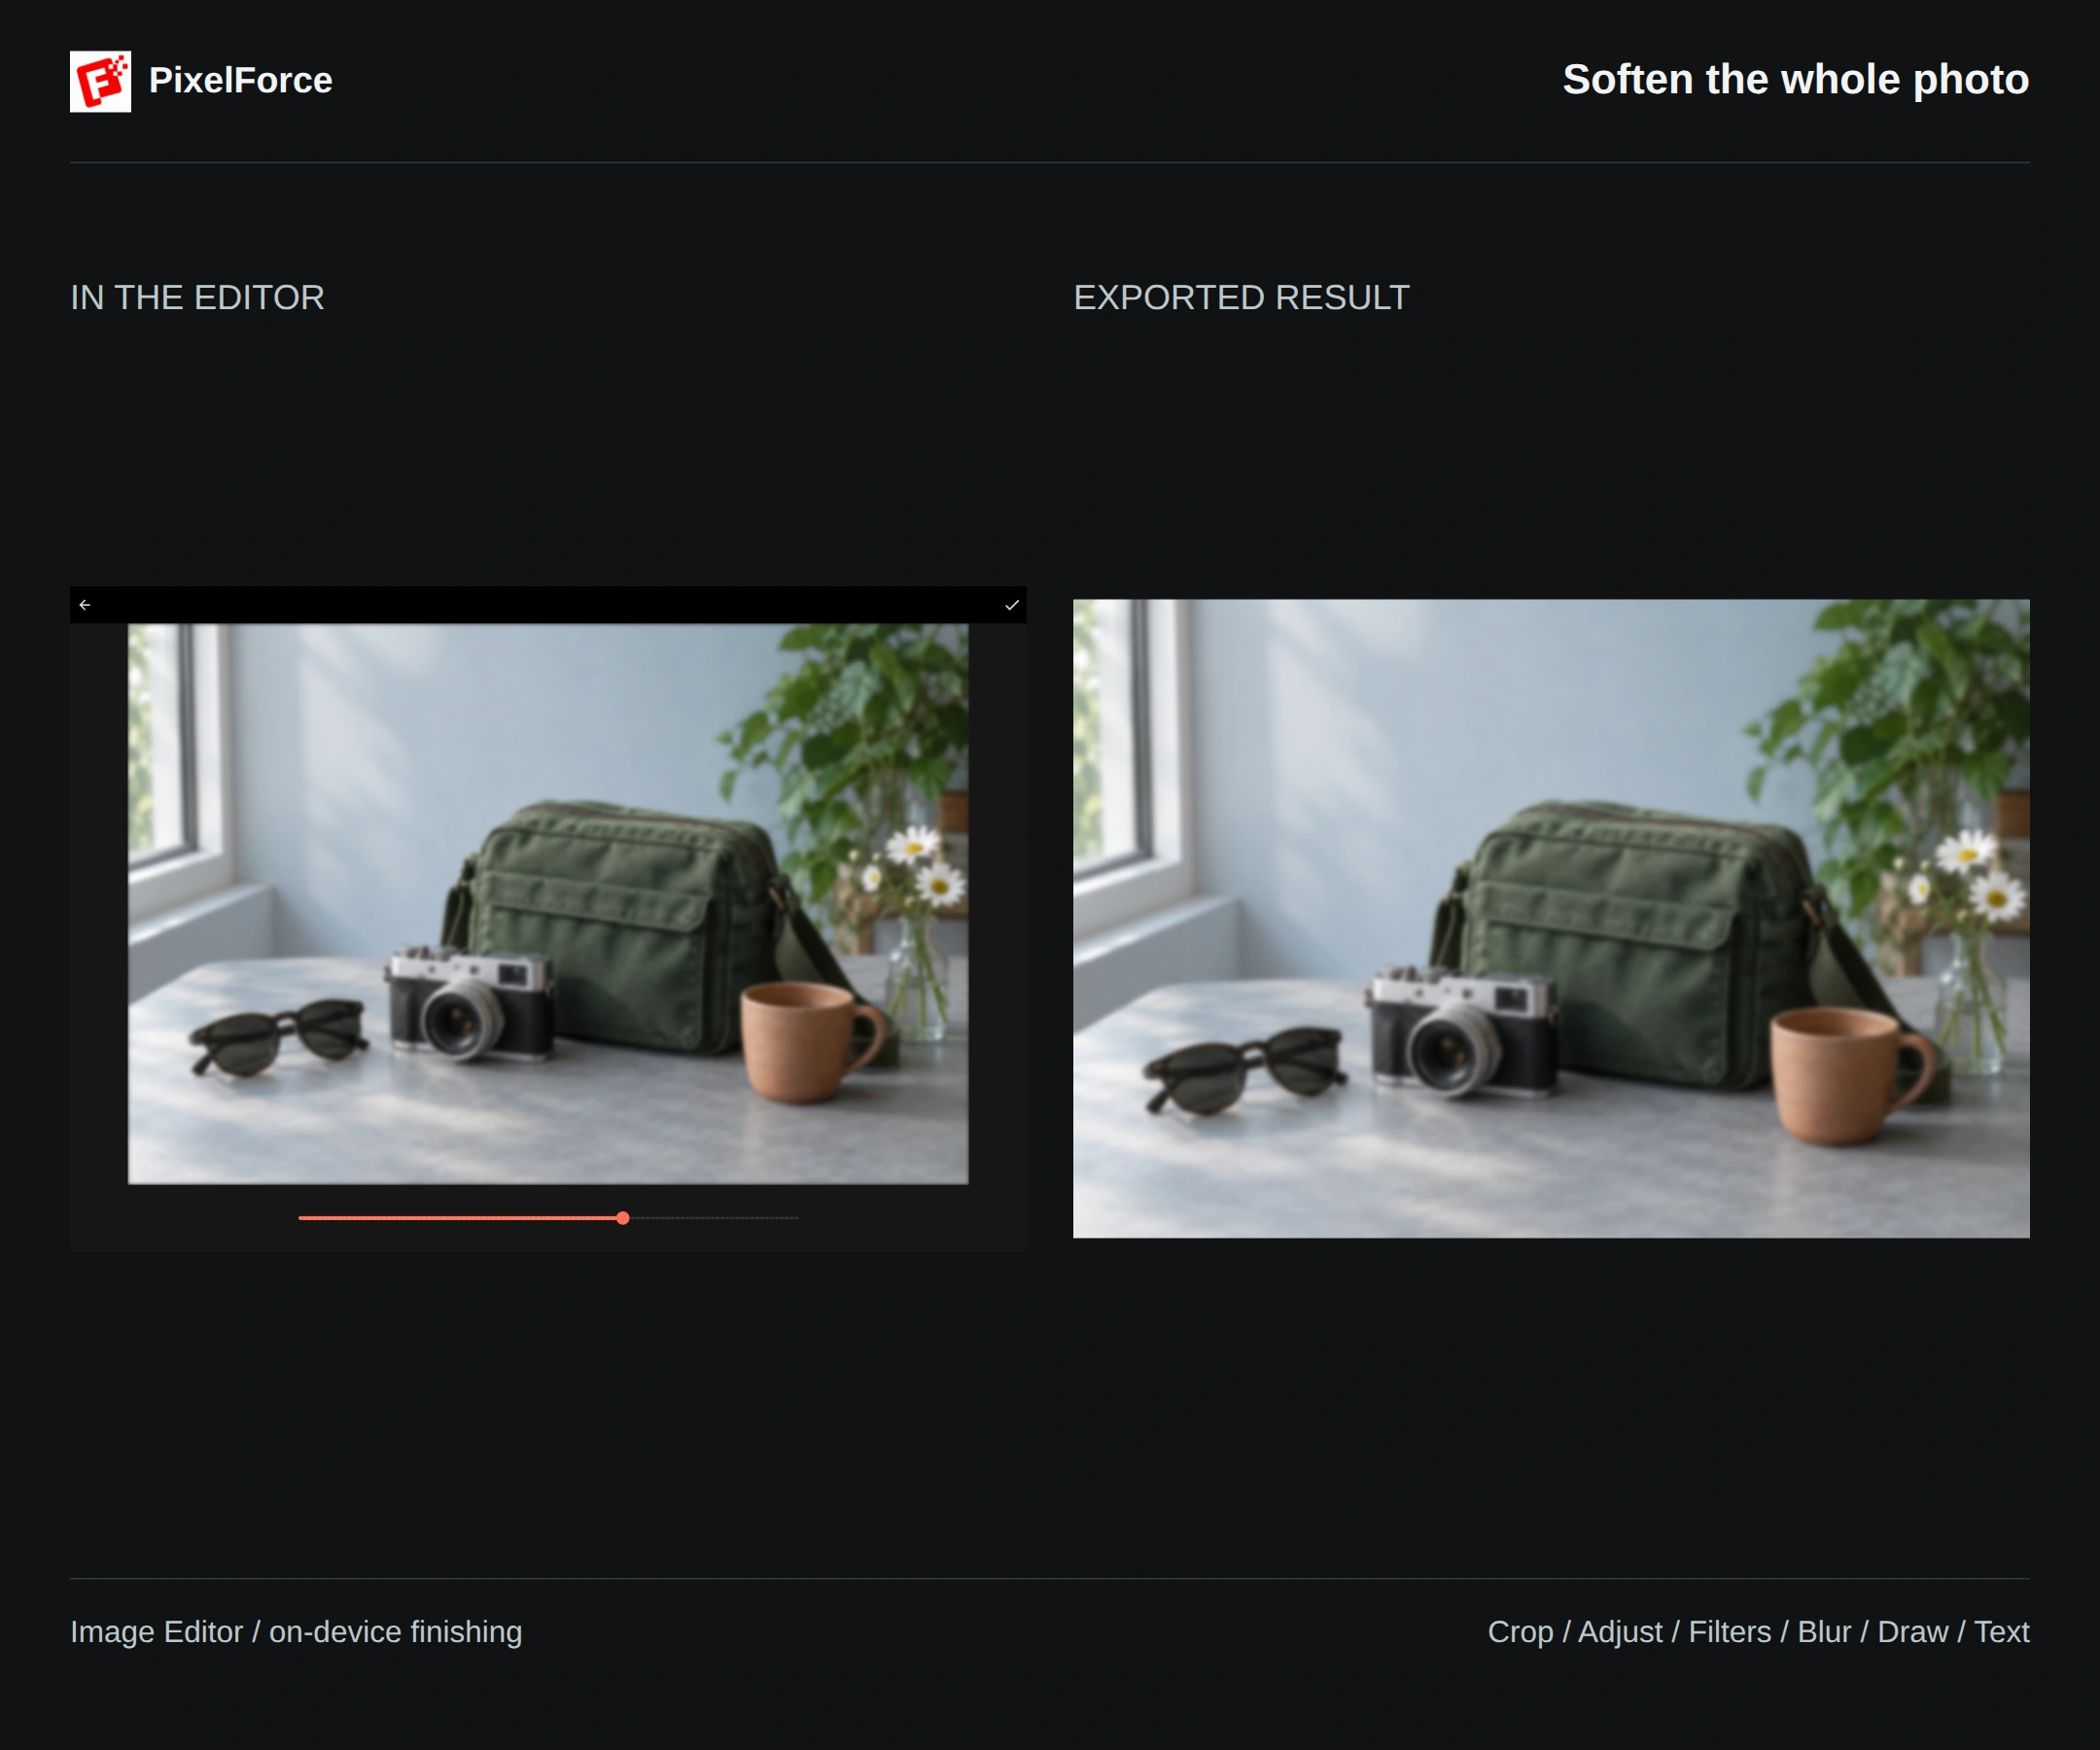
The main Blur tool softens the entire image. Move the slider to preview the strength, then select Apply. The example turns the still life into a soft background for text.
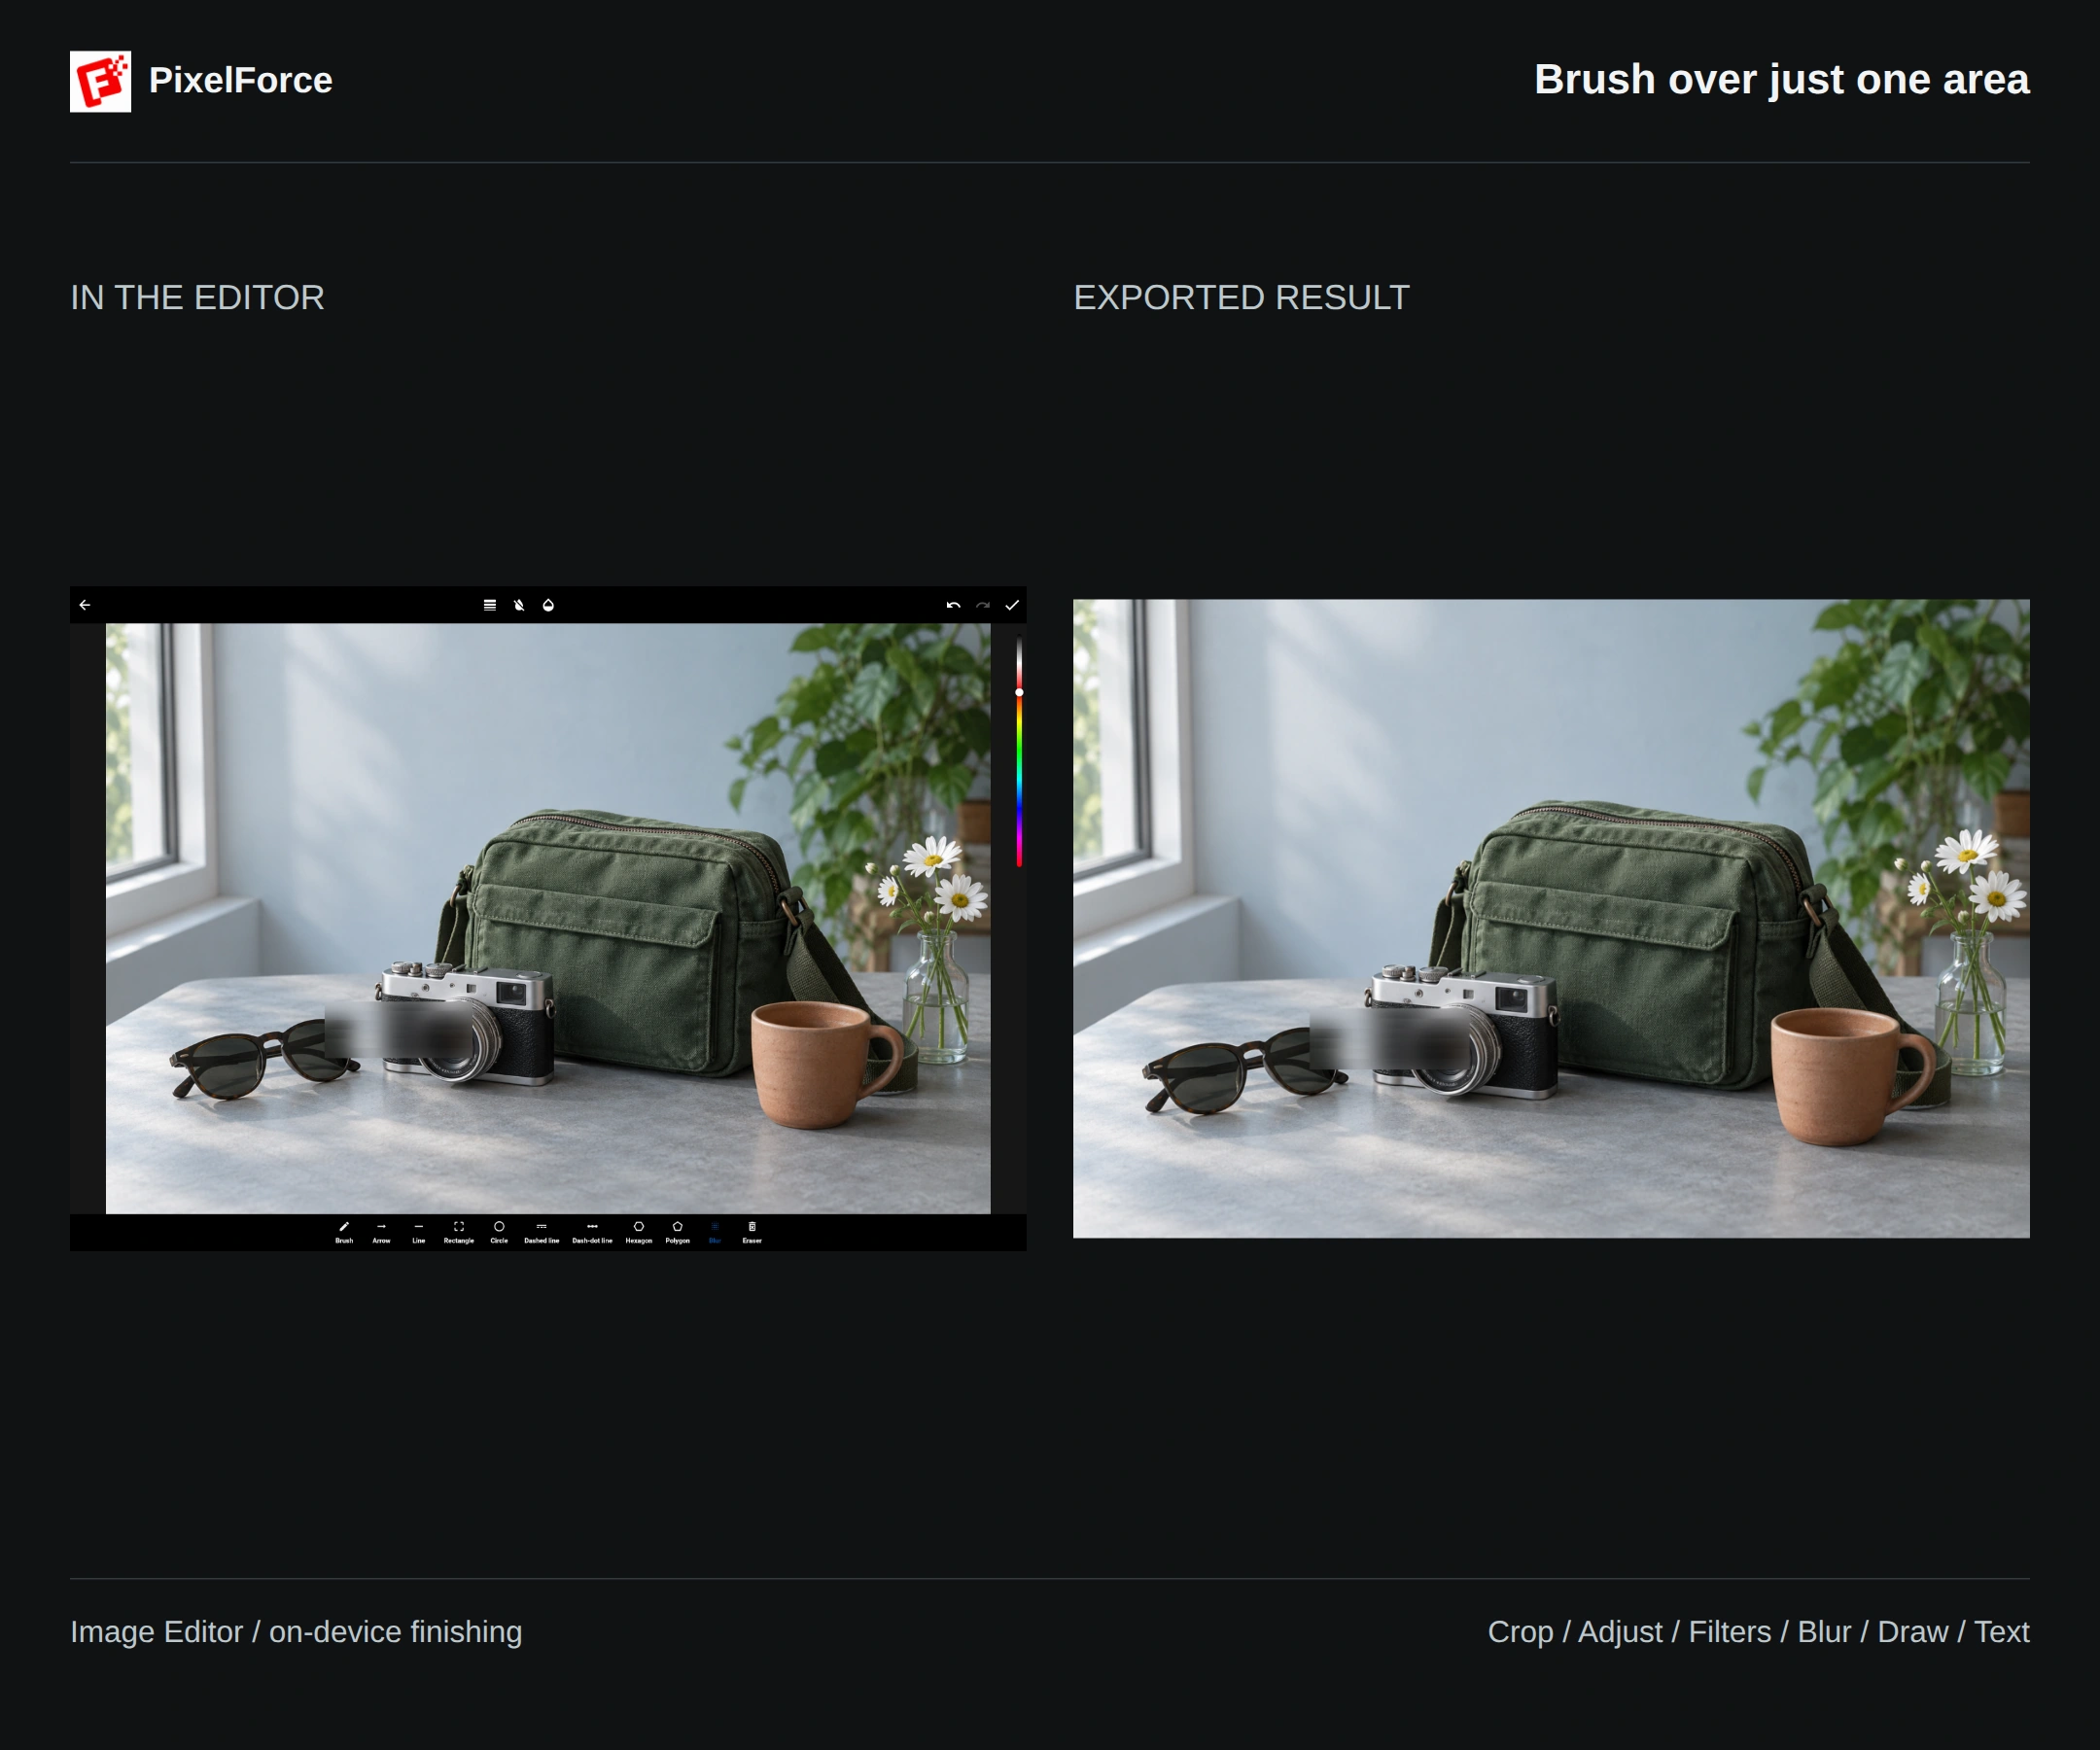
For a local edit, open Draw, choose Blur, adjust Brush size, and paint over the area you want to soften. The rest of the photo stays clear. This example treats a small area near the camera.
Some devices also show Pixelate; use the options available in your toolbar. When covering text or personal details, zoom in to check the coverage and inspect the saved image.
Draw shapes and annotations
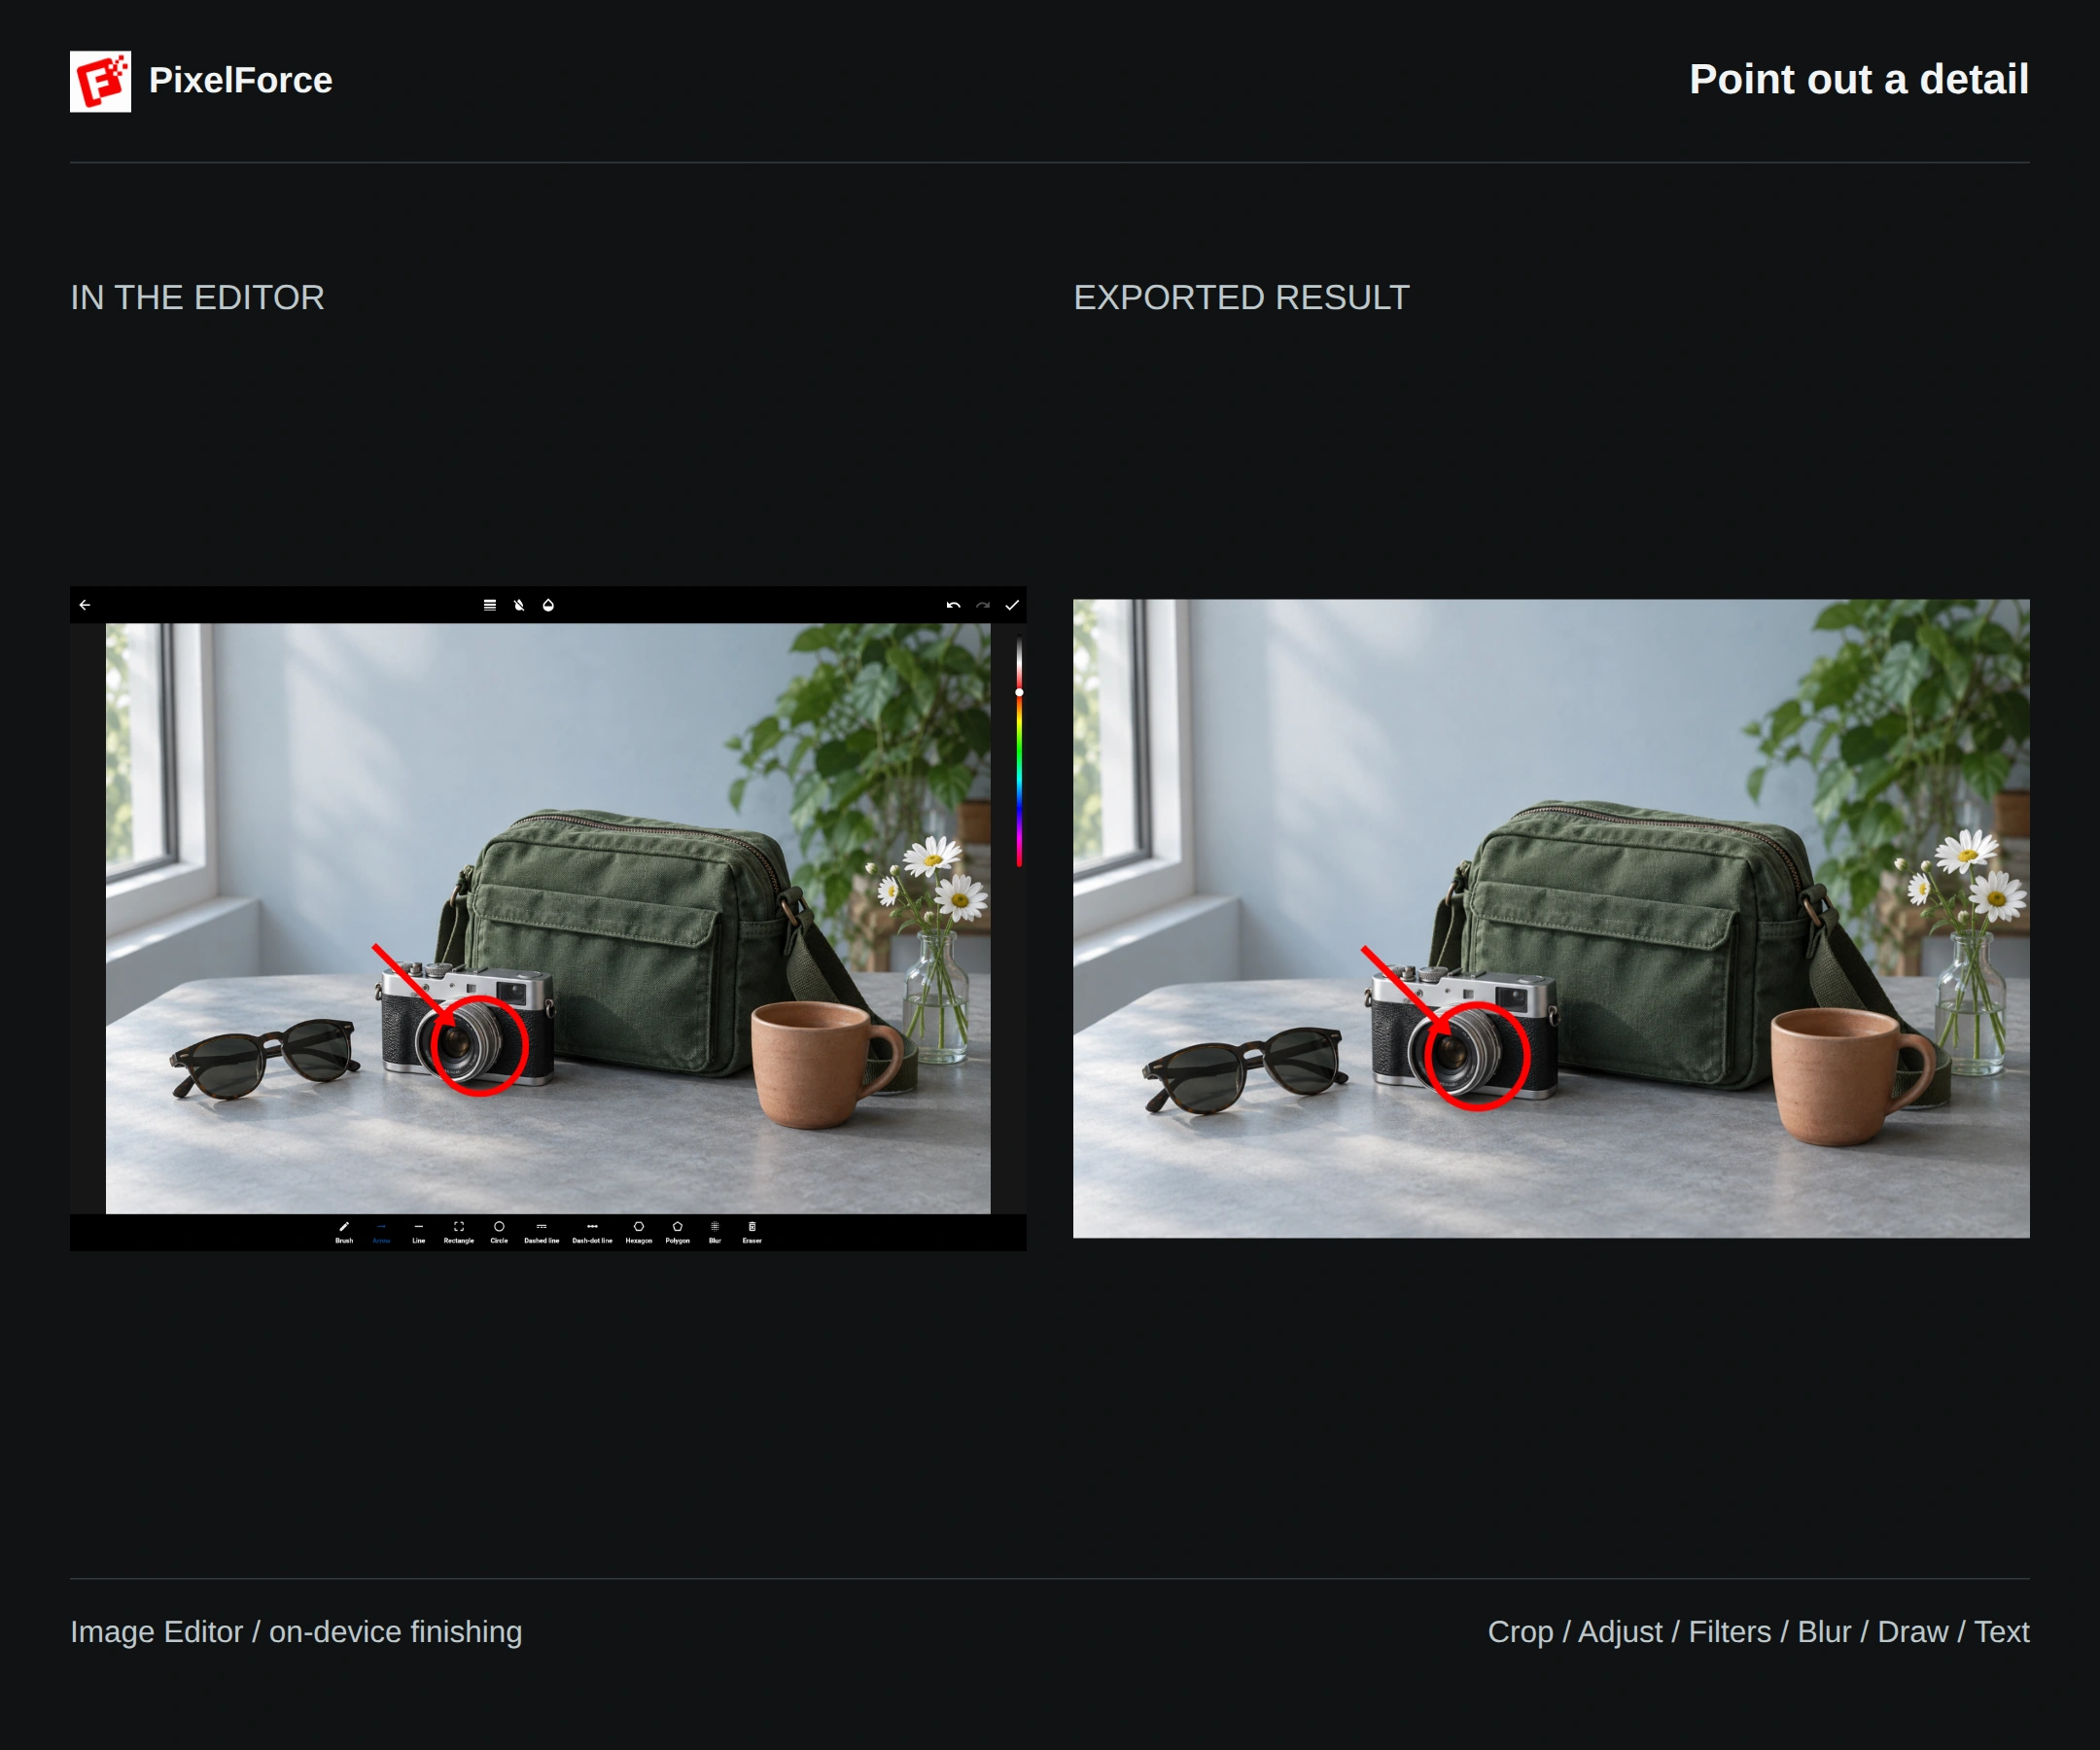
Open Draw and select Arrow, Circle, Rectangle or the brush. Choose a color from the bar on the right and set the line thickness with Brush size. Use Fill for solid shapes or lower Opacity for a lighter mark.
Here, a circle and an arrow call attention to the camera lens. After applying a drawing, you can select its layer to move, resize, rotate or remove it. The drawing Eraser edits your brush marks; use Object Eraser to remove an object and reconstruct the scene behind it.
Add a title
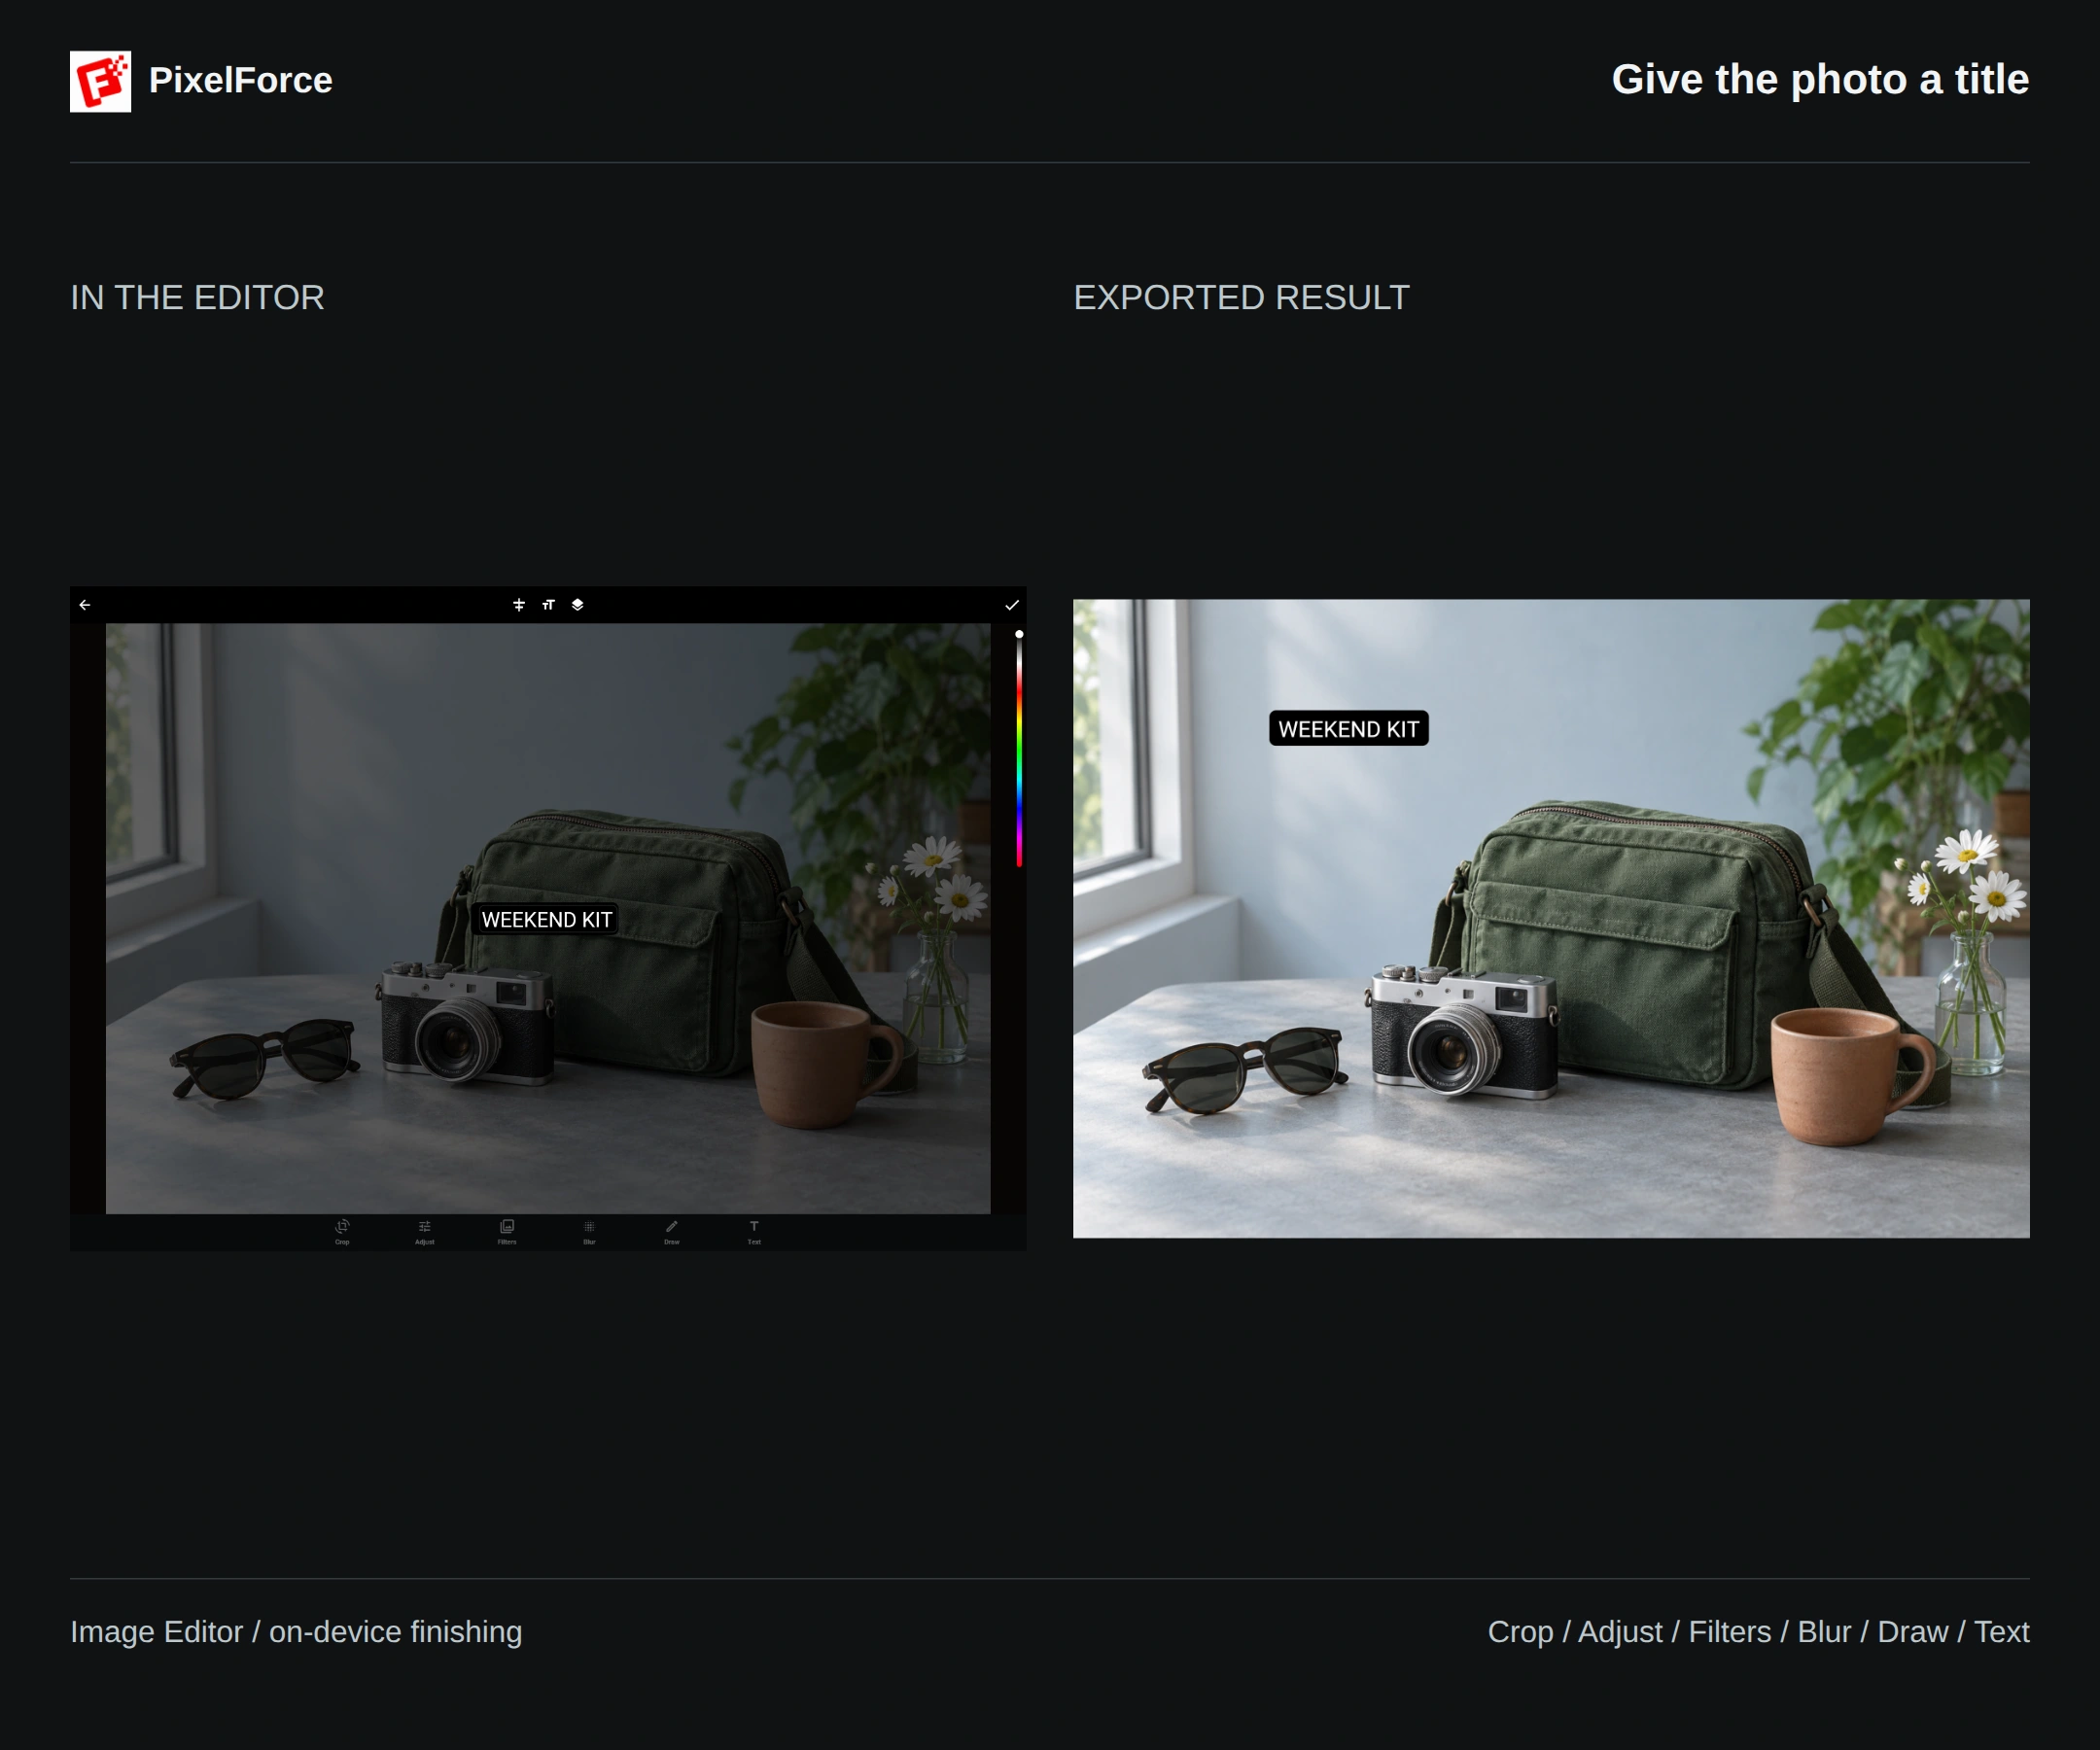
- Open Text and enter "WEEKEND KIT".
- Adjust Text size, Align text and the color bar. Text background switches between background treatments to help the lettering stand out.
- Select Apply, then drag the text into the open space above the objects.
Select the text layer to move, resize or rotate it, or reopen it to edit the words. Leave the bag, camera and flowers visible, and check that the lettering stays inside the image edges.
Combine the edits you need
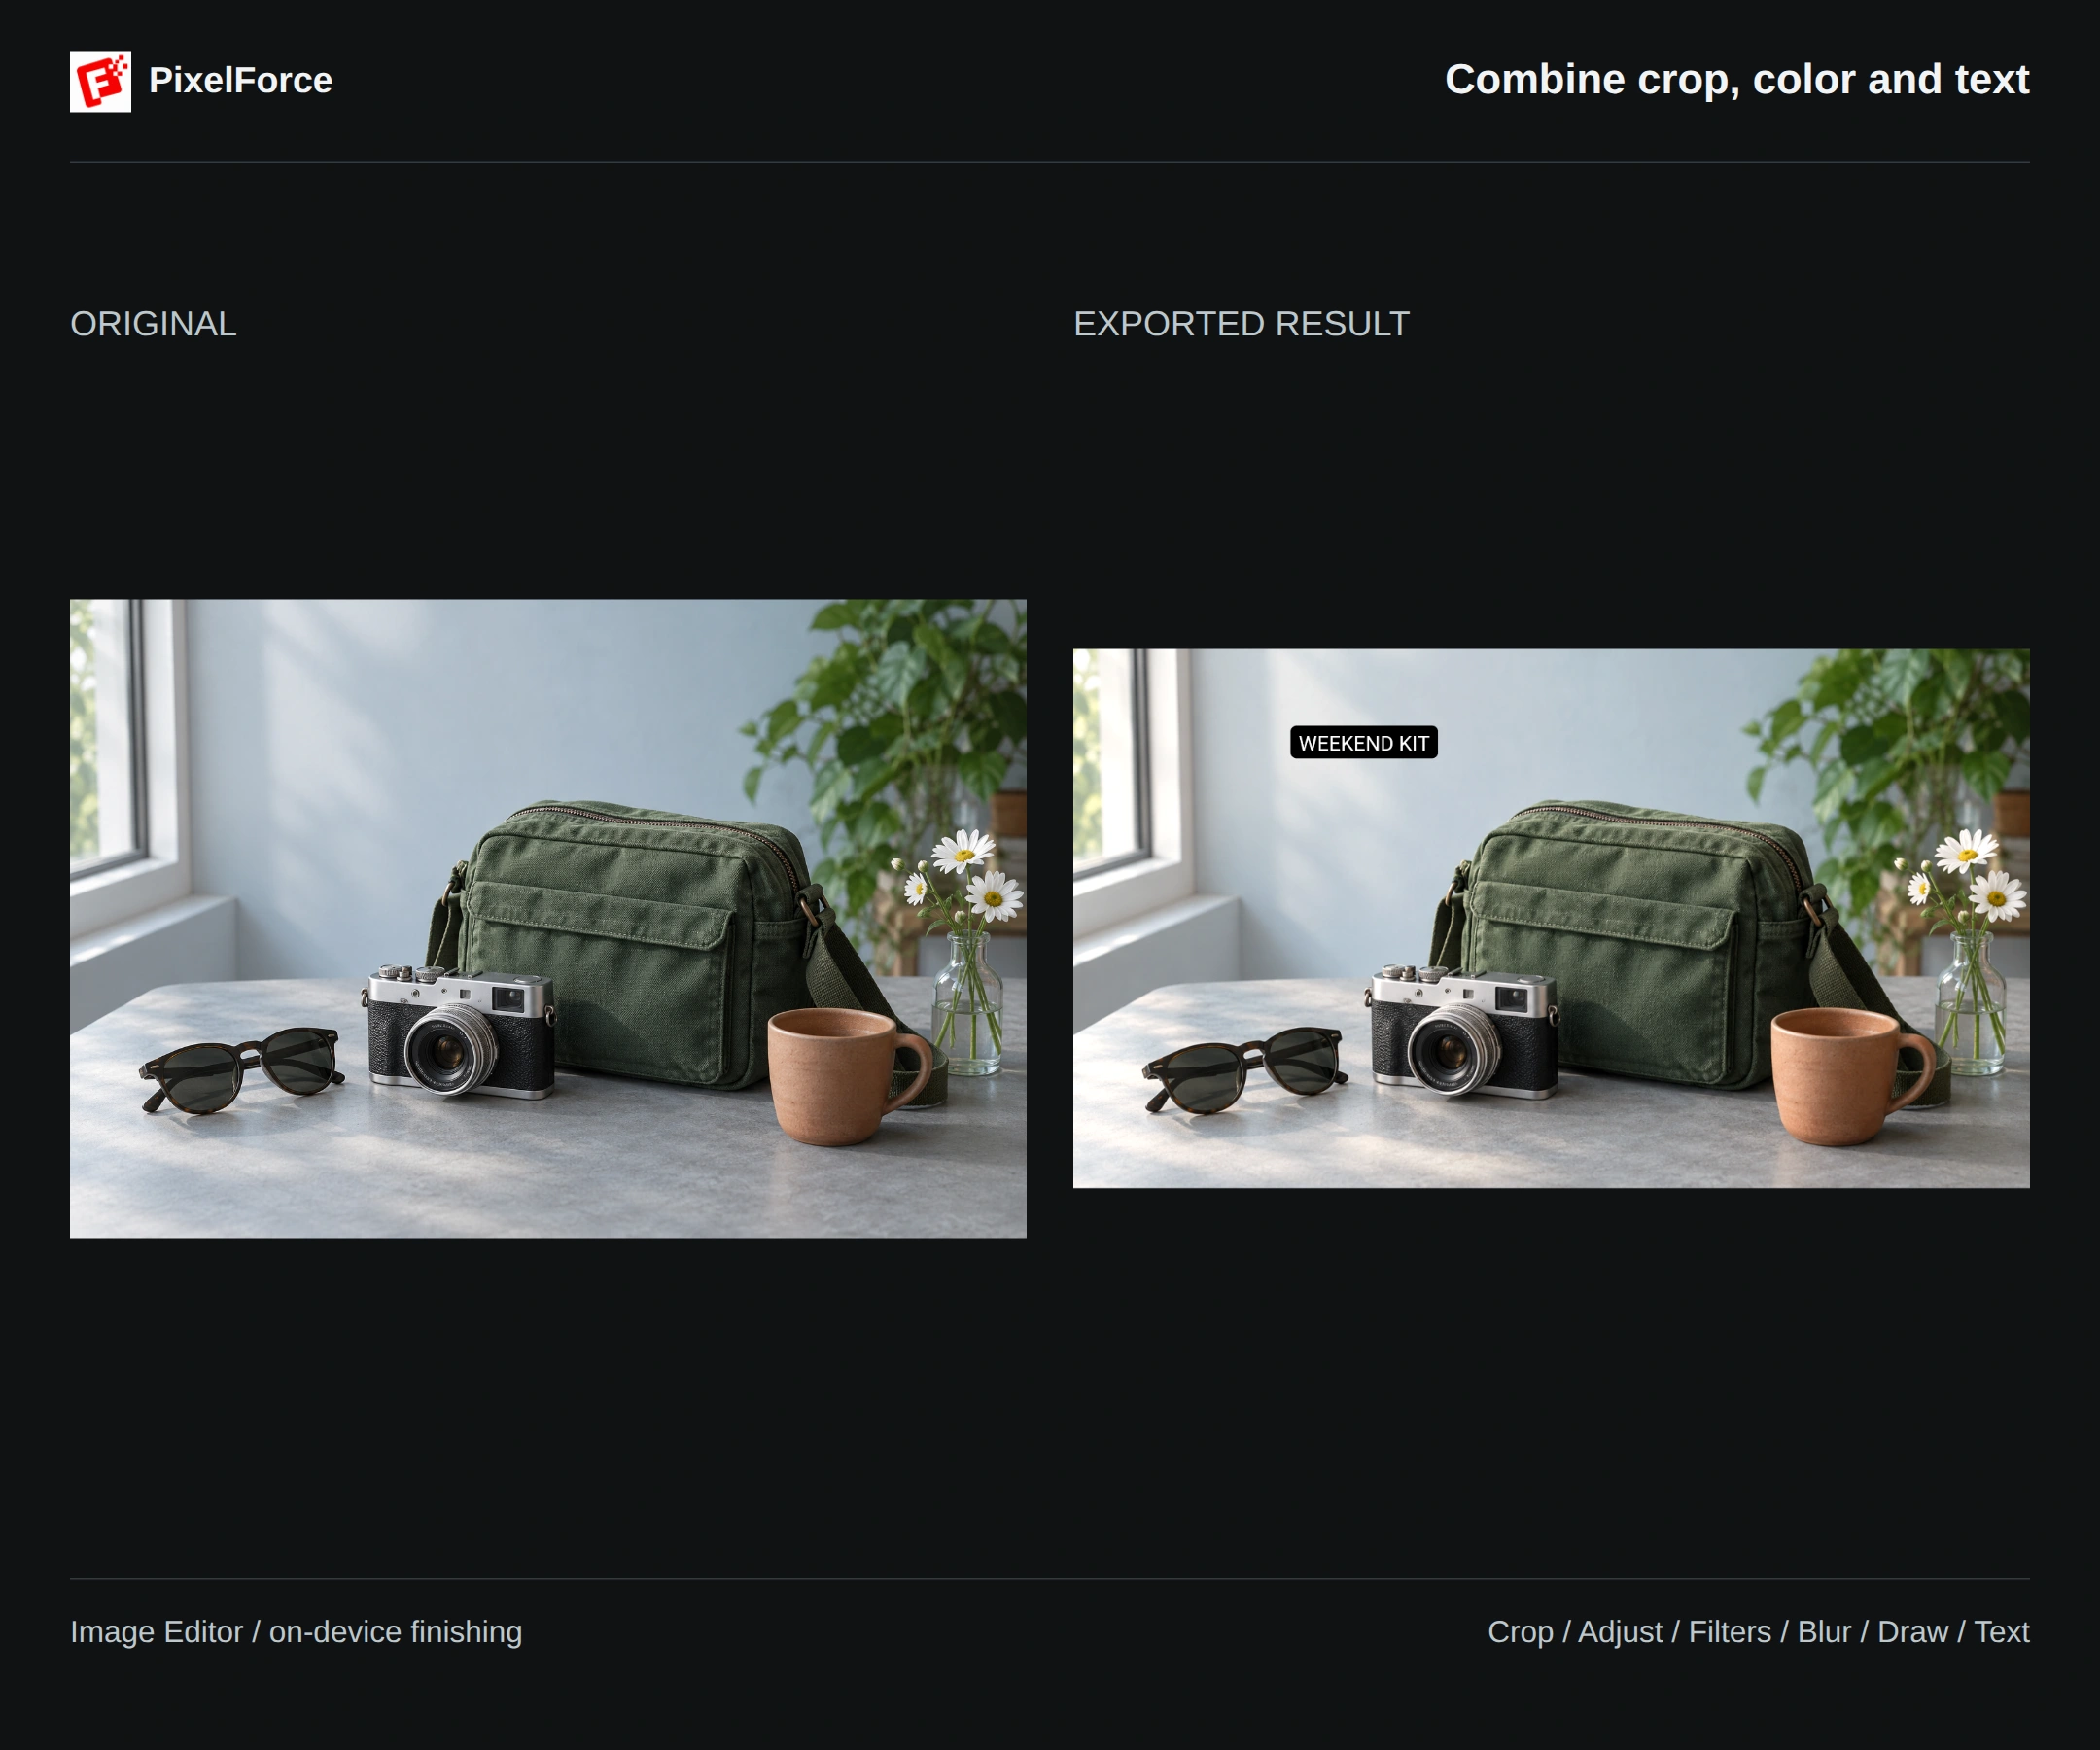
This finished version uses the same source photo: a 16:9 crop, subtle brightness and temperature adjustments, and a title. You do not need to apply every tool shown in the separate examples.
Use Undo and Redo at the top of the main editor to review individual changes. After zooming in, Fit image brings the whole photo back into view on Web and larger screens.
Compare and save
Select Apply at the top of the main editor to open the comparison page. Switch between Original and Edited to check the result. Edit image returns to the current editing session so you can make another adjustment.
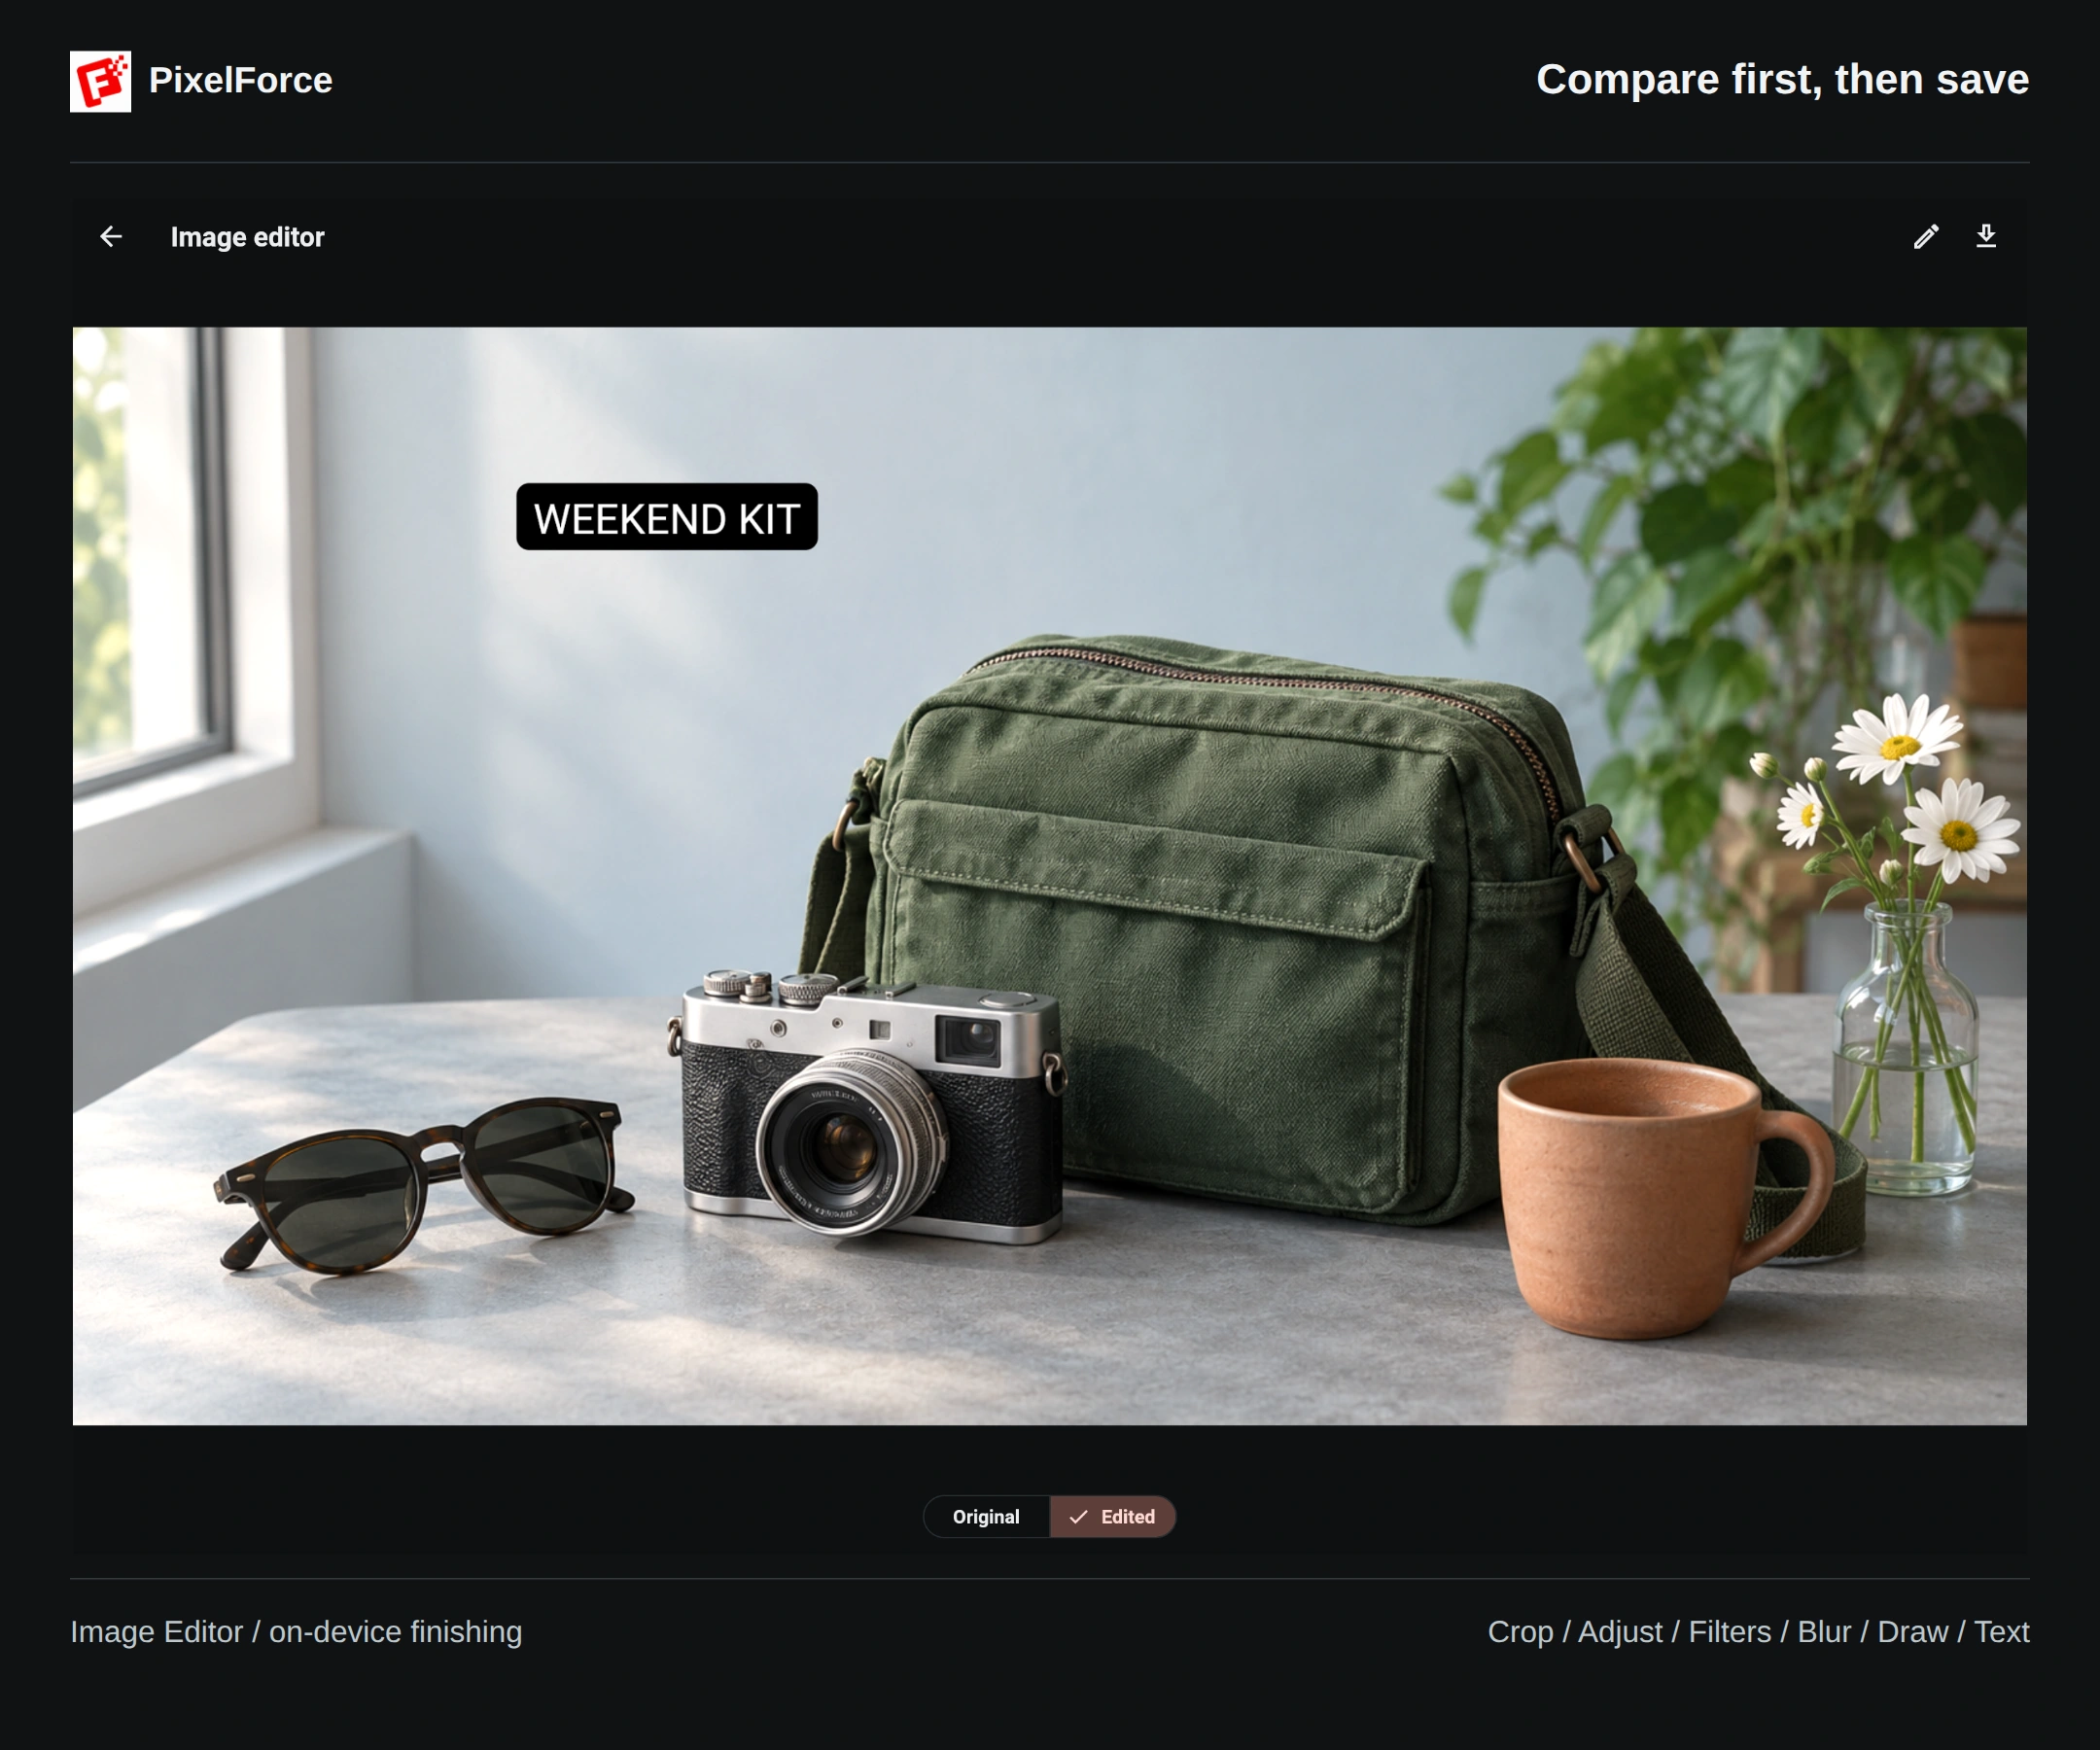
When you are happy with the result, select Save image at the top-right to export a PNG. Web and desktop save a file; on a phone, follow the system save or share sheet. The export is a new copy and leaves your original file intact. Existing transparency can be retained.
Apply confirms your edit. Save image keeps the finished file. The edit history belongs to the current session, so save before leaving, refreshing the page or closing the app.
Troubleshooting and next steps
- Images must be no larger than 20 MB and 32 megapixels. Local editing uses the full source image. Cropping and rotation can change the composition and output dimensions; check the exported PNG.
- Supported formats depend on the device and browser. If a photo will not open, convert it to PNG or JPEG and try again.
- Use AI Retouch to add an object, change a material or describe a broader edit.
- Use Outpaint to extend the edges.
- See Results and library for saving and reusing generated images.