Smart Recolor
Try a different color without arranging another shoot. Smart Recolor changes the color of clothing in an existing photo, with instructions for details you want to keep. It is useful for exploring colorways before deciding which ones to develop or photograph.
One sweater, a different colorway
In this example, a blue knitted sweater becomes warm brown while the gray shirt collar stays gray. The target color is #9A6843, and High is selected. The instruction focuses on one exception: leave the collar's color alone.
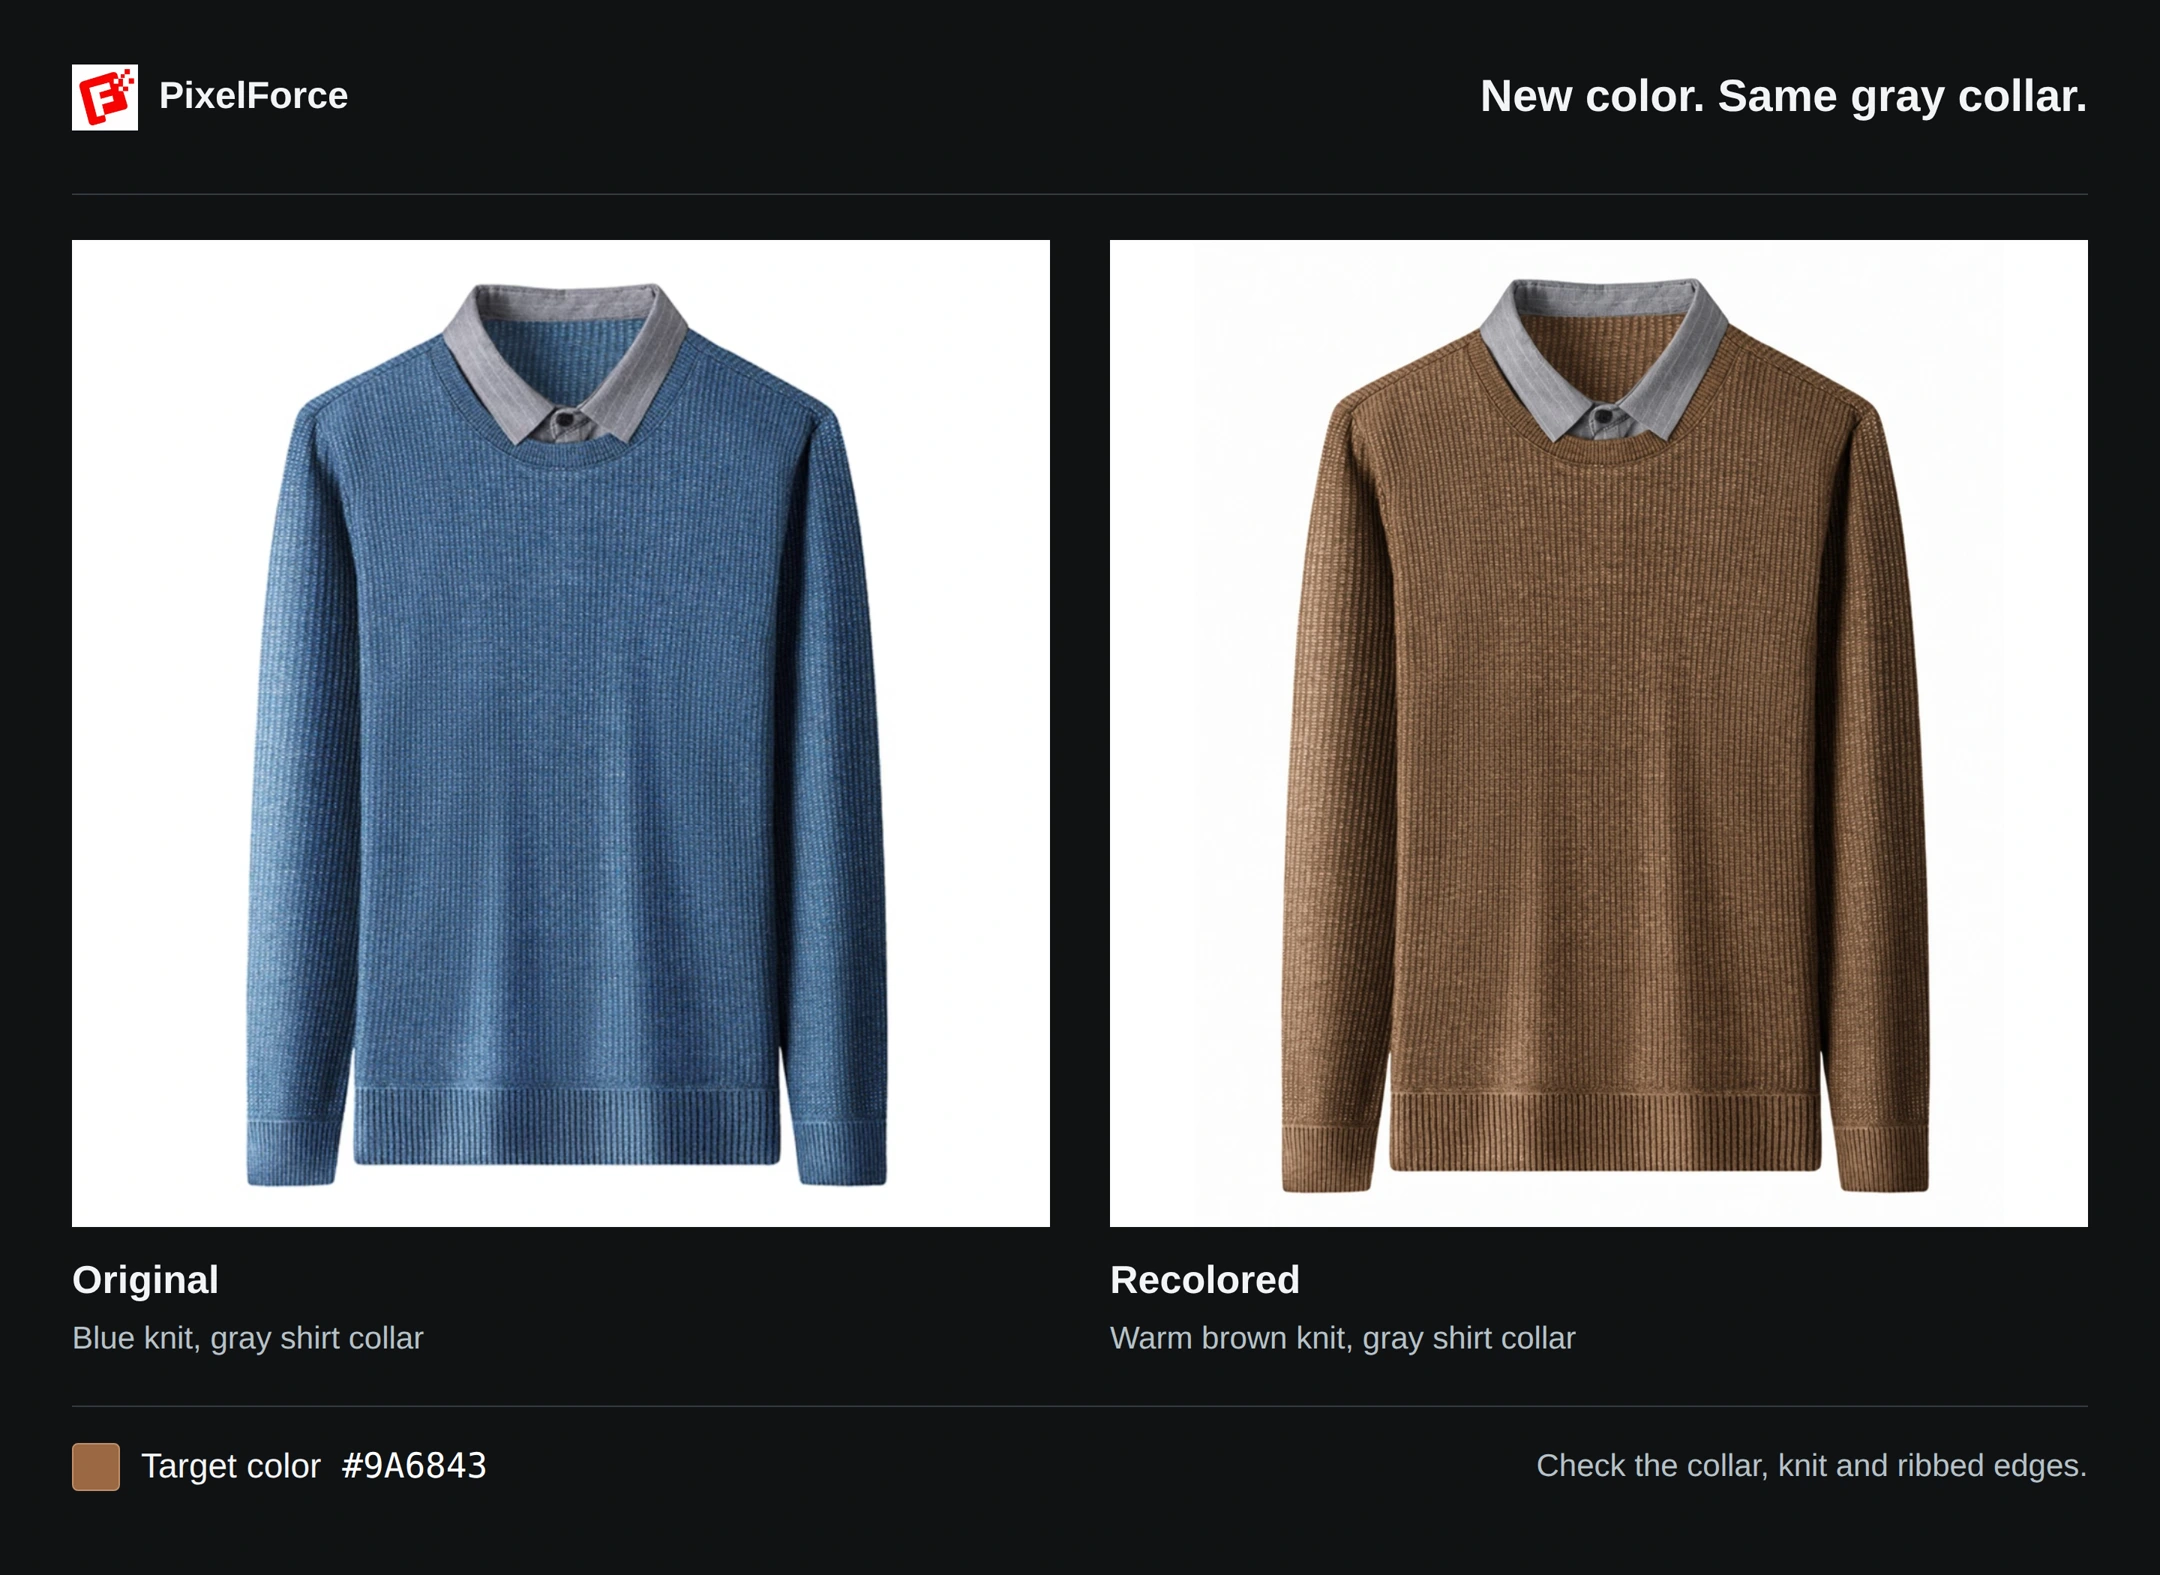
The result illustrates selective recoloring, not a flat tint over the whole photograph. Knit texture, folds and shadows still need to read naturally. This is an AI-generated preview, not proof that every stitch or product detail is unchanged.
Recolor your image
1. Add a clear source photo
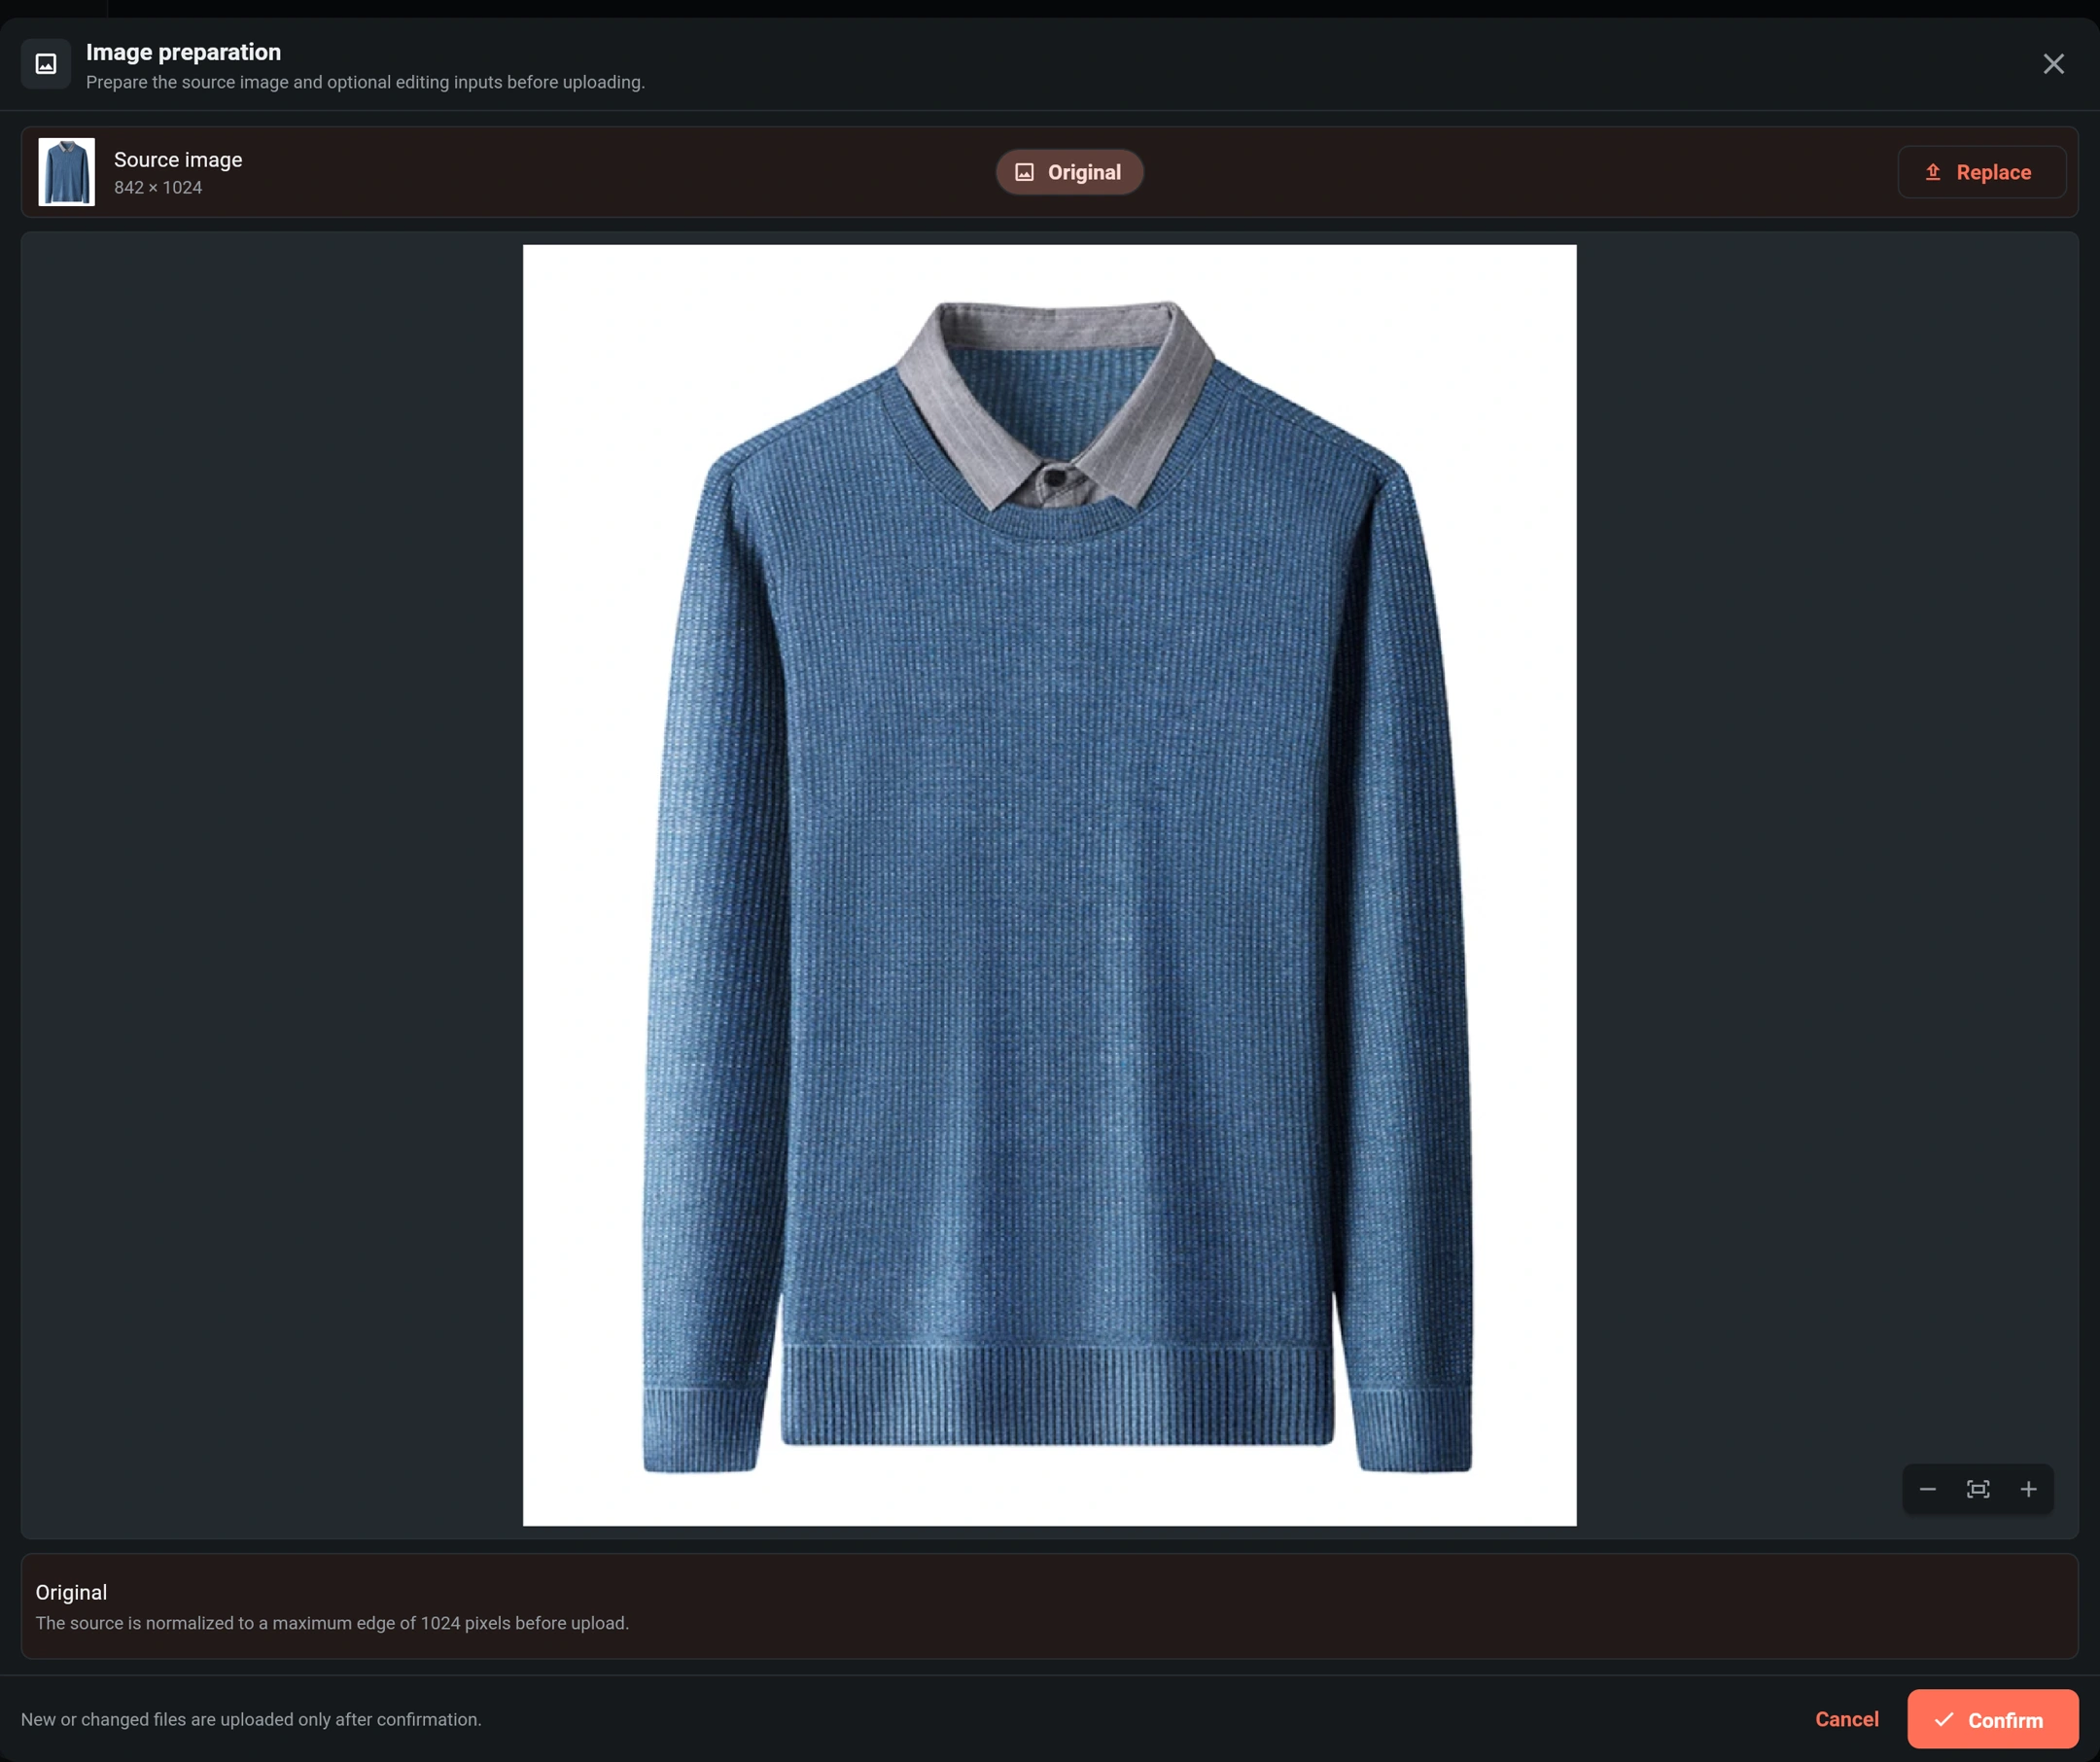
Open Smart Recolor from Create or Explore, then choose your image. Keep the whole area you want to recolor visible, including edges and contrasting trim. A sharply focused photo with balanced lighting makes the boundaries easier to identify.
Use Edit inputs to check the image and confirm its framing. On Android and iOS, you can choose a photo, take one with the camera or browse files. You do not need to paint a mask for this workflow.
2. Set the target color
Open Target color. In Choose color, select a swatch, adjust hue, saturation and brightness, or enter a six-digit value in HEX color. For this example, enter #9A6843, then choose Apply.
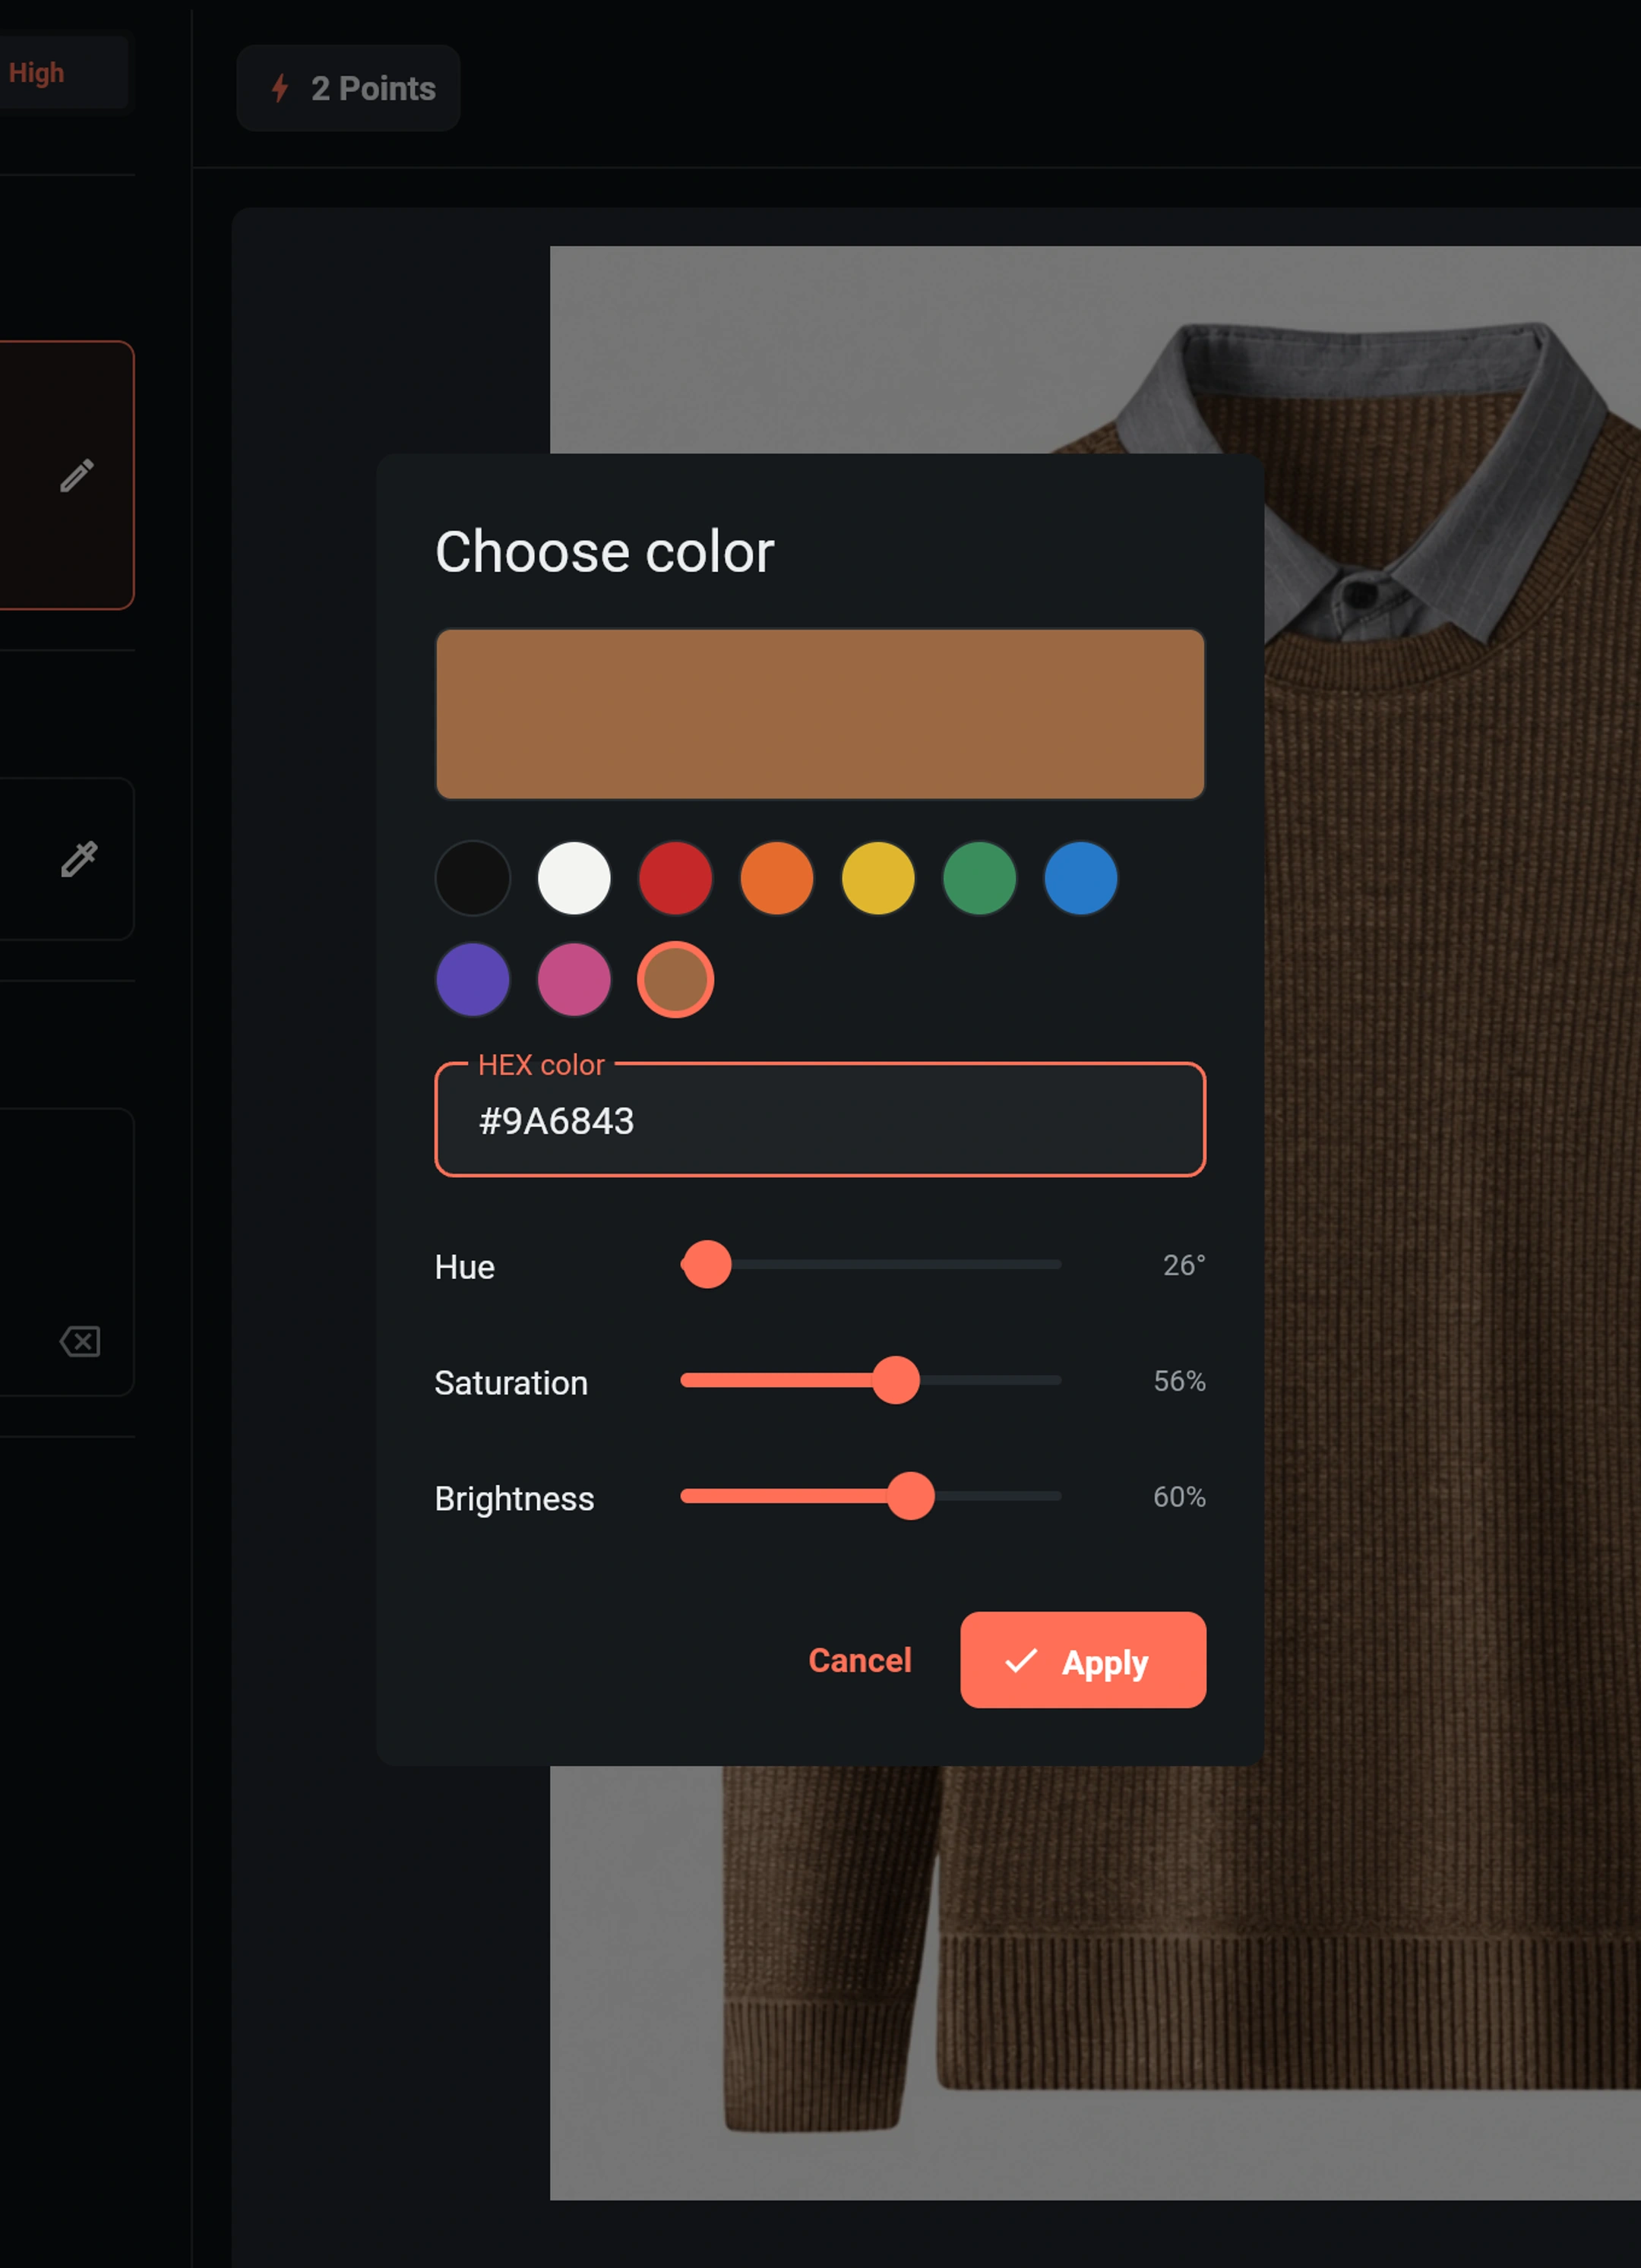
The swatch defines the color direction. It does not mean every fabric pixel should have that exact value: highlights, folds, texture and shadows create lighter and darker tones.
3. Say what should stay unchanged
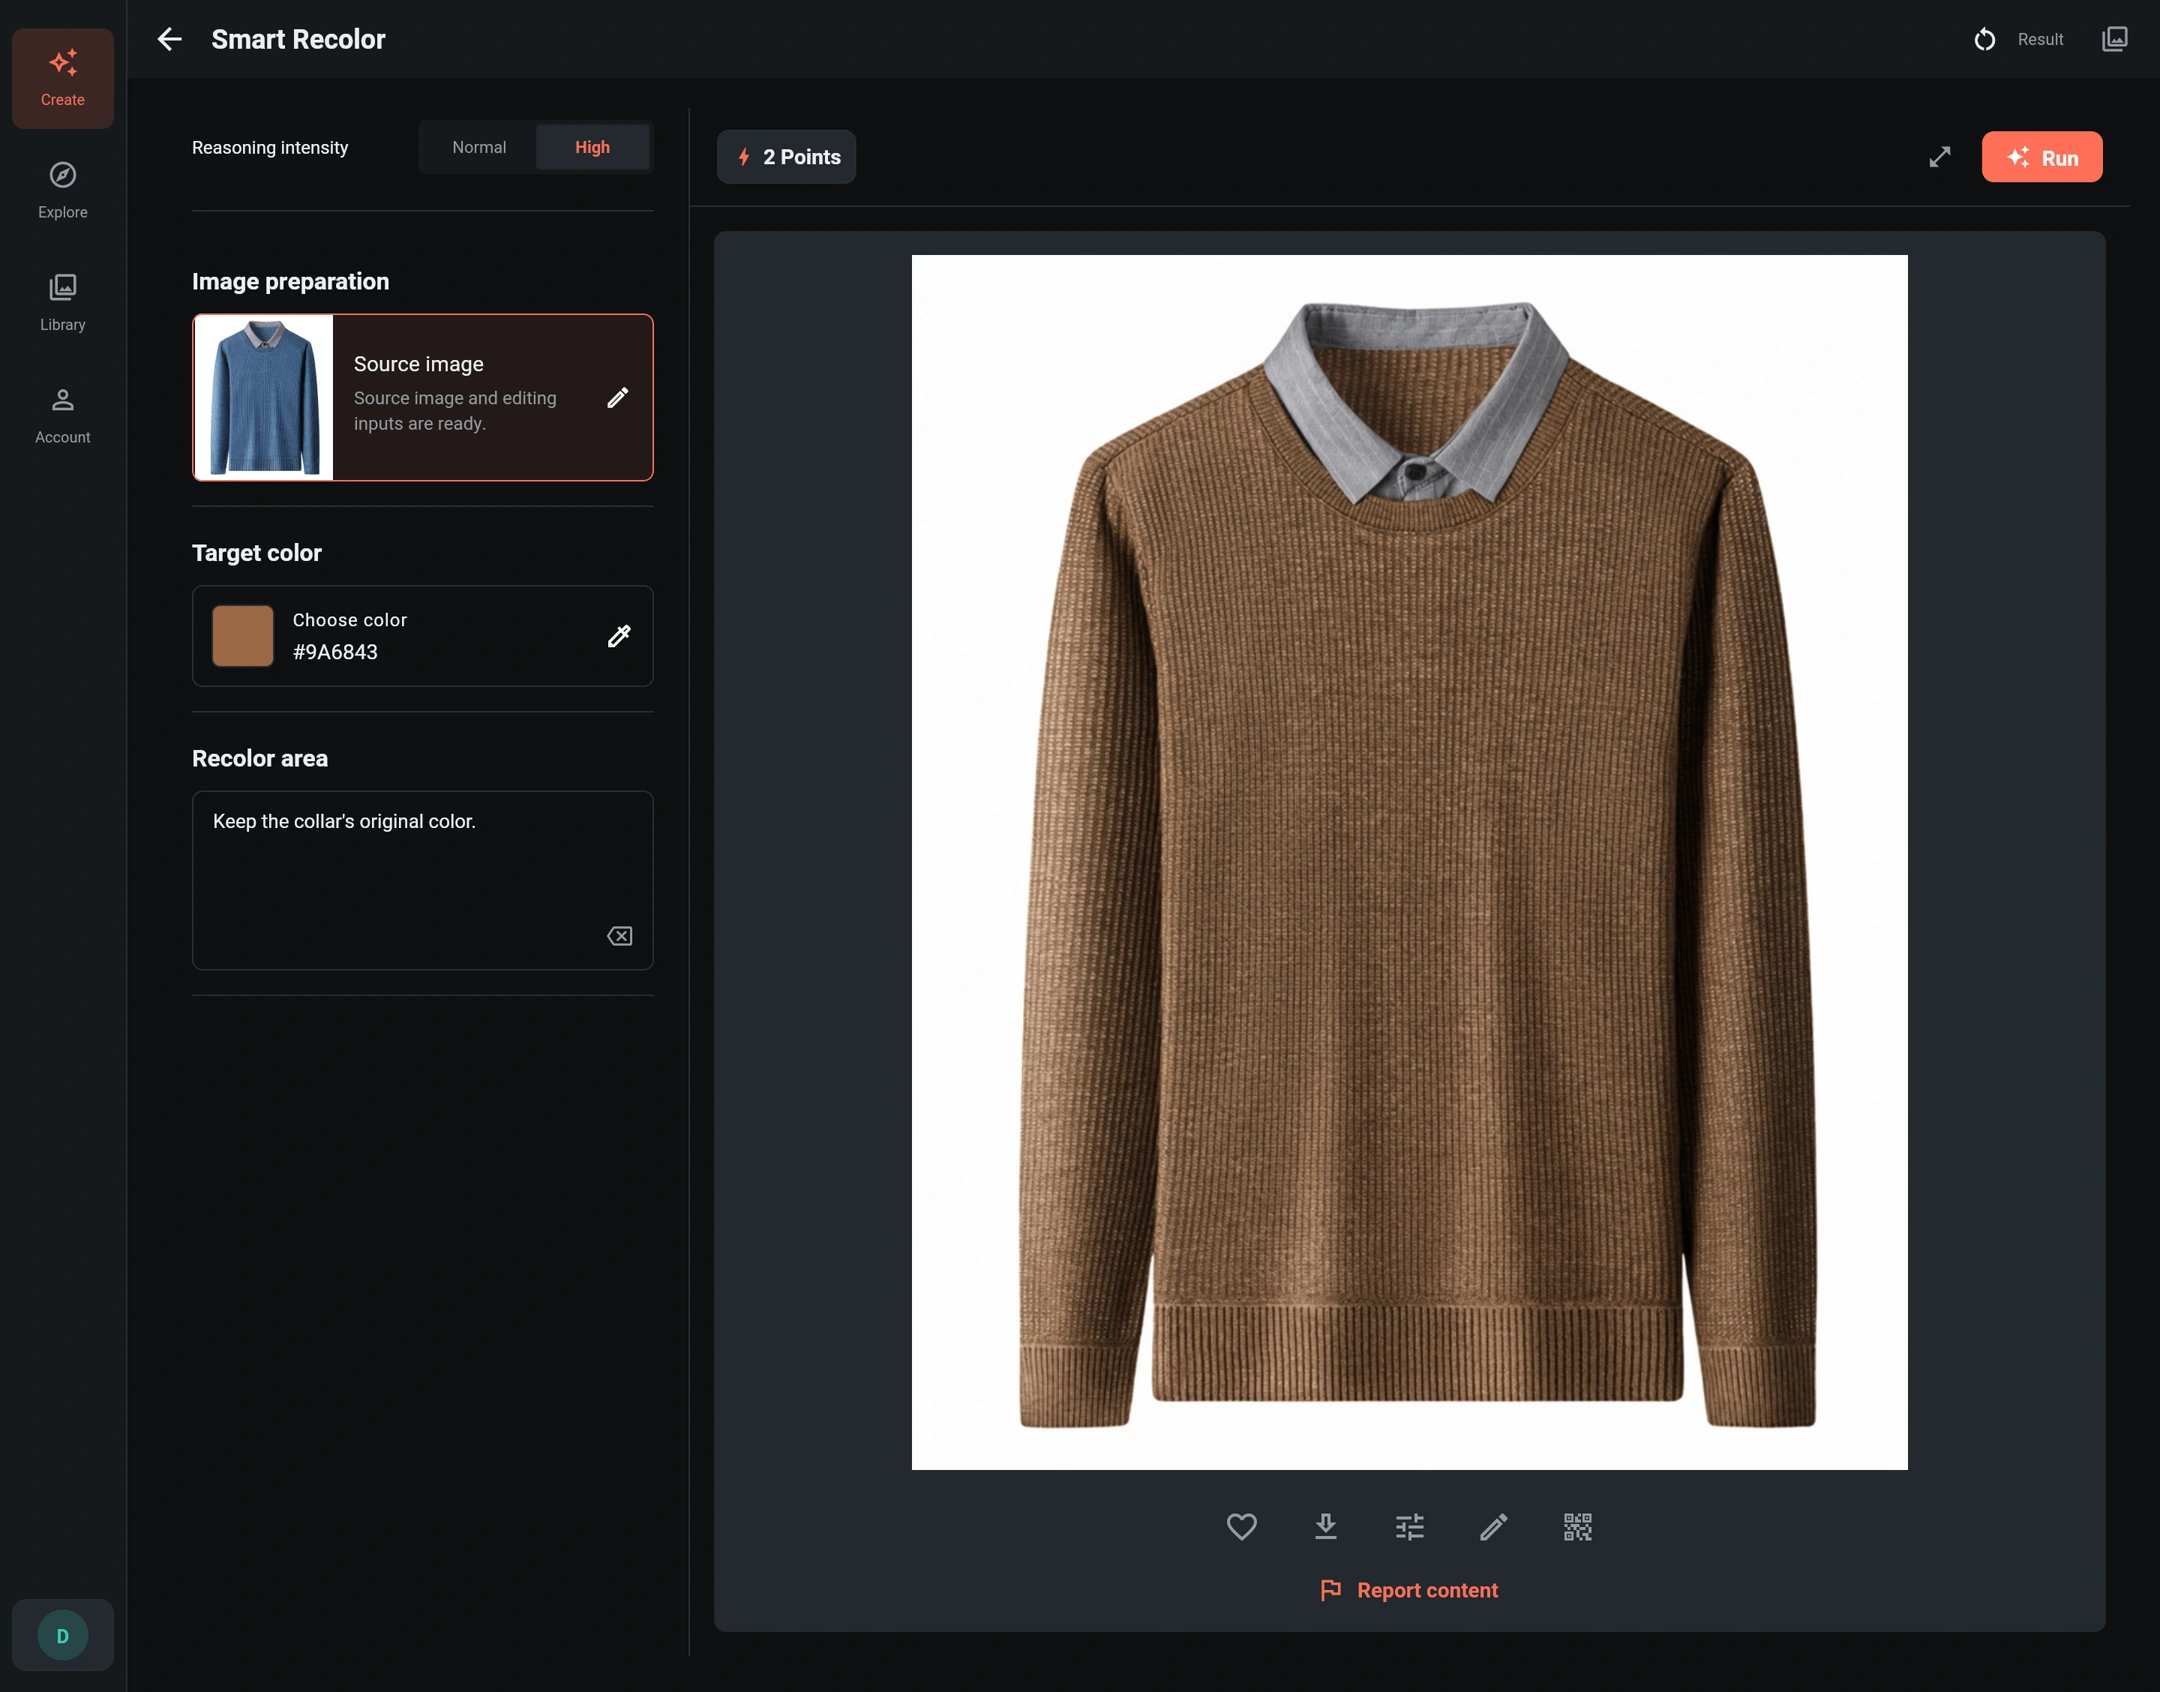
Use High when you need to distinguish between garment panels or protect contrasting details. In Recolor area, identify what to change and any exceptions. High is the default for a fresh task when available.
The example's original Chinese instruction asks to keep the collar's color. Its English equivalent, also shown in the screenshots, is:
Keep the collar's original color.
Normal uses automatic garment detection with the source image and target color. It does not offer the same area-description control. For a garment with a contrasting collar, piping or several colors, use High and spell out the exceptions.
4. Generate and compare
Check the selected color, instruction and points quote, then choose Run. When the image appears in Result, compare it with the original at a larger size. Start with the protected collar, then inspect the fabric and edges.
Write a focused instruction
Let the color picker specify the new color; use the description to define the area. For a more explicit request than the short instruction above, you could write:
Recolor only the sweater's knitted body and sleeves. Keep the gray shirt collar, button and white background unchanged.
This is an alternative instruction to try, not the text used to produce the example. Name concrete parts such as sleeves, body panels, collar or piping. Avoid asking for a new material, cut, pose or background in the same request.
Check the details before publishing
- Protected areas: did the collar, trim, skin or background pick up an unwanted tint?
- Fabric and construction: compare the knit pattern, ribbed cuffs and hem, seams, buttons and silhouette.
- Print and branding: check lettering, logos and their placement, if present.
- Light and color: highlights and shadows should remain believable. Very dark-to-light changes or reflective fabrics may be less predictable.
A HEX value is not a calibrated fabric sample. Before using the image to sell a real color variant, compare it with the actual product. Do not publish a result that misrepresents its color, texture or construction.
Save a result or explore another color
Open the finished image to save the original output. In Library, choose Reuse settings to start again from the saved source and parameters, then change the target color or instruction. Reusing settings does not generate an image by itself; review the new quote before running another task.
For overall color adjustments without AI generation, use Image Editor. For broader image changes, see AI Retouch. Learn more about saving and comparing results.